Do it yourself
Life hacks, master classes, useful tips, recipes.
home » Electronics » DIY amplifier » Compact ULF 20 Watt
Compact ULF 20 Watt

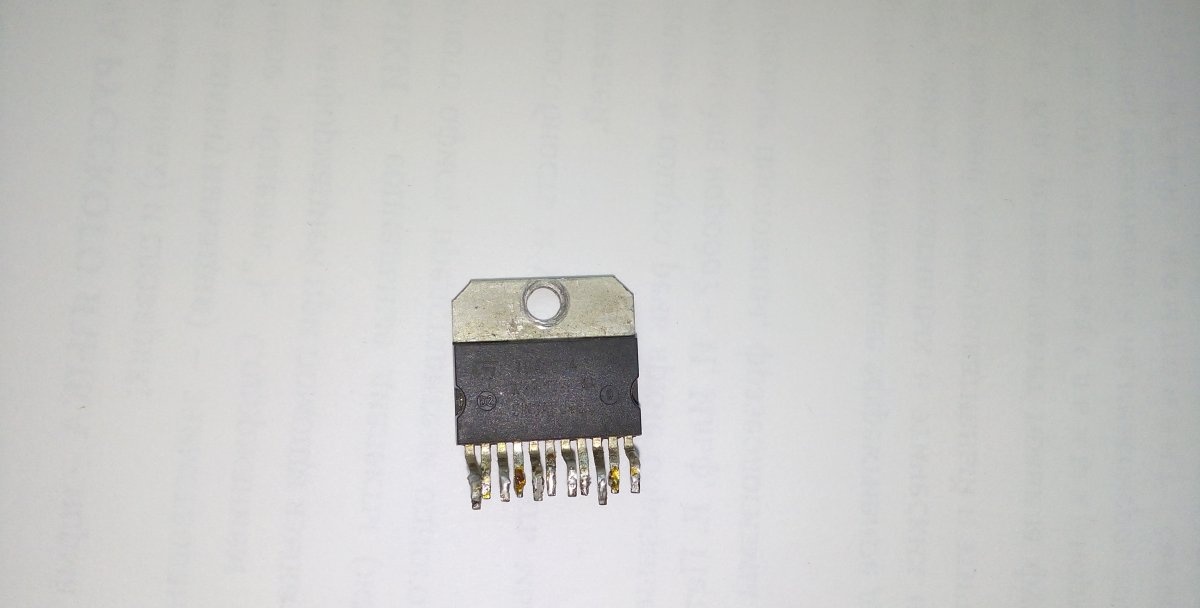
Good afternoon Now we will assemble a low frequency amplifier. The TDA2004 microcircuit is taken as the basis.
Compact ULF 20 Watt

It has two outputs, but the power of each individually is 8 watts, which is not so much. Therefore, we will use bridging. This inclusion will more than double the power.

Amplifier Specifications


So, the main characteristics of our amplifier:
  • Supply voltage: 8-18 volts;
  • Rated output power: 20 Watt;
  • Maximum output power: 25 Watt.

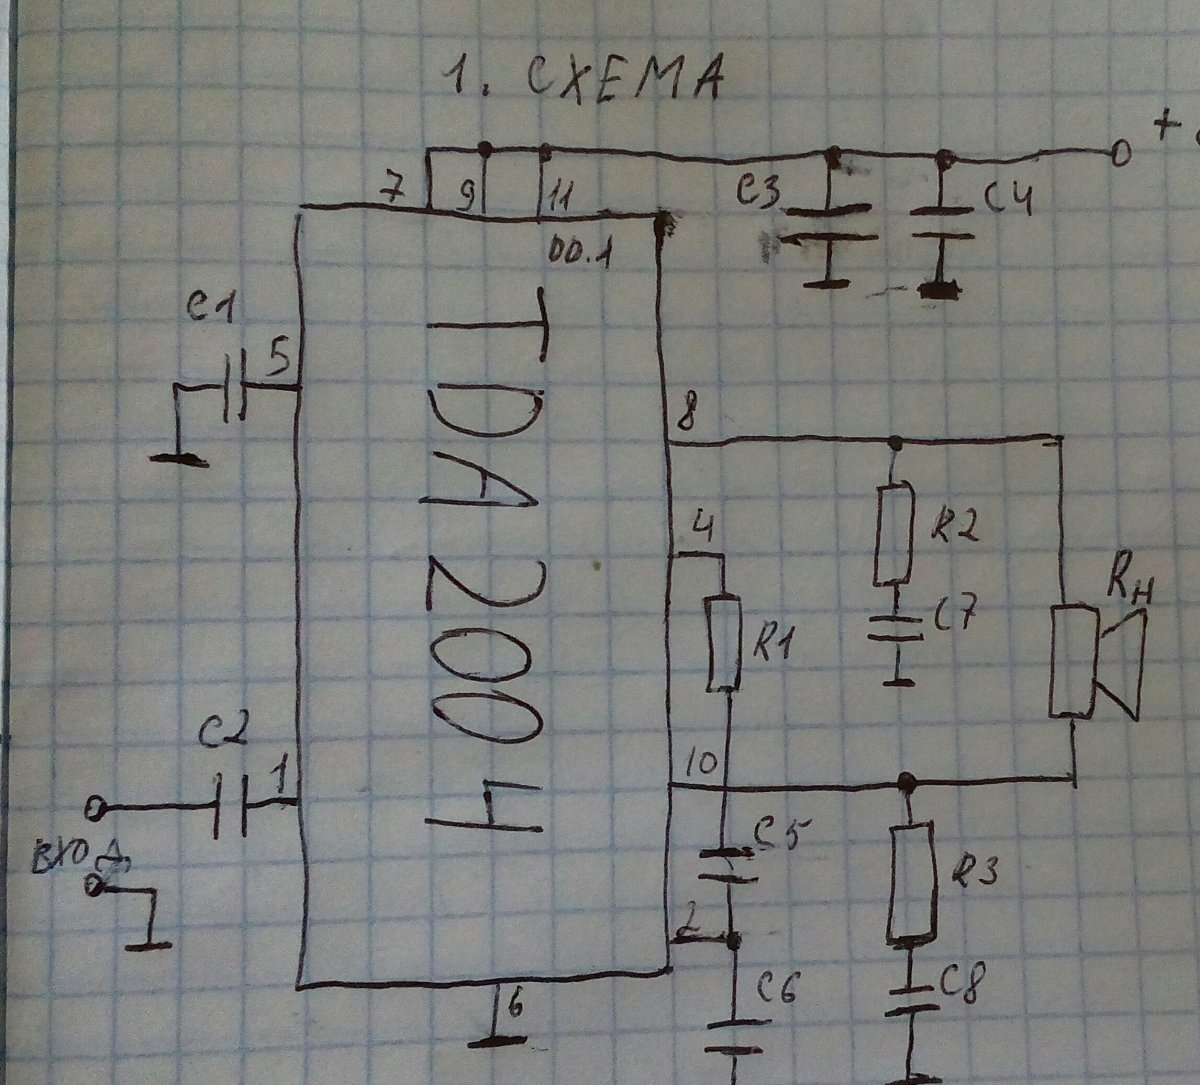
The diagram looks like this:
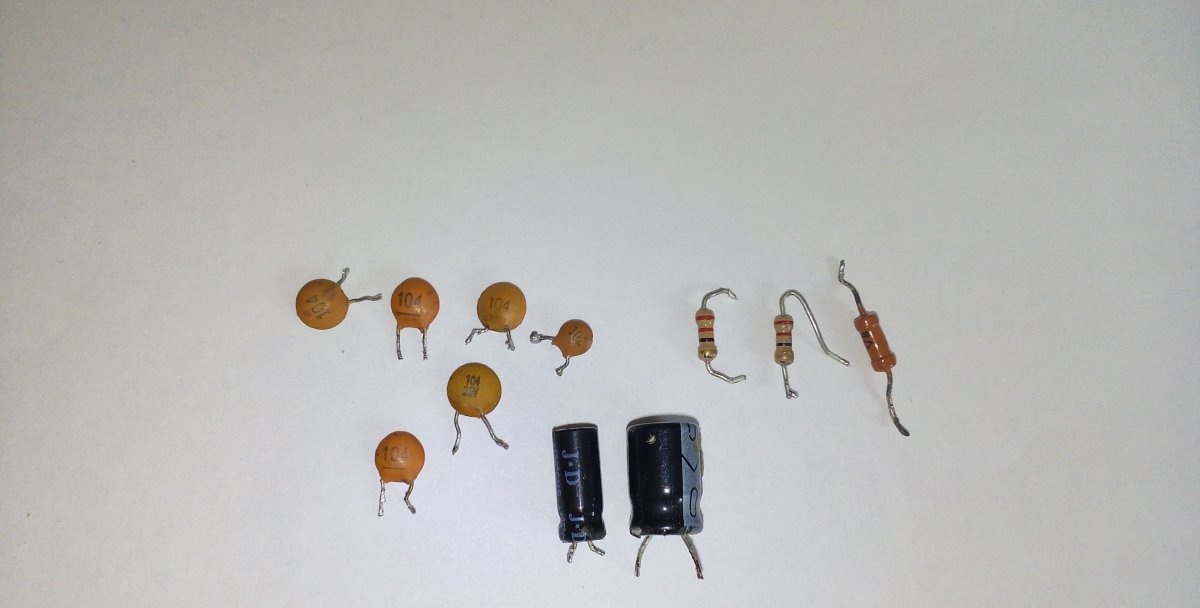
Compact ULF 20 Watt

Required Parts


  • DD.1 – TDA2004;
  • C1, C2, C3, C7, C8 – 0.1 µF;
  • C4 – 470 uF, 25 Volts;
  • C5 – 10 µF;
  • C6 – 1 nF;
  • R1 – 470 Ohm;
  • R2, R3 – 22 Ohm.

Compact ULF 20 Watt

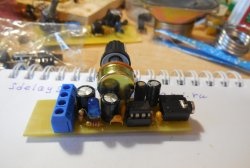
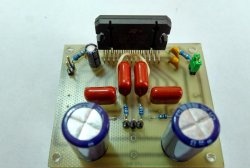
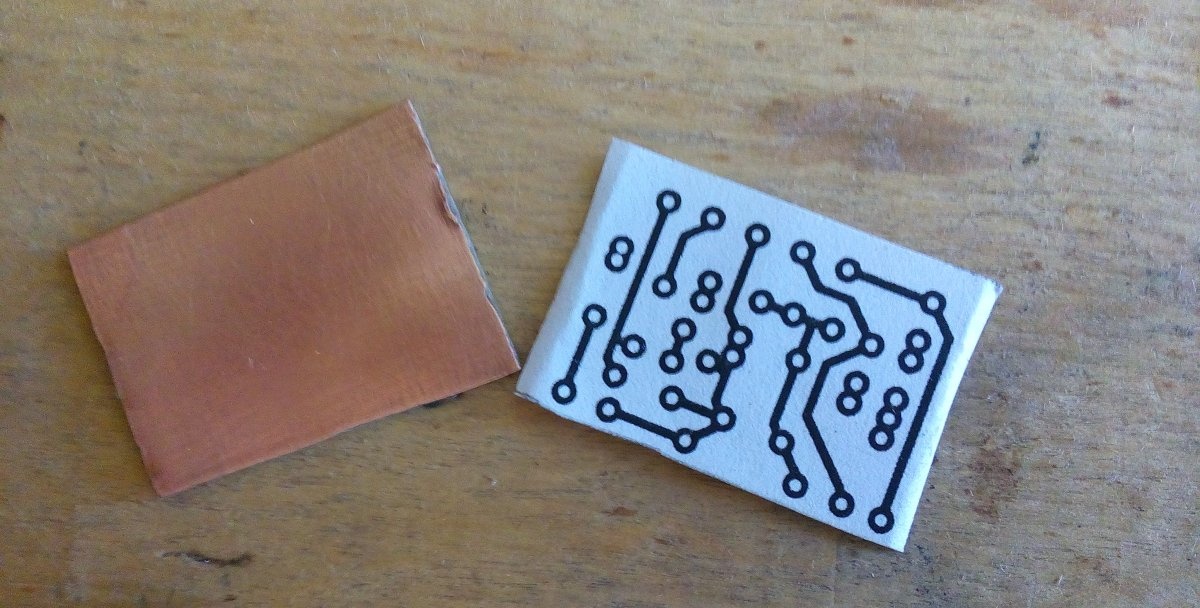
Printed circuit board


For the printed circuit board we will need a piece of PCB measuring 3x2 cm, as well as a drawing of the board:
pp.zip [33.05 Kb] (downloads: 486)

Compact ULF 20 Watt

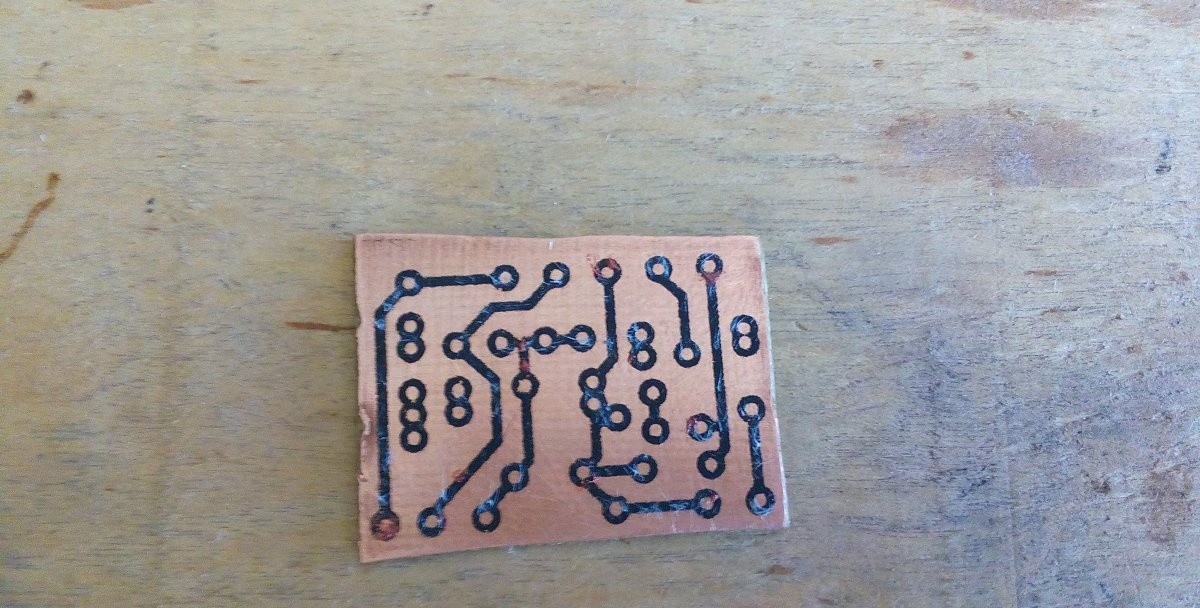
Making a low frequency amplifier


We cut and transfer using the laser-iron method. We finish painting everything that has not been completely transferred with varnish.
Compact ULF 20 Watt

We will etch in a solution of hydrogen peroxide and citric acid.Pour three tablespoons of peroxide into a large disposable glass, add a tablespoon of citric acid and add a pinch of ordinary salt, it is a catalyst and is not consumed during the reaction. Stir the solution until the substances are completely dissolved and throw the board into it. Hydrogen bubbles begin to be released, and the solution turns blue.
Compact ULF 20 Watt

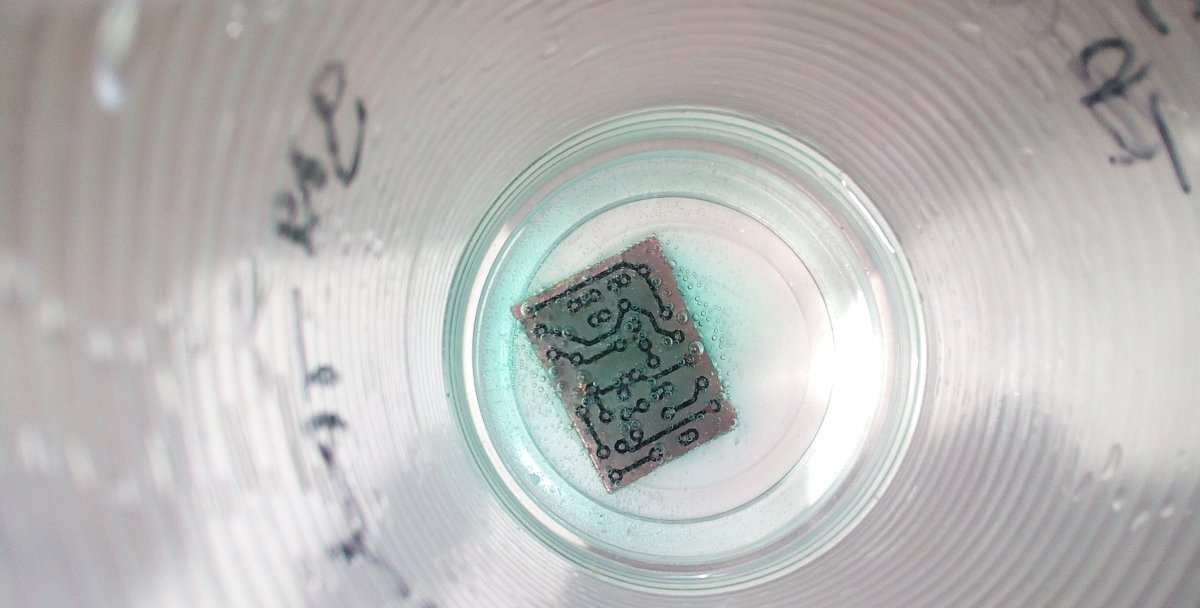
The board is etched for about half an hour. You can speed up the process a little by placing the solution in the sun.
When the excess copper has dissolved, take out the board and rinse it with water.
Compact ULF 20 Watt

The used solution should be poured into the public sewer.
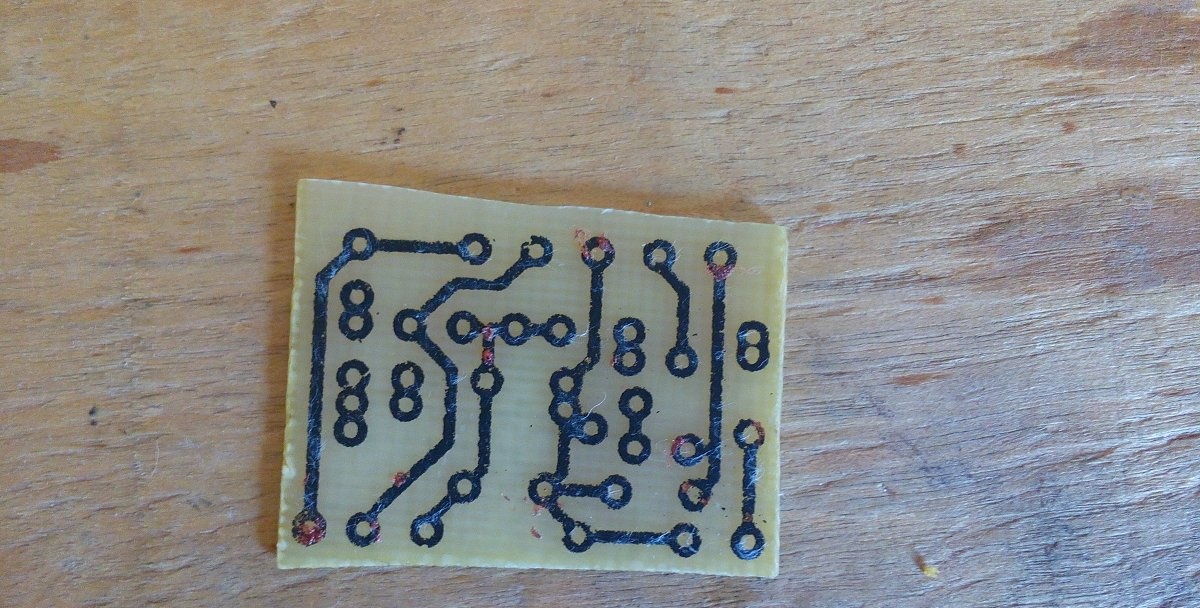
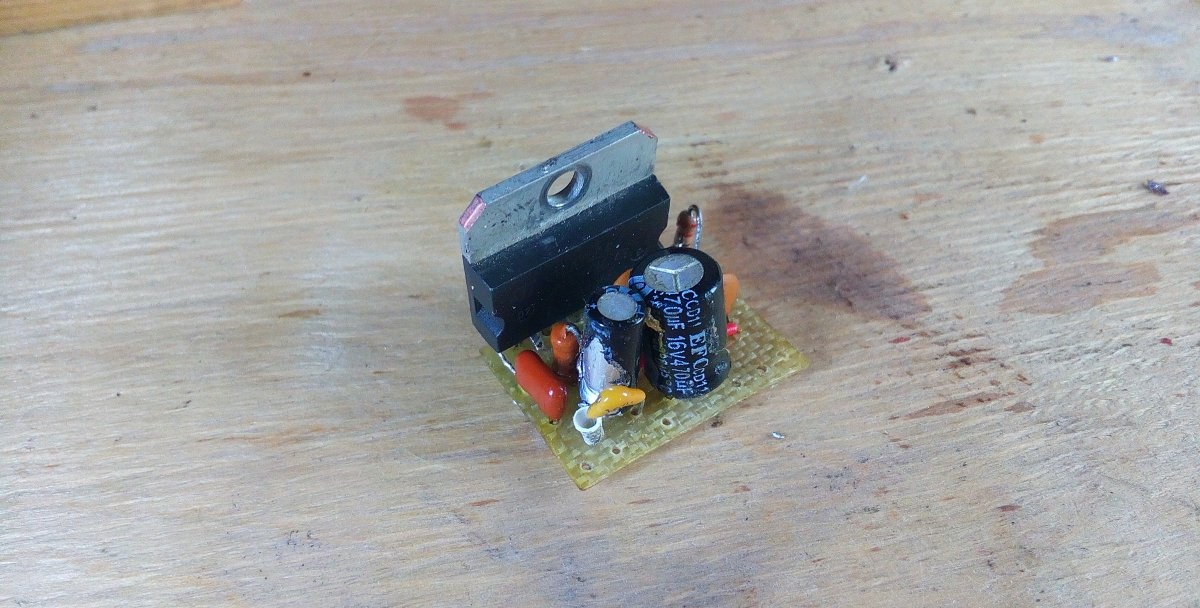
Next, we clean the board from toner with acetone and tin the tracks.
Compact ULF 20 Watt

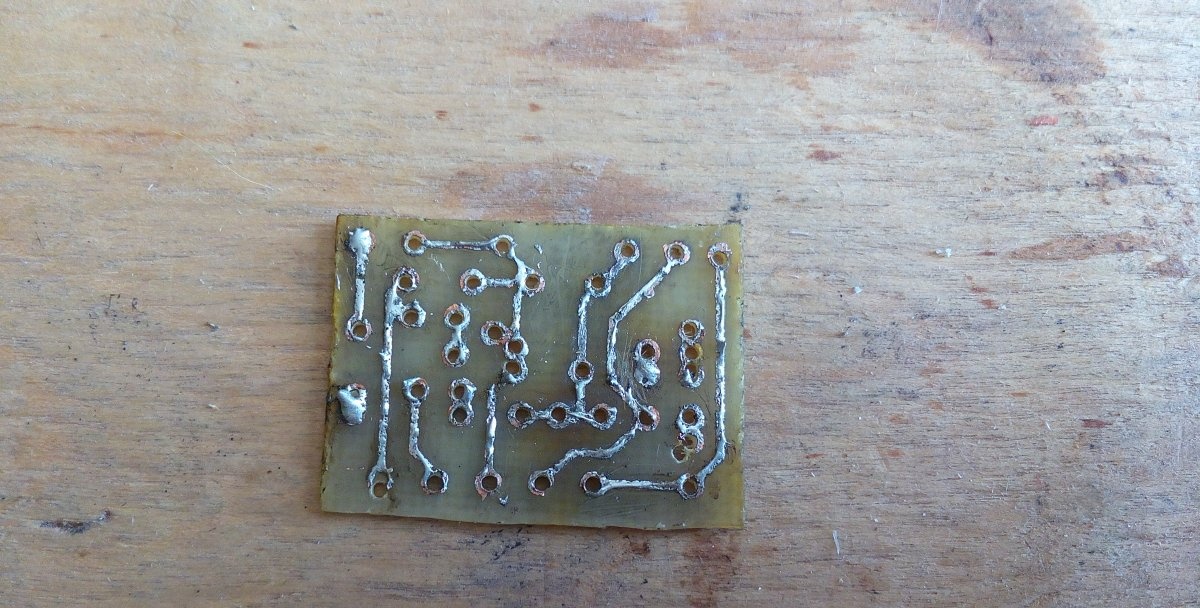
First, we solder the microcircuit into place, then the remaining components.
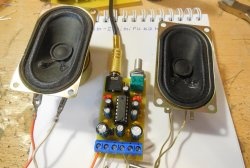
Carry out installation based on the picture:
Compact ULF 20 Watt

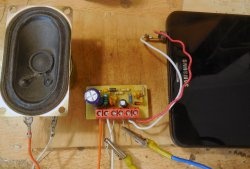
At this stage the amplifier is ready. Before turning on, the microcircuit should be installed on a heat sink.
Compact ULF 20 Watt

Compact ULF 20 Watt

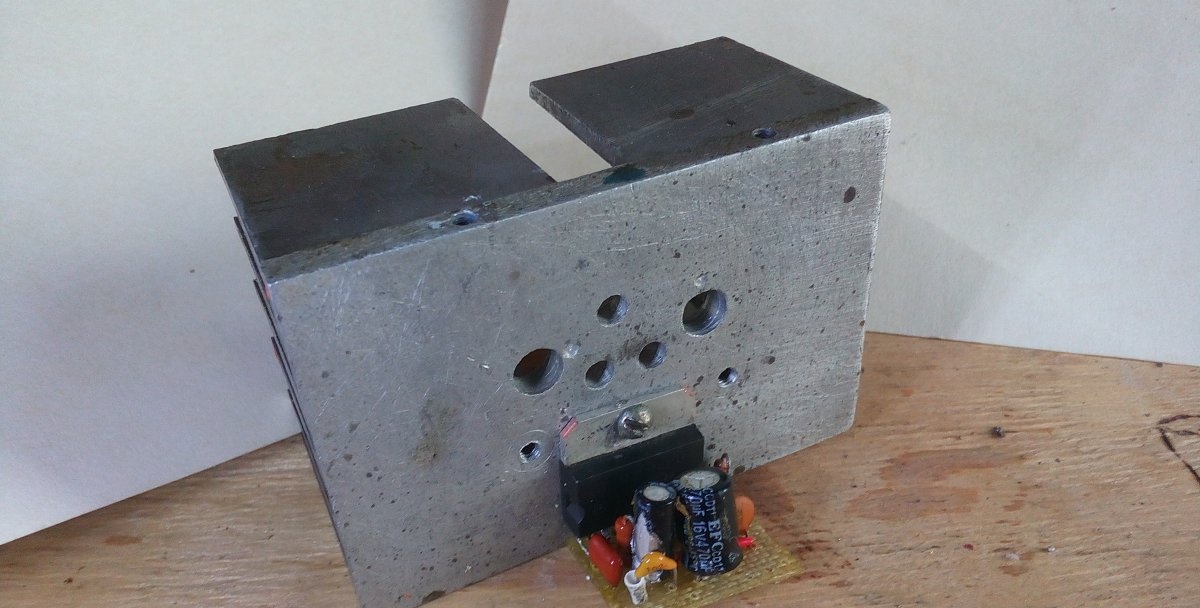
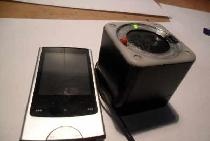
This is a compact but quite powerful amplifier. I connected a 25 Watt 4 Ohm low-frequency head to it - it did an excellent job, at full volume there were no wheezes, clicks or other sound distortions. After an hour of operation, the radiator heated up to 60 degrees.
And with this my article has come to an end, good luck to everyone in the repetition!
come back
Comment
  • bowtiesmilelaughingblushsmileyrelaxed relaxedsmirk
    heart_eyeskissing_heartkissing_closed_eyesflushedrelievedsatisfiedgrin
    winkstuck_out_tongue_winking_eyestuck_out_tongue_closed_eyesgrinningkissingstuck_out_tonguesleeping
    worriedfrowninganguishedopen_mouthgrimacingconfusedhushed
    expressionlessunamusedsweat_smilesweatdisappointed_relievedwearypassive
    disappointedconfoundedfearfulcold_sweatperseverecrysob
    joyastonishedscreamtired_faceangryragetriumph
    sleepyyummasksunglassesdizzy_faceimpsmiling_imp
    neutral_faceno_mouthinnocent
3+three=
Comments (5)
  1. Michael
    #1 Michael Guests 17 July 2018 10:32
    1
    Where are the pluses for the electrolytes on the diagram?
  2. putnik
    #2 putnik Guests August 20, 2018 09:34
    1
    At all times, it was recommended to solder passive elements first, and then active ones, microcircuits and field devices last. As for the circuit, it would be more correct to show this very BRIDGE connection of the microcircuit in functionality, so that a beginner can understand what goes where and why.
  3. Vyacheslav
    #3 Vyacheslav Guests 31 July 2019 12:28
    1
    I assembled this circuit back in 95, it still works. Six months ago I assembled a full amplifier on TDA2005, four channels with an MP3 player
  4. Sergey
    #4 Sergey Guests 26 January 2023 16:18
    0
    I assembled it and connected it to 9 volts. The amplifier certainly works, but there is no word on the fact that it is ULF. It plays all frequencies, so it’s not a subwoofer, but a regular speaker.
  5. Yuri
    #5 Yuri Guests 2 May 2023 19:52
    0
    On the printed circuit board it is not clear where the radio element should be. Please tell me, I really want to build such an amplifier.

Repairing plastic with epoxy glue

How to automate the welding process with a lying electrode

Do it yourself - crafts and master classes | Page 357

Doll Lolochka | Do it yourself

«Do it yourself - with your own hands» - a site of interesting homemade products made from scrap materials and items at home. Step-by-step master classes with photos and descriptions, technologies, life hacks - everything a real master or just a craftsman needs for needlework. Crafts of any complexity, a large selection of directions and ideas for creativity.

We recommend reading

Washing machine error codes