Hello, lovers of agriculture, part-time craftsmen. Recently, the secrets of homestead activities related to the cultivation of fruit and berry crops have been more often revealed. I wanted to say vegetables. Many people, for consumption and for commercial purposes, are looking for profitable ways to increase their yield. An indisputable fact - if you plant 40 bushes of cabbage on 20 square meters, the total mass of ripened heads will be less than when planting in the same area not 40 bushes, but 20. Or even less. And let not the people in the village and the villagers who are accustomed to farming from childhood take offense at me, I will say directly. Grandma's tales have no place in this activity. And the village today lives in oblivion, thoughtfulness and confusion. Lost skill in the village. After all, it is not necessary to dig up the land in order to get a good potato crop. On the contrary, you do not need to dig. But this is a different story. And now I will tell you how to make a hanging bed in a greenhouse.
What greenhouse is the bed intended for?
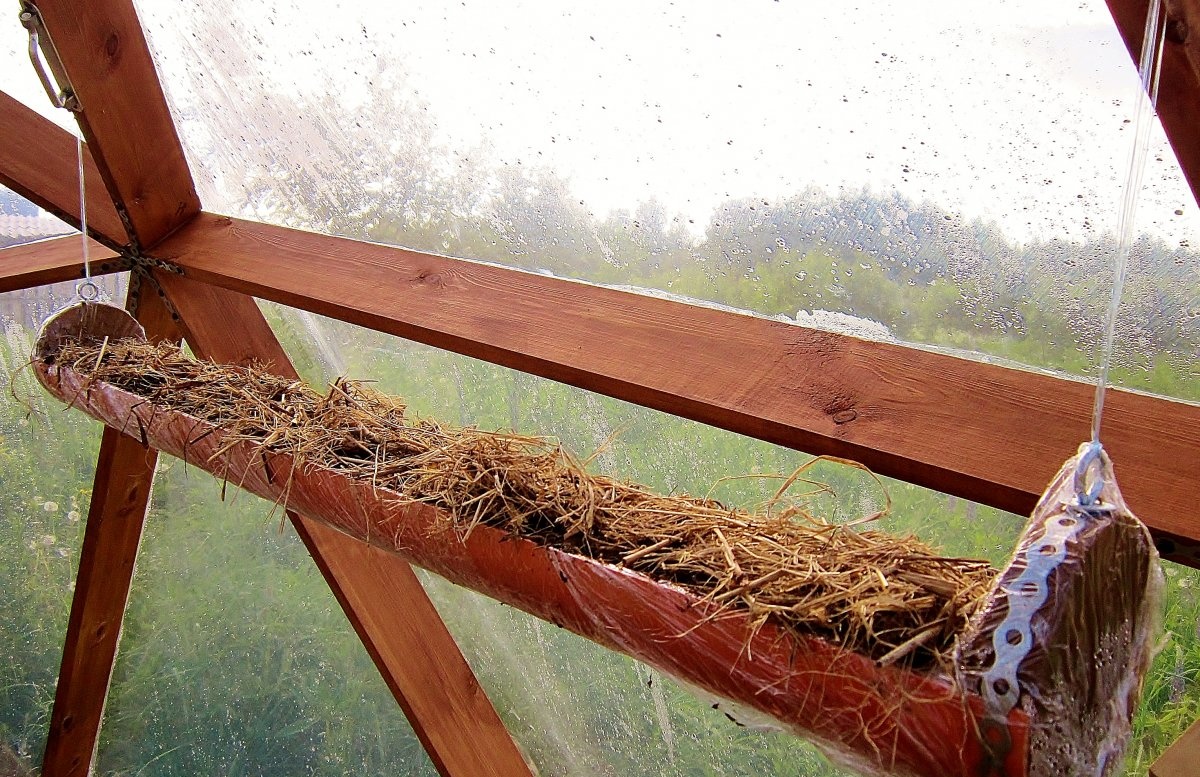
Question number one, for which greenhouse is this bed intended? Well, of course, for the dome, friends. The remaining types of greenhouses are like pampering. Only the dome will provide a long temperature while reducing daylight hours. And for the middle and northern strip of Russia, where I live, this is the main point. Moreover, only in the dome the hanging bed does not interfere with watering the plants on the soil area. But if you have an ordinary greenhouse, do not be discouraged. You have not yet reached and realized the advantages of the dome. The suspension device will fit in your place. Moreover, the functionality will not suffer.
Will need
Question number two, what shall we do? To make a one meter long hanging bed, we need:
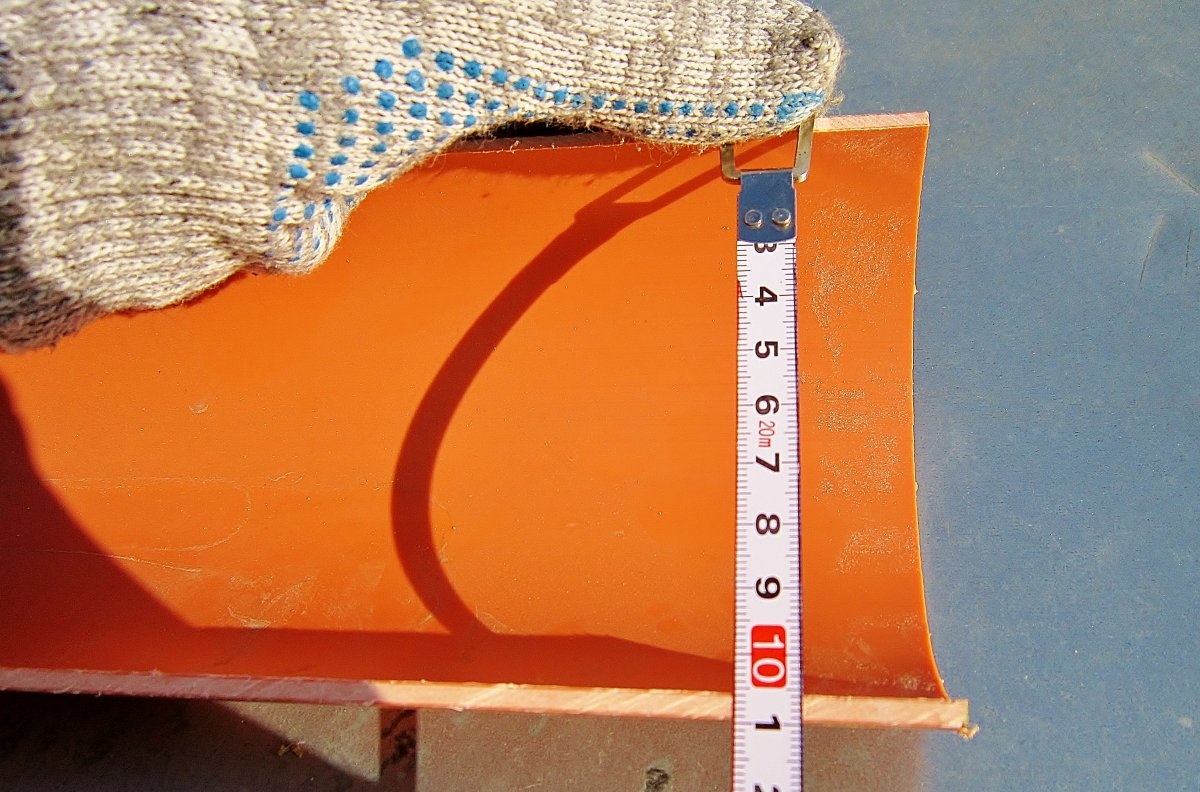
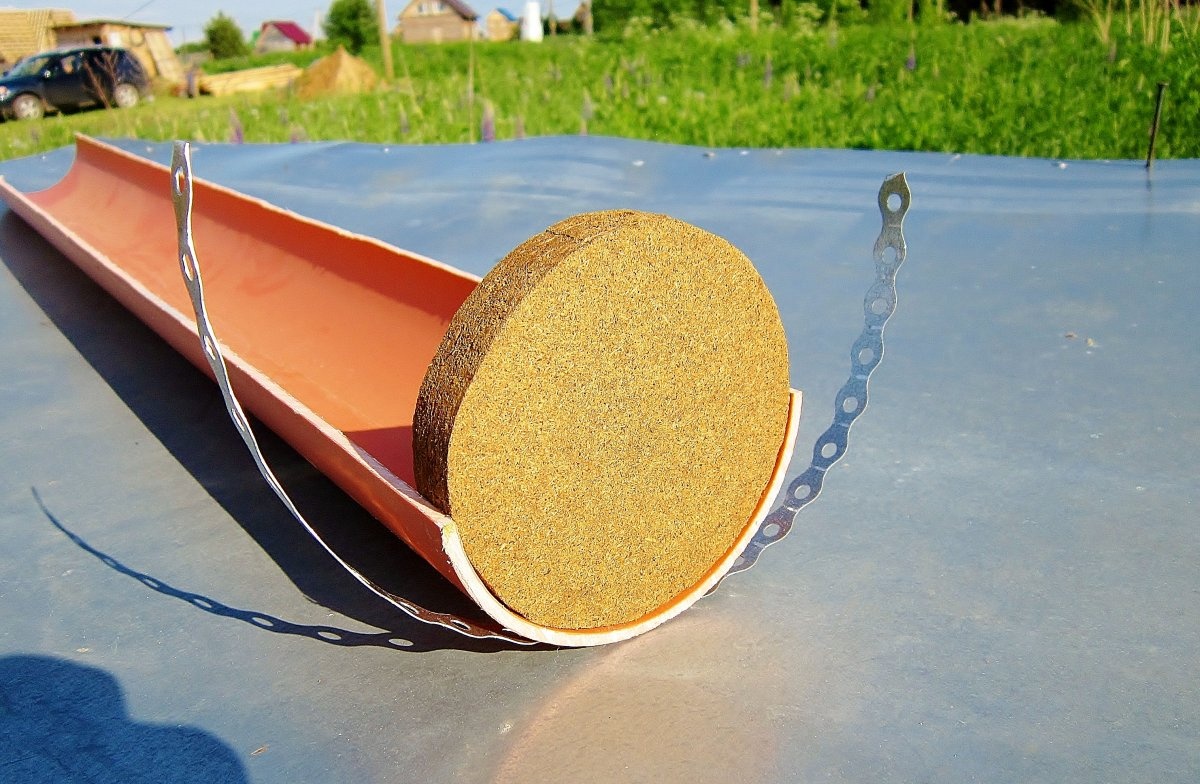
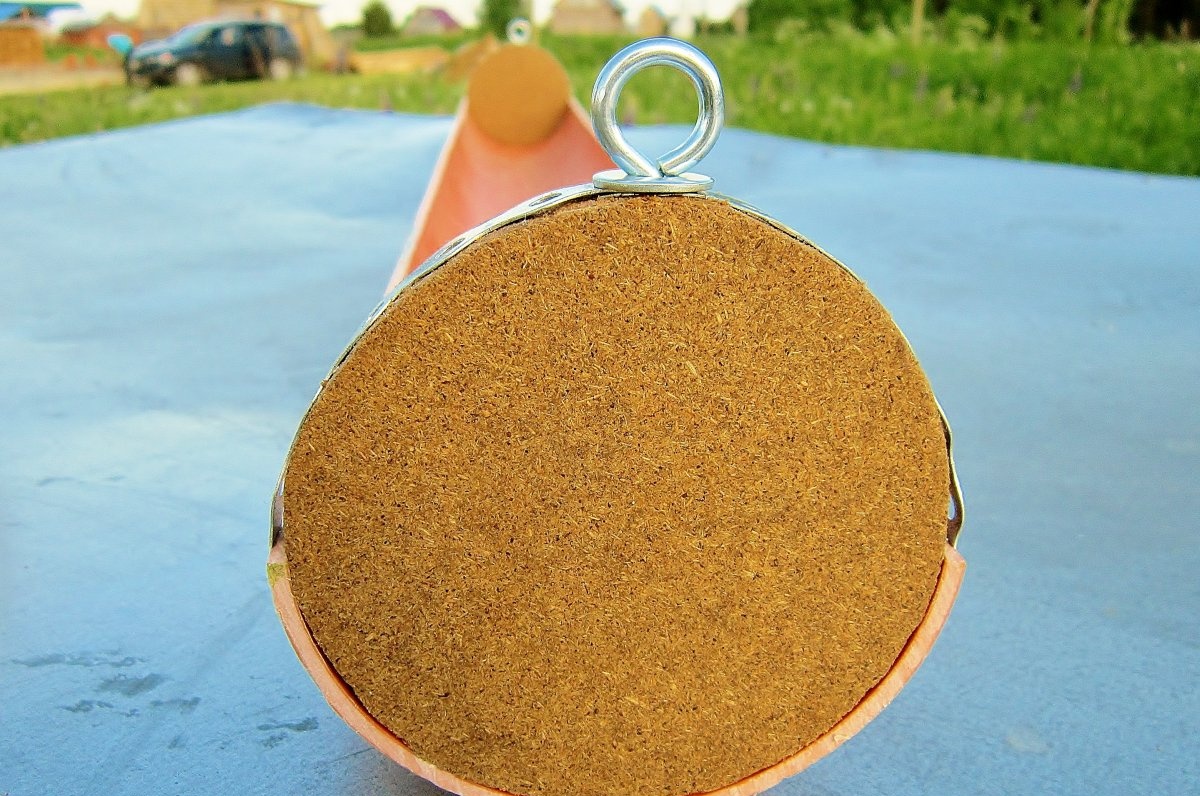
- Sewer pipe for external use. I will say right away not to confuse you. This is an orange pipe. Plastic does not deteriorate from ultraviolet radiation and low temperatures. The diameter is 11 cm and the wall thickness is 3.2 mm. This is enough for a decent carrying capacity. Although more about it later. However, it is worth clarifying the material of manufacture. I came across two options:
- NPVH. As I believe it is polyvinyl chloride with nylon. It is a solid and form-holding material.
- Polypropylene. Soft and plastic. It bends well. - Punched tape. I find it difficult to characterize the one that I use. I will say this. It is not thin metal. It bends well, but keeps its shape, withstands the load. Holes with a diameter of slightly less than 6 mm are arranged in a row one after another. Another punched tape around the edges is wavy.
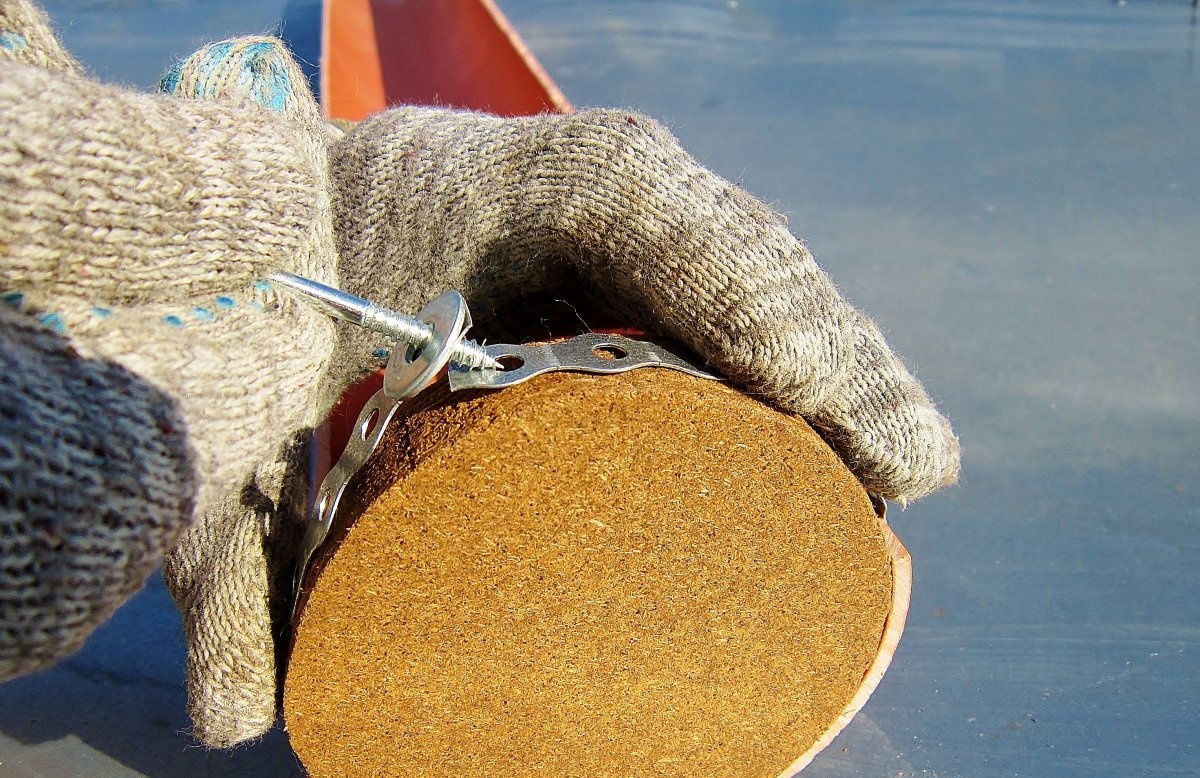
- Brackets. These are spinning rings with a thread of 4 mm. One bed requires two brackets.
- Washers The main thing is that they coincide with the brackets.
- Particleboard mugs with a diameter of slightly less than 11 cm and a thickness of at least 18 mm. Next, I will tell you what it means a little less. Nevertheless, I do not recommend using other material for the circles. Chipboard is a finished board, dried and pickled with anti-corrosion resins.
- Pet tape. This tape is cut from a plastic bottle using a bottle cutter. Useful thing.
- You may also need cling film. Or maybe you can do without it. You decide.
From an improvised tool requires: - A file or a more perfect machine. For example, an electric jigsaw. I used a miracle of Chinese manufacture - a screwdriver tip. On one edge of the nozzle is a cricket for cutting metal, and on the other is a file.
- Scissors are ordinary and metal.Although if you bite the pet-tape with your teeth, you will manage with metal scissors. This is for cutting punched tape.
- And for drilling holes under the bracket, although, you know, it’s rather an anchor bolt. I will call it fasteners. So, I used a screwdriver with a 3 mm drill.

Production of a hanging bed
I leave the afterword at the end and move on to the procedure:
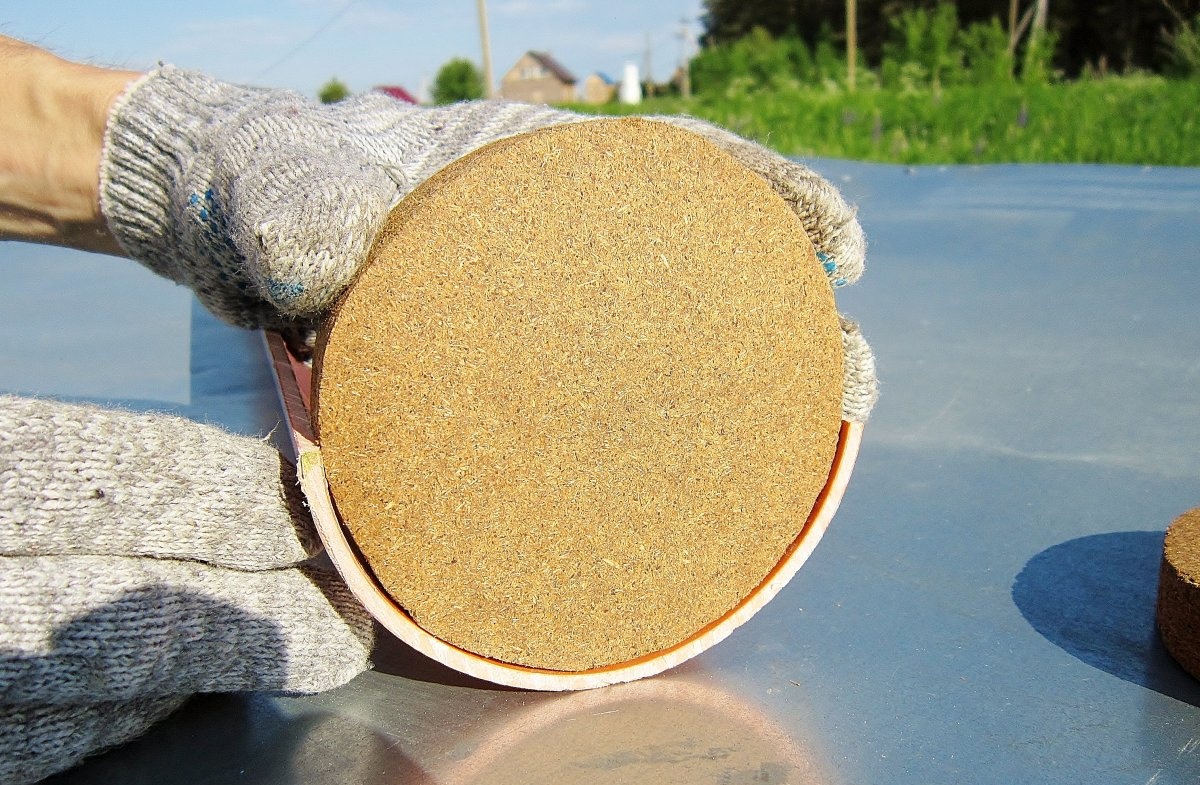
1. The pipe, regardless of its length, requires cutting in half. Buying a three-meter pipe, you save and you can make more beds. I experimented only with a meter length, since with increasing length, the mass and load on the fasteners increase. The half pipe already looks like a bed.

2. For cutting circles from chipboard, I used a jigsaw-tip for a screwdriver. A few words about the diameter of the circles. It is more practical to put the pipe on the chipboard and circle the outer circle with a marker. You will cut exactly next to the line. There is a second option - to make a template. This husband told me, and really works. With the right template, you can cut exactly according to the line. Then the cut out circle turns out a little less than 11 cm. And we don’t need it to freely enter the pipe. We need tension in order for the punched tape to create external stress.
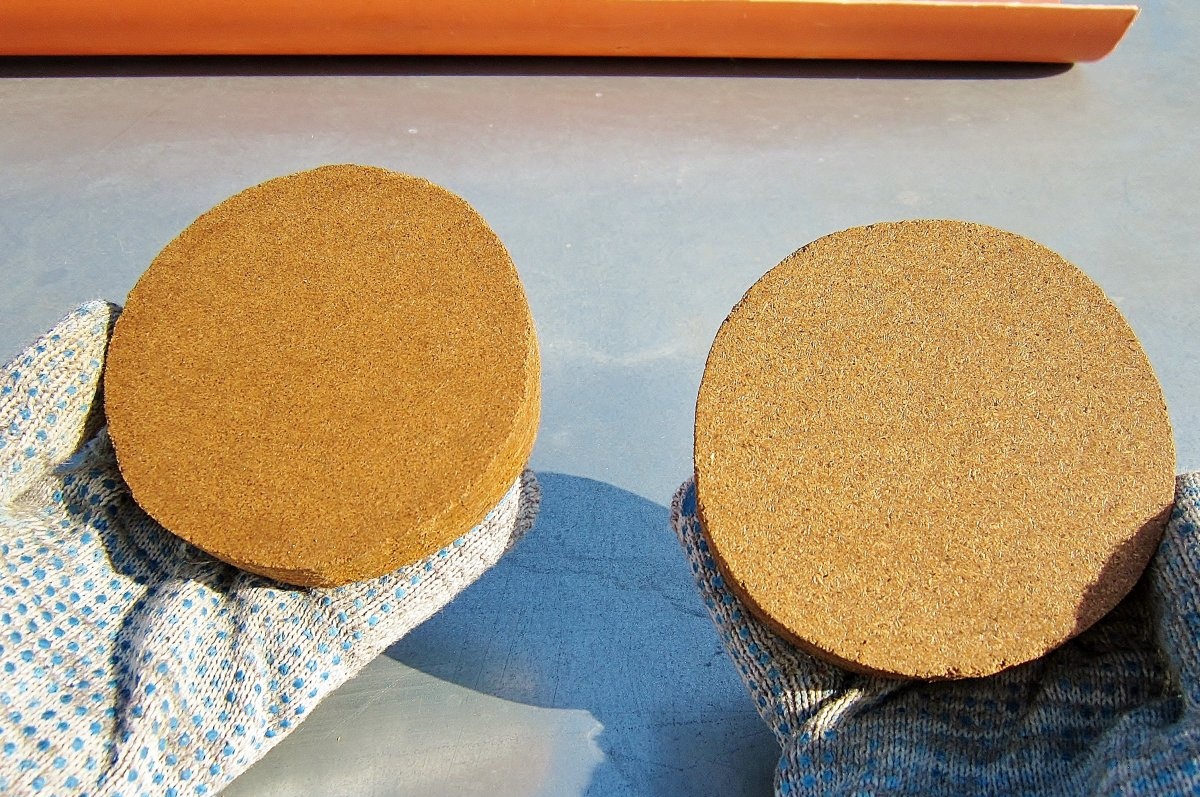
I would like to give advice to paint the mugs with some Tenotex. Water protection. But I didn’t paint.
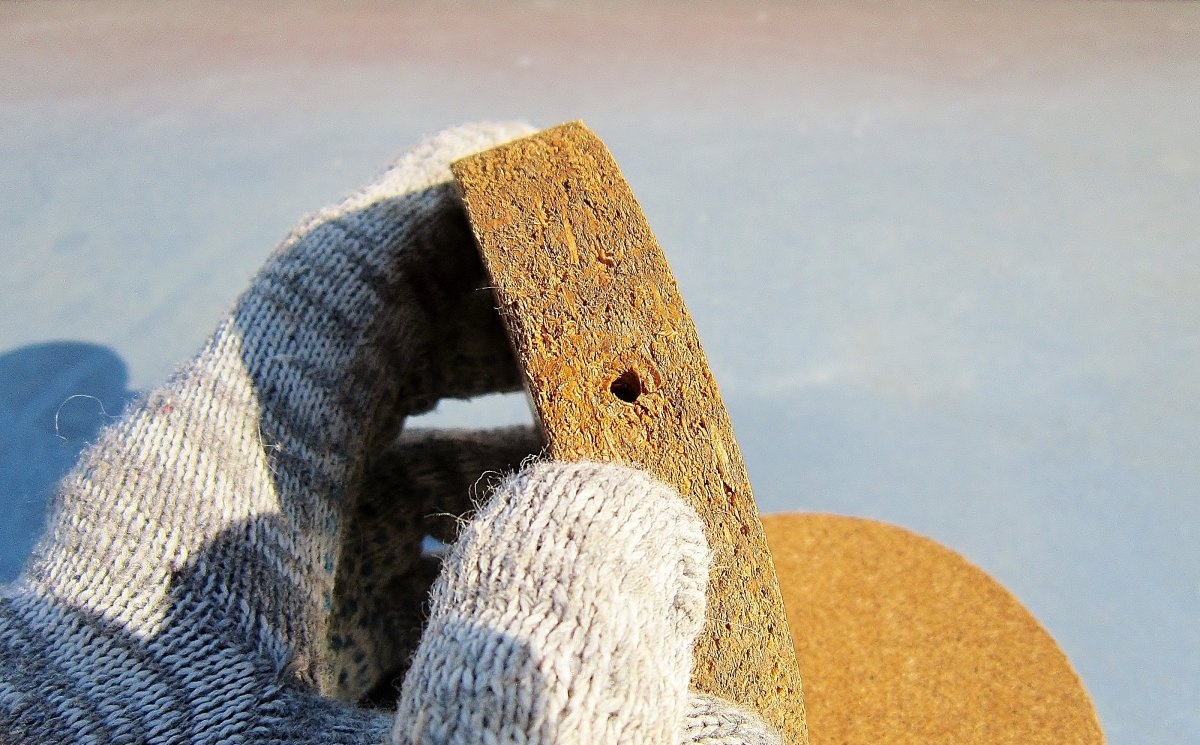
3. Drill one hole in the end of the circle-wall.
4. Cut a piece of punched tape into 23 holes. That is exactly what happened to me.

Try collecting:
1. Align the three elements:
- - The pipe.
- - The circle.
- - Punched tape.
2. Connect the extreme holes of the punched tape to each other and to the hole on the chipboard mug.
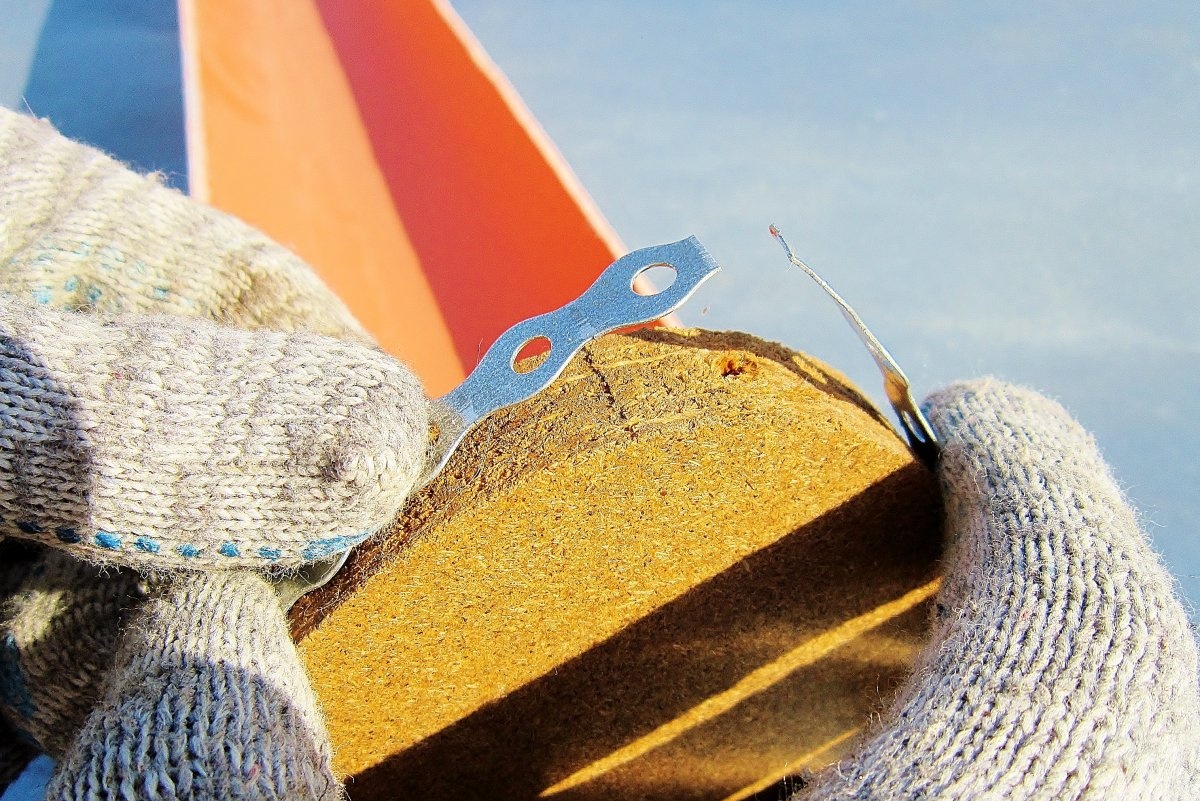
3. Slide the hardware into the three holes. Yes, it requires ingenuity. But understand one thing. If you use the same material as me. Then it will seem to you that the edges of the metal tape do not converge. But this is not so. Make an effort, hook the holes with the thread of the anchor and tighten. Remember, exactly 23 holes.
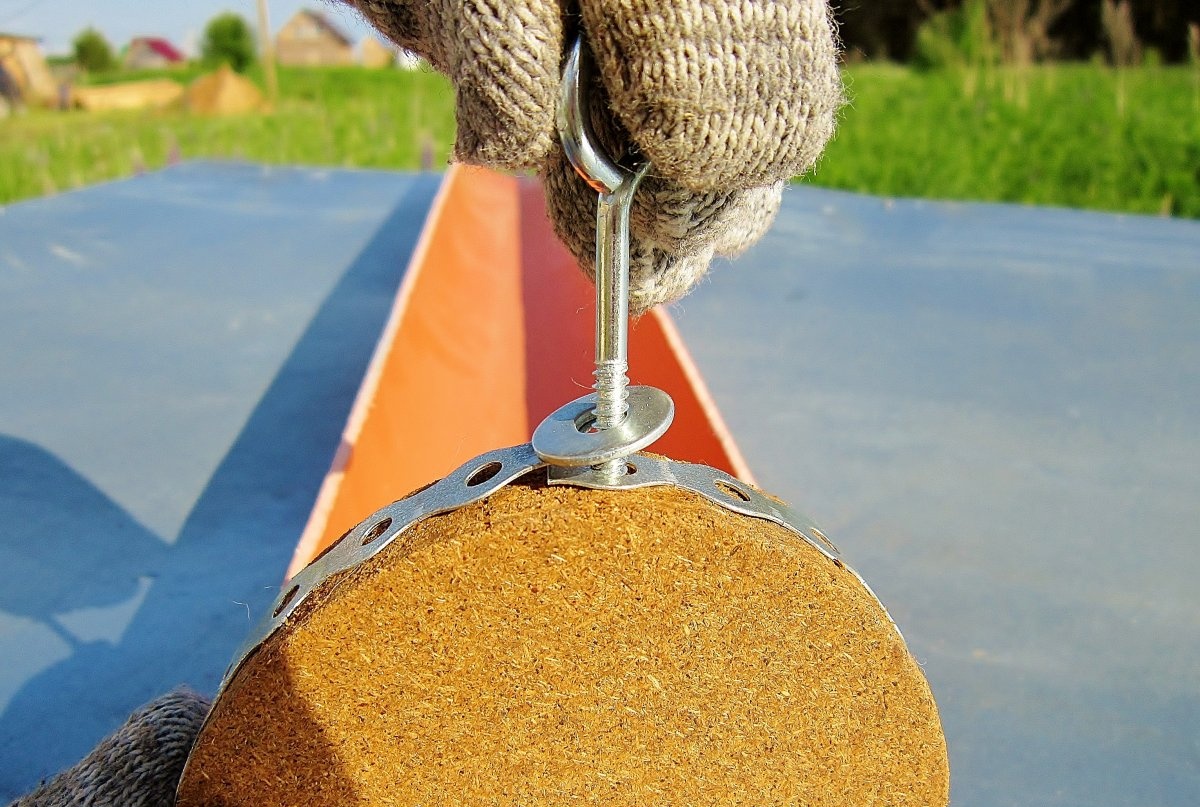
In fact, the bed is ready. I supplement it with hanging fasteners in the form of double loops of pet tape, and also wrap the entire garden with cling film. But this is my prejudice. If you use a garden bed as a decor on the street, then it is better to decorate it with a colorful ornament. Climatic conditions in the dome greenhouse mean high temperature and humidity differences. Therefore, I use cling film. I fastened the bed with the help of the construction level and the husband who kept the construction level.

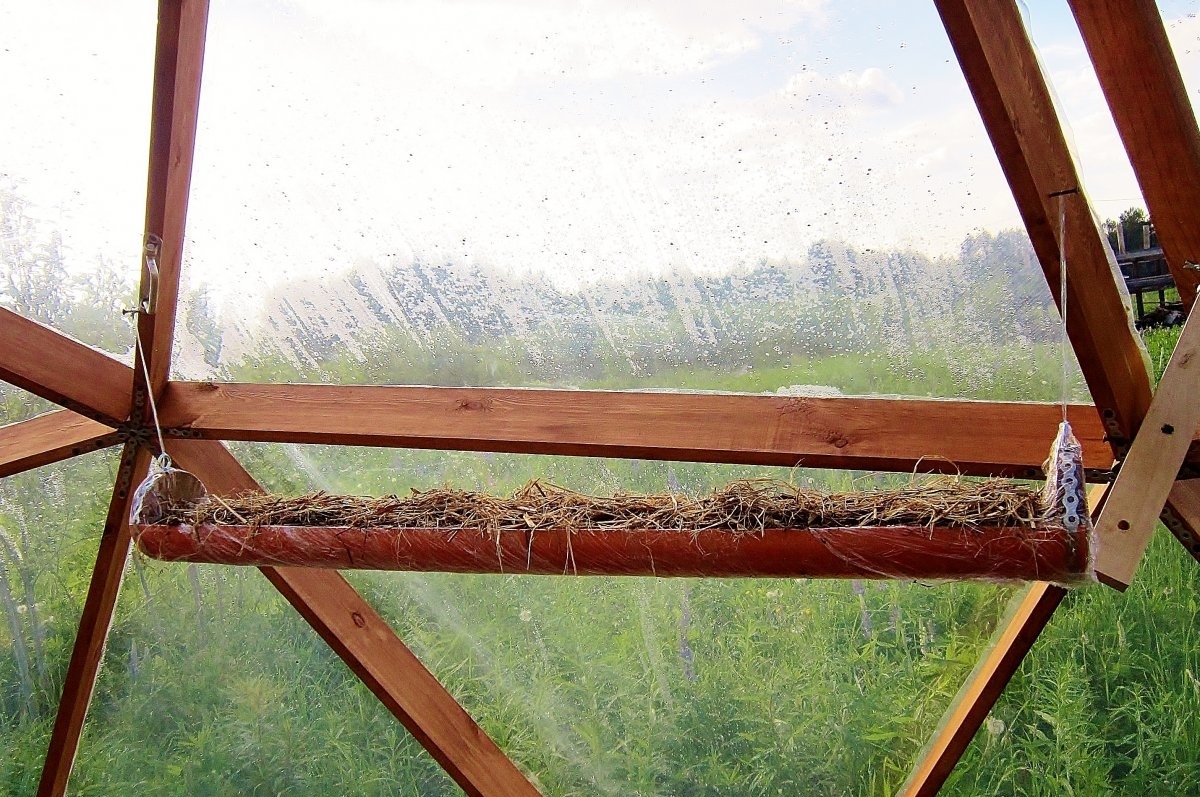
Today I made four beds. They do not interfere with each other and the rest of the landings. The advantages of such a hanging bed are:
- Additional landing space.
- Shading the non-sunny side of the greenhouse.
- The complication of the microclimate.
- Growing greens such as celery or parsley several times during the warm season.
And I also make a 2-meter-long garden bed with an ornament for the facade arrangement under the window. But that is another story.