Do it yourself
Life hacks, master classes, useful tips, recipes.
home » Electronics » Simple circuits » LED color music

Sometimes you really want to create a bright light show at home, invite friends, turn up the music louder and plunge into the atmosphere of a disco. There are usually no problems with music and friends, but organizing color music can be quite problematic. Even the simplest lighting effects sometimes cost a lot of money, and besides, they are not sold in all stores. What to do if the desire to enjoy the lights blinking to the beat of the music does not fade away? There is a way out - to assemble the color music yourself.

Color music scheme

LED color music

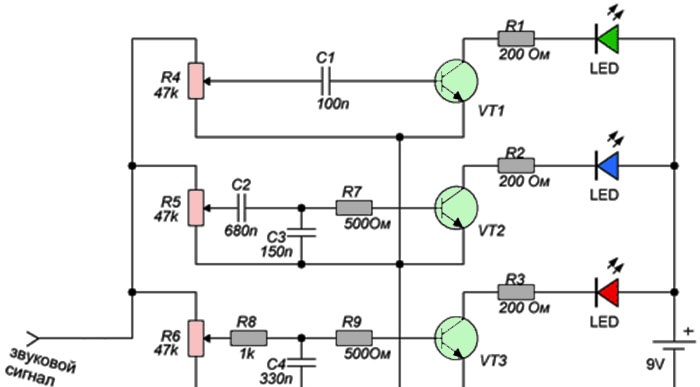
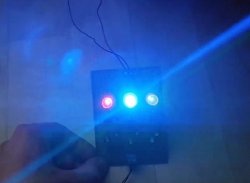
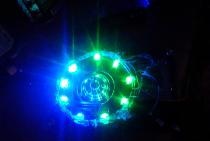
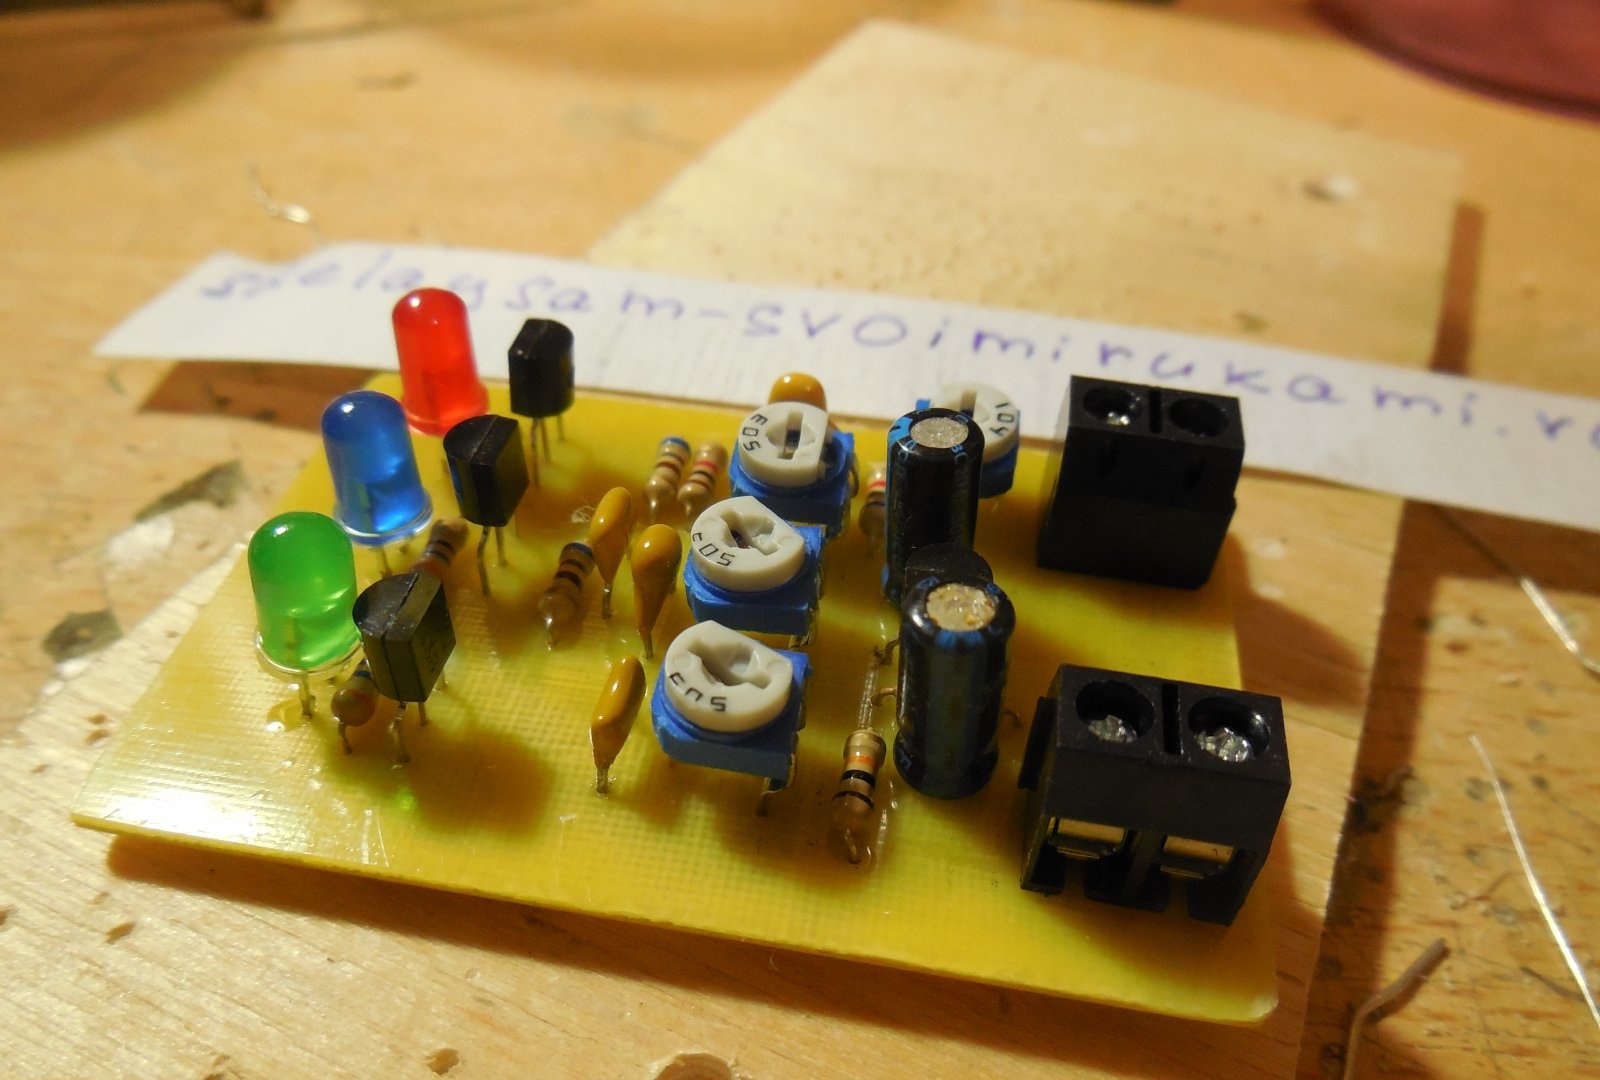
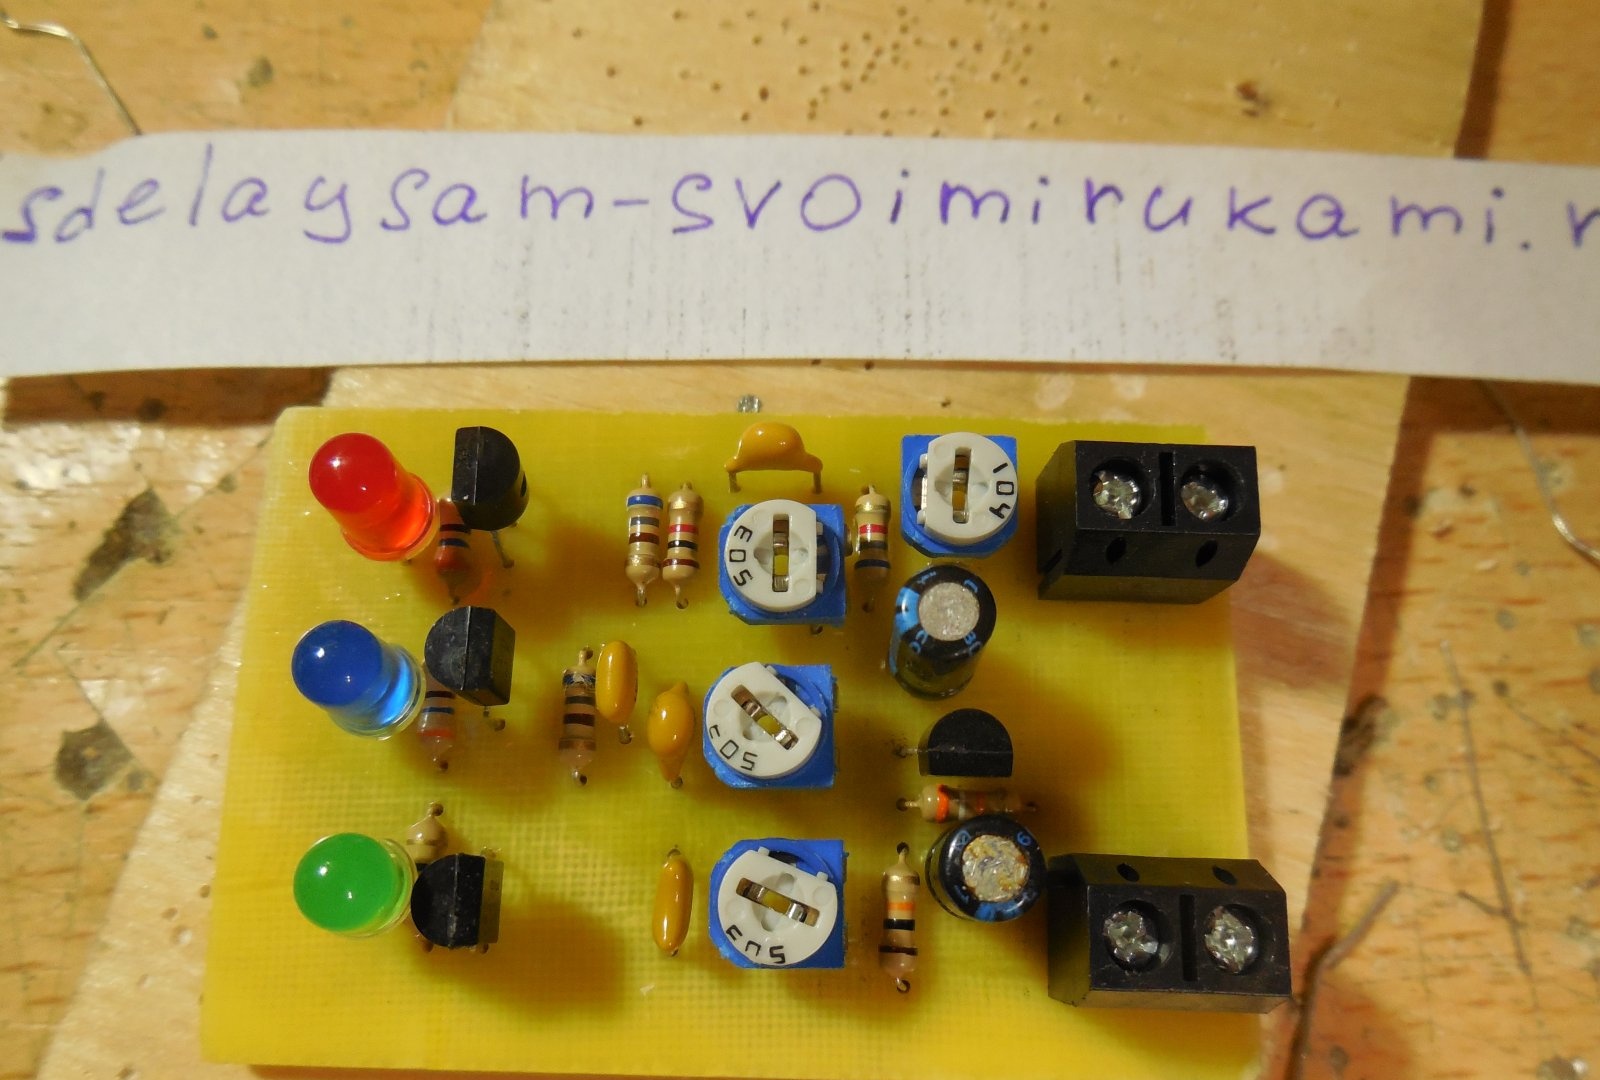
The circuit is as simple as boots, it contains only three transistors and a handful of resistors with capacitors. It contains three filters for low, medium and high frequencies, so this color music can be called three-channel. Red Light-emitting diode lights up when the audio signal is dominated by low frequencies, blue Light-emitting diode responds to mid frequencies, and green to high frequencies. Trimmer resistors R4 - R6 regulate the sensitivity of each channel, with their help the required brightness is set. Transistors VT1 – VT3 switch LEDs, here you can use any low-power n-p-n transistors, for example, BC547, BC337, KT3102. Instead of separate LEDs to increase brightness, you can use pieces of LED strip; in this case, transistors should be installed with higher power, for example, BD139, 2N4923, KT961. An audio signal can be supplied to the input of the circuit, for example, from a player, telephone or computer. However, it may turn out that the audio signal level is not enough to open the transistors of this circuit and LEDs will glow dimly. To prevent this from happening, the signal must be amplified, for example, using a simple amplifier with one transistor, the circuit of which is shown below.

Amplifier circuit

LED color music

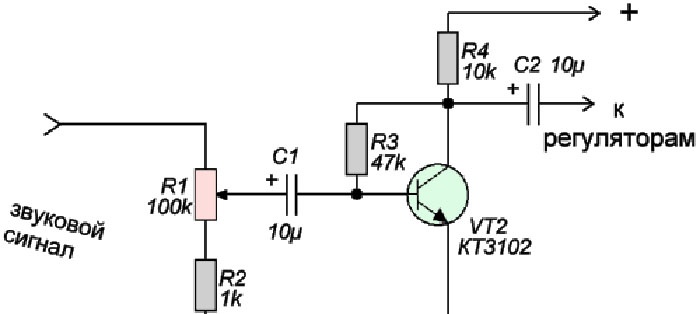
Any low-power transistor can be used; the domestic KT3102 has proven itself well in this circuit. Using tuning resistor R1, you can adjust the level of the signal supplied to the color music circuit. The amplifier is powered by the same 9 - 12 volts. You can even send a weak signal from your phone to its input, because it will be amplified to the desired level.

Assembling a simple color music

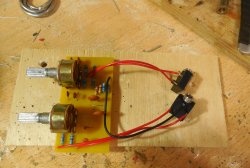
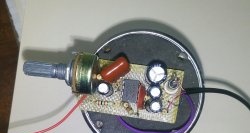
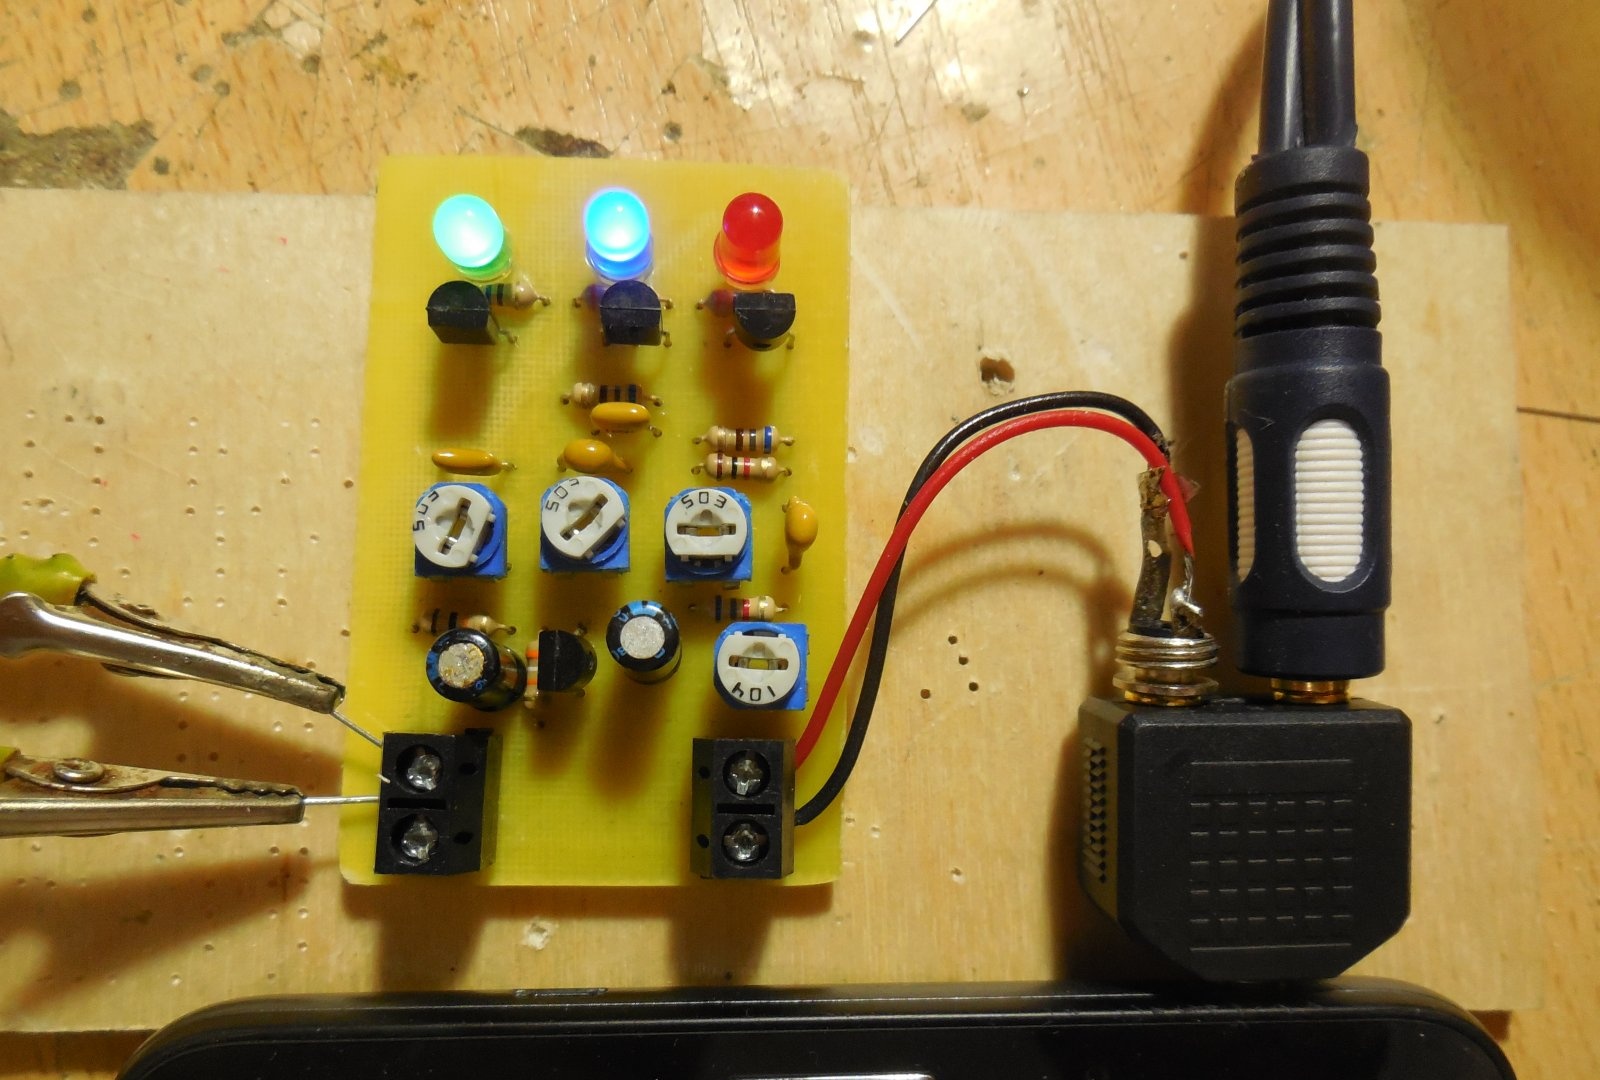
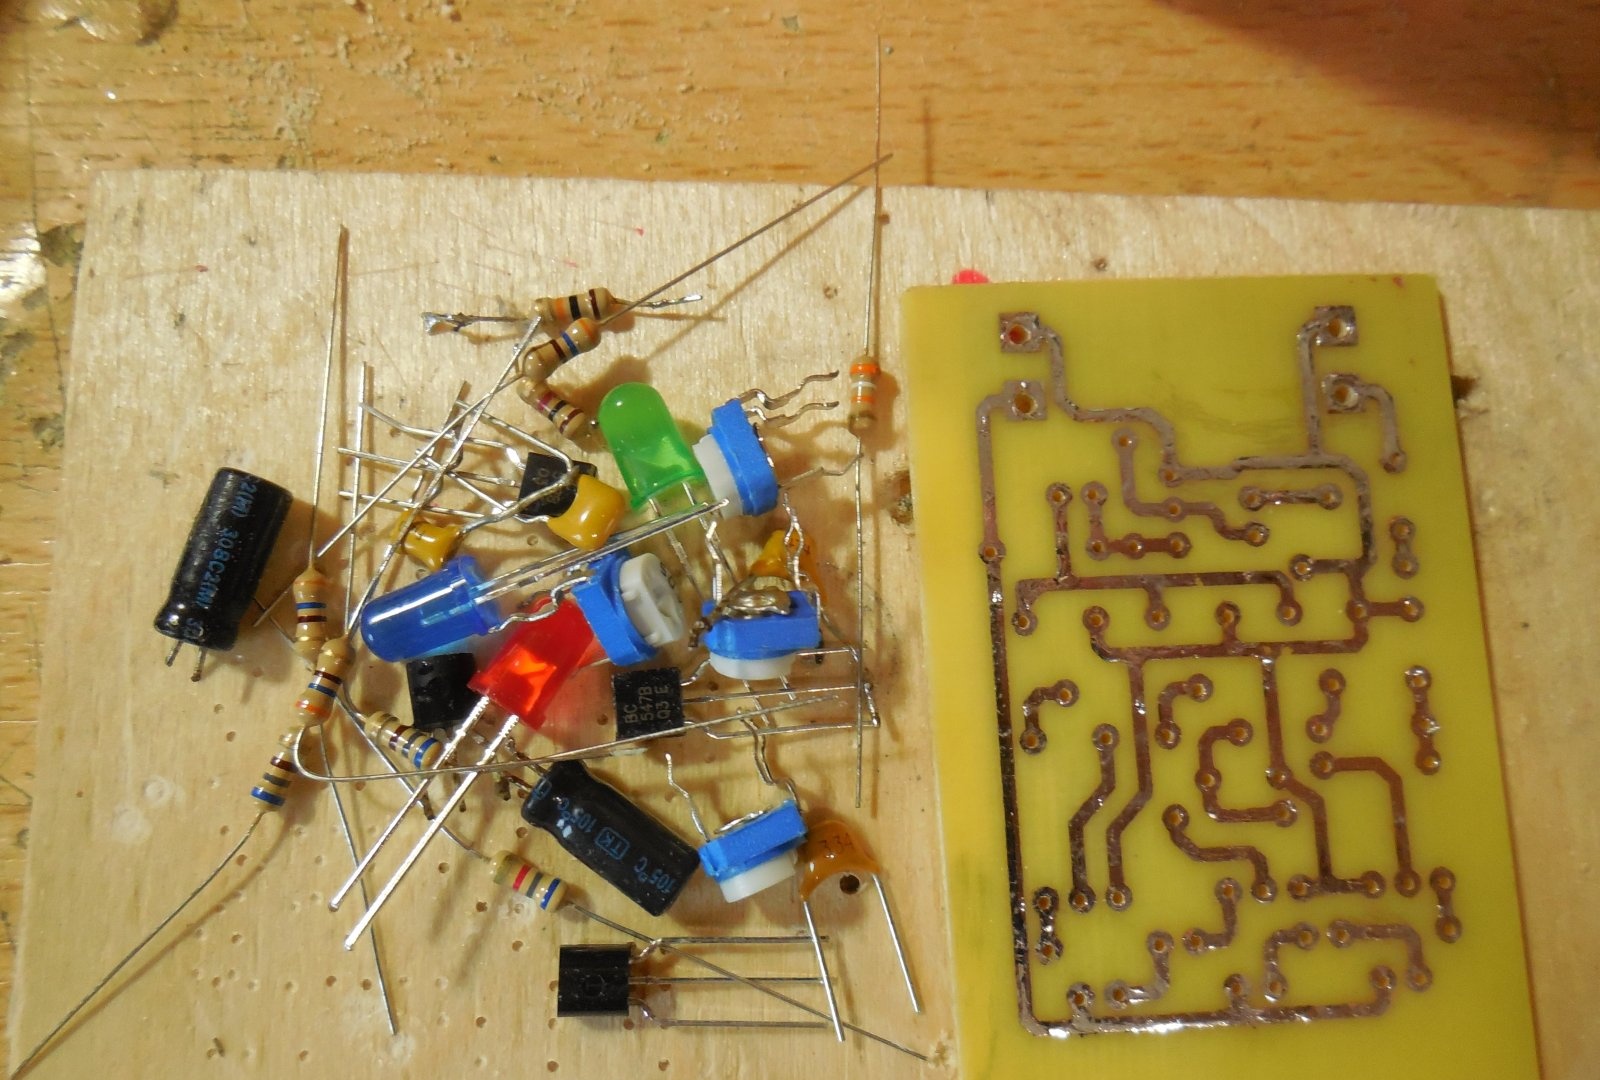
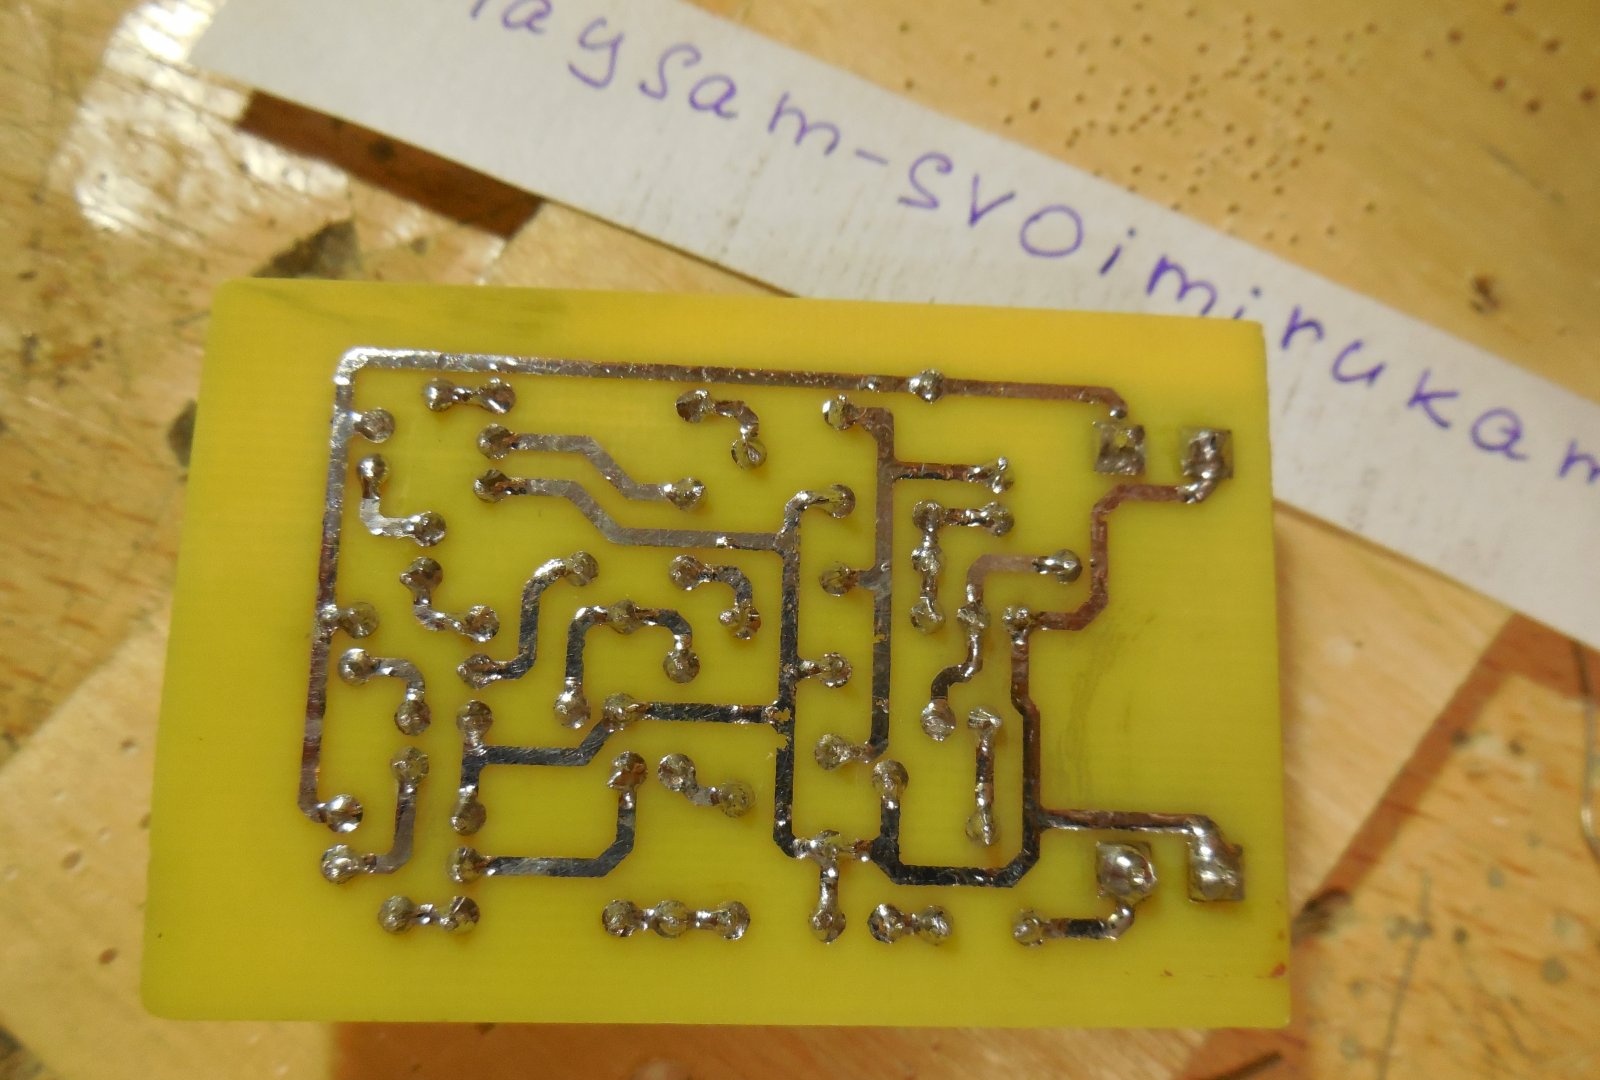
After analyzing the diagrams, you can proceed directly to assembling the structure. Both circuits can be assembled on one board, which is what I did. The printed circuit board has dimensions of 35x55 mm and is made using the LUT method. A few photos of the process:
Download the board:
pechatnaya-plata.zip [8.98 Kb] (downloads: 2270)

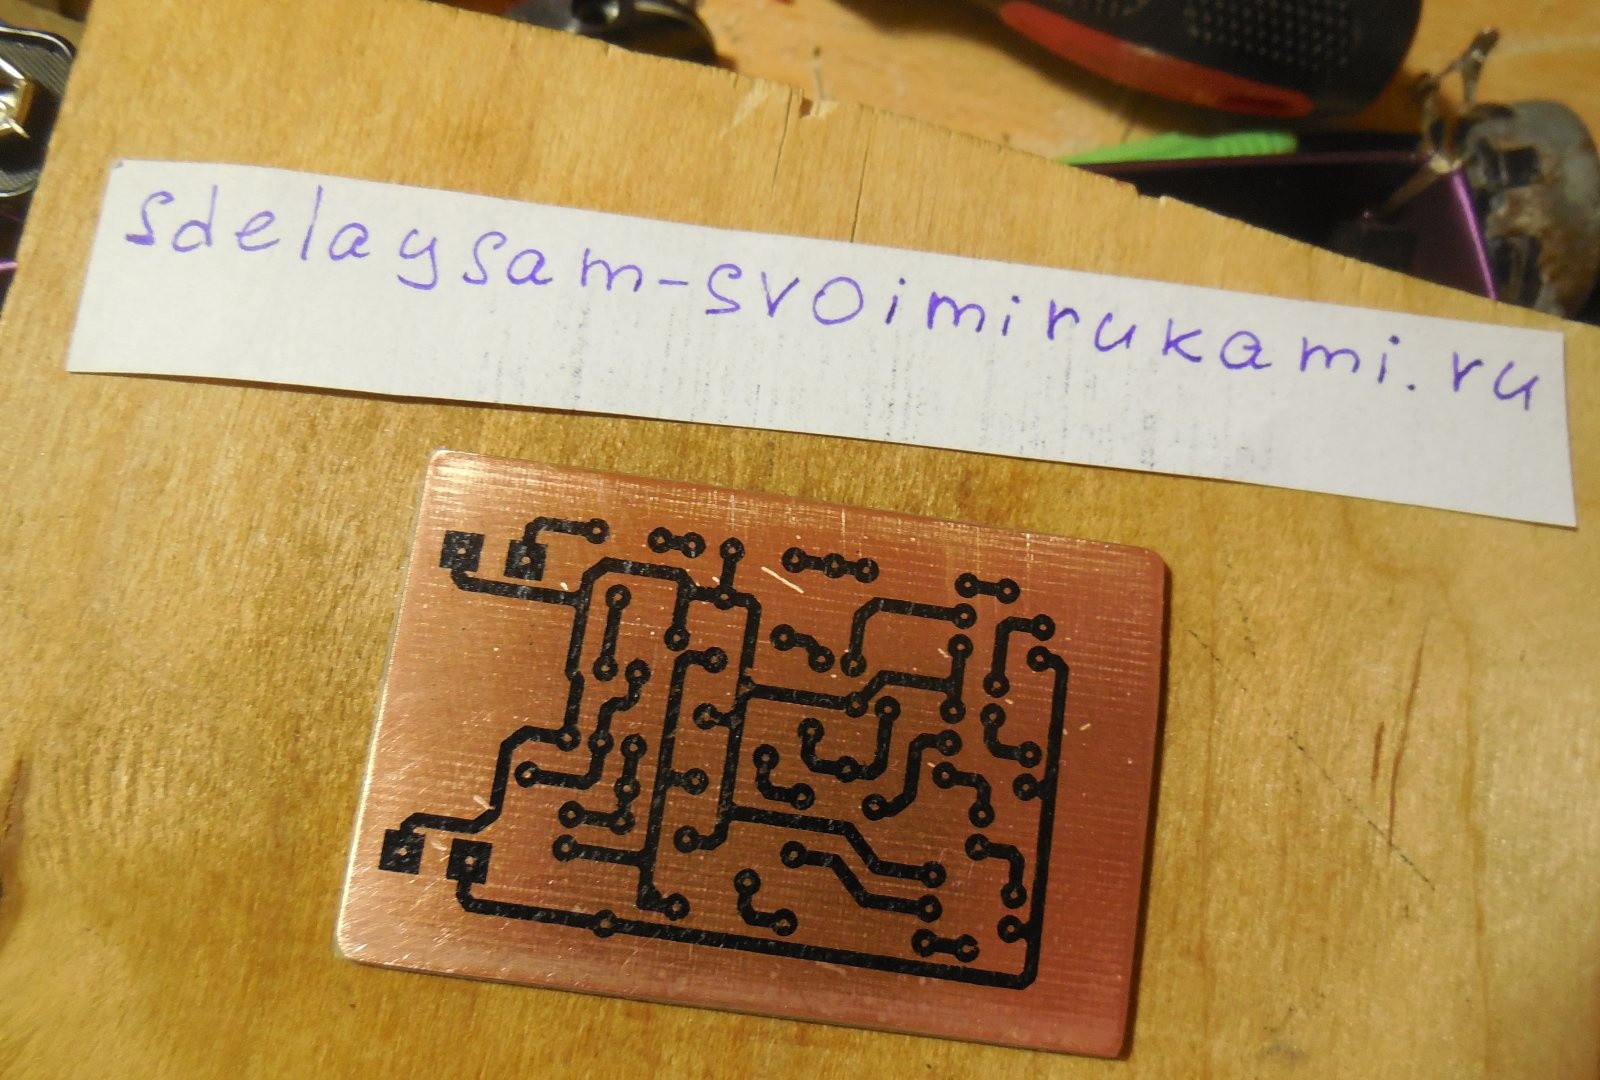
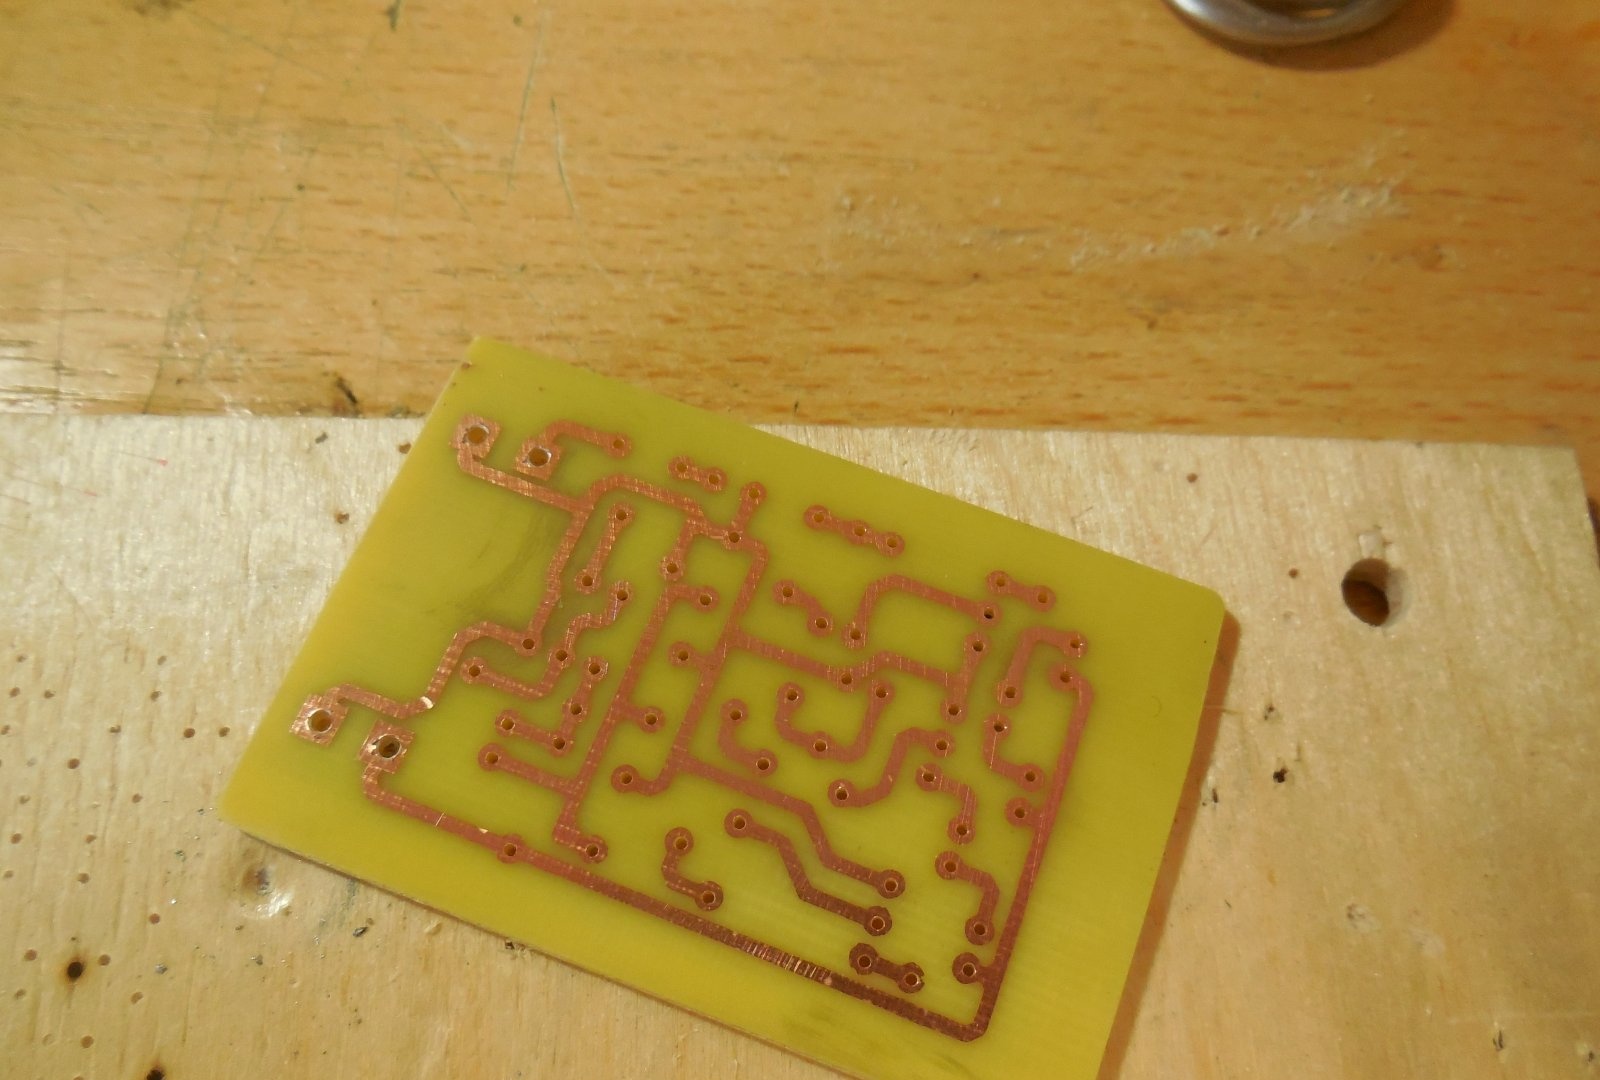
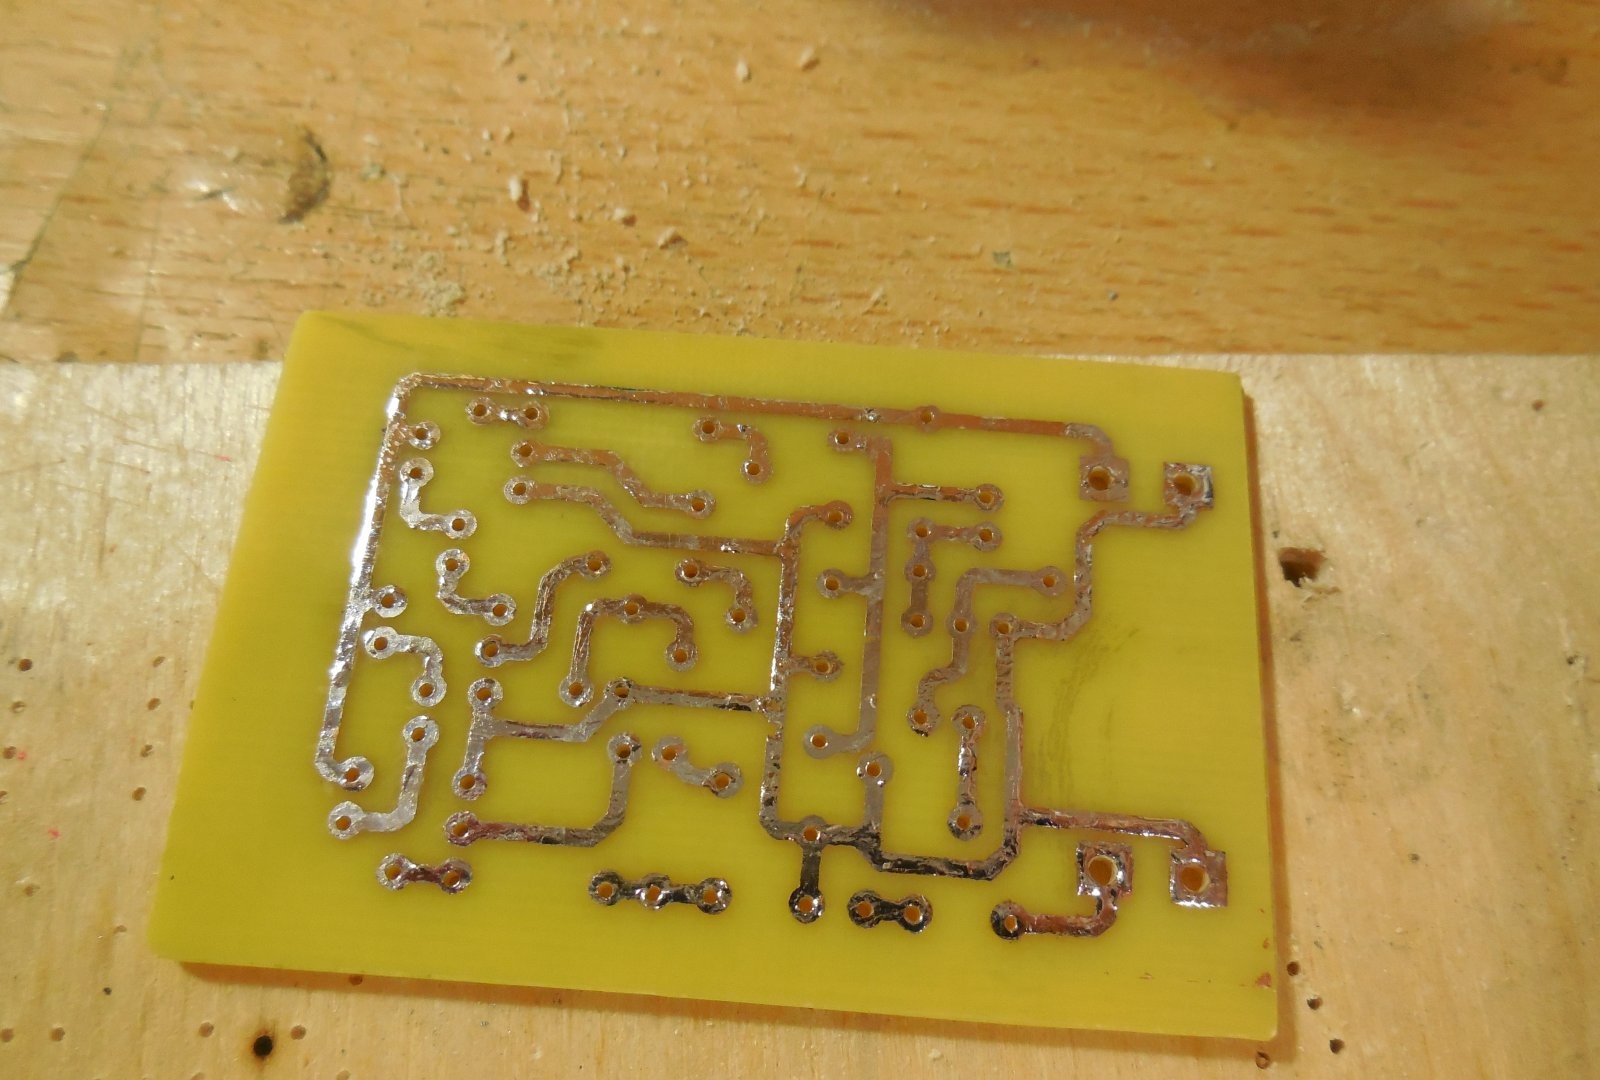
After the excess copper has been removed, the holes have been drilled, and the tracks have been tinned, you can begin to solder the parts. Small parts - resistors - are soldered in first, followed by capacitors and transistors. Lastly, massive trimming resistors are installed on the board. To connect the power and sound signal wires, you can use terminal blocks, then connecting the wires will be much more convenient. After all the parts are sealed, it is necessary to wash the board from flux and test the adjacent tracks for short circuits.

First startup and setup

It is worth applying voltage to the board by connecting an ammeter to the gap in one of the power wires. When there is no signal at the input, the circuit consumes approximately 1-2 mA. All trimming resistors need to be turned to the middle position, after which a sound signal can be applied to the input of the circuit. To do this, you should use a splitter that plugs into the socket of your phone or player. In this case, the signal will simultaneously be sent to both the speakers and the color music board. Using R1, you need to ensure that the brightness of the LEDs is sufficient. Then, using resistors R4 - R6, each channel is adjusted separately so that the brightness of all LEDs is the same. After the circuit is configured, you can connect bright LED strips instead of individual LEDs, turn on the music louder and enjoy the work done. Happy building!

Watch the video

The work of such color music is clearly shown in the video:

come back
Comment
  • bowtiesmilelaughingblushsmileyrelaxed relaxedsmirk
    heart_eyeskissing_heartkissing_closed_eyesflushedrelievedsatisfiedgrin
    winkstuck_out_tongue_winking_eyestuck_out_tongue_closed_eyesgrinningkissingstuck_out_tonguesleeping
    worriedfrowninganguishedopen_mouthgrimacingconfusedhushed
    expressionlessunamusedsweat_smilesweatdisappointed_relievedwearypassive
    disappointedconfoundedfearfulcold_sweatperseverecrysob
    joyastonishedscreamtired_faceangryragetriumph
    sleepyyummasksunglassesdizzy_faceimpsmiling_imp
    neutral_faceno_mouthinnocent
3+three=
Comments (11)
  1. Guest Alexander
    #1 Guest Alexander Guests 4 June 2018 20:17
    2
    Bullshit, not color music.
  2. Guest Sergey
    #2 Guest Sergey Guests 5 June 2018 17:00
    7
    Is this color music? Of the three LEDs? I did something similar in the 70s, only the signal after the filters was fed to the control electrodes of the thyristors. The lamp load is 220V 60W. There was no AGC, so it had to be adjusted frequently. But at least the plastic imitation of a crystal chandelier shimmered quite interestingly on the edges of this pseudo-crystal. And the girls were dragging themselves to dance, as the entire room was illuminated with shimmering sexual twilight. What is the use for this shelter? The member is illuminated during masturbation... For more than three LEDs will not be enough. The proposal to include LED garlands makes no sense: it will not be much brighter, and secondly, due to the Volt-Amp characteristic LED will not light up at low volume levels. Even if you put them in a good diffuser, they will not shimmer with colors, but blink stupidly, like a broken traffic light.
  3. Guest
    #3 Guest Guests 12 November 2018 14:49
    3
    Are you sure there are no errors in the print? Assembled the device. The amplifier refused to work, the output stage was working - I hung a separate amplifier on it.
  4. Drutoc
    #4 Drutoc Guests 5 February 2019 10:44
    1
    Question about the amplifier. Where to attach the “+” from R4?
    And "-" from C2, what kind of regulators are they?
  5. Guest
    #5 Guest Guests 3 December 2019 17:38
    2
    soldered, works without an amplifier, but the quieter the sound, the weaker it blinks. Only the 100N capacitor didn’t fit, so I soldered a larger one, 400N
  6. Profkom
    #6 Profkom Guests 25 February 2020 19:19
    3
    Can anyone post the board for it, thanks!
  7. Maksik
    #7 Maksik Guests 10 March 2020 18:01
    3
    Is a regular 3.5 jack soldered to the input?
  8. Almir
    #8 Almir Guests 26 October 2021 17:30
    1
    The circuit is simple, but the variable resistor is expensive. And here there are 3 of them.
  9. Oleg
    #9 Oleg Guests 12 April 2022 14:48
    0
    I put it together and it doesn't work. Are you sure there are no errors in the amplifier board?
    1. Well
      #10 Well Guests 13 April 2022 08:38
      1
      There are no errors in the diagram. Elementary device. Look for mistakes in yourself.
  10. Nikolay
    #11 Nikolay Guests 21 October 2023 10:02
    1
    As a child I bought an electronics set. I just found a diagram on the Internet:
    There is a compressor, active filters, and a background channel. This scheme worked well.
    I also made color music with running lights from the 176ie12 clock chip. There is a non-standard use of it.

Stained glass | Do it yourself

A center punch from an automobile valve that does not give in the hand

Master classes on how to make a money tree with your own hands

How to clean a well yourself without risks and difficulties

«Do it yourself - with your own hands» - a site of interesting homemade products made from scrap materials and items at home. Step-by-step master classes with photos and descriptions, technologies, life hacks - everything a real master or just a craftsman needs for needlework. Crafts of any complexity, a large selection of directions and ideas for creativity.

We recommend reading

Washing machine error codes