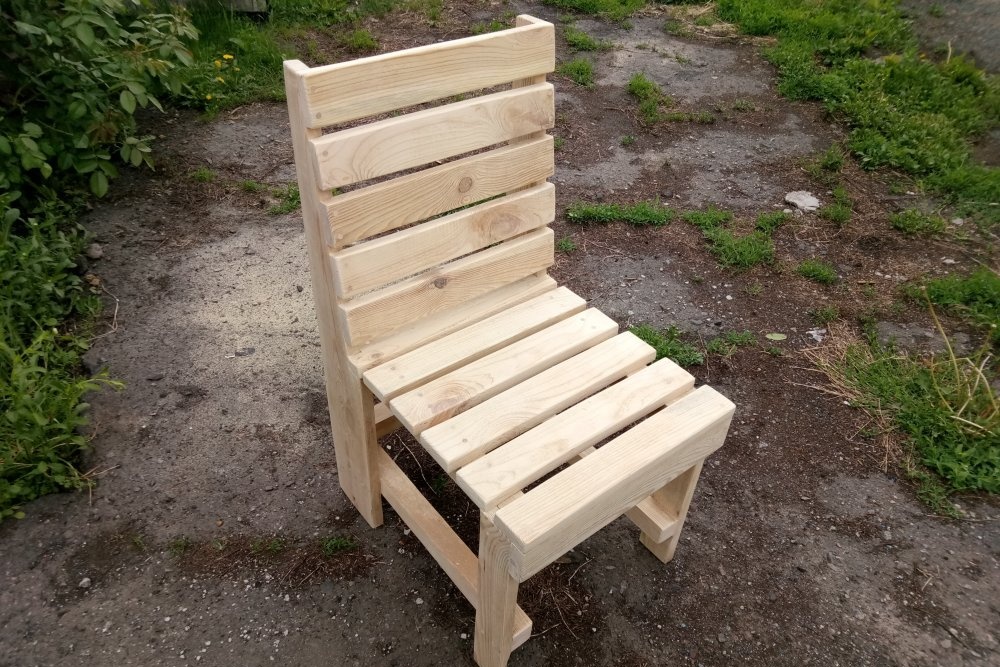
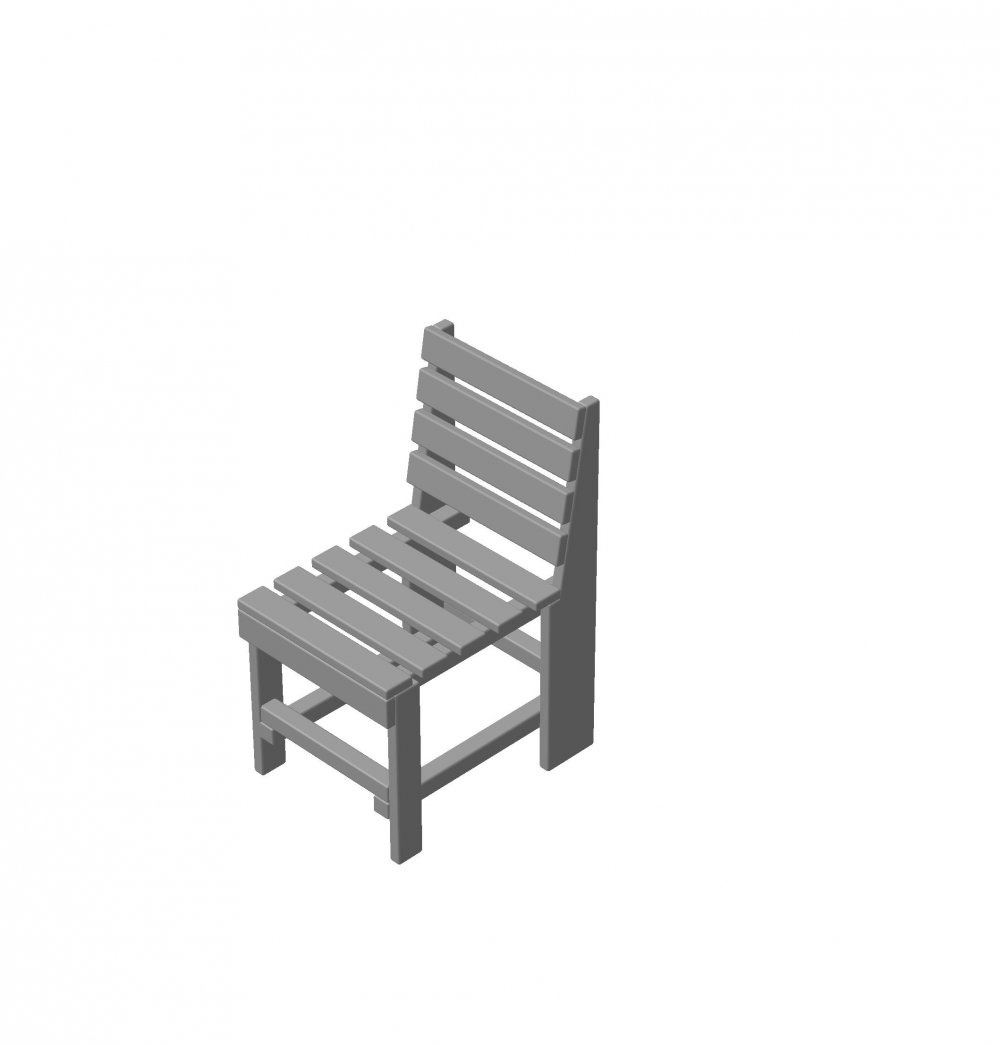
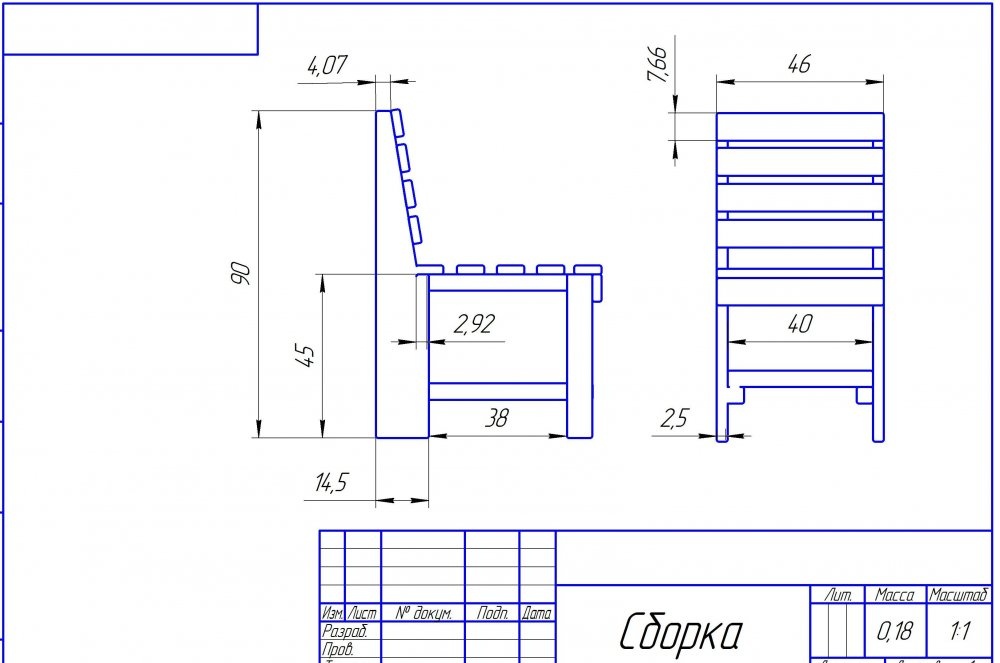
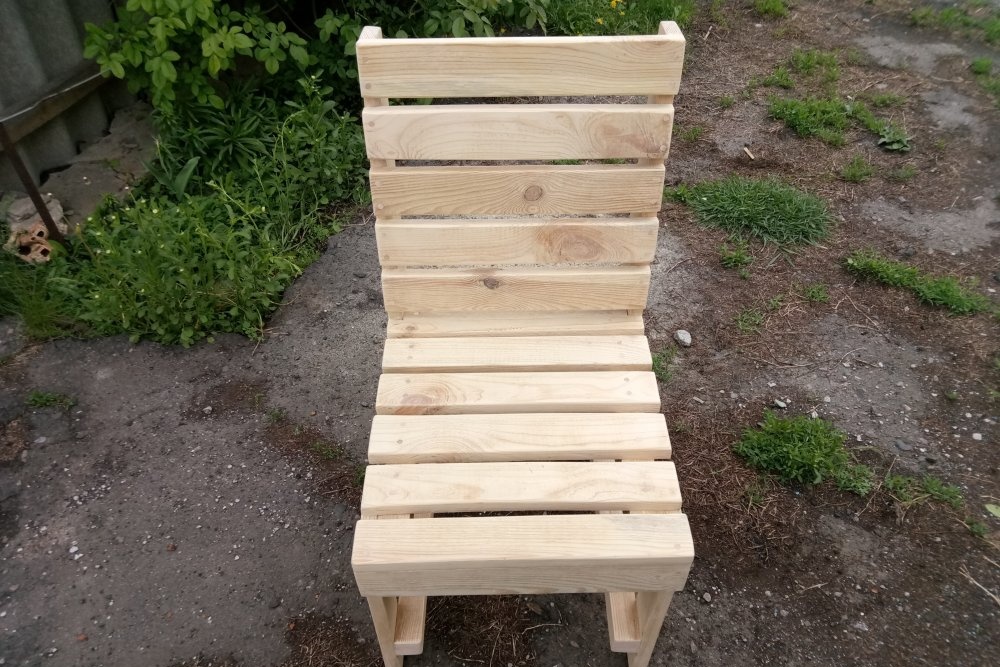
The article describes in detail and shows how to use these two "helpers" to make a durable, reliable and, moreover, an aesthetically attractive garden chair. A three-dimensional model and a drawing with dimensions will help you quickly navigate the project and correctly manufacture the details of the future subject of furniture. The material also contains some recommendations for the assembly and processing of a wooden chair.
Materials
To make a garden chair, you will need a trimmed pine board with a thickness of 25-30 mm and a width of 140 mm. Also for the manufacture of jumpers you need a wooden beam of 5050 mm. These details can be made from the board, but the structural strength will lose significantly from this. The garden chair will be operated in harsh conditions, because the safety margin will not hurt.
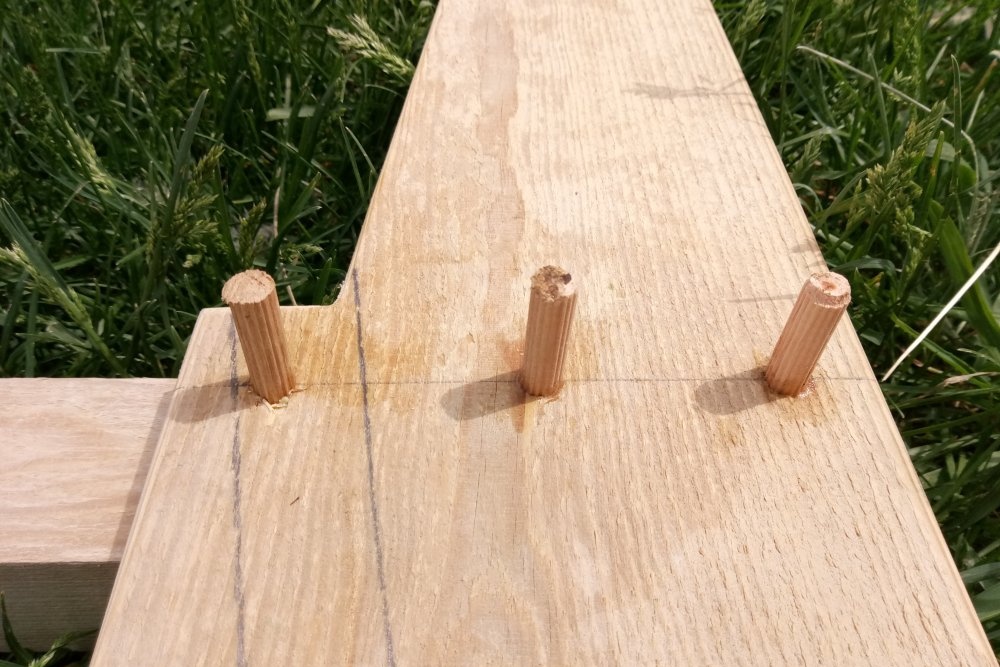
All structural elements are connected to self-tapping screws and carpentry glue. At the same time, as can be seen in the photographs presented, the fasteners themselves are not visible. For their "disguise" will require standard 8 mm furniture dowels. The length of the screws is 30 mm.
Now by the number of materials:
- Board - 5 m.
- Timber - 2.5 m.
- Self-tapping screws - 60 pcs.
- Dowels - 20 pcs.
Joiner glue, by and large, is needed only for gluing dowels, because it will take very little. If everything is done “wisely”, that is, to glue absolutely all the compounds, then approximately 50-100 grams will be consumed.
Instruments
The main idea of the material is to use a minimum of tools that any home craftsman has to use to make a garden chair. Like it or not, you should prepare the following:
- wood hacksaw;
- drill;
- wood drill with a diameter of 2.5 mm;
- wood drill with a diameter of 8 mm;
- bits for screws (you can use a screwdriver);
- sandpaper with a grit of 100 units;
- joiner's square;
- roulette;
- a simple pencil.
To simplify and speed up the process of manufacturing parts and assembling a garden chair will help the presence of the following tools and devices:
- jigsaw;
- a circular saw;
- electric planer;
- grinder (preferably orbital);
- joiner clamps.
But if all this is not there - it does not matter. The minimum from the first list is quite enough. In time, however, it will be much longer.
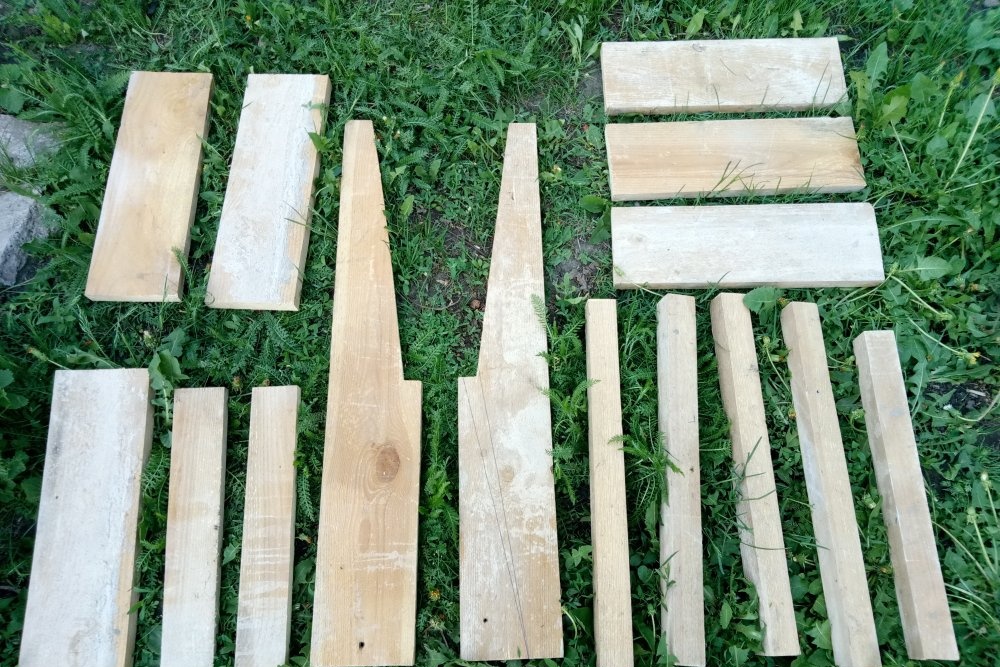
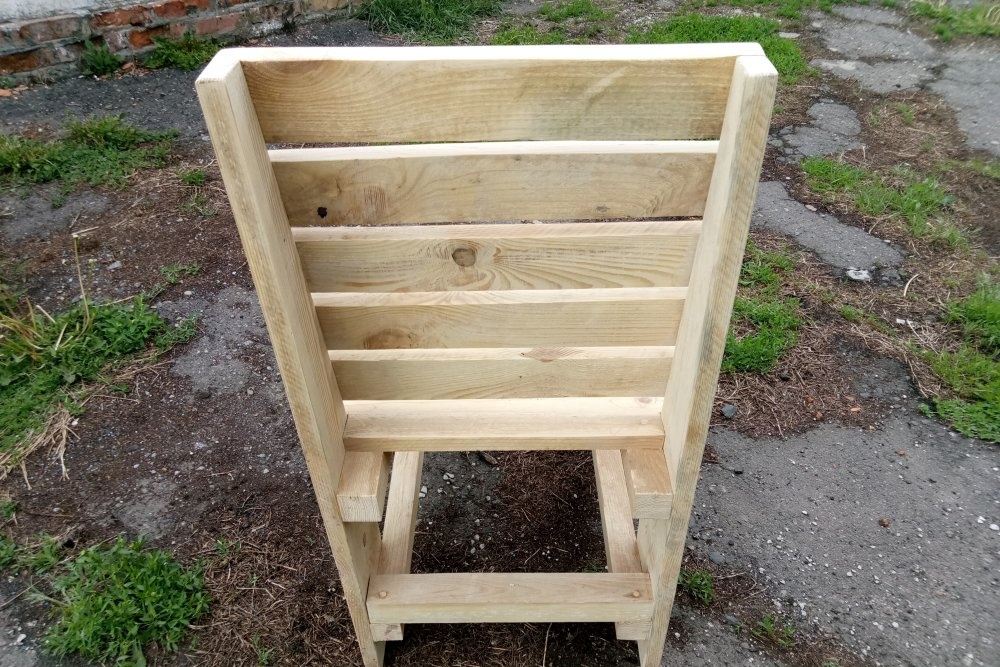
Wooden garden chair details
It is best to start with the manufacture of the hind legs. These are the most difficult parts of the chair, because there is an oblique cut of the board. It is necessary so that the backrest has a certain bias, which improves the comfort and attractiveness of the chair.
Further, longitudinal and transverse jumpers are cut from the timber. As already mentioned above, it is quite possible to make these parts from the same 30 mm board. But it is better, nevertheless, to use precisely a bar.
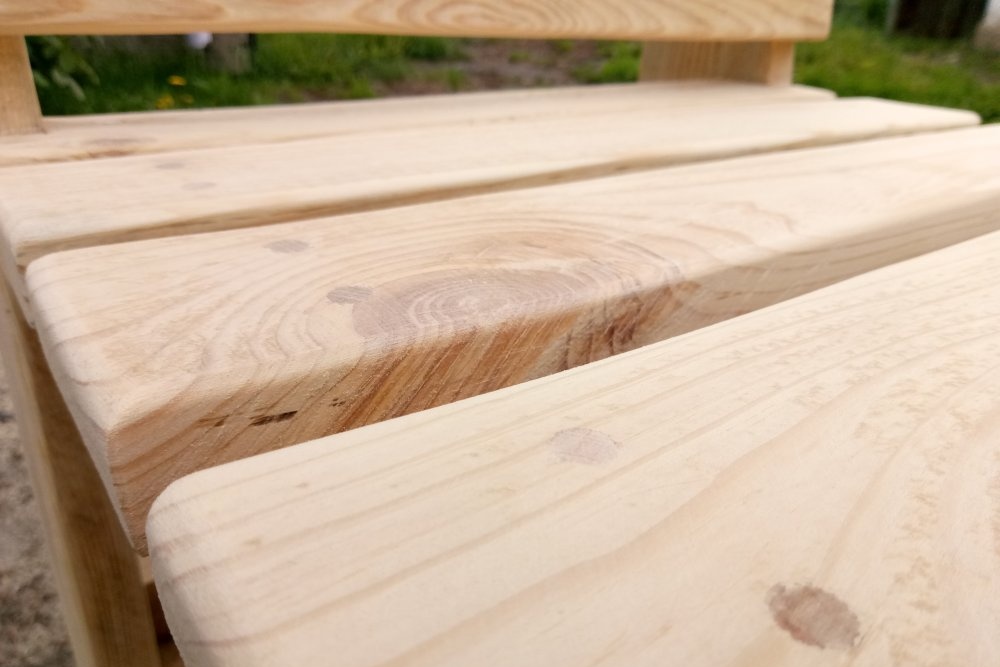
The last step is to make the front legs and lamellas for finishing the seat with backrest. In the above example, for this, a 14-centimeter edged board blossomed along. In principle, manually performing such an operation is quite difficult.Therefore, if there is no jigsaw or circular saw, you can use a whole board with a width of 14 cm. Although narrow lamellas look more attractive on the finished product. In addition, if your edging board is not too straight, longitudinal sawing will make it easier to fit the parts to the required size.
After cutting all the elements of the garden chair, it is recommended to immediately process them with a plane and sandpaper. To improve the appearance, it is advisable to round off all the ribs that will be outside. Even if there is no planer and a special grinding machine, we take a drill, a disk nozzle and abrasive wheels with a grain size of 100 units. The chair shown in the example is fully processed only with this kit (even a plane was not used).
To extend the life of sandpaper, it must be periodically cleaned of chips. To do this, it is easiest and cheapest to use a heater in the form of foamed polyethylene (the one that is covered with foil on one side). If you “walk” with sandpaper on such polyethylene, it will be completely cleaned. This method does not work only against tar tar. When the paper is clogged with resin - it remains only to throw it away.
Stages and nuances of assembling a wooden chair
The technology for connecting all parts of the chair is the same. It is called the "invisible screw."
The sequence of execution is as follows:
- Details are gradually applied to each other as shown in the drawings and photographs. For convenience and greater accuracy, they are fixed with clamps.
- Holes with a diameter of 2.5 mm and a depth of 30 mm are drilled for self-tapping screws.
- In the same places, the holes are expanded with an 8 mm drill to a depth of about 10 mm.
- Screws are screwed into the holes. To make them easier, it is recommended to lubricate the tip with ordinary engine oil.
- In the remaining holes, carpentry glue is applied and dowels are clogged.
- After the glue dries, the protruding parts of the dowels are cut with a hacksaw.
If you do not fix the parts with clamps, they may shift during the drilling process. If you do not make holes for the screws beforehand, then when screwing in, they can crack the material. Unevenly sawn dowels are subsequently easily ground “to zero”, and look much more aesthetically pleasing than open screws. Additionally, the contact areas of the parts can be treated with wood glue. Such an assembly will be more professional.
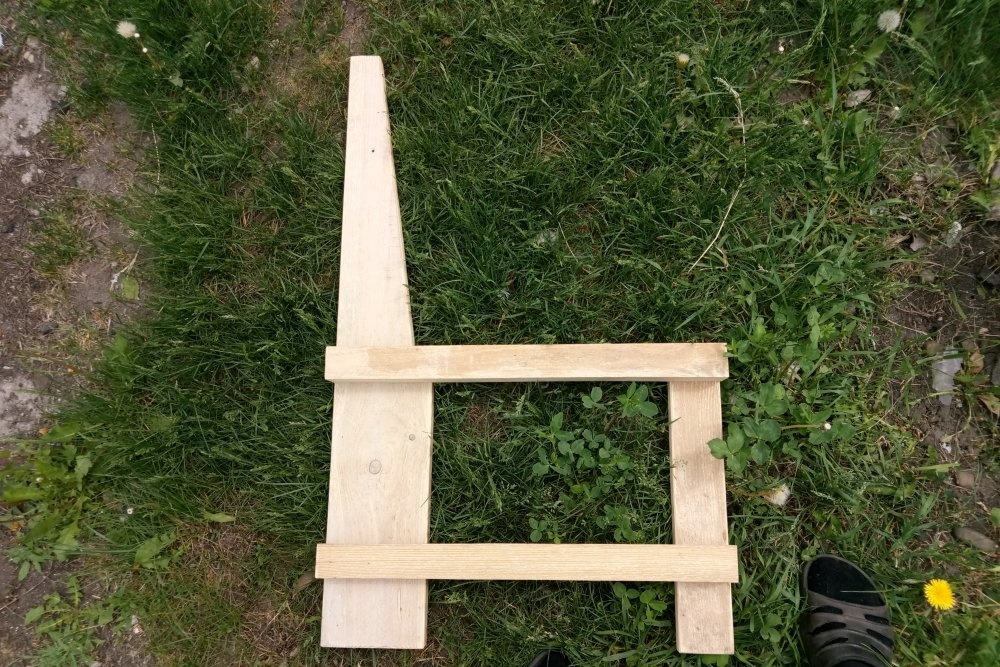
The process begins with the fact that longitudinal jumpers and the front leg are attached to the rear leg. There will be two such assemblies. In the process, particular attention should be paid to ensuring that the details are perpendicular. The right angle is monitored and checked by a joiner square.
Next, you need to connect the resulting sidewalls at key points. For a chair, this is the rear lower jumper, as well as the lamellas - the upper on the back, and the front on the seat. It is better to connect immediately only one self-tapping screw at each point. If the perpendicularity is disturbed, the situation can be easily corrected. Only after that a second self-tapping screw is added to the key connections.
It remains only to evenly distribute the remaining lamellas and secure them as described above. At each point, it is better to use two screws. So the design will be as rigid as possible and, accordingly, reliable.
After assembly, the final grinding of the product is carried out. At this stage, you can remove a lot of errors made earlier. The remaining dowels are also sanded. The decorative and protective finish of the chair is not shown in the photographs, since the required material (tung oil) was not available at the time of assembly. For these purposes, you can also use wood stains, glossy or matte varnishes.
Results and cost of a garden chair
If you work only with a hacksaw and a drill, then it will take about 8 hours to produce parts and assemble them. In a well-equipped carpentry workshop, 3-4 hours will be enough.
At cost price. A board and a beam for making one such chair cost about $ 5. Self-tapping screws and dowels - $ 1.5. Sandpaper and spent glue - another 1 dollar. Decorative oil painting - about $ 2. Total, the cost of a do-it-yourself garden chair is less than $ 10. Naturally, it’s unrealistic to buy solid wood furniture at the store for that kind of money.