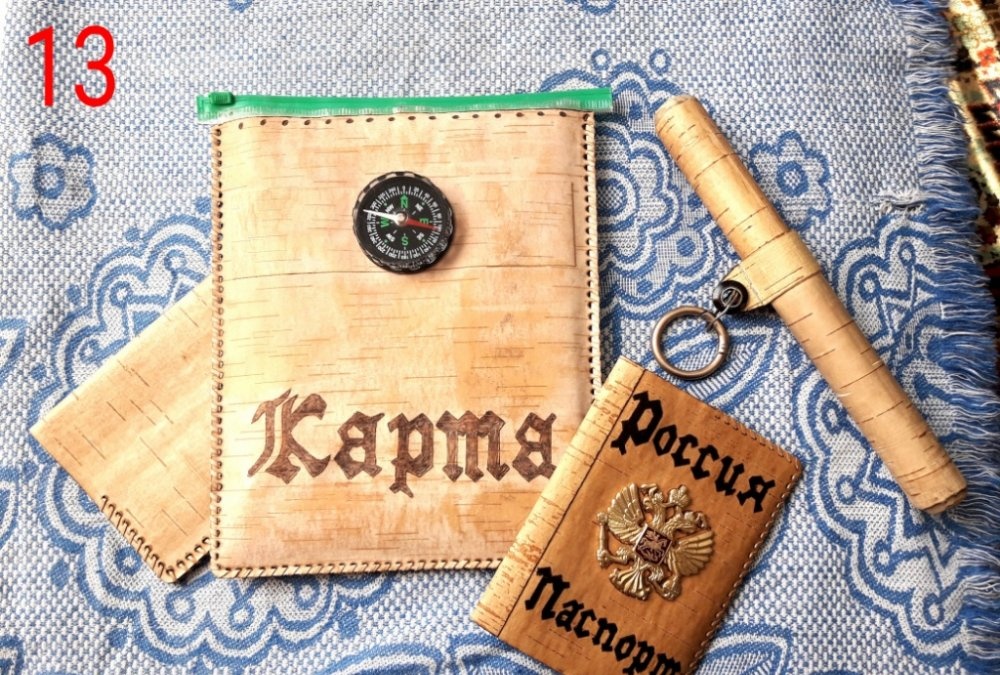
With modern technology and a variety of miniature storage media, we nevertheless sometimes have to use ordinary paper documents. For transporting and storing such documents, there are many different folders, files, envelopes and similar products. Despite the abundance, it is all gray and boring. I propose to change this monotony and dullness to a more exotic look! A folder, cover for a passport or any other document can be made from a very unique, practical and reliable material, such as birch bark. There is nothing easier than cutting a piece of bark from a birch tree while going on vacation in nature.
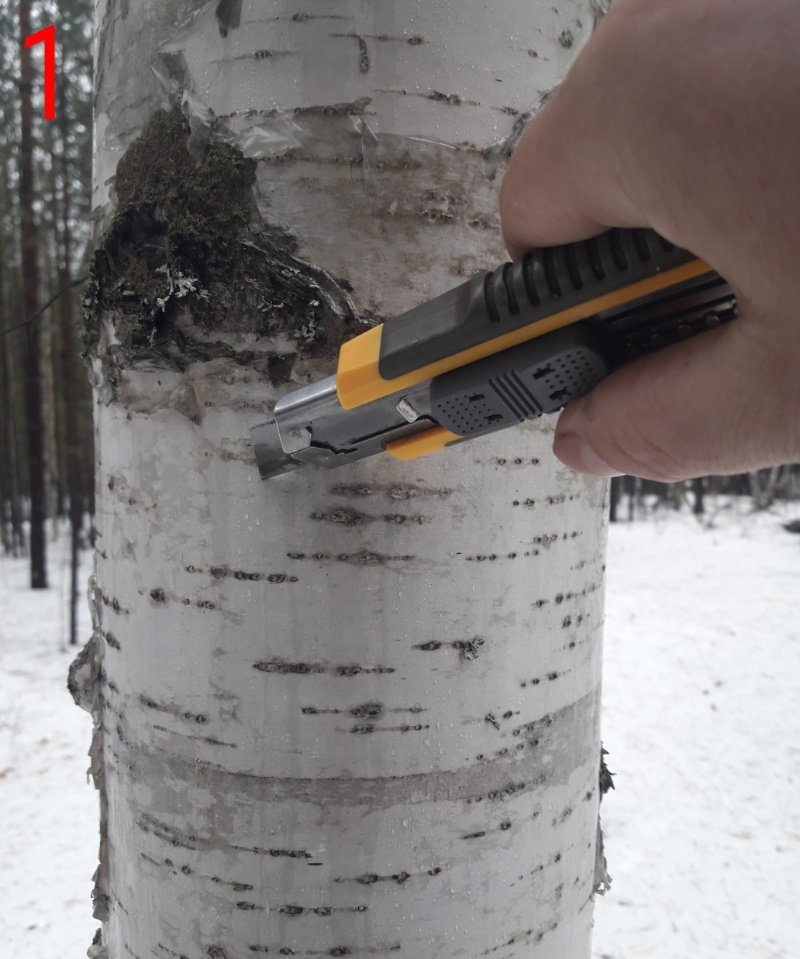
But this must be done with minimal losses and sad consequences for the tree! Namely: there is no need to make deep cuts on the tree bark, all the way to the wood. Moreover, the lowest layer in front of the wood is usually the hardest and most unyielding to work with. We need middle layers of birch bark.To do this, we make shallow cuts on the tree with a stationery knife of the size of the piece that we need and carefully, with the tip of the knife, bend the upper and middle layers from the trunk.
They easily come off and if we carefully pull the bent part, we can easily remove the required piece of material, causing minimal damage to the tree.
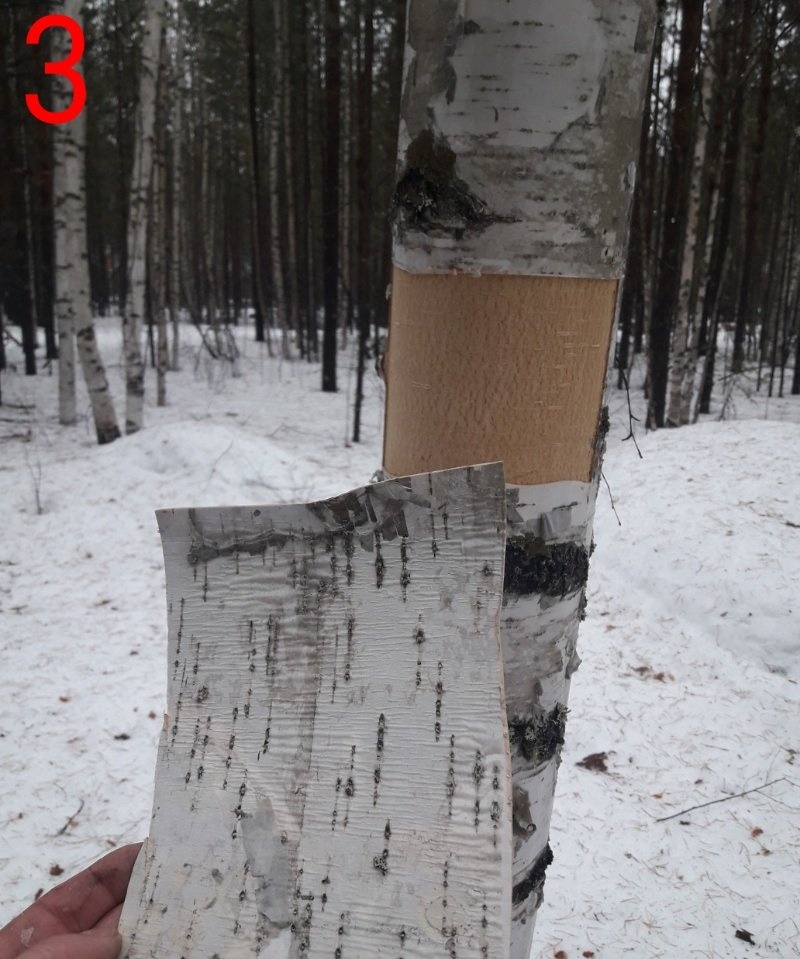
The bark does not need to be dried; due to its high tar content, it will not wrinkle or deform when the finished product dries. If you start work not on the same day, but say, after a while, you can lubricate the bark with glycerin so that it regains its elasticity, like freshly cut one.
Tools and accessories
To make a passport cover you will need the following materials and tools:- Stationery knife.
- Cautery on wood.
- Scissors.
- Dense, transparent polyethylene.
- Birch bark.
- Pencil and pen.
- Second glue
- Ruler.
- Glycerol.
Making a cover from birch bark
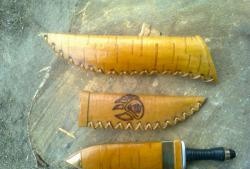
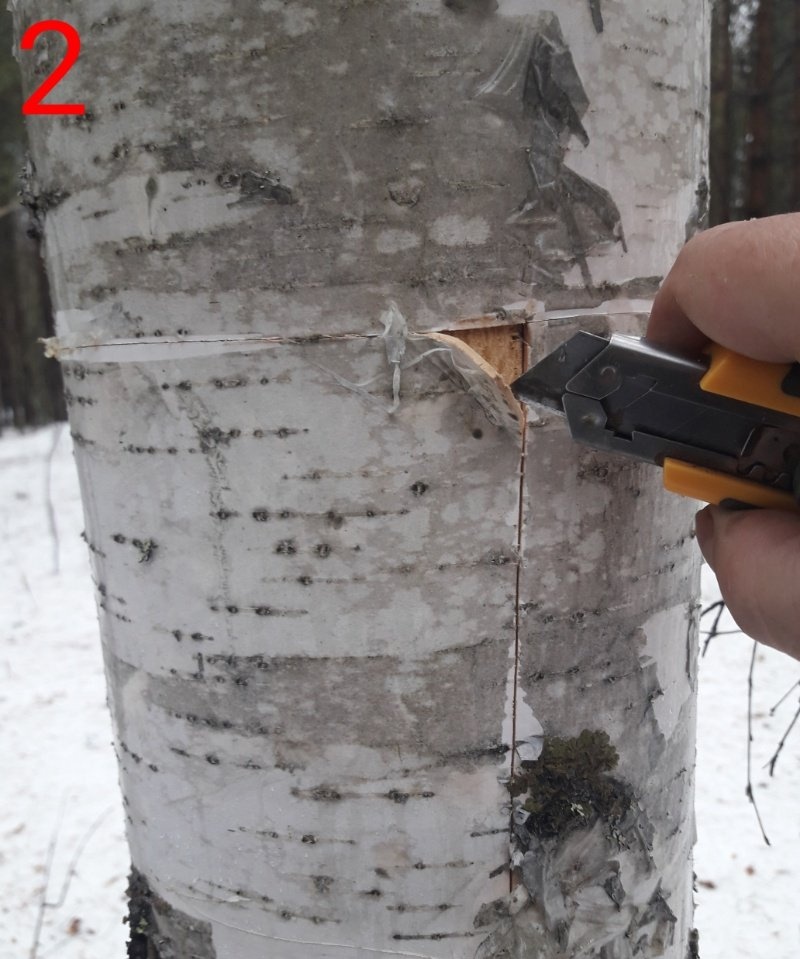
First you need to peel off the bark. To do this, use a stationery knife to bend the layer we need from the rest of the bark (the thinner the layer you manage to remove, the easier further work will be) and carefully and slowly peel off the selected layer.
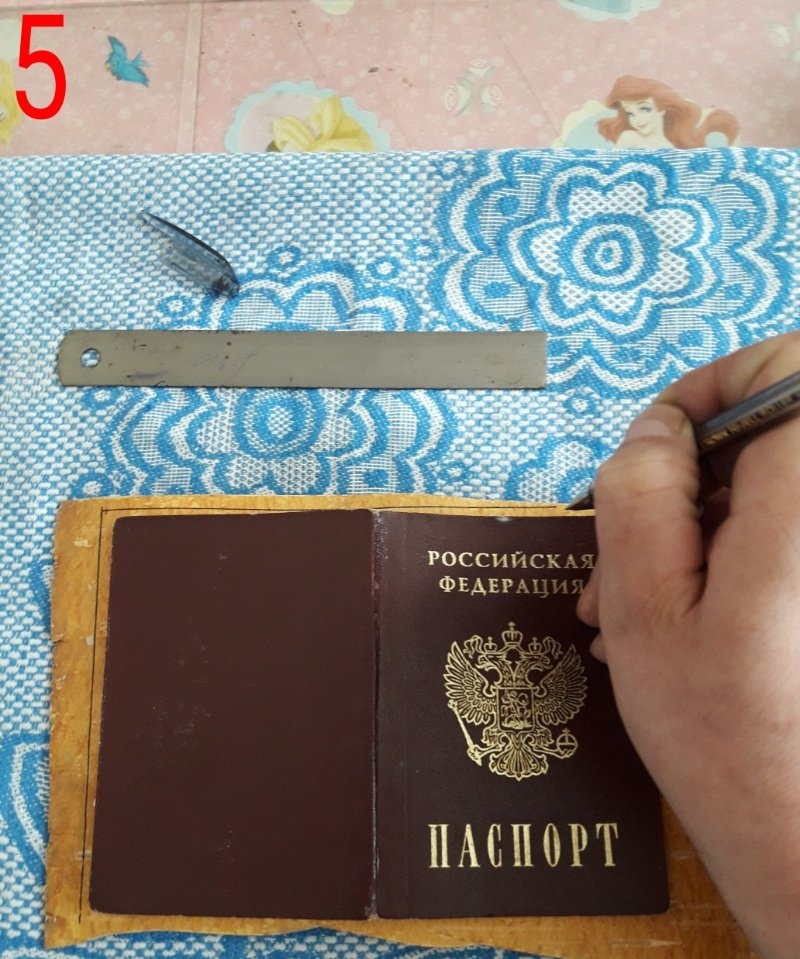
After this, we attach our document (in my case, a passport) in expanded form to a sheet of selected birch bark and trace it with a pencil.
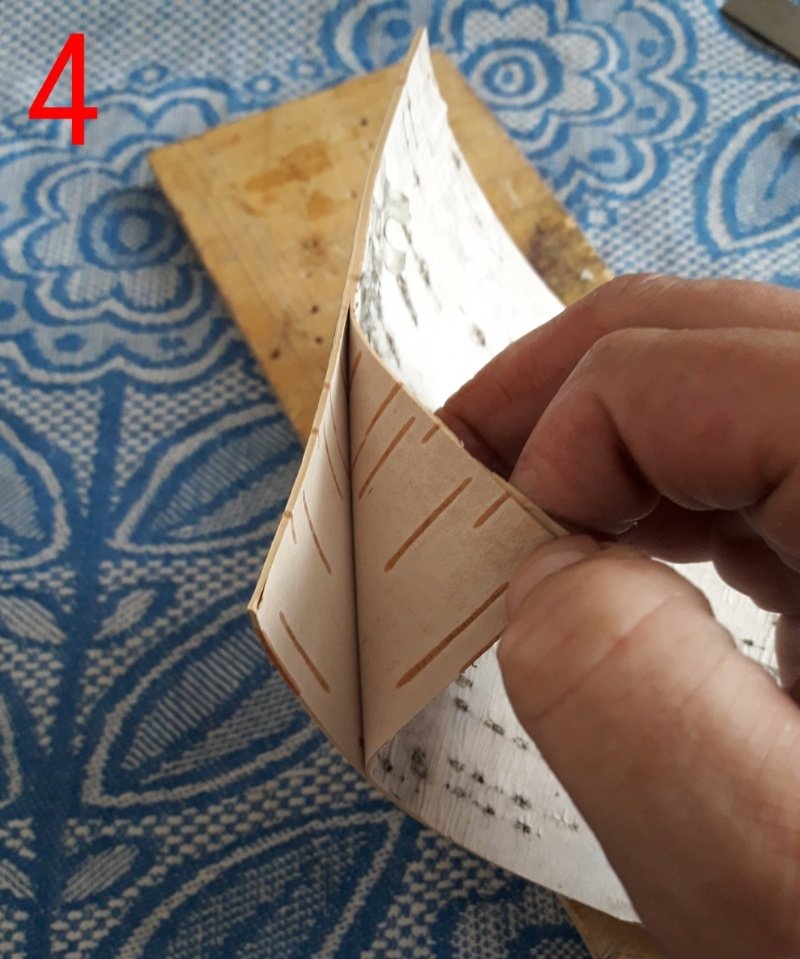
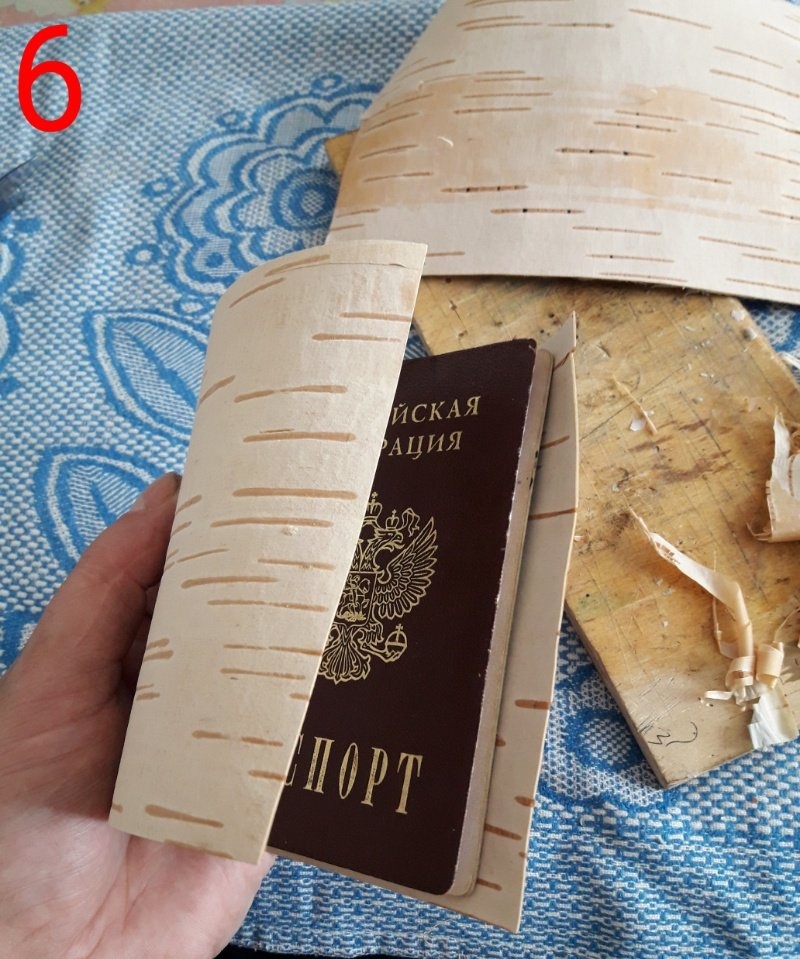
Now we take scissors and cut along the outlined contour, but with a margin of three millimeters more. Next, fold the workpiece in half, put the passport into it and straighten it with scissors, bringing it to symmetry. Don't forget about the reserve fields!
After this, we take the document out of the blank and put it aside. We cut out the internal (preferably transparent) margins for the cover from thick polyethylene. To do this, we put 5 cm of polyethylene inside the workpiece.and trace it with a pen.
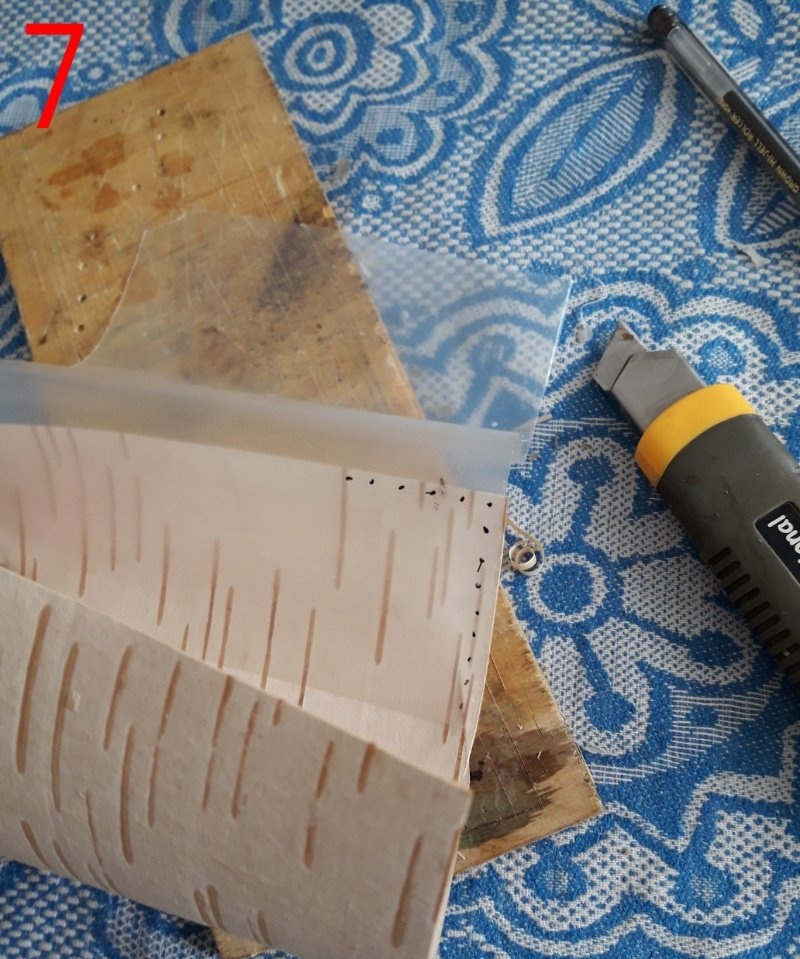
Cut out the resulting fields. We repeat the same procedure with the second side. We apply the cut polyethylene to the inside of the workpiece and apply second glue.
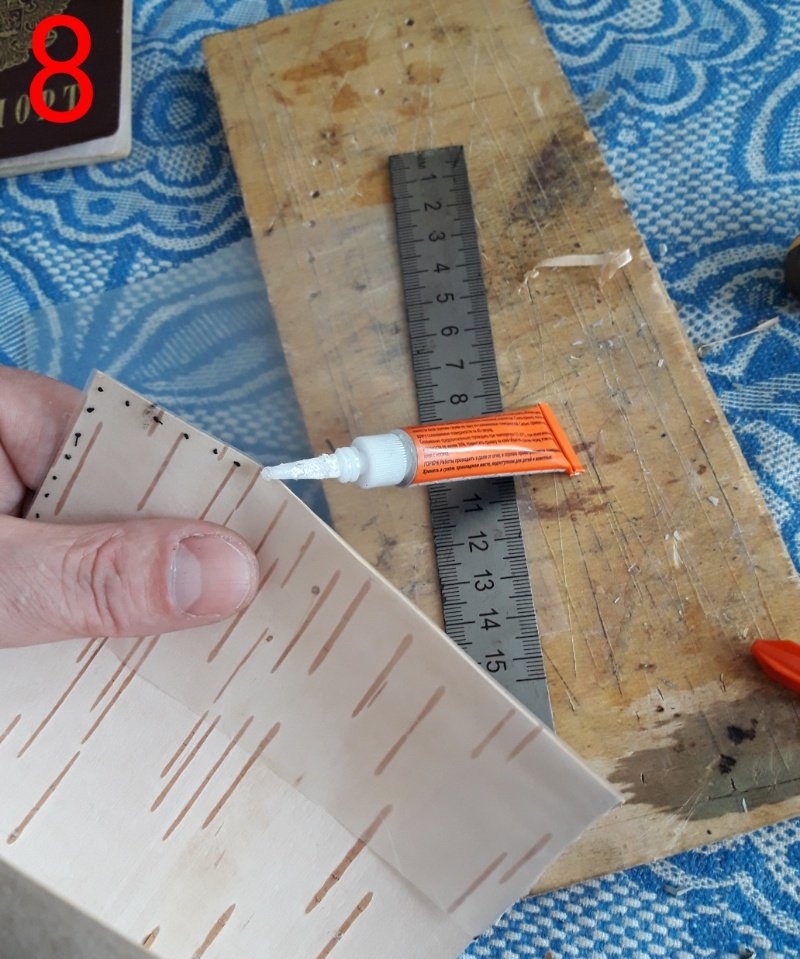
We just seal the very edges so that the glue does not get between the birch bark and the polyethylene. Now take a ruler and put marks every five mm. along the edge of the birch bark where the polyethylene is adjacent to it. Next, use a burner to make holes at the marks.
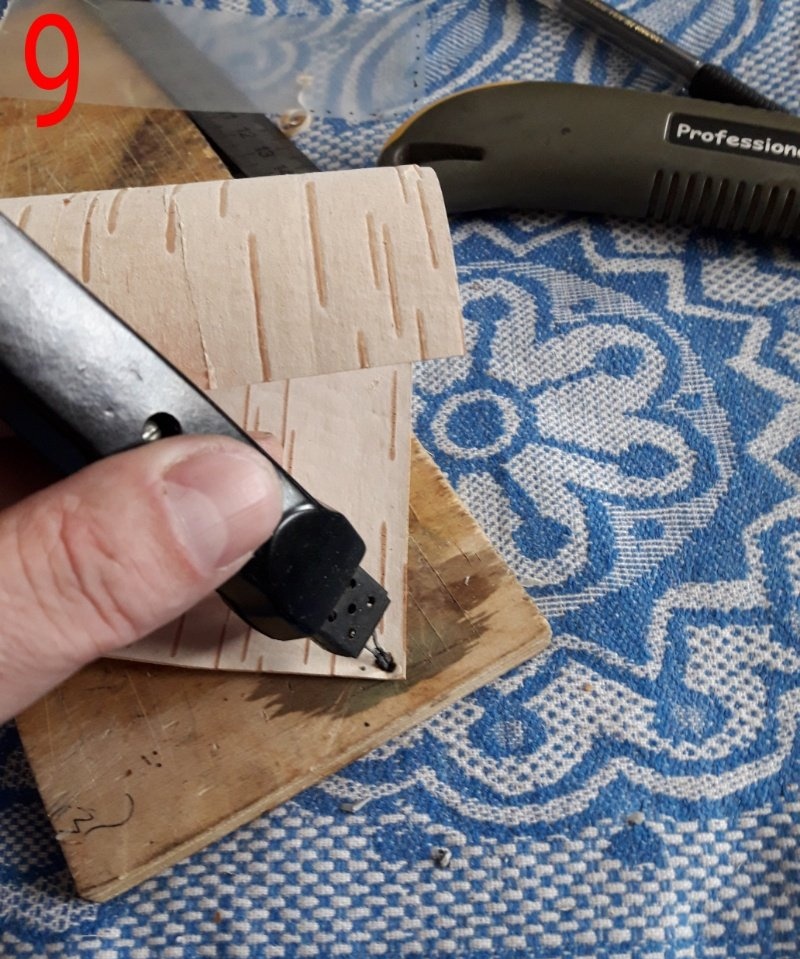
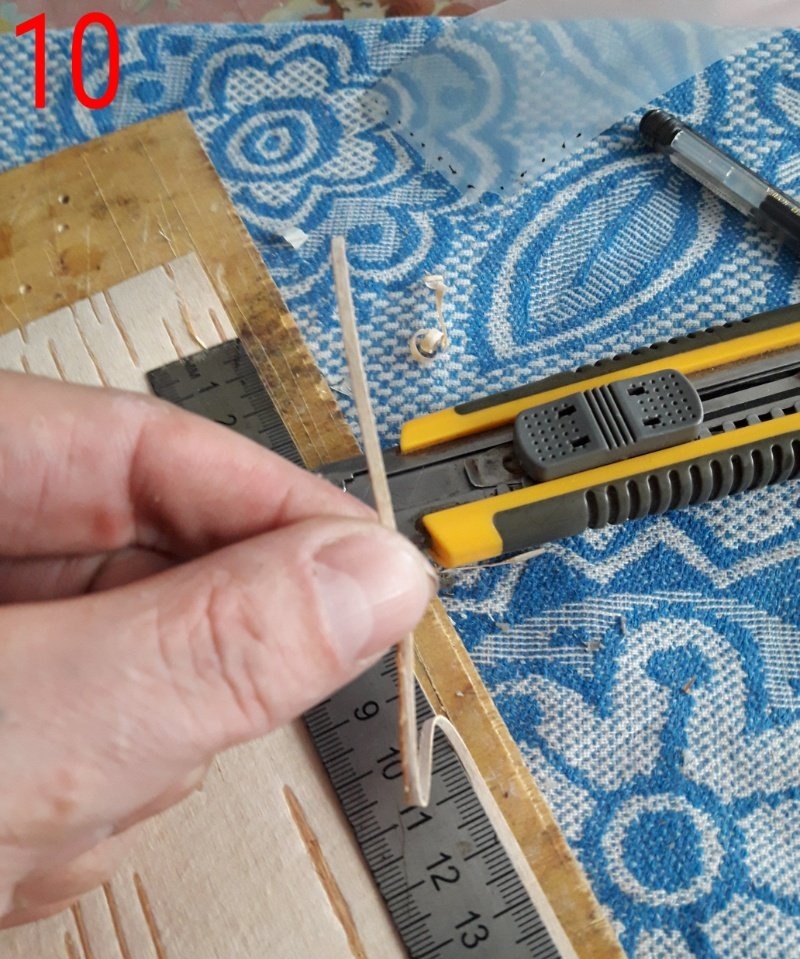
We put this blank aside to make a tourniquet for fastening birch bark and polyethylene. To do this, using a ruler, cut off a thin rope with a knife (the width of the burnt holes!), peel it off until you get a kind of thin ribbon and soak it in glycerin for elasticity.
Now we thread this flagellum into the burnt holes.
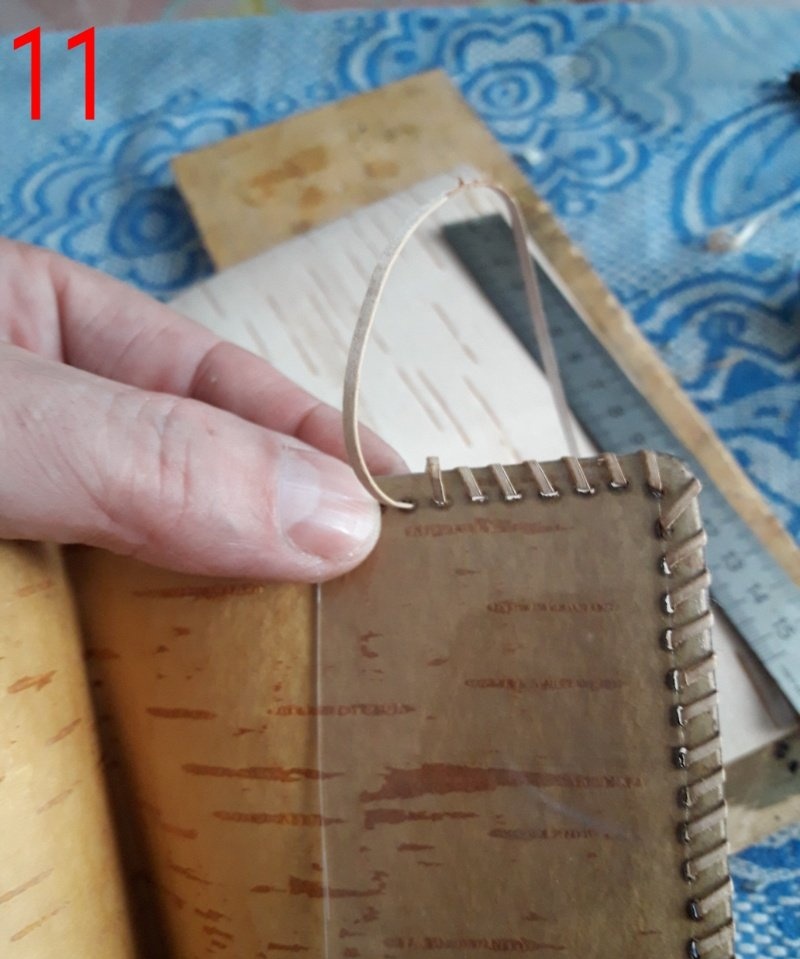
We hide the ends of the harness into the holes and secure them with second glue. The main work is finished. If you wish, you can burn it or draw a drawing on the cover with a marker.
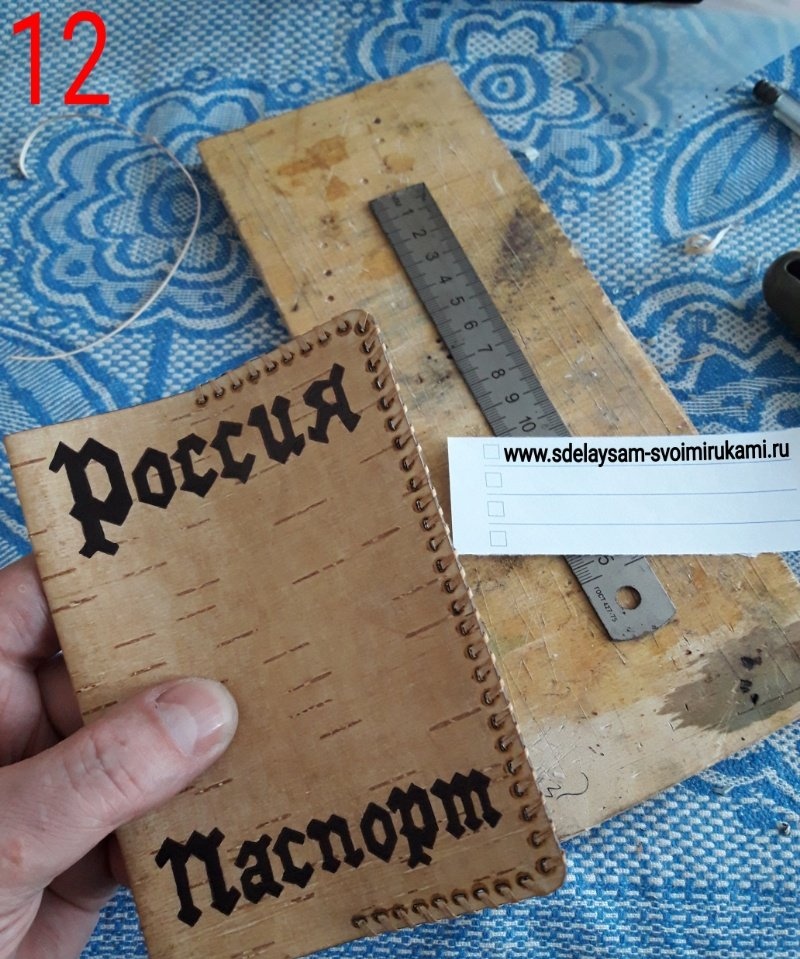
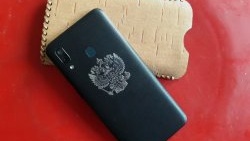
Or glue some emblem with double tape, like mine, for example. After the final completion of all work (including artistic work), wipe the resulting product with glycerin. Using the same technology, you can make a case-bag for your phone, or a folder for papers of different formats, only to make the folder you will also need a plastic bag with a zipper and double tape to secure it inside the folder. Also, again, using double tape, you can decorate glass glasses, straight vases, knives, etc.
This durable and practical material will serve you for many years.