The following describes the process of making a home-made transparent case for the power supply using only simple and affordable tools. There are also many useful recommendations regarding plexiglass processing. You will learn how to cut it, fit the parts to size, drill holes in them, including rectangular ones. One of the easiest ways to connect wood and plexiglass is clearly shown. Additionally, there is information on how else you can fasten these materials together.
Tools and materials
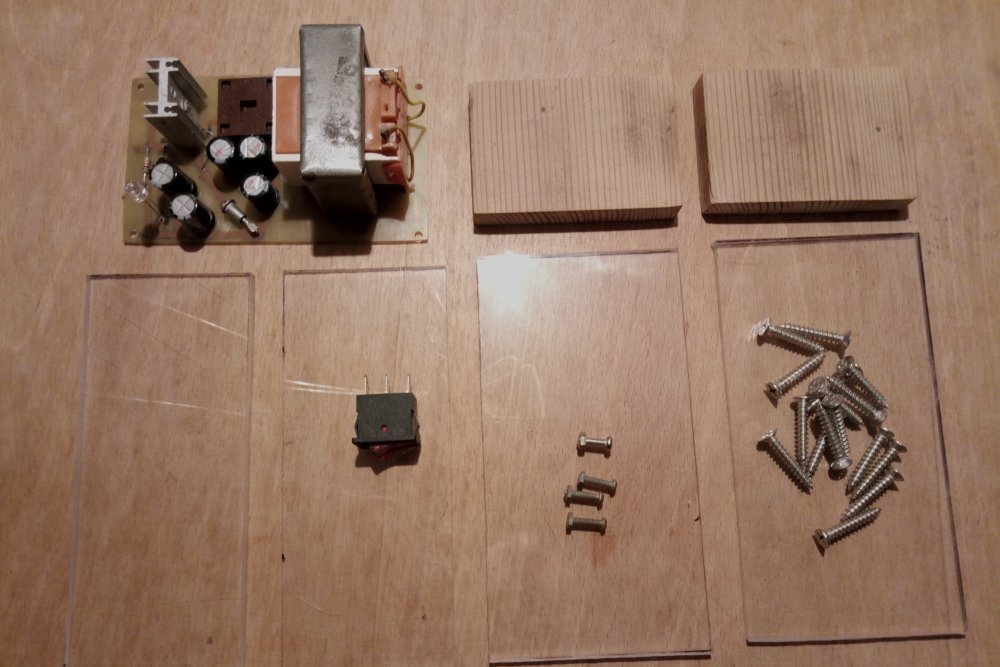
To make a home-made transparent case, you will need the following consumables:
- transparent plexiglass about 5 mm thick;
- a wooden board or plywood with a thickness of at least 10 mm;
- countersunk head screws - 12 pcs;
- small bolts with nuts - 4 pcs;
- rectangular button for 250 V and at least 2 A;
- sandpaper with grit P100 and P240;
- mineral or synthetic motor oil;
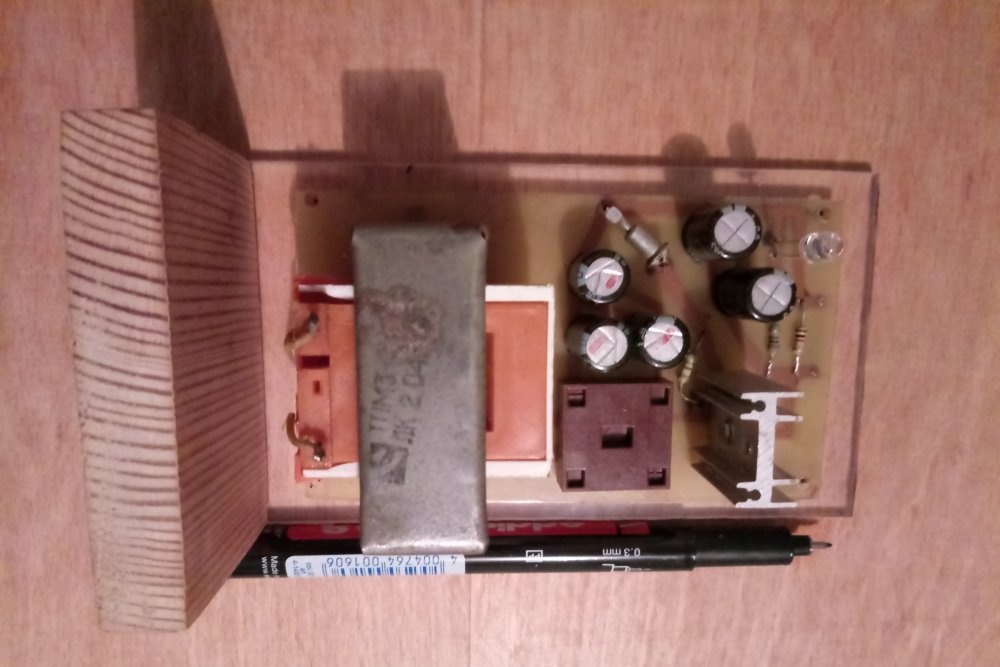
- assembled circuit board with mounting holes.
To get the finished product from all of the above, you should prepare such tools and devices (only affordable and cheap ones are specially taken):
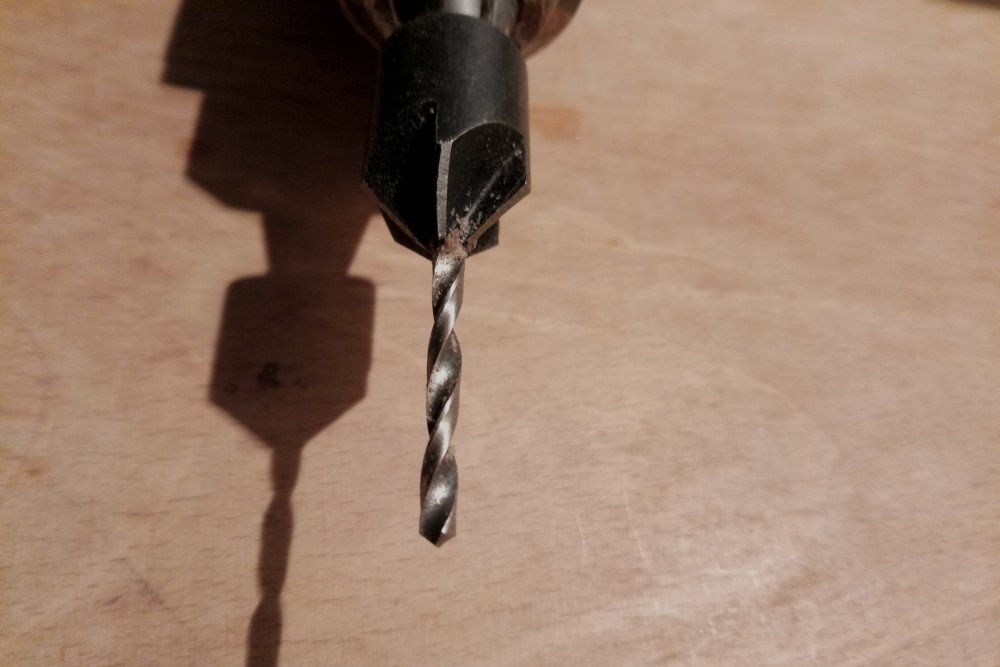
- electric drill;
- wood drills with a diameter of 3 mm and 10 mm;
- countersink;
- wood hacksaw;
- clamp;
- hacksaw for metal with a blade;
- crosshead screwdriver;
- ruler;
- black marker.
If you have an electric jigsaw, a milling cutter, a screwdriver and a grinding machine at your disposal, then all this will significantly speed up the manufacturing process. However, it is quite easy to do without these rather expensive tools. After all, one of the key tasks of the material is to show how to make a transparent case using only budget tools.
Production of wooden walls of the body
Let's start with the simplest operation, that is, with the manufacture of body parts from wood, that is, its end walls. For these purposes, you can take either wooden planks with a thickness of at least 10 mm, or the same size of plywood. Even the remnants of a platband or trimmed lining will do. It is not recommended to use chipboard or OSB, as these materials are not very suitable for the manufacture of small items.
The dimensions of the parts in the presented example are 70x50x10 mm. Naturally, if you make a body for any of your products, then the width and height of the end walls are selected individually. It is advisable to leave only the thickness of the wood unchanged, since it will be difficult to manually make the correct holes in thinner blanks.
Sawing such simple parts is the least expensive with a regular wood hacksaw. For a more accurate result, it is recommended to use a miter box and a saw blade. In fact, such small blanks can even be made with a hacksaw. Again, if you have an electric jigsaw - the task is only simplified.
Much more important is the cutting of wooden blanks is their adjustment. They must be absolutely identical and, at the same time, have the shape of a rectangular parallelepiped.Without a professional carpentry tool, this problem can be solved with just one clamp and emery paper with a P100 grit. The abrasive is fixed on a flat surface, and the parts are connected to one another and polished until the faces are completely mated.
Plexiglas body parts manufacturing
Working with Plexiglas without any CNC machines is a bit more complicated than with wood. Although this is a fairly malleable, at first glance, material, but if improperly processed, it constantly melts, bubbles, cracks and scratches. However, it is quite possible to cope with these difficulties, armed with the information presented below.
First of all, we determine the dimensions of the parts. They are selected depending on the length and width of the end walls made of wood. First, any two opposite sides are made, then a couple of the remaining ones. If anyone will be interested, in the example the dimensions of the side walls are 140x70 mm, and the top and bottom are 140x50 mm.
Now about cutting plexiglass. The cheapest and most reliable way to cut this material is to use a conventional metal hacksaw. You can also cut using a special knife, home-made devices, engravers, electric jigsaws, milling cutters and so on.
If, nevertheless, it was decided to use a hacksaw for metal, then before doing the work you need to learn just a couple of tricks to avoid known problems. Firstly, with such sawing, plexiglass can melt due to friction. Secondly, markup made by a marker can be difficult to wash away, especially if it is permanent. Thirdly, plexiglass is very easily scratched, which pretty much spoils the appearance of the finished product (as in the photos in the example).
So, we will consider methods for solving the above problems. To prevent plexiglass from melting when cutting with a metal sheet, it must be pre-treated with conventional engine oil. Moreover, you can lubricate both the blade itself and the cutting line. If you apply oil to plexiglass, then it will be possible to cut it without problems even with an electric jigsaw, and the material will not melt at the same time.
The first thing that comes to mind about washing off a permanent marker is ordinary medical alcohol. Yes. He copes with traces of the marker, but there is one nuisance. The fact is that when alcohol gets on the edge of organic glass, it gives noticeable cracks. To avoid such problems, it is better to use a regular felt-tip pen for marking. An even better option would be a nail that easily scratches the cut line on plexiglass.
And the last moment. To protect acrylic glass from accidental scratches, before cutting and processing it should be sealed with ordinary masking tape. In the example presented in the photo, this was not done, and the result can be clearly seen. Although all work was carried out very carefully. Masking tape will not interfere with sawing, grinding, drilling or assembly. And the problem with the traces of the marker disappears automatically.
After cutting parts from plexiglass, they must be sized. This can also be done on sandpaper, mounted on an even base. The material will also melt, but in this case it is better not to use oil. It is much more efficient to use ordinary water - it will cool the plexiglass perfectly when grinding, preventing it from melting.
Rectangular plexiglass hole
If with round holes everything is more or less clear, then without special tools to make a rectangular landing socket for the same switch is not so simple. There are two ways to solve this problem. Both are simple.
If there is the same electric jigsaw (or manual), then simply drill small holes in the corners of the future socket, insert a nail file into one of them, and work along the perimeter. Do not forget about lubrication. If there are no jigsaws, then we take a conventional drill, the diameter of which is as close as possible to the width of the mounting socket on the case. We drill one or two holes, and then we finish to a rectangular shape using the usual cheap file.
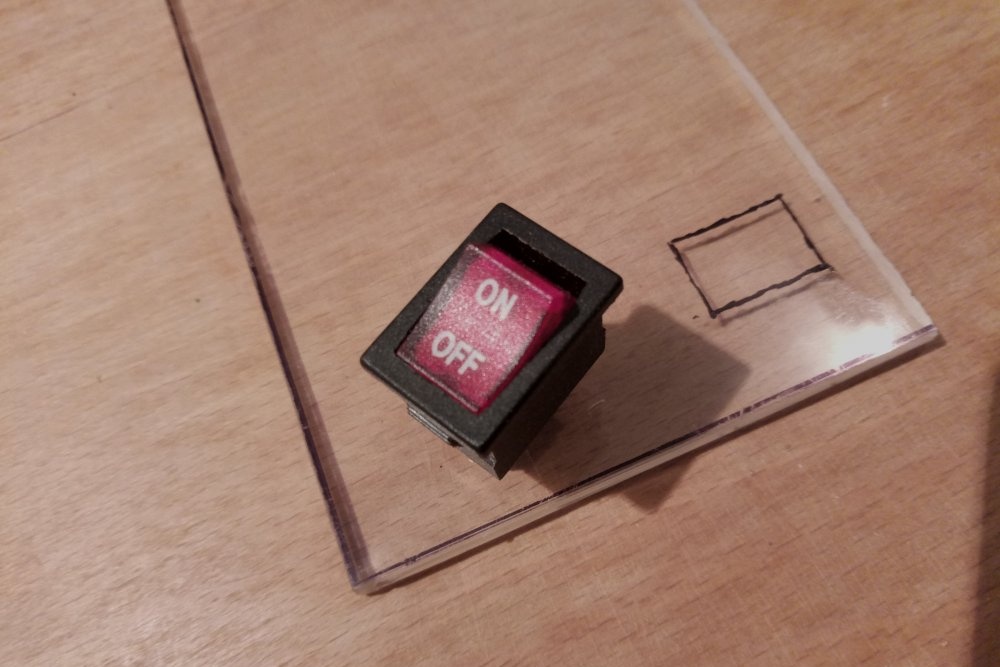
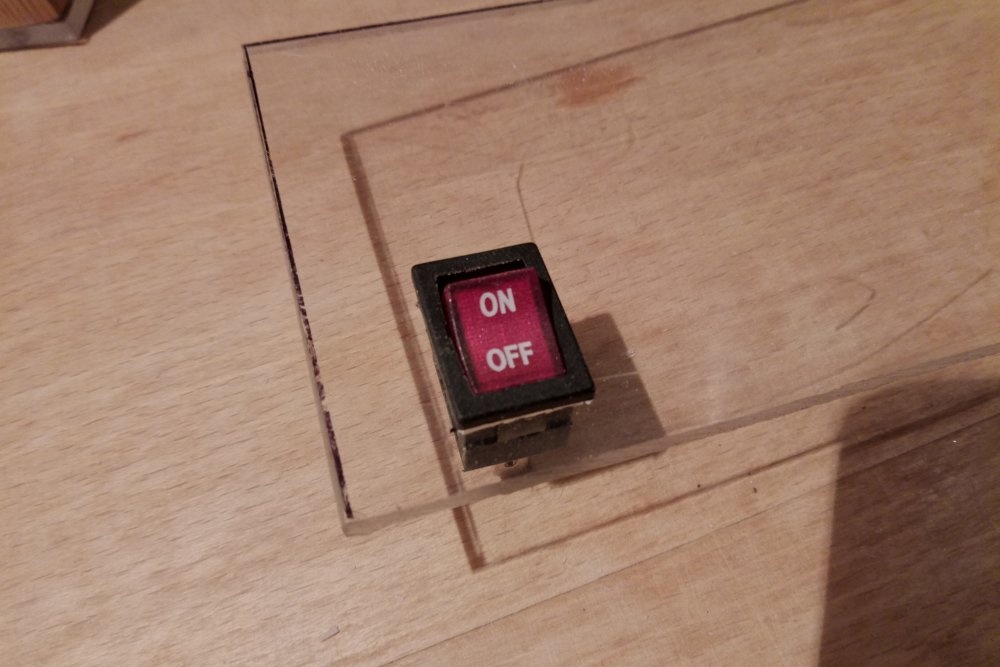
In the latter case, the processing will be much faster and easier if the plexiglass is previously fixed motionless. It is also worth first working with a file at an angle of 45 degrees on both sides of the workpiece, and only then align the face at a right angle.
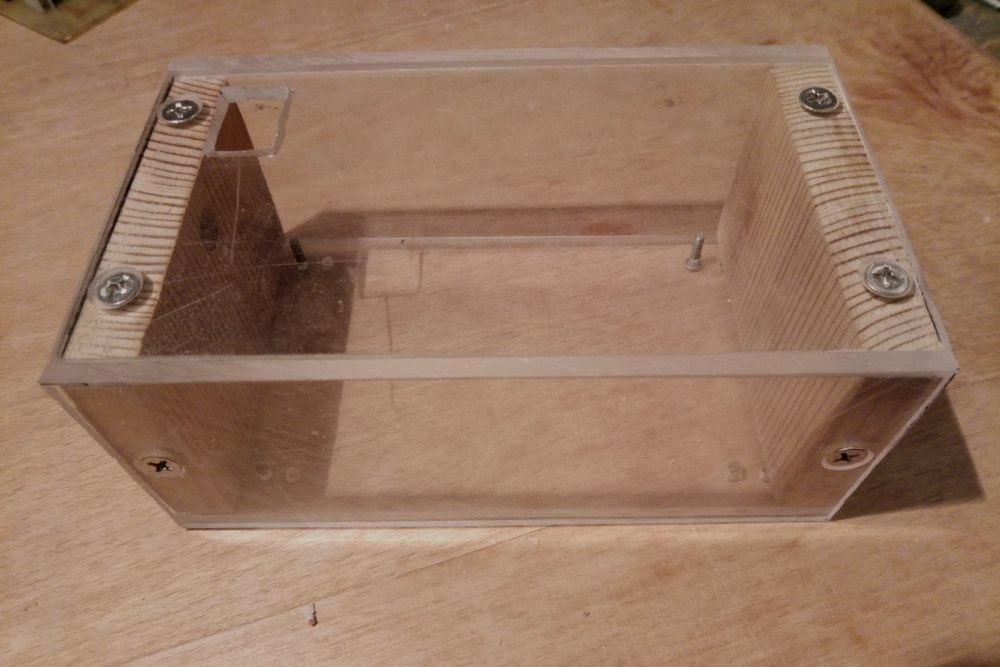
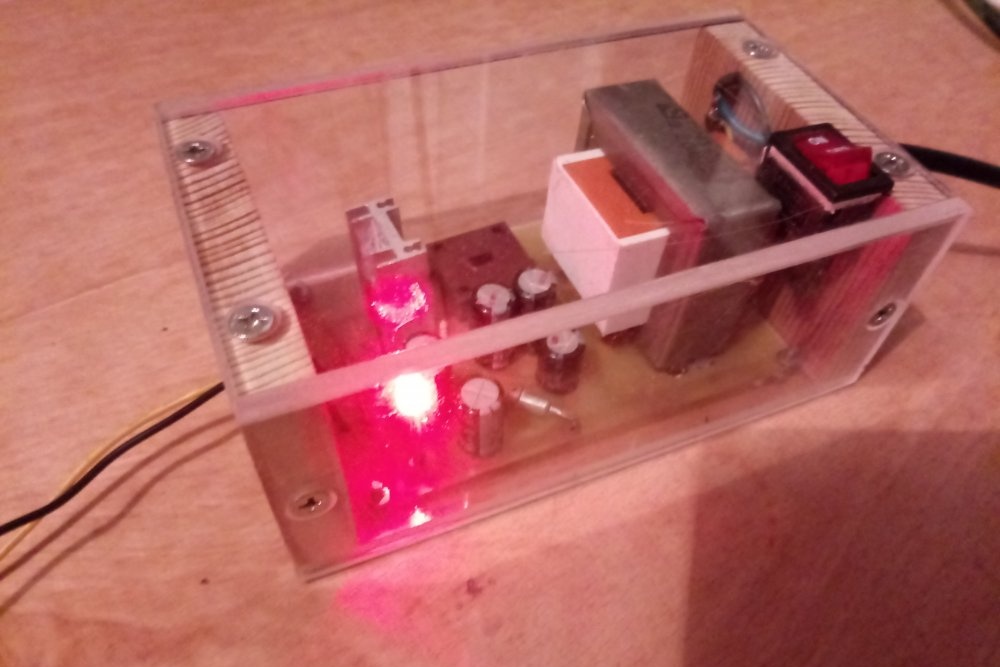
Assembly of the body of wood and plexiglass
When all the blanks are made, it remains only to assemble them into one product. To begin, we will analyze the options for how to attach plexiglass to a tree. The glue in this case is not quite suitable, since its traces will be visible through a transparent material. Look, in the end, all this will not be very.

The simplest approach is countersunk head screws. If they are distributed symmetrically, then they will not spoil the appearance of the product. To assemble in this way you will need a drill, drill with a diameter smaller than the hardware itself, as well as a countersink.
Two adjacent blanks are mated and fixed to each other using a clamp. It is better to use two small ones, since the compression force plays a big role here. The fact is that when a drill passes through a plexiglass into a tree with weak fixation of parts, they are necessarily displaced, which is unacceptable. When the holes are ready, make a seat under the head and screw the screws. We do the same with all the walls of the case.


It is also worth noting that the use of self-tapping screws is not always the best approach to solving such problems. Such a connection will lose strength after several assemblies and disassemblies. Therefore, it should be used only in cases where your device will not be opened frequently.
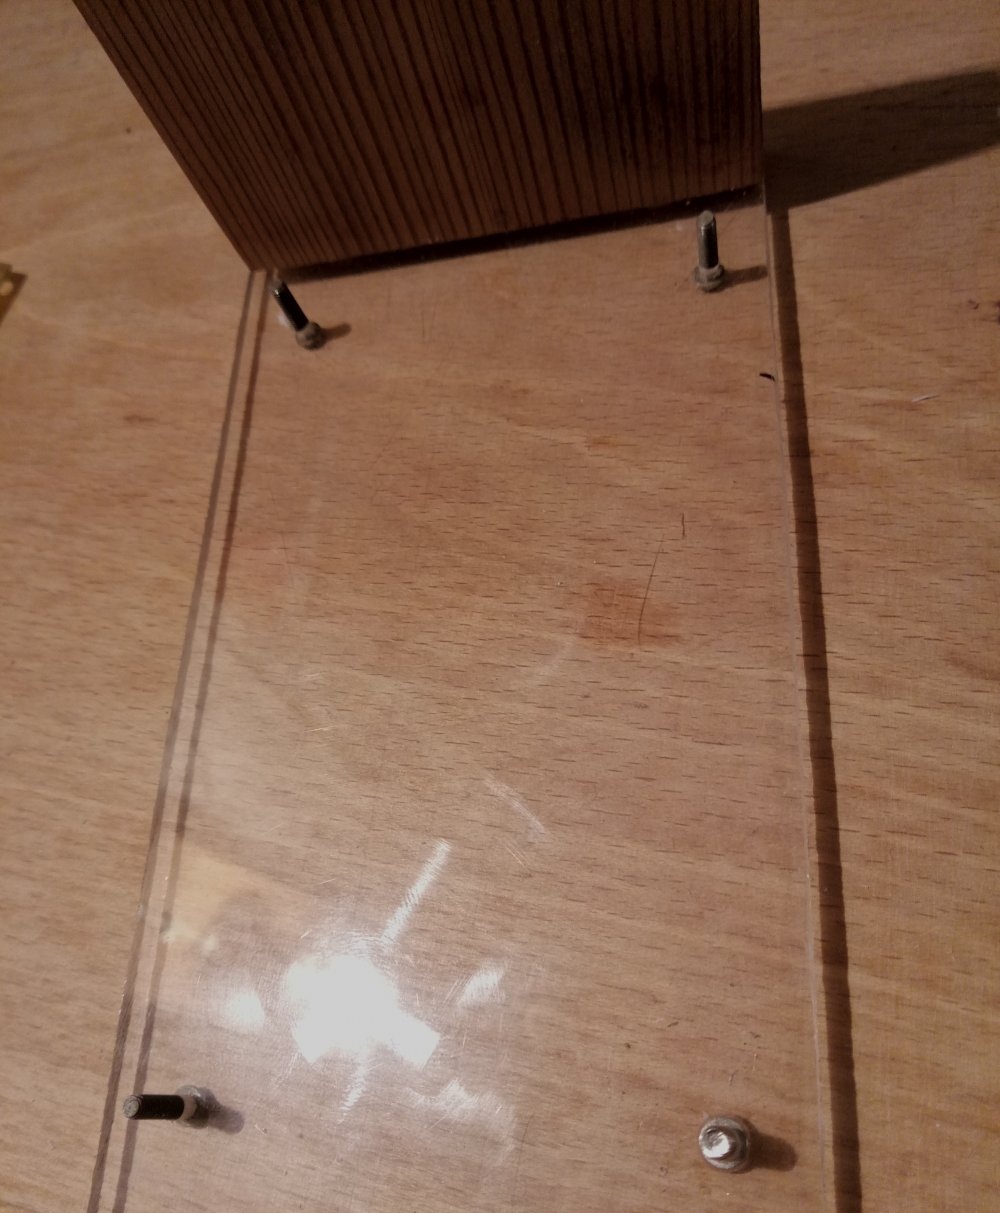
If you need a transparent case with the possibility of endless disassembly, then instead of self-tapping screws, use special threaded bushings and countersunk screws. In this case, first the bushings are screwed into the tree, and the screws are screwed into them already. Such a connection is absolutely not inferior to self-tapping screws in strength, but in terms of functionality it wins by several times.
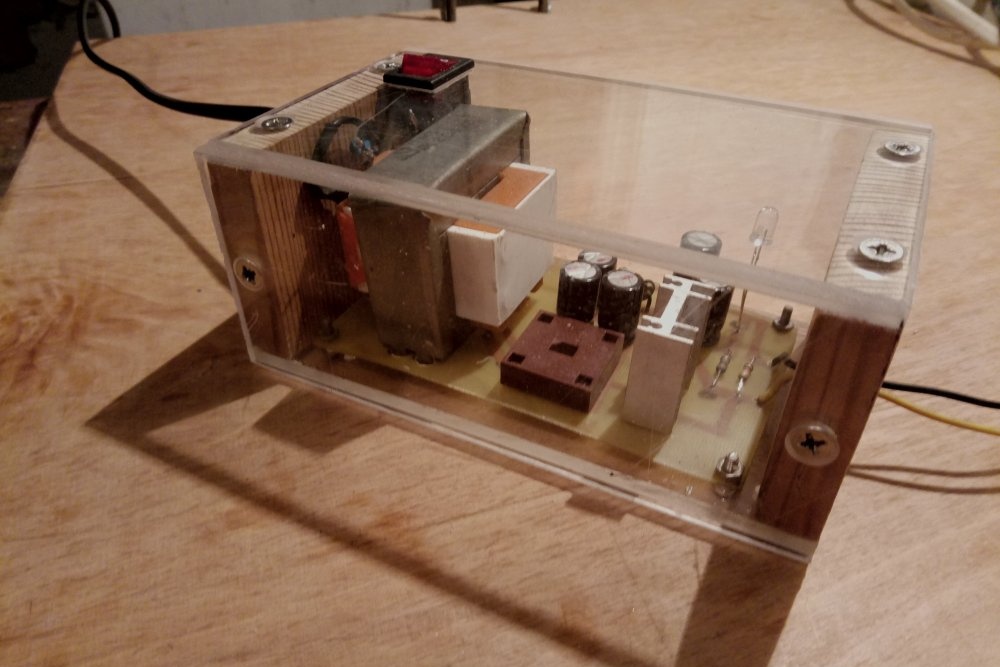
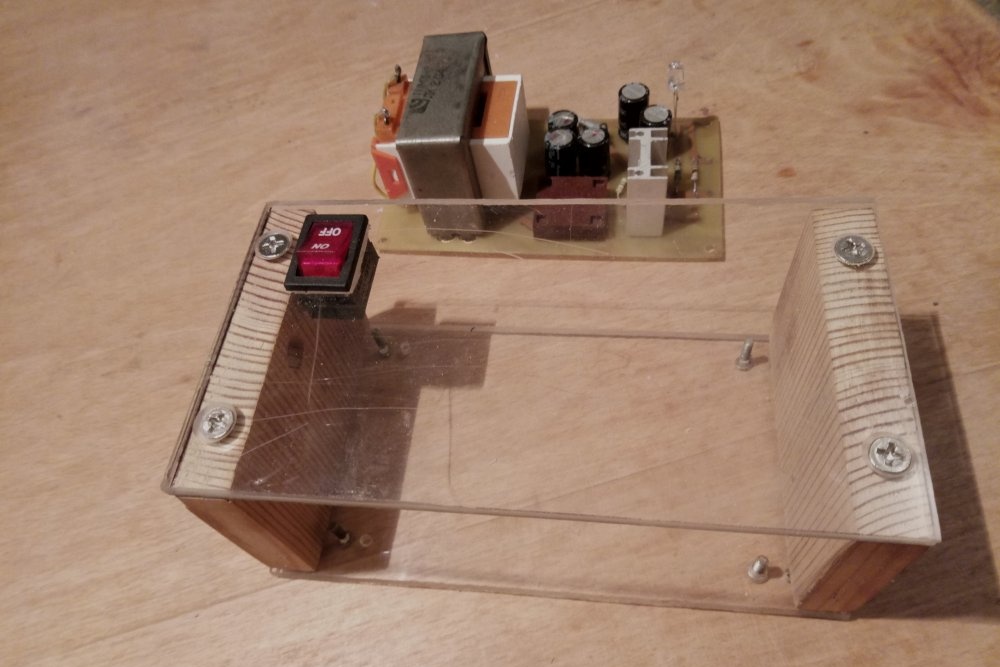
After a trial assembly of the case, it remains only to integrate the filling into it. To fix the printed circuit board, holes are made in the bottom, and bolts with nuts are used to fix it. If there are special radio mounting racks with corresponding threads, it is preferable to use them. The button shown in the example is fixed by itself. In addition, we provide exits for wires or holes for connectors, and collect everything according to the scheme. If there is a desire, then add rubber or plastic legs.
As a result, we get an excellent transparent case for our crafts. Despite the rather fragile appearance, it is quite durable. In addition, plexiglass does not conduct current, because the case is safe from this point of view. If you don’t like the presence of wood in the product, then you can use thick plexiglass instead. However, unlike wood, it will have to cut threads for screws or bushings.