Over the past ten years, all active life has been centered around a large wooden structure for games in the backyard. This clumsy building really liked the children, like a pirate ship, an obstacle course, a refuge from persecution. However, as they grew older, they could be seen less and less on his deformed wooden staircase. And once my wife and I realized that the children have matured, they need something new. We were secretly happy about it.
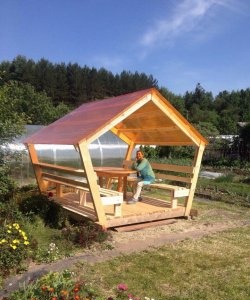
Now we could take control of our back yard again and turn it into a place where the whole family could spend time. We presented a place where we could relax on a comfortable street of furniturespending time with friends, sharing food, or maybe watching a movie. After a little research on the Internet, we settled on the design of one gazebo that could turn our yard into the place we dreamed about.
After two months of design, construction and decoration, we now spend more time in the backyard than ever.
Preparation of materials
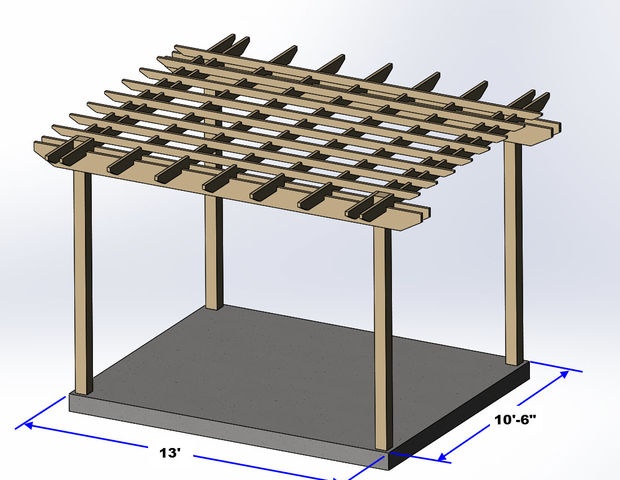
Materials for the gazebo (for dimensions, use the drawing in the image below)
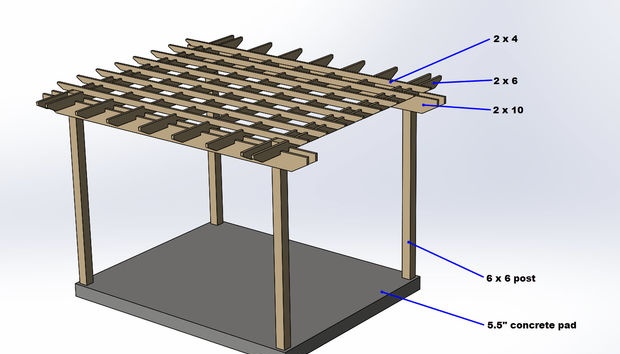
- impregnated wood posts 15 x 15 cm,
- impregnated wood boards 5 x 25 cm,
- impregnated wood boards 5 x 15 cm,
- impregnated wood boards 5 x 10 cm,
- base for poles (4 pcs.),
- wood screws (7 cm),
- 4 carriage bolts with a diameter of 12 mm and a length of 25 cm.
For concreting:
- 2 x 15 cm boards to create formwork,
- bars 3 x 3 cm for stakes,
- reinforcing bar
- reinforcement clamps,
- clamps
- crushed stone
- concrete.
Instruments:
- Miter saw,
- drill,
- goats
- stairs and scaffolding (optional),
- shovels
- wheelbarrow,
- rake,
- broom,
- iron for concrete.
Gazebo design

In large projects, planning ahead is the most important stage. Construction arbors are no exception. We spent many hours thinking about what exactly we wanted to see in the courtyard, including the type of furniture, and how it would be located. As it turned out, these decisions influenced the final size and shape of the gazebo.
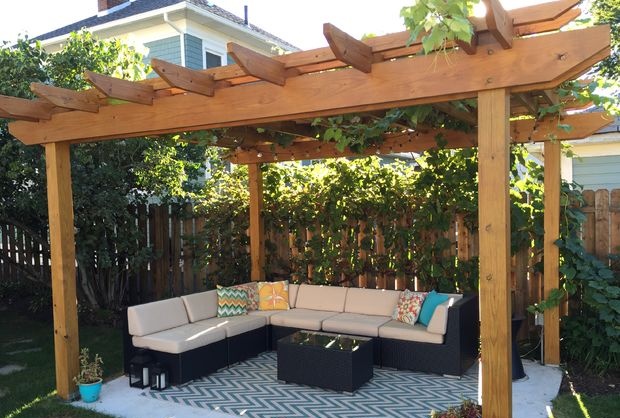
We decided to put in it a sectional sofa for the street, which can accommodate six or seven people. Having the dimensions of the sofa, we could make some sketches to determine how much space will be needed in the gazebo in width and in depth, in case you need to put a few more chairs. We have determined that the size of 3.2 x 4 m will provide the space we need without undue crowding.
Then we proceeded to design the gazebo itself. There were many options, and we spent some time searching for / changing the design, which was to ensure the strength of the structure and not be overly elegant. I modeled the project in a computer-aided design system, but this could easily be done with graph paper.
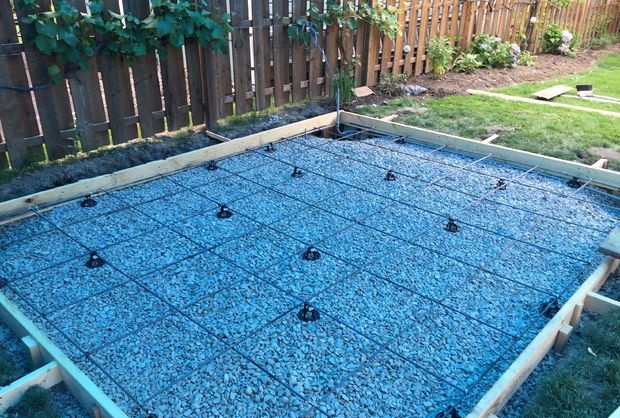
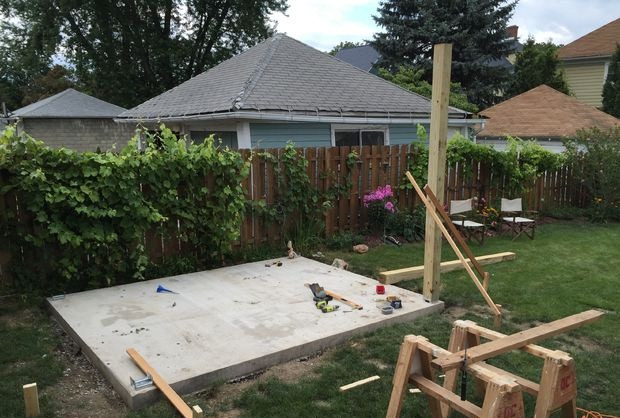
Concreting preparation
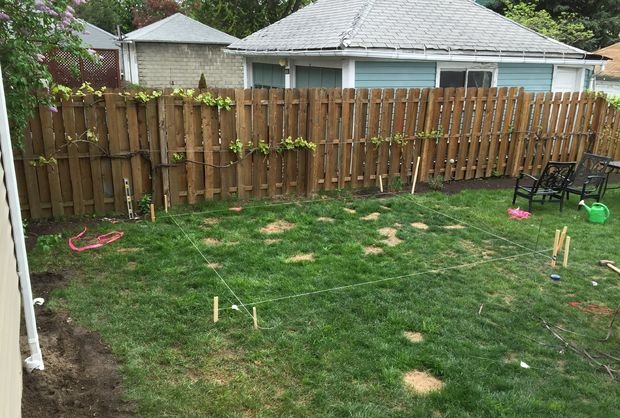
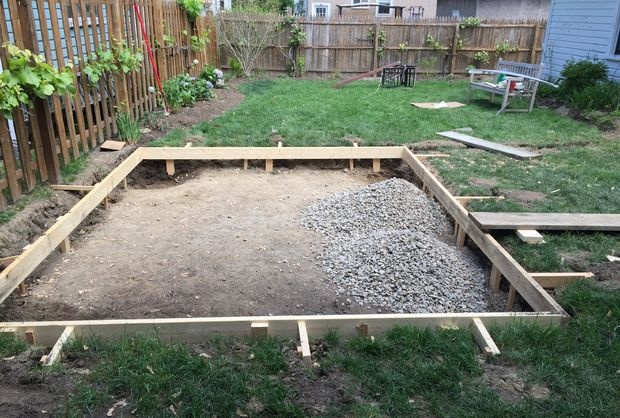

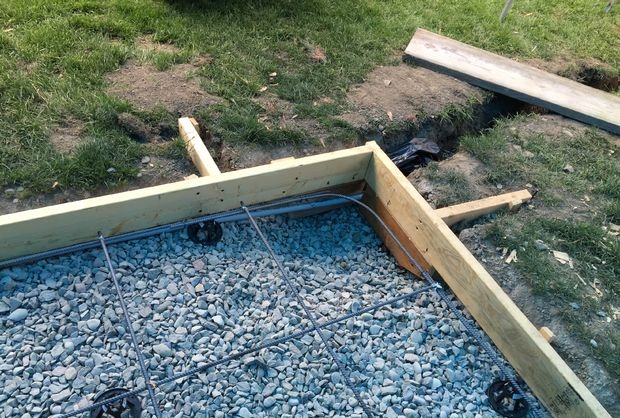
I started by marking the site for concreting with stakes and cords. I placed the stakes so that they were about 30 cm from the corners on the outside. By doing so, I could take off the ground without worrying about the cords. It is important to make sure that the perimeter is square by measuring its diagonals. Still need to align the cords in level. I did this with the usual level, but working with a laser would be easier.
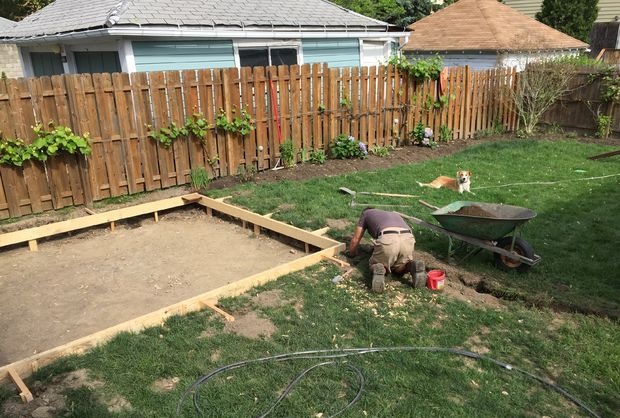
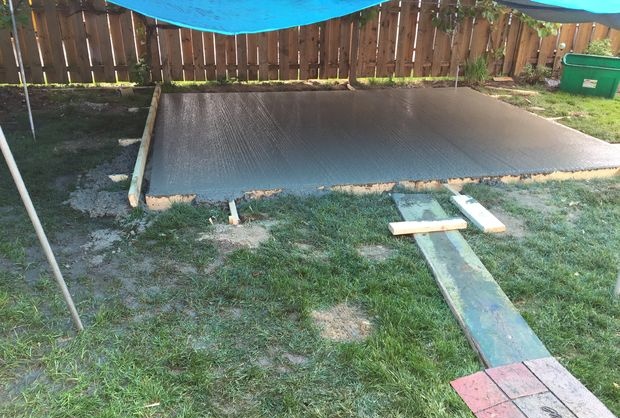
Then I removed about 30 cm of soil from the entire site. This gave me space for 18 cm of rubble and 12 cm of concrete. Having removed the excess soil, I installed the formwork around the perimeter. It was made of boards measuring 5 x 15 cm. I aligned them in height and arranged them perpendicular to the surface of the earth. I wanted a 3-centimeter slope of the site, for this one side of the formwork had to be lowered down by this amount. The formwork was fixed with screws on 2.5 x 5 cm pegs, which I drove into the ground.
To provide the gazebo with electricity, it was necessary to dig a narrow moat from its edge to my garage. The depth of the ditch varied from 45 to 60 cm. I led a cable channel with a cable 2 mm in diameter from the garage along the edge of the platform and brought it to the place where one of the columns of the gazebo should stand.
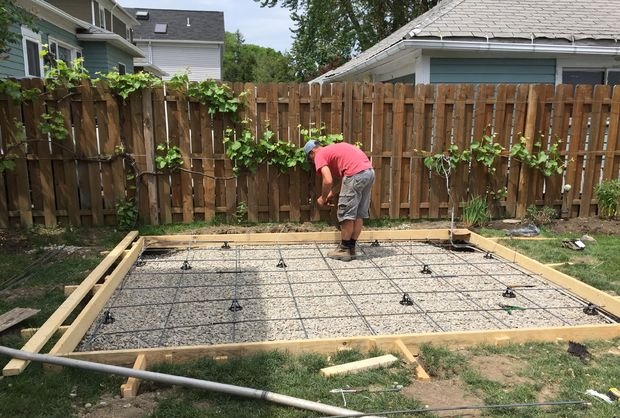
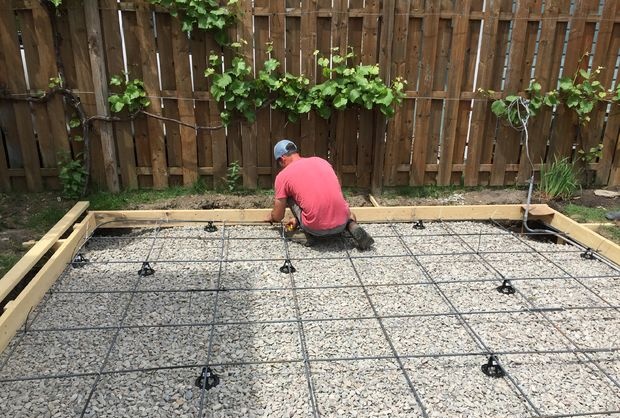
Having finished work with the moat, I covered the site with rubble. It is important that the rubble is laid in accordance with the level, only in this way a uniform plate can be formed. With the exception of the corners where the pillars will be located, on which the main burden will rest. Here I made a recess to make 15 cm of crushed stone and increase the concrete layer by 3 cm.
Finally, install the reinforcing bar. It can be fixed using special clips. My reinforcement was 6 cm above the rubble. The space between the rods was 45 cm, and they were rounded at the corners. Additionally, before pouring, I reinforced the fittings with clamps.
Cement pouring
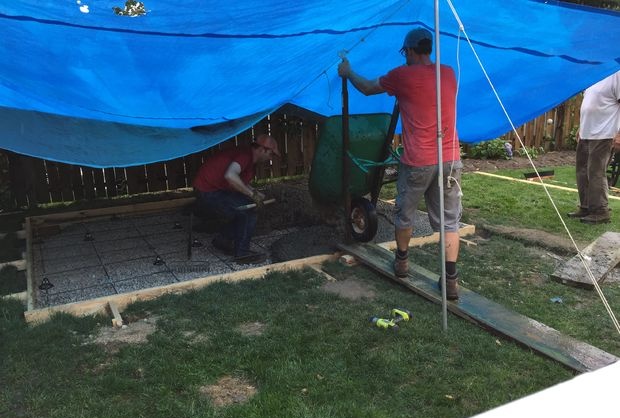
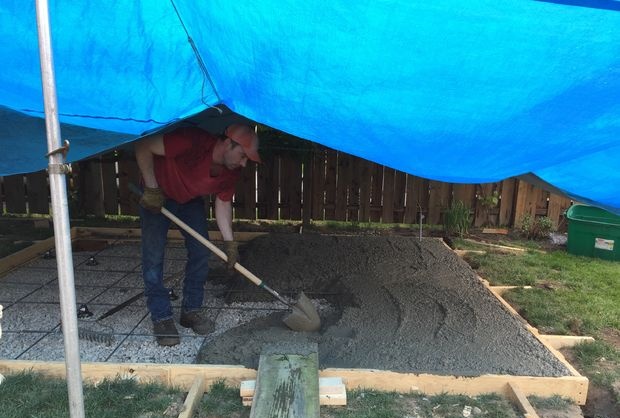
It was definitely the most hectic stage. Because the mistakes made, then it will not be easy to fix. However, after doing a little research and watching a couple of videos on Youtube, I became confident that it was time to start.
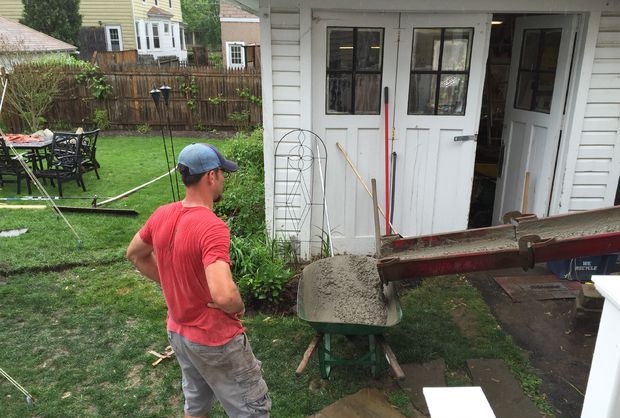
I calculated the volume of concrete mix that I needed. You can cook it yourself, but I settled on the option of delivery. If you order the finished mixture, then you will be asked questions about the technical qualities of the concrete that you need. I explained the specifics of my project to a company consultant, and he helped me with this issue.
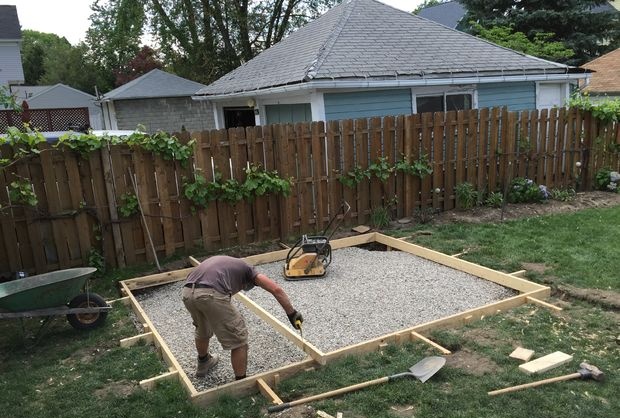
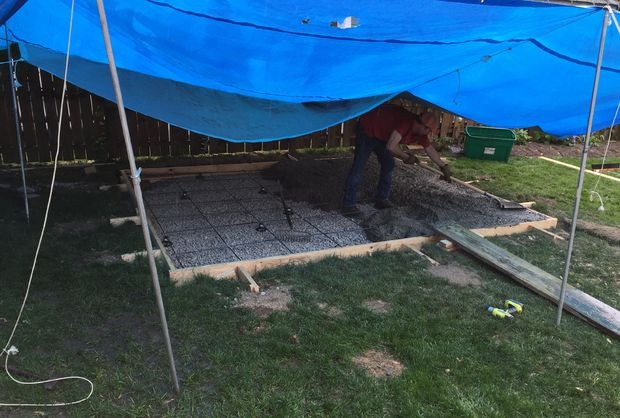
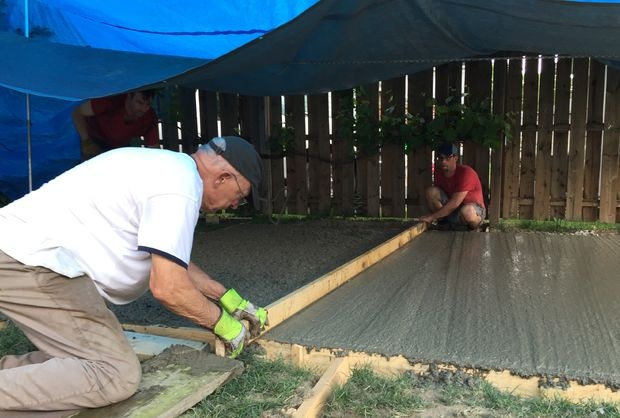
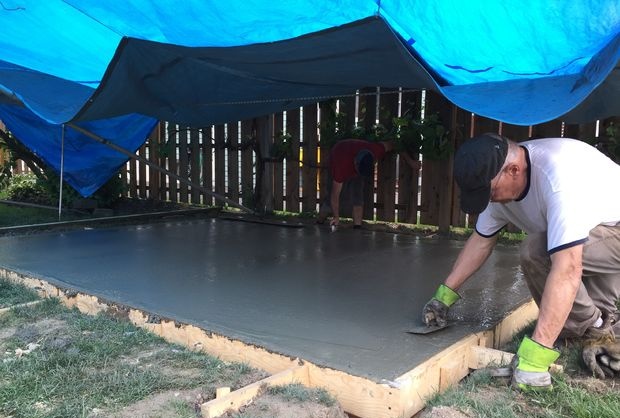
The truck mixer was unable to drive close to the site. Therefore, the solution had to be transported with a wheelbarrow. We started from one end and gradually moved to the other. Then we trimmed the surface with a rake to a distance of about 50 cm from the edges and after that, using a long board of 5 x 10 cm, we leveled the entire surface. This technique makes the concrete surface even.
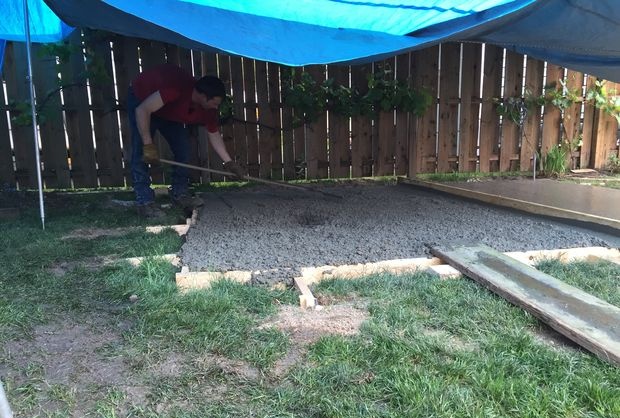
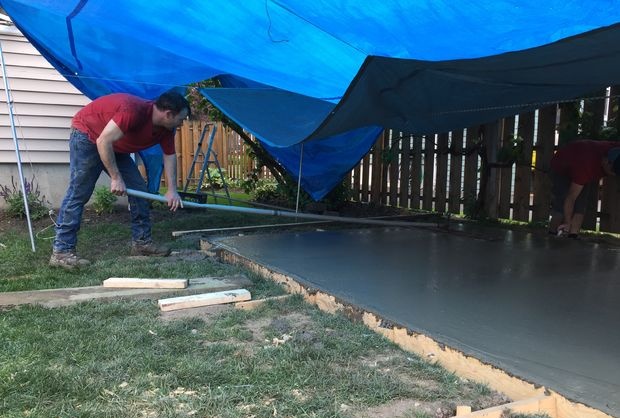
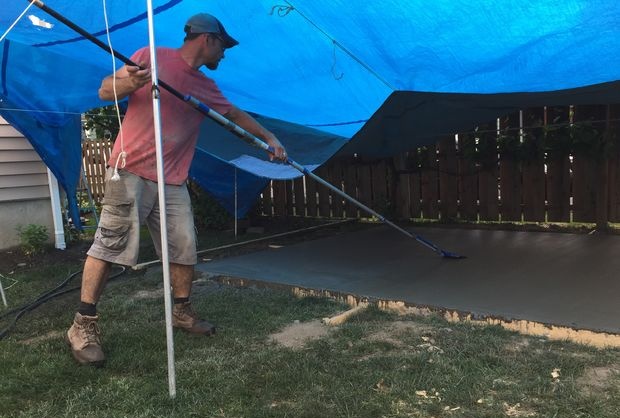
After that, we worked with trowels. A smoothing machine is a tool that pushes small stones from the surface in depth, making a concrete coating without flaws. Since the site is on the street, and when wet, it should not become slippery, the surface had to be roughened. We did this with an ordinary broom (with a long handle). When the surface froze enough to withstand the spray of water from the hose, I wet the pad and covered it with foil for a couple of days. This technique slows down the drying, but the area will become stronger.
I was lucky that my father and brother helped me with this. Both used to work with concrete, which is very important, given the limited time working with it. At this important stage, I recommend that you invite someone knowledgeable to help.
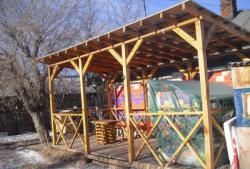
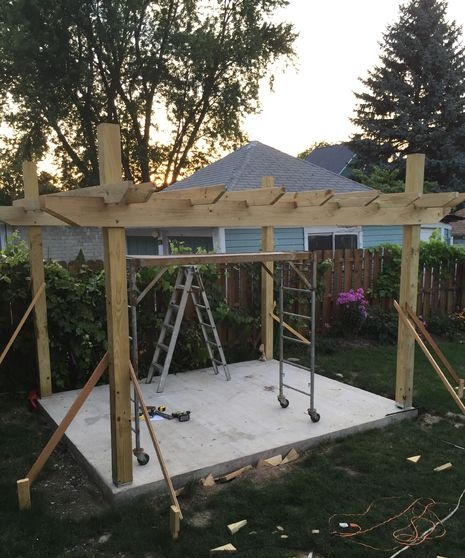
Arbor construction
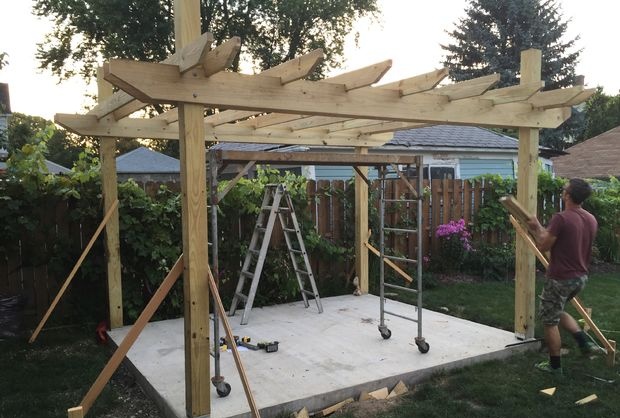

Up to this point, a lot of time and money (and sweat) was spent only on a concrete site. I was ready to start construction.
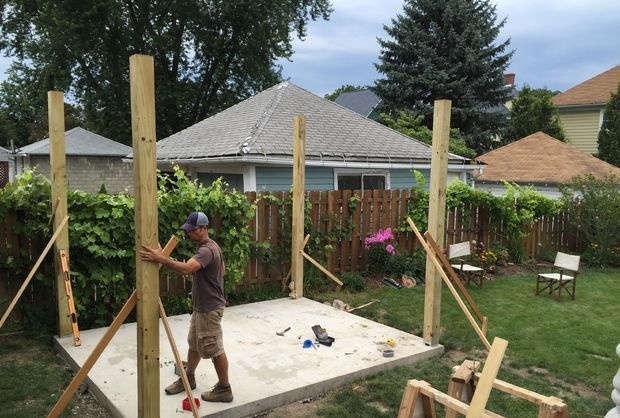
I started by installing poles with a galvanized bottom in the four corners of the site (5 cm from each edge) using concrete anchors. One by one, the pillars fell into place. The metal base was bolted to the galvanized base of the pillars. After that, the poles were leveled and temporarily fixed with boards and stakes.
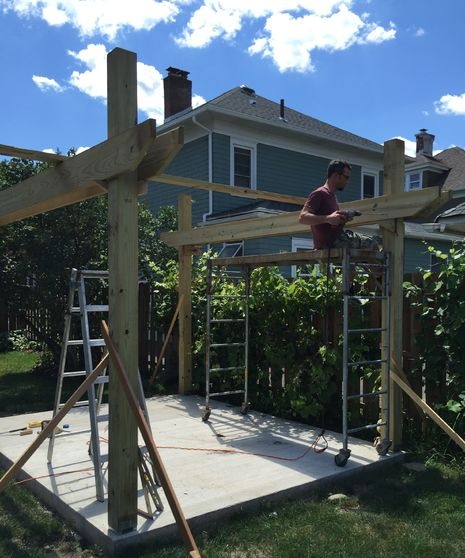
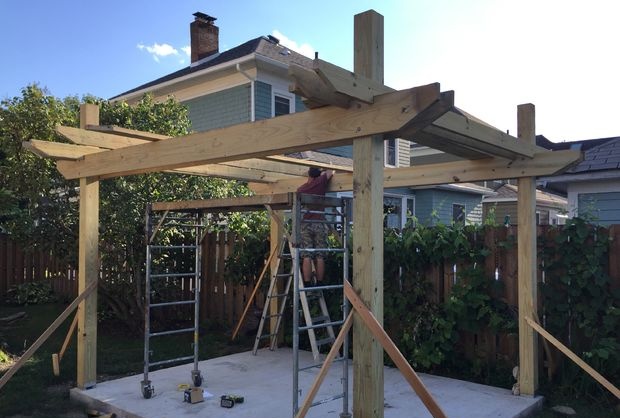
Then I bolted two supporting boards 5 x 25 cm between the front and rear posts. Before doing this, I first fixed them with screws, and then drilled holes for the bolts. Even between the posts, I screwed the transverse beams, on which I placed 5 x 25 cm boards, before fixing them. These crossbeams were later removed.
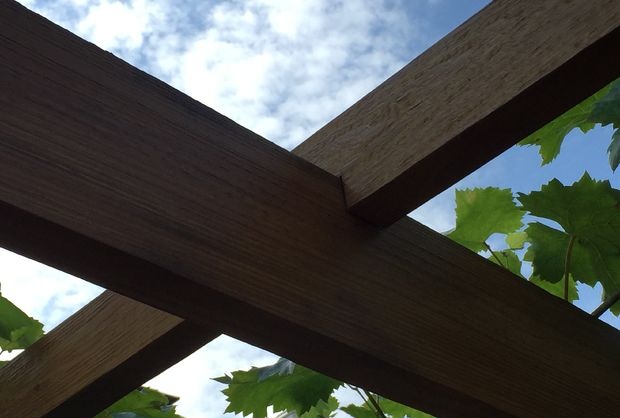
Then 2 x 15 cm boards were installed, which passed from the front to the back. These boards make up the first layer of the "grid".Before installing them on the supporting elements, the boards were cut in length and the grooves were sawn at the end. They are made in such a way that the transverse board fits 5 cm on the carrier. I saw options when the board simply lies on the carrier, but with the help of the grooves the view is more accurate and the probability of deformation is reduced. I noted the location of the grooves on the boards, so the work could be done on the ground. I made cuts with a miter saw. The process is very tiring, but the result is worth it. I additionally fixed the boards on the supporting boards, screwing the screws on top.
And finally, a similar process was required for the second row of boards. For these purposes, I used boards measuring 5 x 10 cm, making grooves in them, and securing them after installation with screws.
Finishing touches
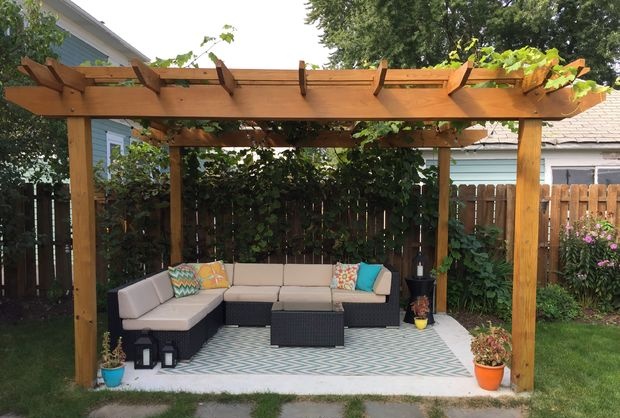
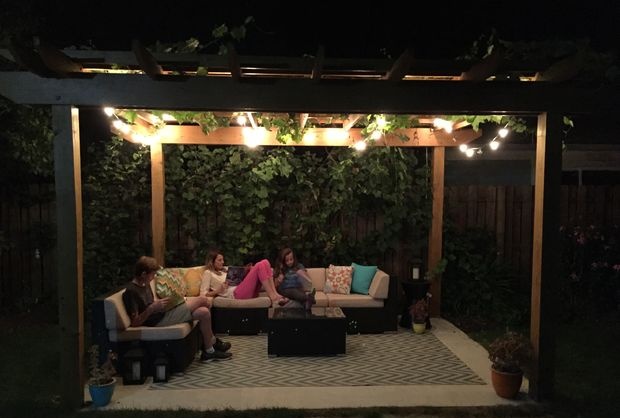
With the help of several improvements, the gazebo can be turned into an attractive place for street pastime. The more attractive it will be, the more you will use it.
- Hanging lights. It is necessary. They have a pleasant, warm glow that looks great at night.
- High quality outdoor furniture. It will be exposed to rain, the sun's rays, the dog’s dirty paws ... If you can afford it, buy furniture with high-quality fabric that will retain its original appearance for a long time.
- Carpet. It will help create the feeling that you are indoors. It’s better to buy material that dries quickly.
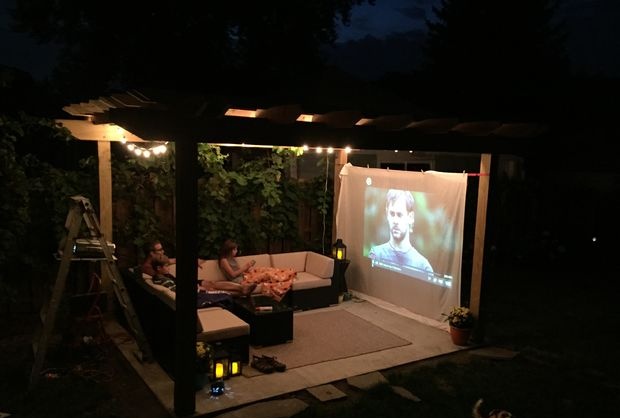
- Night cinema. On one side we hung a large sheet, and on the other we placed a projector. Great for parties or family watching movies.
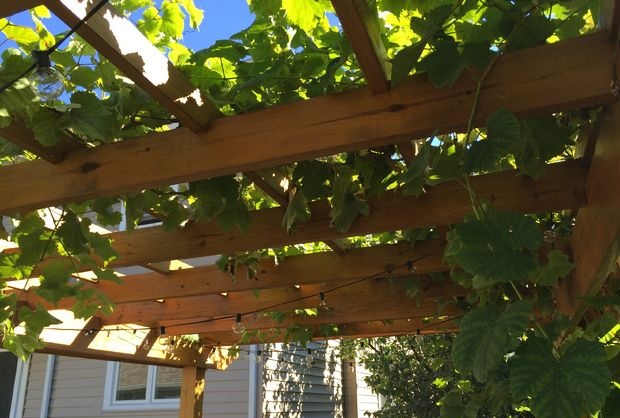
- Grapes or climbing plant. Near our arbor we planted grapes. I began to adapt it so that it grew to the top, and later provided reliable protection from direct sunlight.
- Curtains. We haven't added them yet, but we'll probably do it soon. Our gazebo is facing east, so in the morning there is too much sun in it. The Internet has highlighted many options where people use shower curtains or plain fabric to solve a similar problem.
I hope that this master class will make you think about how to use your yard, and will give confidence in the construction of your own gazebo.