Each time I independently changed the oil in my van, I had difficulty replacing the oil filter.
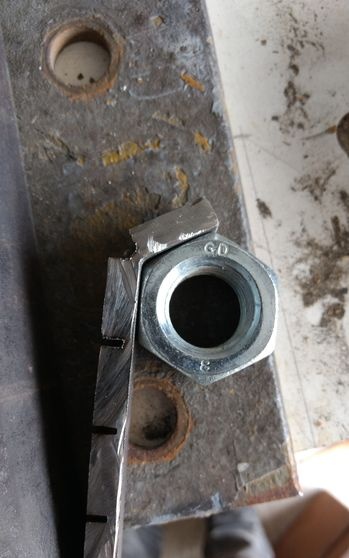
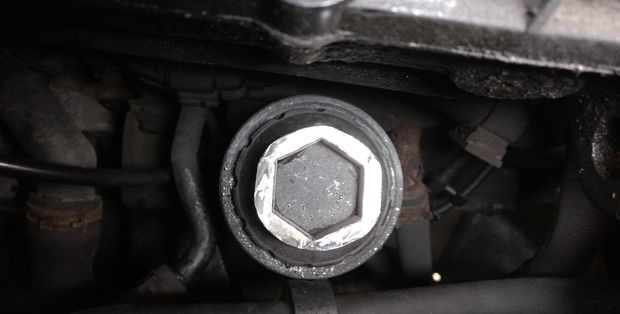
The reason is that to replace it, you need to unscrew the cover, on top of which there is a hexagonal protrusion similar to a nut. Unfortunately, I do not have a suitable socket wrench, and for these purposes I used an adjustable or combination wrench, or a combination of them. The whole difficulty lies in the fact that in a limited space it is quite difficult to exert a force sufficient to unscrew the cover.
Therefore, I decided to make a key designed specifically for this task.
What is needed
Instruments:
- - welding machine for electric arc welding.
- - angle grinder.
- - other tools (file, metal brush, hammer ...).
Materials:
- - a small metal plate with a thickness of 8 mm (it is probably possible and thinner, but not less than 5 mm).
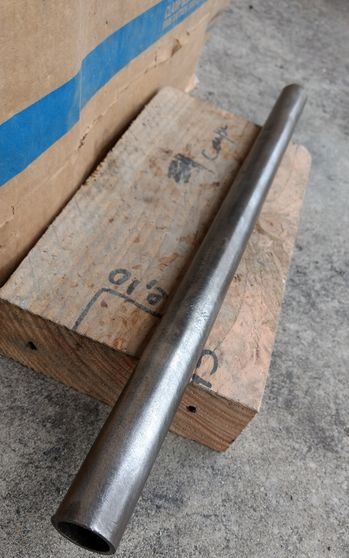
- - metal pipes (with a diameter of 20 and 25 mm, about 40 cm in length each).
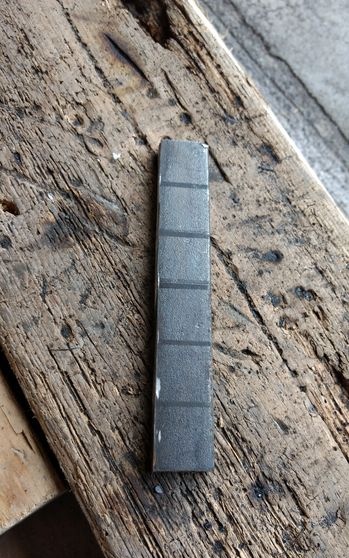
Metal strip cutting
The first thing to do is measure the length of the face of the hexagon for which you need to make a key.
We multiply this size by six (the number of faces), and we get the length of the metal strip that needs to be cut.
I recommend adding 6 mm to the resulting length (which I did not do), then it will be easier for you at the next stage of manufacturing.
The plate should be wider than the height of the bolt under which you make a key (a couple of millimeters is enough).
When everything is measured, cut off the strip.
Next, draw lines on it, between which there should be a distance equal to the length of the face plus one millimeter.
Then you need to make cuts along the lines, going deeper into 2/3 of the plate thickness.
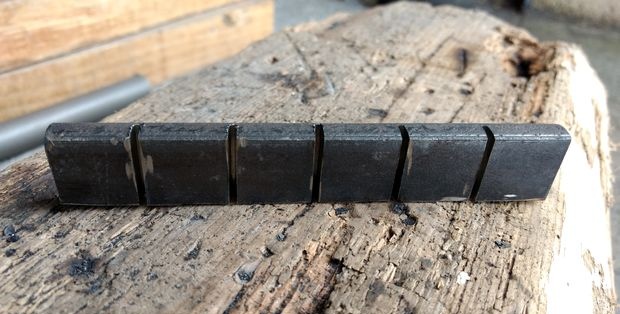
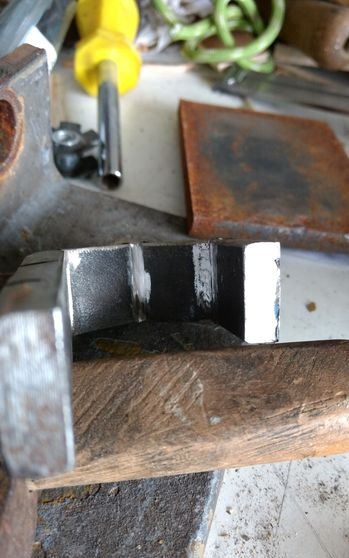
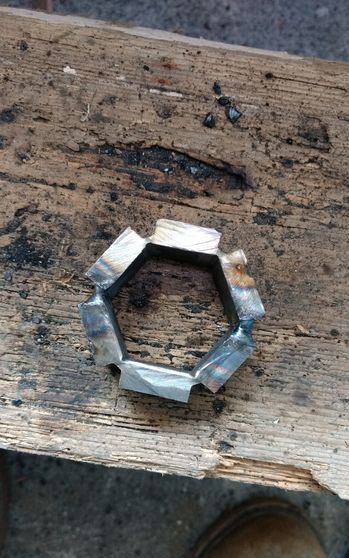
The result should be a strip of metal that looks like a bar of chocolate.
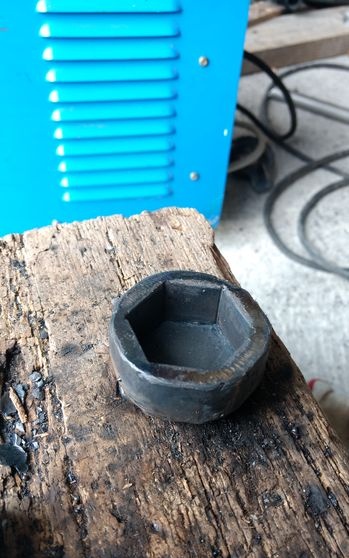
Hexagon
At this stage, it will be more convenient to work if the metal is heated. (I did not maintain a constant temperature and I could not bend the entire part in one piece).
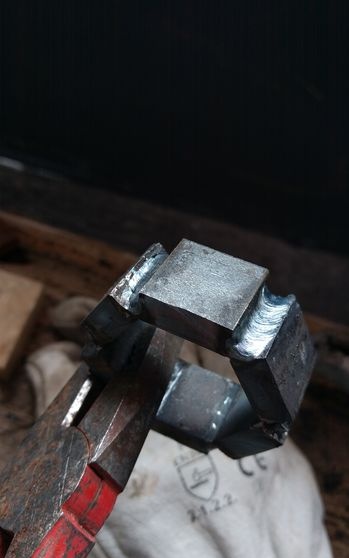
Clamp the strip in a vice at the level of the previously made recess.
With a hammer, bend the section protruding from the top of the vise.
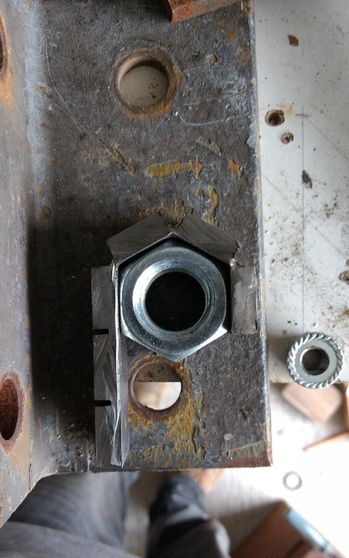
Check if the angle fits by trying it on the corresponding nut.
Repeat for each segment.
Since my strip has cooled, it has become more difficult to work with metal. This led to a crack over the third leg. In my case, it was to my advantage, since when I started to bend the fourth segment, it turned out that its length was not enough and you need to grind some metal so that the nut fits normally. (I think that adding a millimeter to each segment will help to avoid a lack of length of the inner edge of the key).
So I got a part consisting of two parts, each with three faces. (Perhaps it’s easier to work with such than with a solid part, bent into a ring, as I planned to do initially).
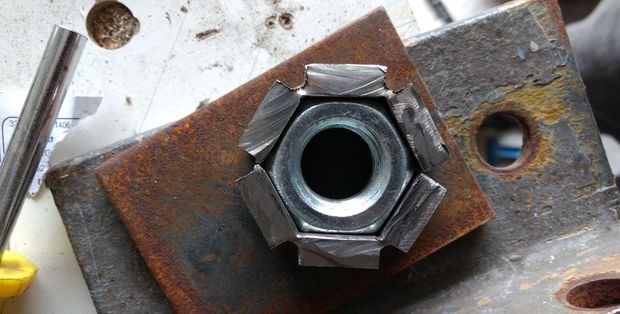
Check that the workpiece fits properly on the nut. But not too tight. (If necessary, you can grind part of the inner surface of the faces)
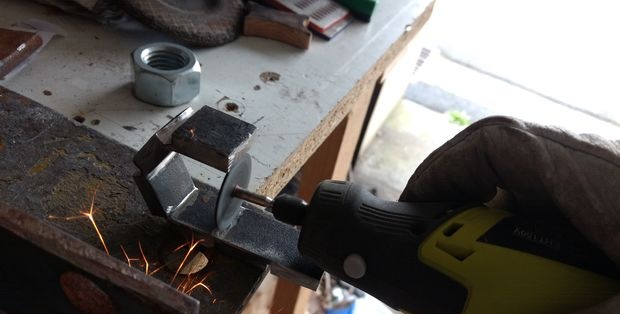
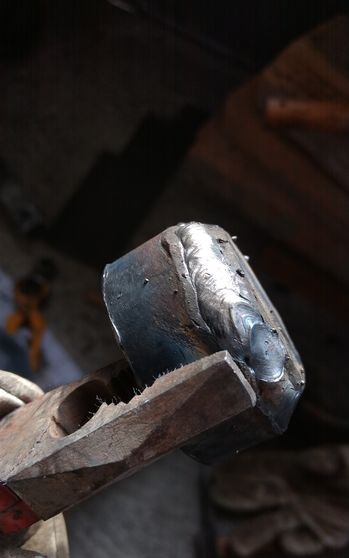
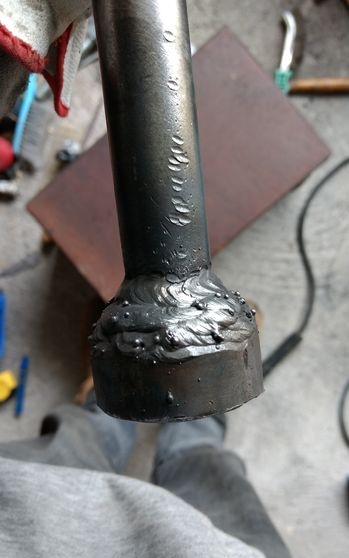
Hex Weld

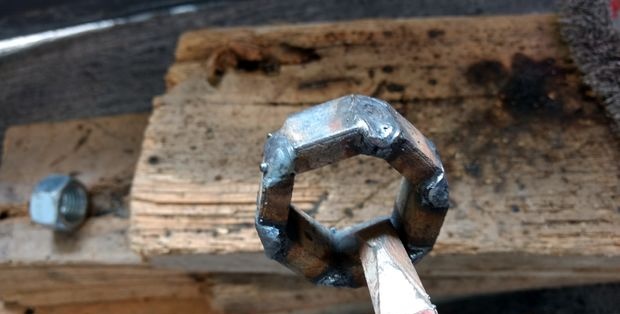
Now it remains to weld the part into one. (In my case, I used a 2.5 mm welding electrode)
After that, you need to try on the nut again, and if everything fits, then you can fill the cuts with welding. (3.2 mm electrode).
Again, we try to put it on the nut, because the high temperature during welding can deform the metal.
(This time I additionally tried on a workpiece to the hexagonal protrusion on the filter ...)
After that, you can clean up all unnecessary, making the shape of the part smoother.
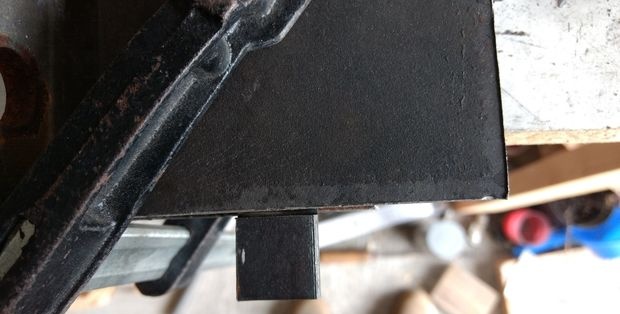
Weld the lid
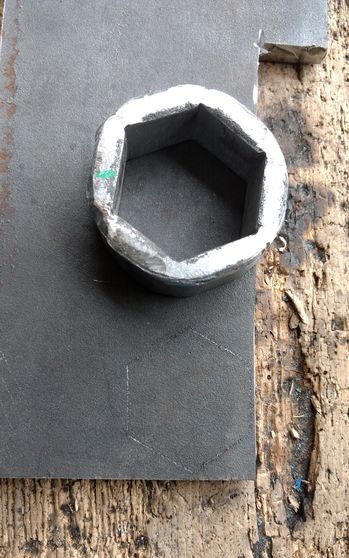
After grinding, place the part on the sheet of metal from which the strip was made, and circle its outline on it.
I preferred the line to lead along the inside, adding a couple of millimeters at the edges. But you probably want to circle the part on the outside, on the contrary, removing the extra couple of millimeters.
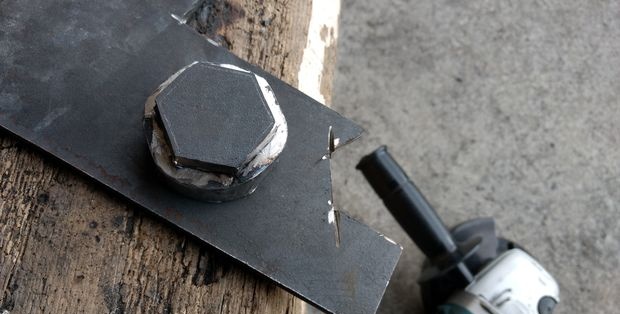
Then we weld the obtained upper part onto the previously manufactured part. (We use 2.5 mm and 3.2 mm electrodes)
Again we check whether everything fits.
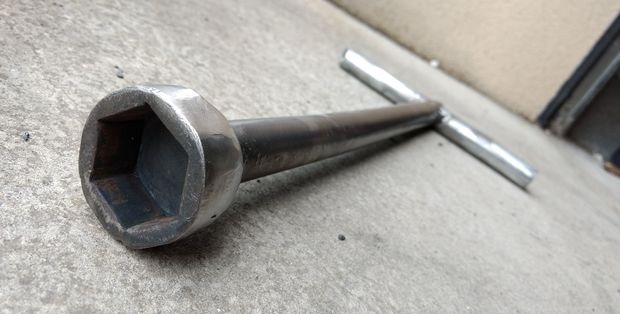
Pipe welding
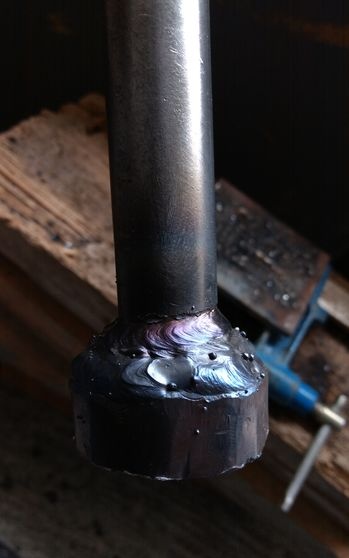

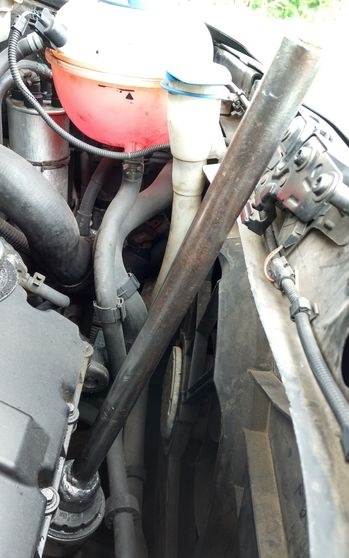
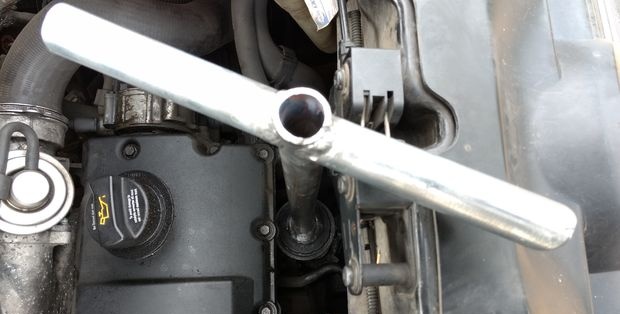
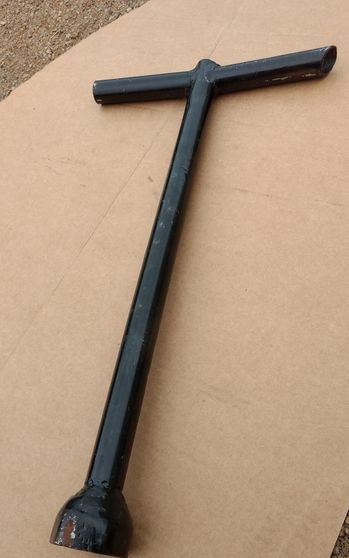
Only after this step, the result of the work can be called a tool.
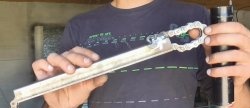
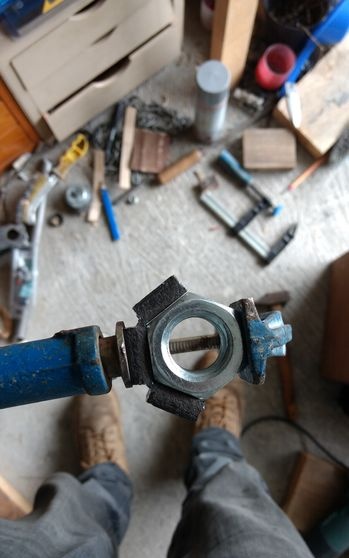
I just welded the pipe on top of the part received (it turned out to be suitable for my single-purpose key).
And then after trying on the key to the filter cover of the van, I welded to the handle pipe. (They are made of half-cut pipes of smaller diameter).
I welded them at an indirect angle, so it will be easier for me to work. (If I had fixed the handles at 90 degrees, then during rotation I would cut my knuckles into the hood lock).
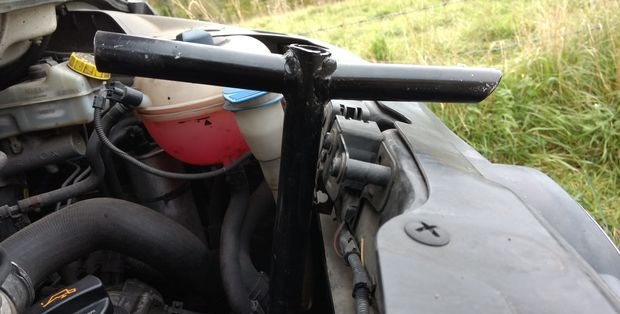
After grinding and rubbing with a brush, I applied black paint from a spray can to the key.
Now everything is ready.
Application
This socket wrench has a fairly clear purpose.
With it, changing the oil filter is a pleasure.
But I think that the way I made the tool can be applied to any other bolts and nuts that are in hard to reach places.
The manufacturing method is quite simple. The work does not take much time (I did it in 3 hours), and the key is quite cheap, even if you will buy all the materials in the store. I think that after this project, in the future I will do more such tools.
I hope you enjoyed it. Thanks for your attention!