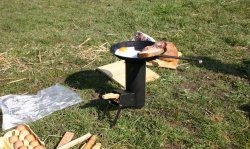
I like rocket stoves ... For those who aren't in the know, this is a great wood-fired cooking device. The effectiveness of the idea lies in the fact that the tree burns quickly and with high heat dissipation. Thus, you limit the spread of heat and direct it to where you need ... To the pan!
Materials:
- Two 20 liter cans.
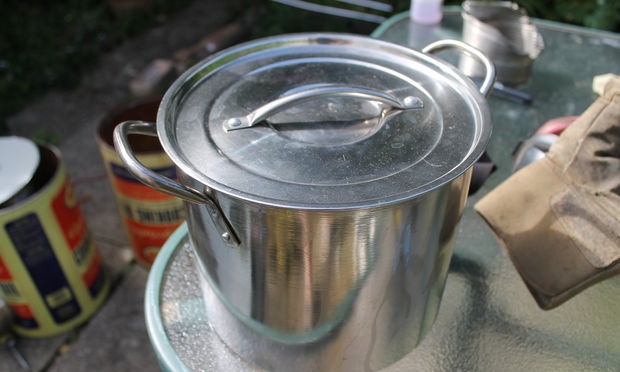
- Pan.
- A lot of wood ash.
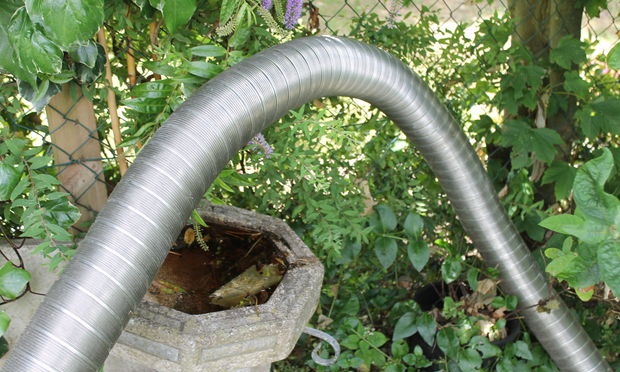
- Corrugated 10 cm pipe (not aluminum).
- Sheet metal.
- A couple of metal pipes.
Instruments:
- Scissors for metal.
- Work gloves.
- Drill.
- Tool for installing rivets.
- Angle grinder (not necessary, but it will significantly speed up the work).
- Hacksaw.
Work must be done with work gloves, as the manufacturing process involves cutting metal, and without them you can injure your hands!
More details about the materials of the plate
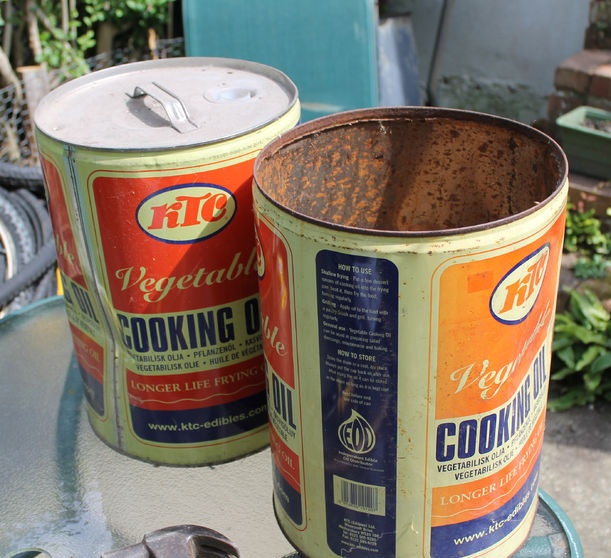
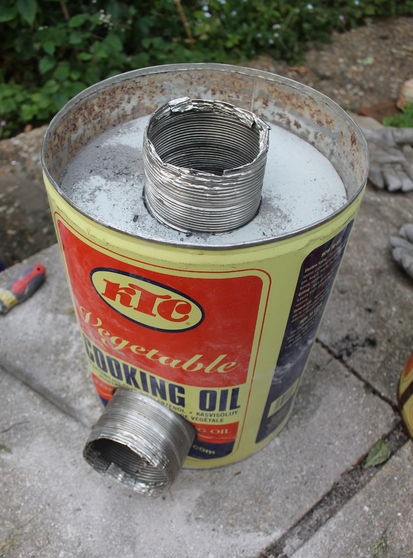
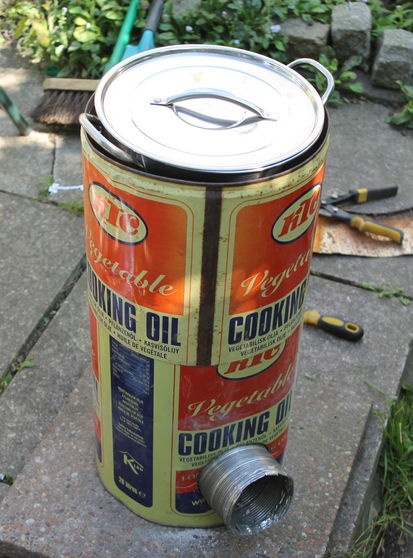
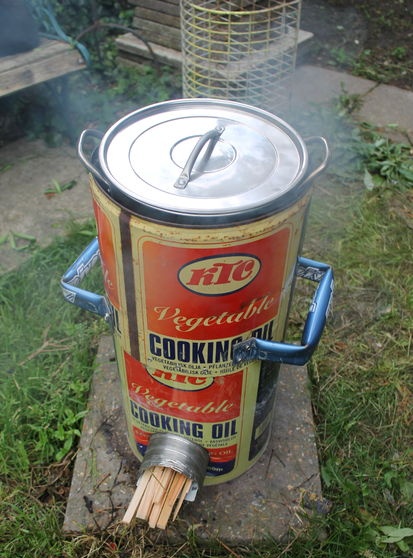
I believe that a rocket plate can be made from anything, but I had several 20 liter cans, and I decided to use them as a case.
A firebox can be made from anything, and, in fact, a rectangular shape is more effective ... But it is easier to work with a corrugated pipe.
This is not an aluminum pipe that burns quickly, but a stainless steel pipe that is used as a chimney. You can use something convenient for you. I met people who managed to make a firebox from cans of the usual size.
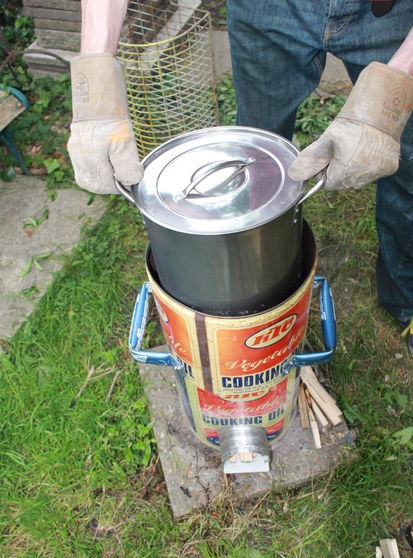
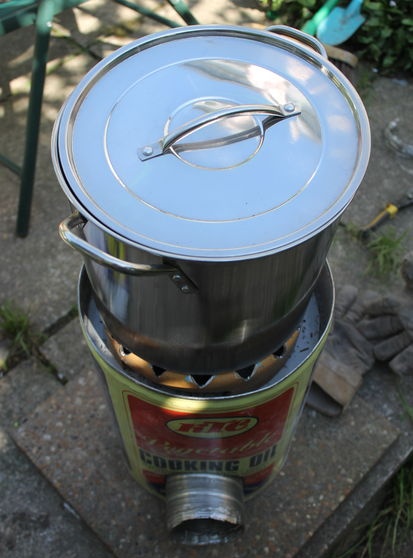
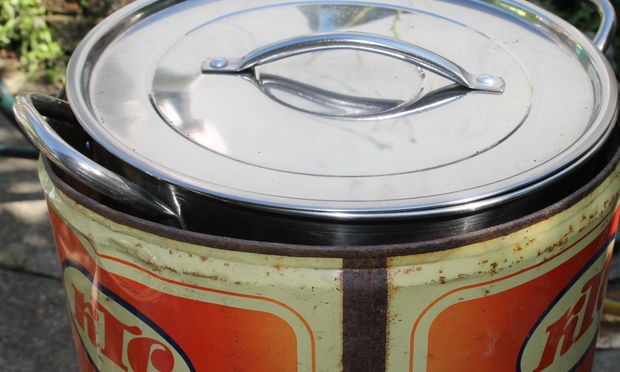
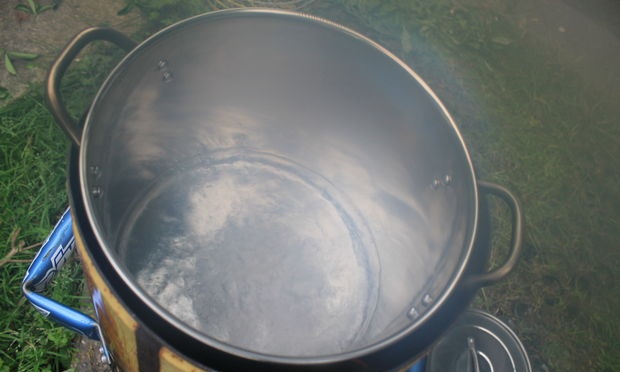
The pan for the oven should fit well, best in diameter 2 cm smaller than the body of the oven. Handles should not be plastic, otherwise they will melt. It is also important that there is a suitable lid, because we know that everything boils faster with the lid. Better on it will be two small handles on the sides than one long, because it will take up less space.
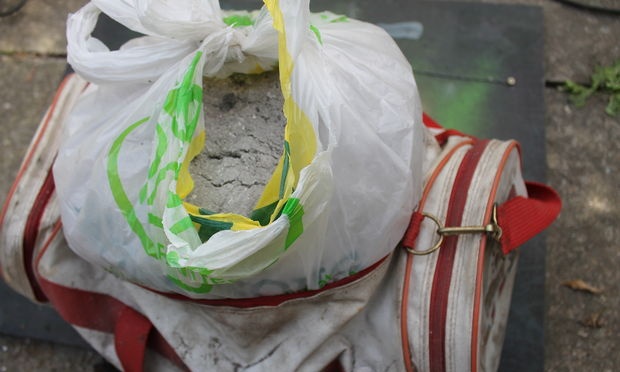
As an insulating material, I used wood ash, but you can use everything that has good heat-insulating properties and does not burn. I heard that people sometimes use vermiculite. I like wood ash because it is free and with it the stove will be quite heavy, and therefore more stable.
Metal cutting
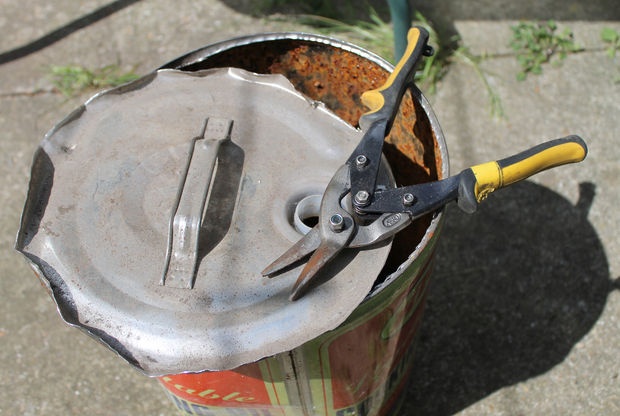
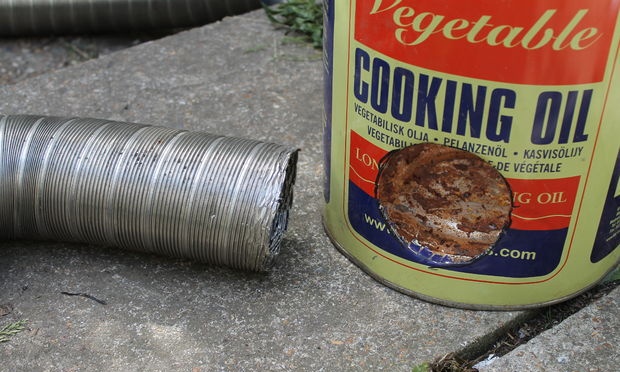
Cut off the top of the can. To make a hole you need a chisel and a hammer, then we use scissors for metal.
When working, you must remember that you are dealing with sharp edges. At all stages of manufacturing, I was wearing protective gloves and constantly filed everything sharp with a file.
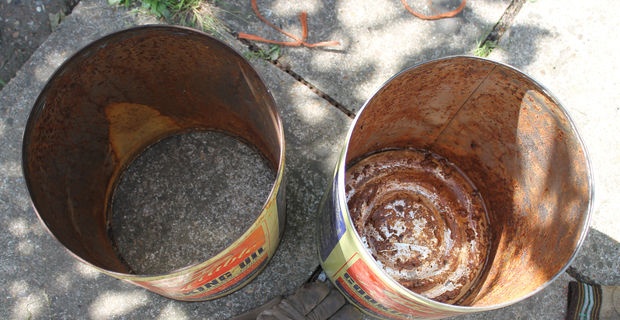
In the second bank, we cut off both the upper and lower parts.
Making the body and pipe
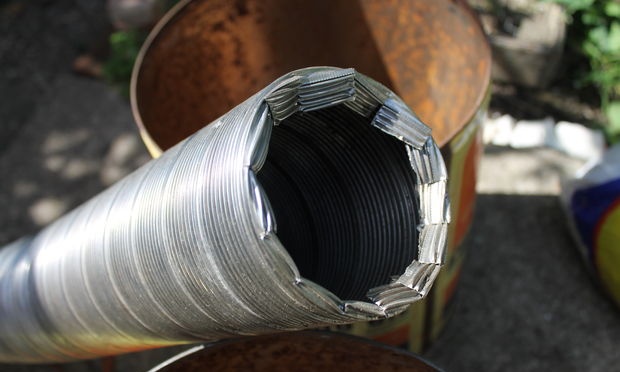
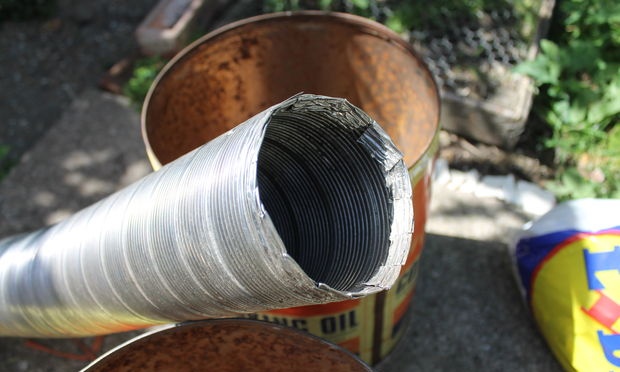
Cut the desired length of the corrugated pipe with a hacksaw and scissors for metal.
Then we make small cuts on its edge and with the help of pliers we align the resulting blades and bend inwards (see photo).
This is done so that the edges are not sharp and it was difficult to cut about them when lighting a fire.
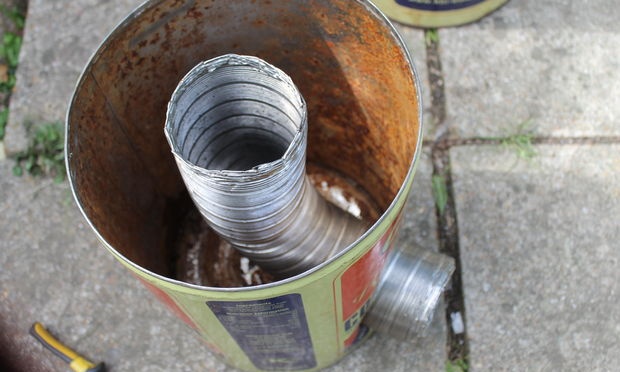
Now in the bank with the bottom we cut a hole for the corrugated pipe. In the side 3 cm above the bottom will be enough.
Insert the pipe into the hole and bend. The bending angle should be made quite sharp, while the pipe should remain in the center of the can (see photo below).
We make a cover
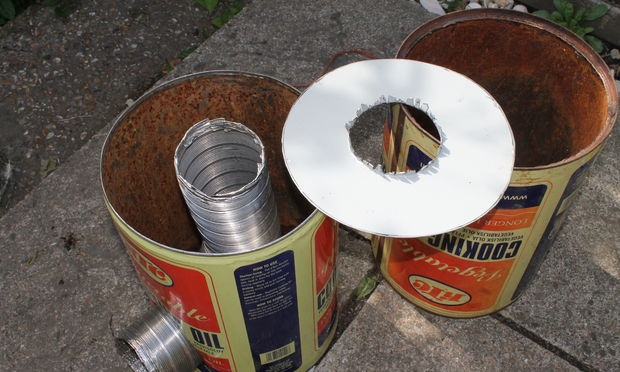
For this purpose, you can use the lower or upper part of the jar, which we cut earlier. But I took advantage of sheet metal, which I had on hand.
We cut out a sheet that will exactly repeat the shape of the can, with a large hole for the pipe. This can easily be done with an angle grinder or other tool.
The sheet should close the jar tightly, but you can not worry too much about this, since during shrinkage the wood ash will keep the structure stable enough.
Insulation

Time to fill the cavity with insulating material.
Especially for these purposes, I have collected enough wood ash, which has excellent thermal insulation properties. But it must be dry.
Ashes should lie tight enough, the main thing is that it does not have nails or other heat-conducting materials. Tamp it and, if you come across large pieces of coal, remove them.
At first, ashes may seep at the junction of the corrugated pipe with a tin can, but do not worry about this. Over time, he will lie so tight that he will no longer get enough sleep.
After filling the furnace with insulating material, we cover the case with a lid.
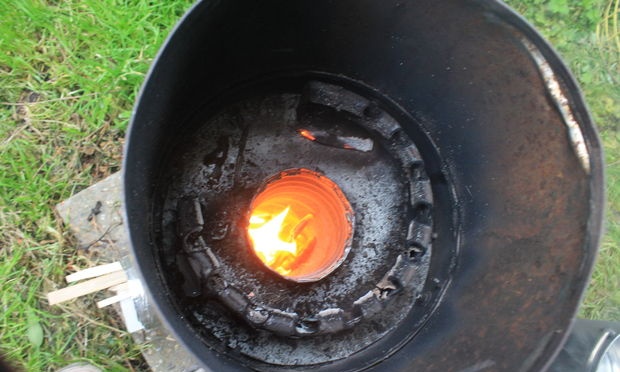
We make the heating surface of the furnace
Some people design rocket furnaces in such a way that the heated utensils are located directly on the pipe, for this, several cuts are made at the edge of the pipe so that air can freely pass.
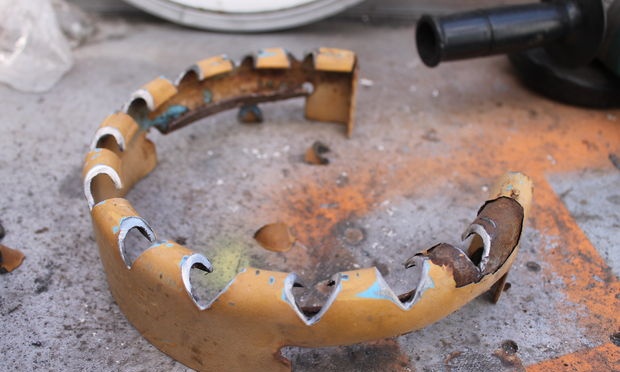
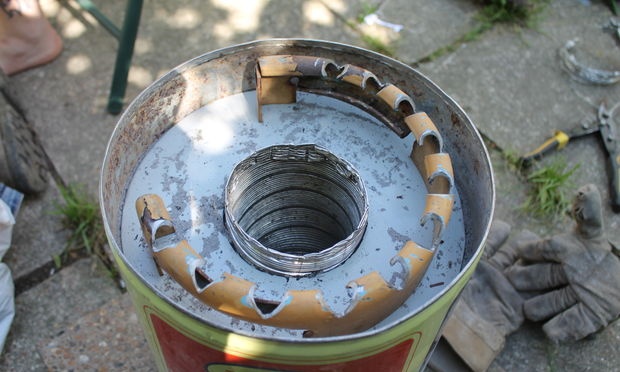
I prefer to make a heating surface from a gas cylinder. I cut off part of it so that between the top cut of the pipe and the bottom of the pan there is a space of 20 mm. Then I make a few slots so that air and fire can freely and evenly pass around the pan.
This design will be much stronger than a corrugated pipe. A plus is the non-waste use of an exhaust gas cylinder if you want to make another stove from the rest of it.
Making a furnace cover
Now we have a thermally insulated fire that will be directed to the bottom of your pan.
For a more efficient distribution of heat on its surface, we need to make a casing. This will allow the heat exiting the oven to pass through the casual sides of the pan, thereby increasing heat transfer.
We make the height of the casing in accordance with the size of your pan. We cut off part of the second can so that it fits onto the second, and the pan handle is freely located above its upper cut.
Put the second can on the first. You may need to use a hammer for this.
Handles for a plate
The resulting rocket furnace can turn out to be quite heavy, and it will be more convenient to carry it with handles.
Some people prefer the cover to be removable. So on the fire it will be possible to put a pan and other utensils. I preferred to use only the selected pan. This made it possible to fix the casing on the furnace body and screw the handles to it.
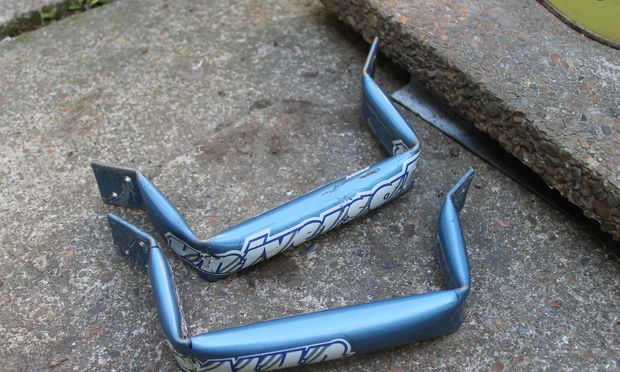
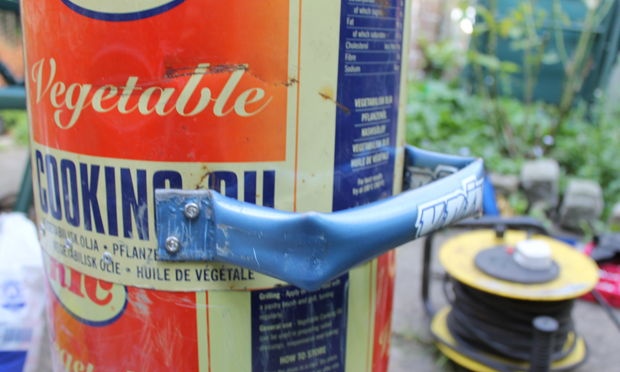
For the manufacture of handles, I used a bicycle frame, giving the pipes the necessary shape, drilled several holes and screwed them to the furnace. To attach the handles, I chose a place where two cans overlap one another, so that the structure is more durable. I also riveted the cans.
Firewood shelf
When I was making my first oven, I missed this detail, because I thought that it was not needed. Wrong. She is necessary.
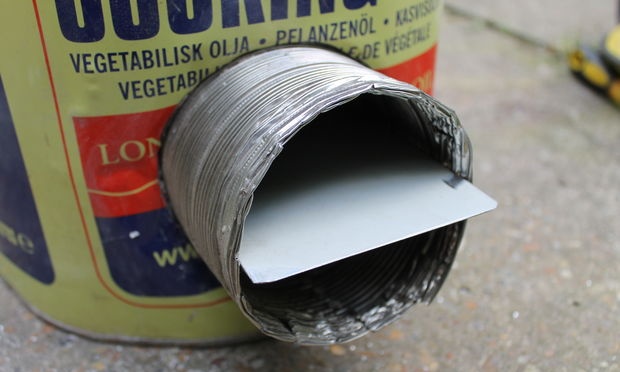
From a sheet of metal you need to cut a plate that will be inserted into the corrugated pipe and protrude a little from it.
Thus, firewood will be fed over the upper part of the plate, and air will pass from below, allowing the tree to flare up well.
Very simple, but very important.
Test test of the finished plate

First place the stove so that the firewood chamber is facing upwind. The wind will allow the fire to flare up better.
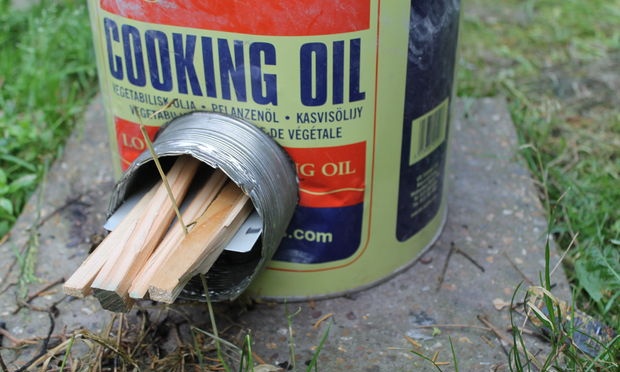
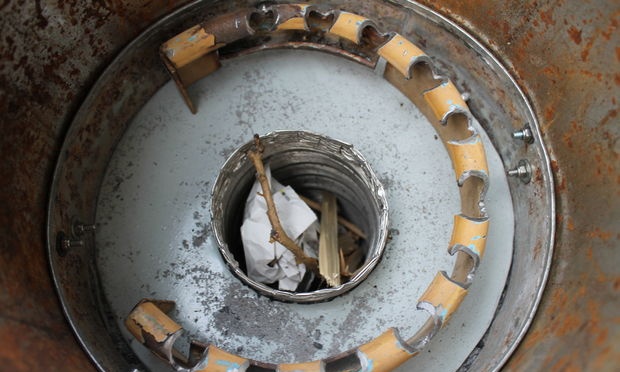
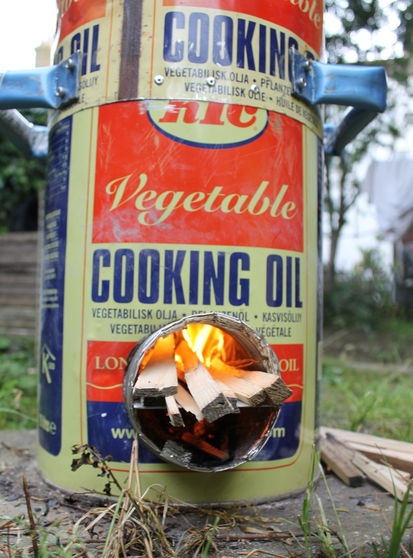
First, the furnace is filled with fuel through the top of the pipe.You can use some paper and thin, dry chips.
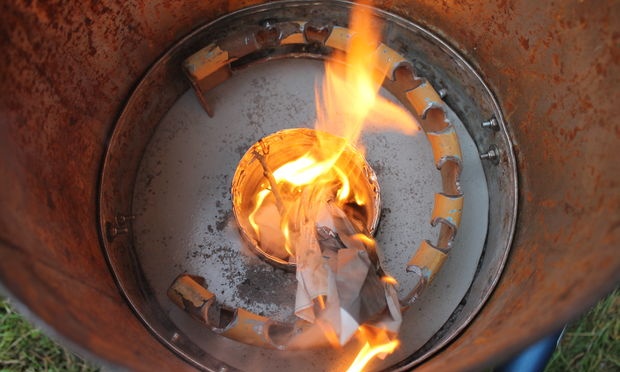
We bring fire, let it burn for about a minute.
Then we feed the firewood over the shelf through the side pipe. A tree above, air below.
We put the pan, it will limit the air flow, which will create better traction.
Firewood in such a stove burns quickly, and it is better to use small pieces of wood. They can be pushed inside with a stick.
The bark does not burn well, so it is better not to use it as fuel. Dry pine wood will be just right.
At the first test, the water began to boil in three minutes and it took a little firewood. The result can be considered successful.
No smoke, no ash - burns well.
P.S. This may be obvious, but only dry wood ash serves as a heat insulator. Therefore, do not leave the stove in the rain.