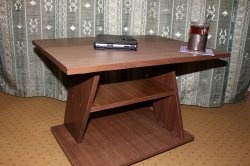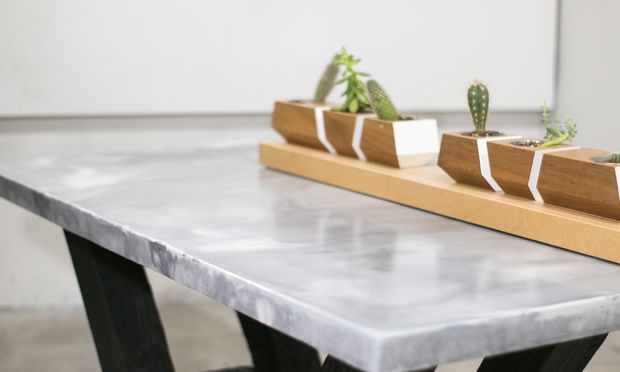
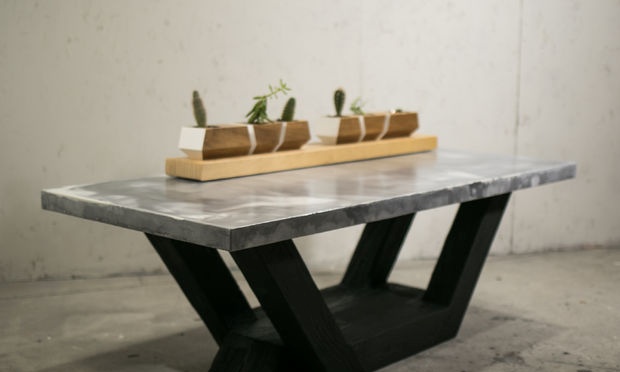
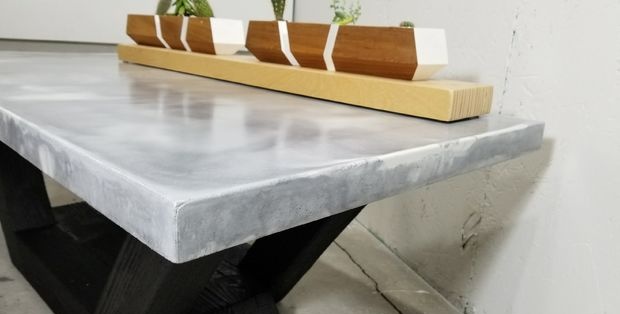
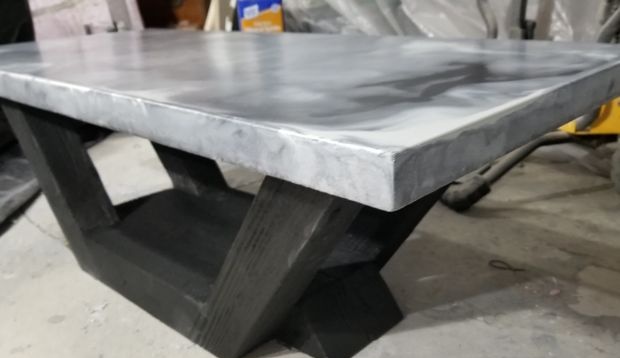
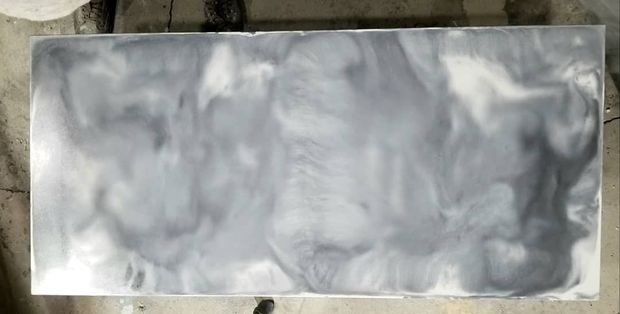
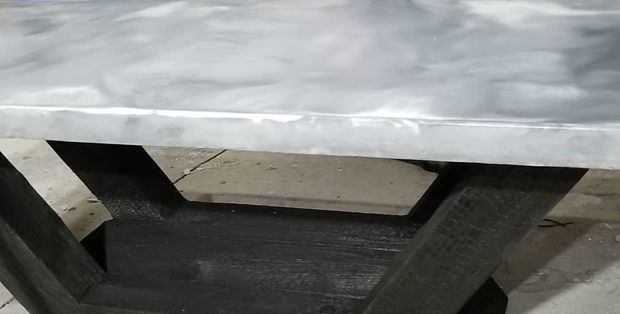
I made a coffee table from concrete that looks like marble (at least for me). The countertop is made of a ready-mixed mixture of fiberglass-reinforced concrete (glass concrete), and is poured in the form of melamine. I divided the solution into parts, gave them a different color (from white to dark gray), poured everything into a mold and mixed it lightly with my hand to give the mixture a marble look.
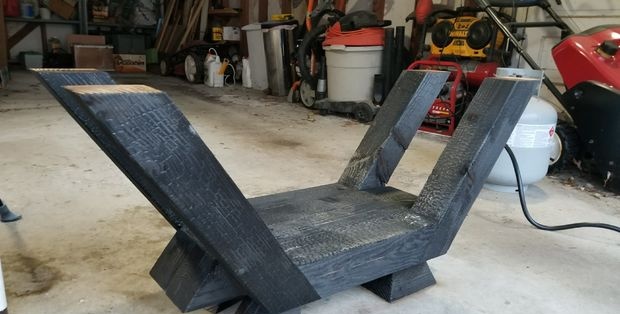
I applied an ancient Japanese technique called “Shou Sugi Ban” to the base. I used its upgraded version, and carbonized the wood surface with a propane burner. This treatment is a natural way to preserve wood. And after applying low viscosity oil, for example, Danish, the surface will become resistant to wear. The technique is well applied to any kind of wood with a large texture, like Douglas fir, pine and cedar. I used an inexpensive 10 x 10 cm timber from Douglas fir, which I purchased at a local warehouse store.
Materials
WOOD:
- - three beams of Douglas fir, cedar or pine 10 x 10 cm and a length of 2.5 m .;
- - Nagel with a diameter of 20 mm .;
- - 120 x 250 cm melamine sheet for the manufacture of molds for concrete.
CONCRETE (GLASS-CONCRETE) MIXTURES:
- - two bags of the mixture for the basis of glass concrete;
- - 0.68 kg package of alkali-resistant fiber glass;
- - a tool for decorating cakes to align the edges;
- - construction mixer;
- - impregnation for concrete of your choice;
- - completely black silicone sealant;
- - wax based polishing mixture;
- - paint for concrete.
MORE WHAT YOU NEED:
- - propane burner;
- - Danish oil;
- - a respirator;
- - diamond-coated grinding wheel (for processing the bottom of the table);
- - a set of drills on wood;
- - level;
- - conductor for drilling;
- - a casing for an angle grinder with a dust extraction.
TOOLS USED IN THE MANUFACTURE:
- - angle grinder;
- - 18-volt wireless miter saw;
- - A set of 18-volt cordless screwdrivers;
- - a sawing machine with a cut width of 82 cm;
- - hand saw;
- - Miter saw.
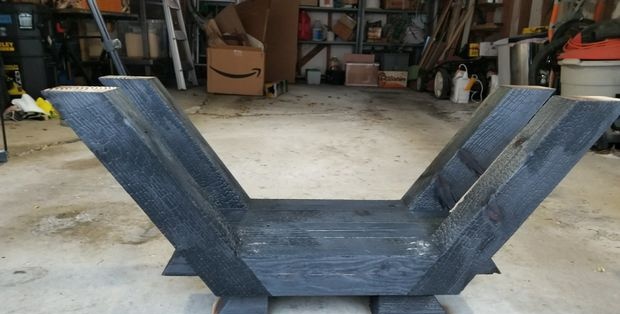
We make a wooden base from a bar 10 x 10 cm.


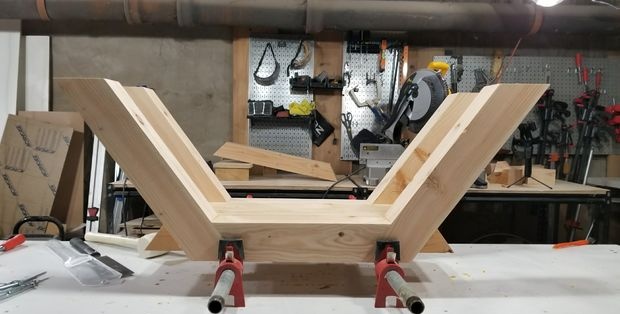

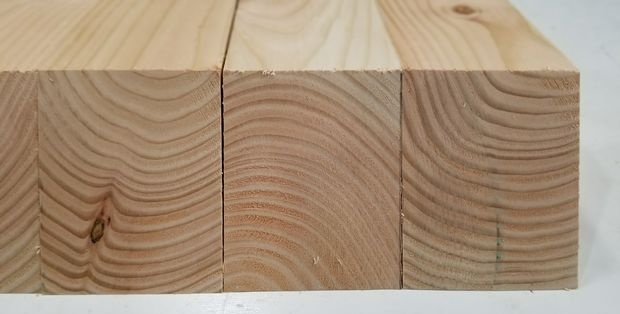
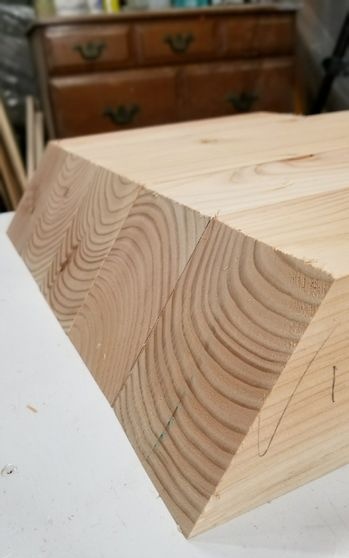
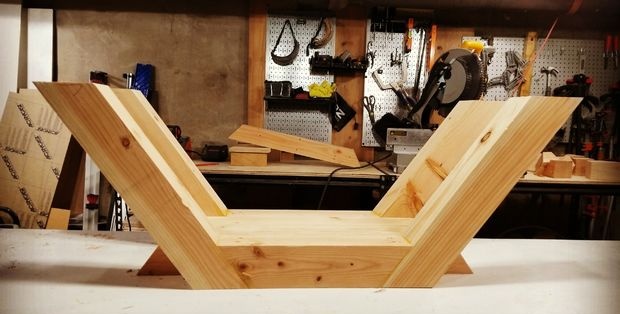
The base is made of 8 pieces of timber 10 x 10 cm. I used only Douglas fir. I processed all the pieces of the beam with a planer to get material of exactly the same size. Their width can be made in your own discretion, but you can also use standard 10 x 10 bars, just try to choose smooth ones right away. For the base you will need 3 beams 2.5 m long each.
Here are eight elements (shown in the image):
- 4 legs (A);
- 2 external ties (B) - each located between two side legs;
- 2 inner ties (C).
All angles will be cut at an angle of 36 degrees. However, I would recommend first cutting all the bars a little bit longer (for example, 10 cm or more than necessary), and then setting the miter saw to 36 degrees, do the rest of the work.
Cut 4 legs (A) first. In order not to engage in trigonometry and get their exact length, I recommend cutting the beam at an angle of 36 degrees, then attach it with a sawed-off part to the table surface, measure 40 cm (or the height you need) perpendicular to the table surface, make a mark on the beam and in this place cut it at an angle of 36 degrees. Then we cut the remaining legs in size first.
After that, cut the two outer ties (B). To do this, I put two side legs and propped them with scraps of the bar that remained after sawing them so that they stood. Then, I spread them in different directions to achieve the desired distance between their peaks (I had 110 cm).Then I measured the distance between the lower edges of the legs, so I got a shorter length (for the lower part) of the external struts (B). Then he cut the timber at an angle of 36 degrees in the marked places.
Now cut off the two internal struts. To do this, you need to attach two side legs and an external strut together (again, trimming will help with this). Place a block for the inner strut next to it and mark the cutting point at an angle. It remains to work with a miter saw.
After cutting all 8 pieces, I will glue them. Ideally, with the help of clamps, you need to make a mechanism that would fix the internal angle between each leg and the external strut of 144 degrees. However, I greased the parts with glue and, using trimmed timber, arranged the parts of the structure manually. I fixed everything with screws until the glue has dried.
After the glue had dried, I fixed the structure with 15 cm of grouse. They fixed the legs with internal struts. First, I drilled a shallow hole with a diameter of 20 mm so that the head hid inside, then a 6 mm preliminary hole and drove a capercaillie into it.
Having hammered a hole into the holes, I hid the grouse heads.
After that, I processed the elements of the spacers with a belt grinding machine to smooth out all the irregularities between them, and grinded the protruding remains of the pins. Then came the firing time.
We process wood with fire
Watch the video on fire processing
This part of the work leaves a positive impression. Prepare a gas burner according to its instructions. The process itself is quite safe, but it is better to have a fire extinguisher nearby. Just in case.
It's hard to overdo it. Aim the burner nozzle at the tree. The hottest part of the flame (its blue end) should lightly touch the wooden surface. The tree turns brown and then blackens. When this part of the work is done, turn off the burner and moisten the wooden surfaces with water (I used a spray gun). After that, using the brush, you need to lightly remove the charred parts of the ashen color.
When the wood has cooled, apply polishing oil to it. I used Danish oil because it penetrates into the tree and freezes in it. This makes the charred “alligator skin” on the tree more durable and resistant to wear. You will need a large amount of oil, because this technique thoroughly dries the tree and opens its pores for absorption. I covered it with three layers, and after that I had to do it again.
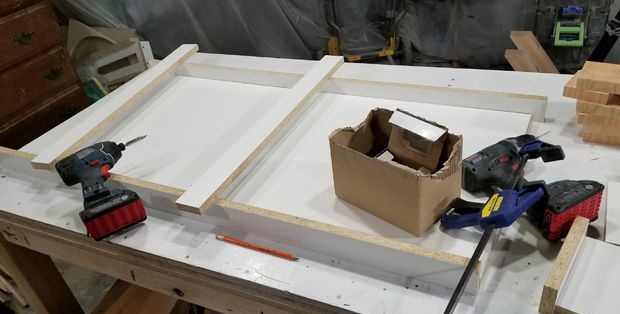
Make melamine concrete pouring mold
This is a shape, so the countertop will be cast top down.
To make the form you gently do the following:
a) Cut melamine strips for the sides of the mold to the height of your worktop + 2 cm. In my case, the worktop was 4 cm high, so I cut the strips 6 cm wide. This is easier to do on a sawing machine, but you can use a miter saw if You will do everything consistently and accurately. Cut all the strips at the same time, so they get the same width. Then cut the strip in length. Each should be several centimeters longer than the base. With this protruding part, the side strip will be easier to remove after the concrete has set.
b) Cut the base of the mold from melanin to the size of the countertop. In my case, it was 120 x 55 cm.
c) Make preliminary holes in the sides, then screw them to the base. I used 30 mm screws for this.
d) Coat the inside of your mold with a wax mixture.
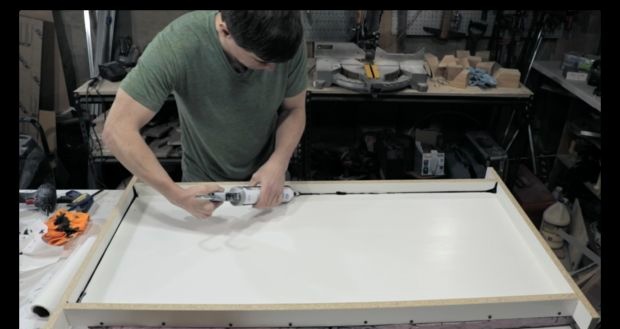
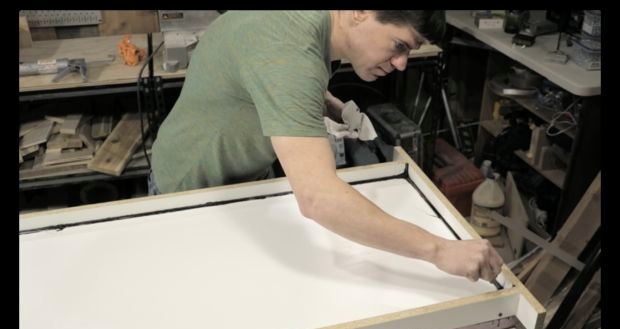
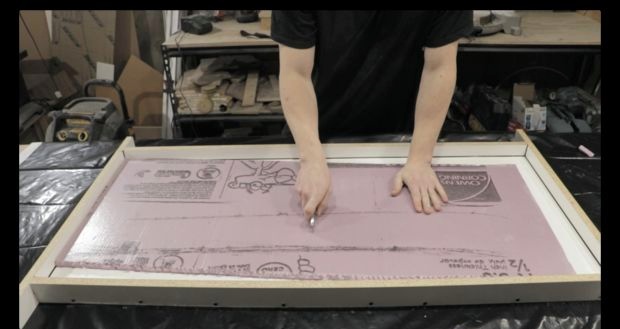
e) Apply silicone sealant to the inner joints and use the cake decorating tool (in the form of a small ball on a stick) to align them. After the sealant has dried, remove excess material.
IMPORTANT POINT I LOST: You will need bars to hold the foam inserts in the solution. They can be attached to the side parts of the mold in the last stage of pouring the solution.
Cut foam inserts into concrete
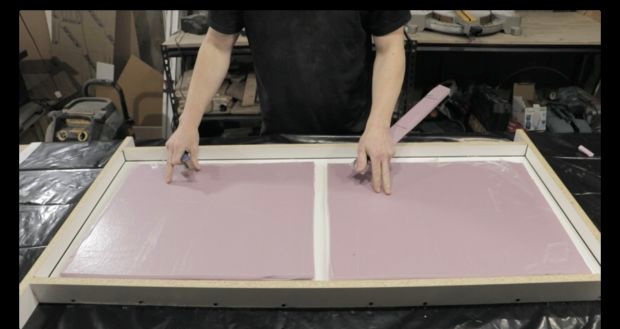
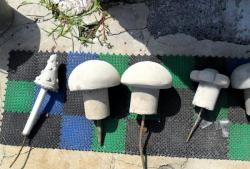
You need to cut foam inserts from a 15 mm thick sheet that will be dipped into the solution.In these places, the countertop will be 2.5 cm thick (in contrast to the edges, where the thickness will be all 4 cm). With a knife, we cut two foam plates of the right size so that they are placed 7-10 cm from each edge of the countertop. The plate can only be incised, after which it easily breaks with your hands. If you need precision, you can use a miter saw or cut inserts on a sawing machine.
Mix and pour the solution into a mold
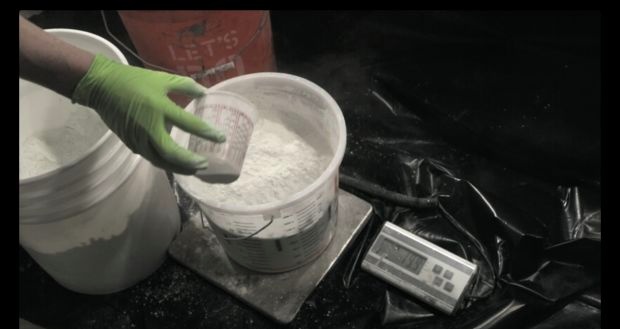


In my project, I used a ready-made mixture of glass concrete in which you need to add only water. We add water according to the instructions. Estimate how much solution you need.
I got almost 45 kg of dry mix. I separated about 10 kg for the cladding (without fiberglass), and I used the remaining 35 kg for the base (with fiberglass). For 35 kg of the mixture, I used 0.7 kg of fiberglass.
When preparing the facing solution (and for the base), slowly add the mixture to the water. For example, add one third, mix, another third, etc. You can add a little more water (but not too much) if you want to make the solution more fluid. It should pour out like whipped batter.
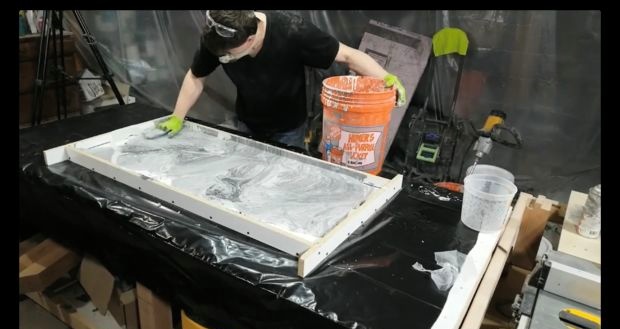
To get a marble look, I selected three small buckets of mortar. In one, I added a lot of paint, after which its color turned dark gray (almost black). A small amount of dye was poured into the remaining part of the lining solution in the main bucket, and only stirred a little so that the color was heterogeneous. Then I alternately poured all three color versions of the solution into the mold and mixed with my hand until the entire mixture completely covered the bottom with a thin (approximately 5 mm) layer. The flooded cladding should stand for 30 to 60 minutes (depending on the solidification time), after which, when touched, it should appear slightly moist, but strong enough. When pouring mortar for the lower part of the countertop, the facing should not be broken.
PAY ATTENTION: it is not necessary to give a solution for glass concrete to vibrations.
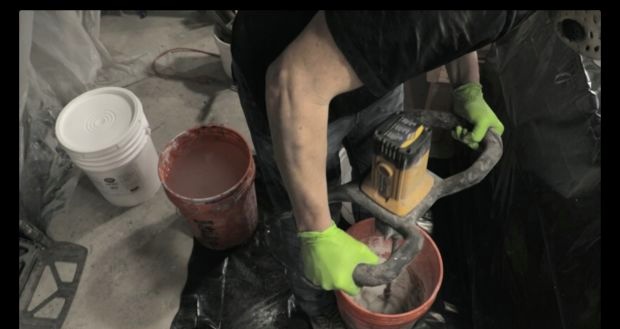
Similarly, prepare a solution for the base of the countertop, but after it is ready, add fiberglass to it. The addition of fiberglass should occur in parts, for example, a third in one mixing. If the solution is too thick, you can add a little water. Pour it into the mold. A hand can help him spread out in all corners. Again - no vibrations needed. If the solution is made more fluid, it will evenly distribute in shape. First, fill in part of the solution without dye (for example, white), then add paint to the residue and mix, leaving it inhomogeneous. At this stage, we immerse the foam inserts and fix them inside the solution with the help of bars bolted to the sides of the mold. Then fill in the remainder of the solution until the form is filled.
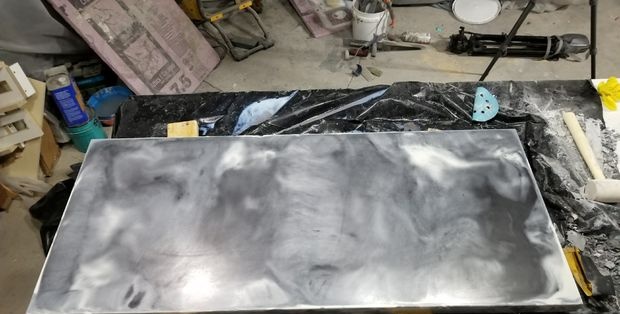
Grind the bottom of the mold
Hardening should last at least 24 hours (36 at a temperature below 20 ºC). If the solution has risen above the foam inserts, these surpluses can be removed with an angle grinder with a diamond-coated disk. Then we remove the foam inserts. At this stage, it is important not to disassemble the form, because when grinding it is convenient to align the bottom along its side parts.
Removing mold elements, grinding and impregnation
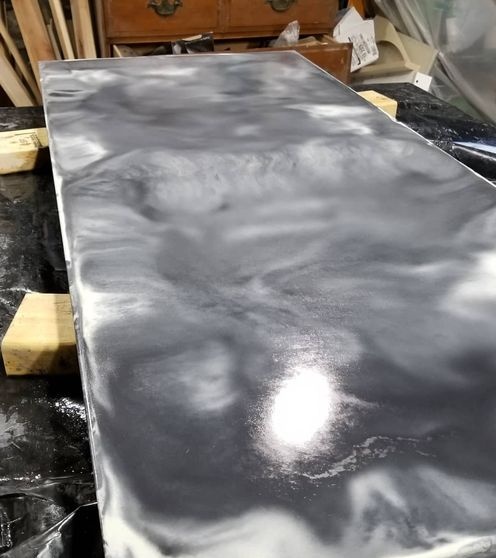
After aligning all the edges of the bottom of the countertop, it's time to disassemble the form. We unscrew all the screws and separate all its parts.
If the sidewalls do not go very well, you can lightly tap on them with a rubber mallet. If you turn the countertop over, it will be easier to separate the bottom of the form (now the top). To do this, you can use a plastic spatula (but not metal, so as not to leave scratches). If the base of the mold adheres strongly to concrete, then vacuum is likely to interfere with the separation. In this case, the compressor gun will help, the end of which must be inserted between plastic and concrete. This will break the tightness created by the vacuum and the plastic will easily come off.
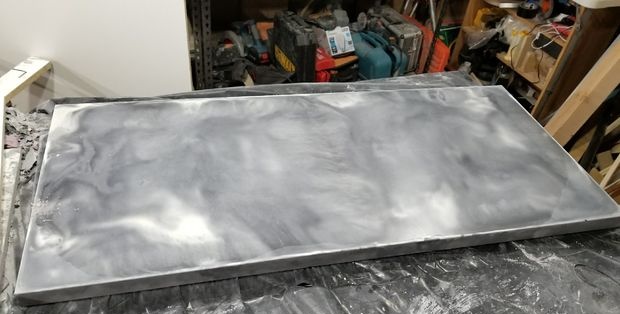
Then we wet the entire concrete surface of the table with water and manually grind with P400 sandpaper. When you feel that the surface has become smooth, grinding is enough.
After that, apply impregnation to the concrete. This can be done according to the instructions.
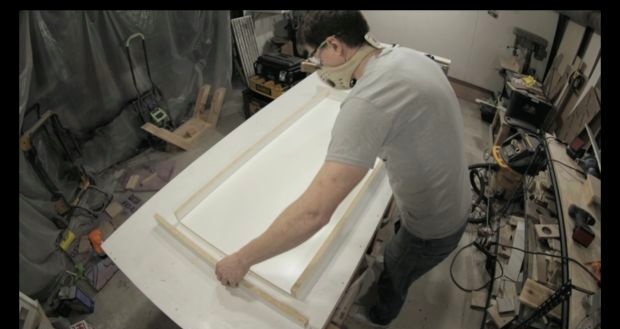
We put the countertop on a wooden base - And that's it!
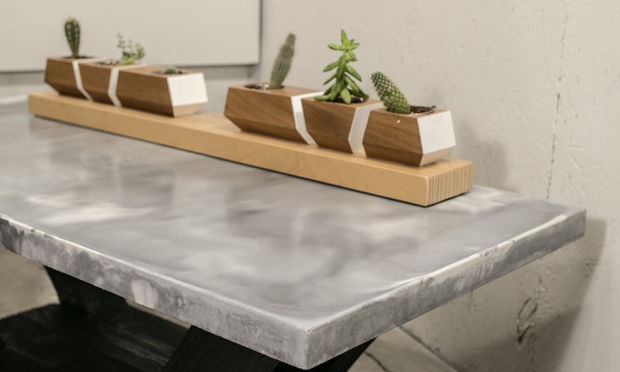


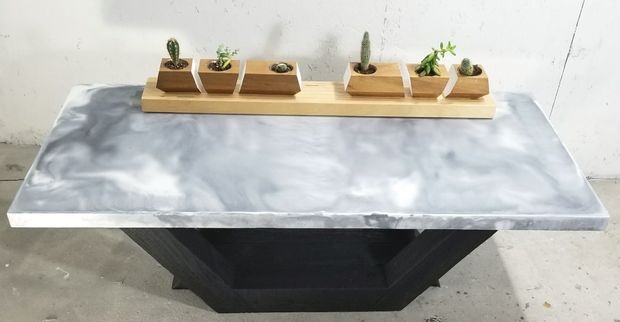
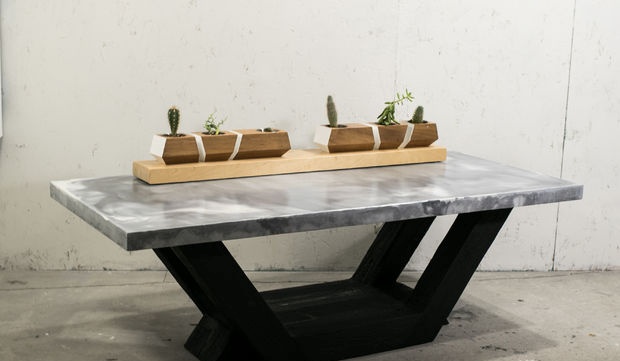
Lay the countertop on top of the wooden base, align it so that it lies perfectly in the center. Carefully lift one side of the countertop one after another to apply glue to the surface of the legs. Before the glue dries, make sure the countertop is perfectly level.