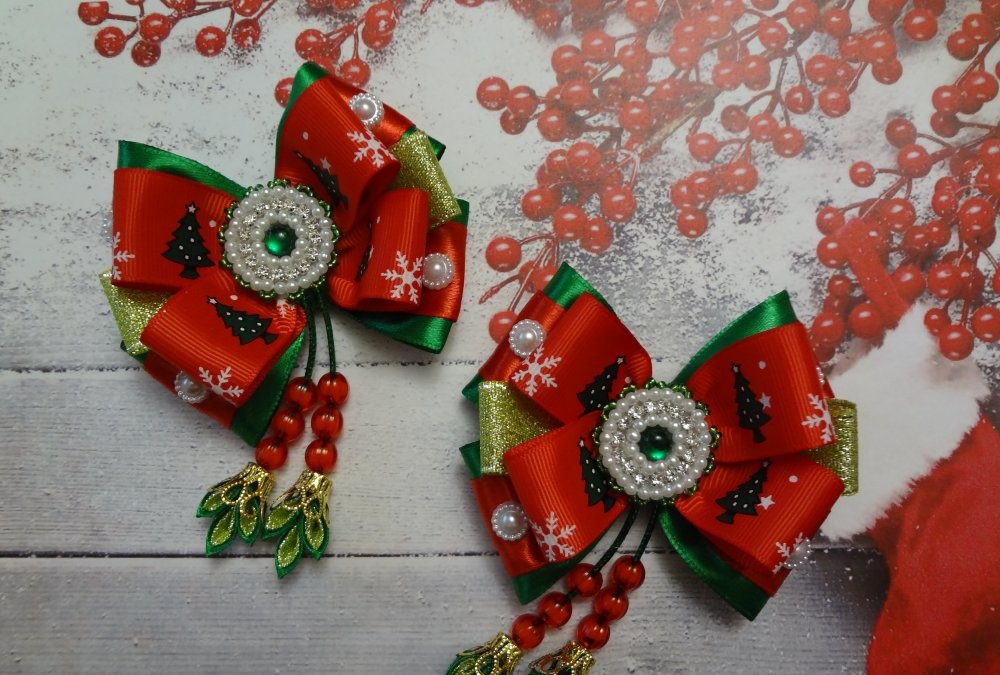
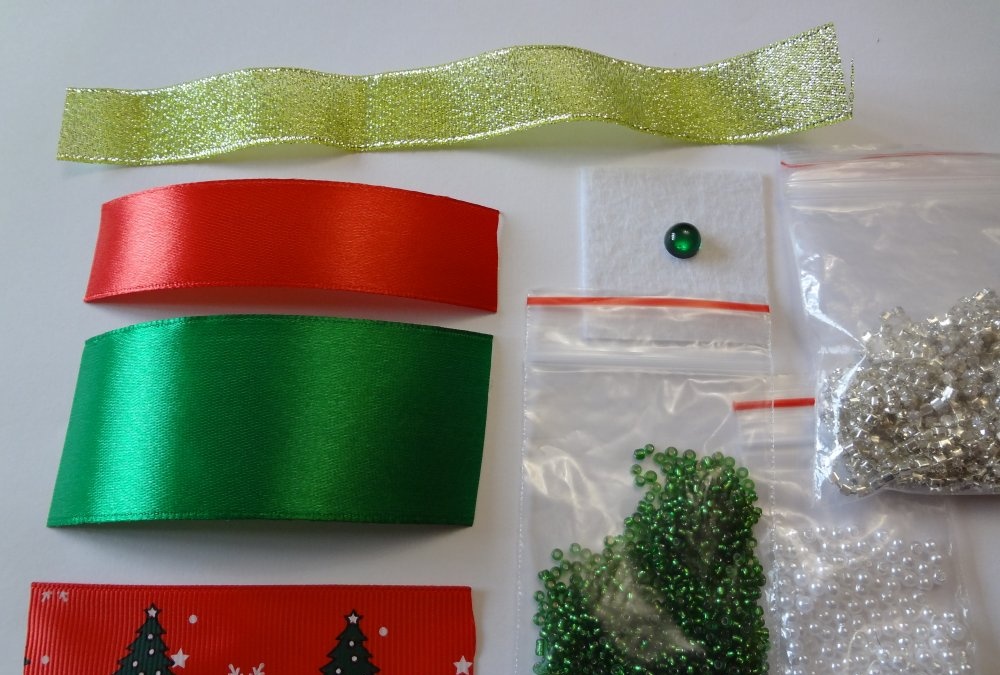
For one beautiful Christmas bow you will need the following set of accessories:
- - 4 pieces of green satin ribbon - 4*9 cm;
- - 1 piece of sparkling green brocade - 2*18 cm;
- - 4 pieces of grosgrain ribbon with a New Year's pattern (depicting Christmas trees, snowflakes, deer or another option) red - 2.5 * 8 cm;
- - 1 piece of green satin ribbon - 1.2*10 cm;
- - 6 squares of green satin ribbon - 2.5*2.5 cm;
- - 6 squares of green brocade - 2*2 cm;
- - 6 red beads with a diameter of 8 mm;
- - 4 white half-beads with a diameter of 1 cm;
- - 1 green half-bead with a diameter of 8 mm;
- - 36 white beads with a diameter of 3 mm;
- - rhinestone sparkling silver chain about 8 cm long;
- - 39 pieces of small green beads;
- - 2 golden bell-shaped huggers;
- - 2 green (gold) laces 8 cm long (or make one cut 1 cm longer than the second);
- - white felt base (small square to create a beautiful center);
- - an elastic band or a clip, an automatic hairpin or a pin - any decoration base you choose.
In the process of work, you need to complete several stages: prepare an interesting center from a half bead, a rhinestone chain and beads, make loops for the bow and assemble a chic model, model the tassels.
How to make your own Christmas bows
1. Types of materials are shown in the first photo. And the required number of pieces, beads and huggers is indicated in the list.
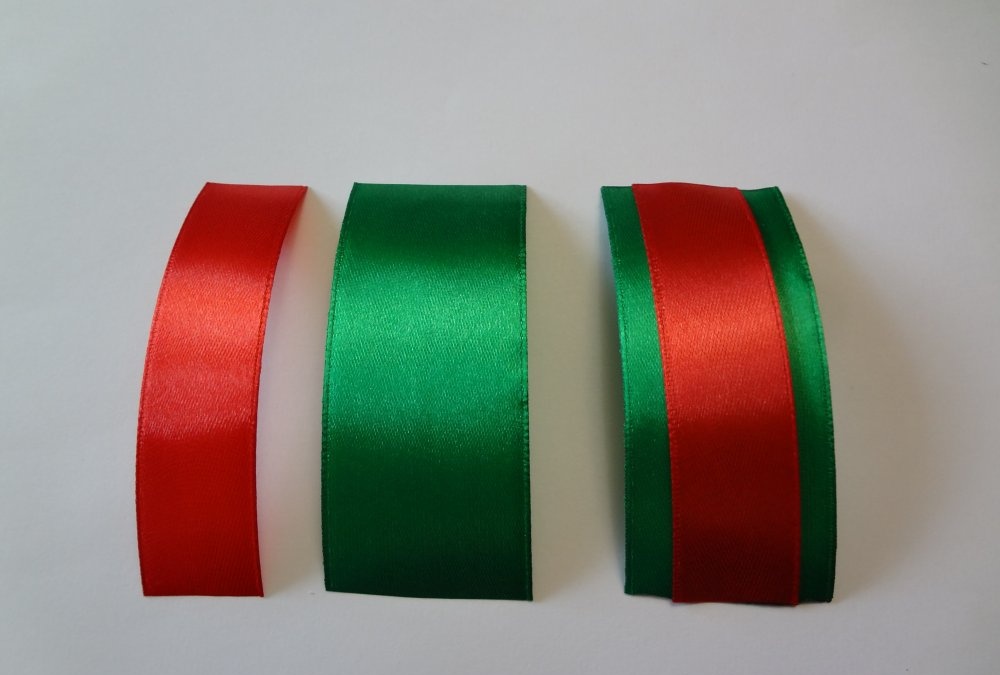
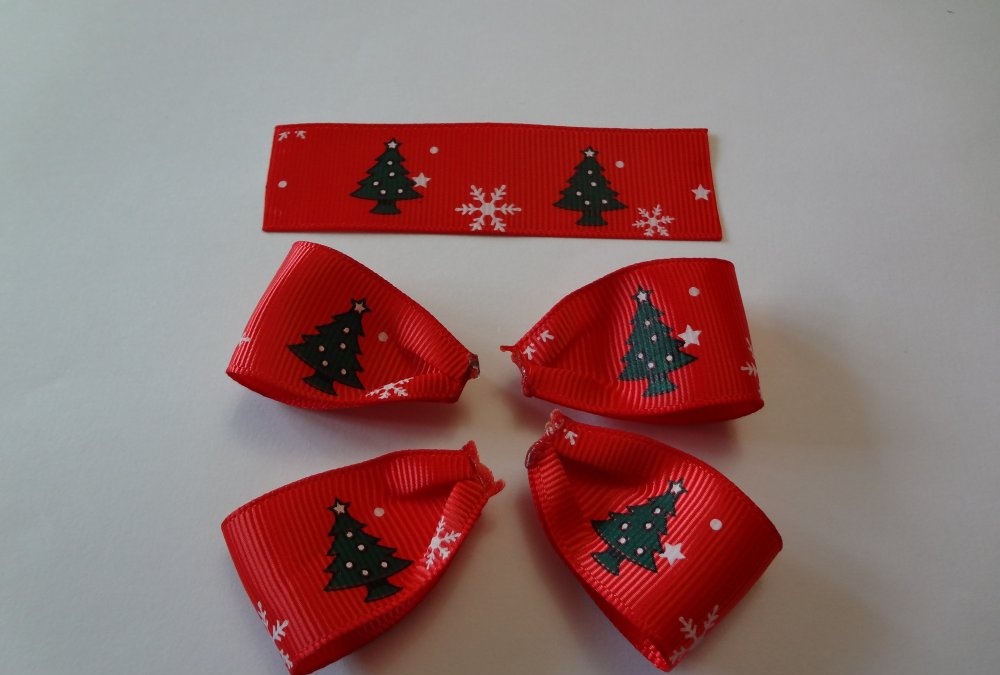
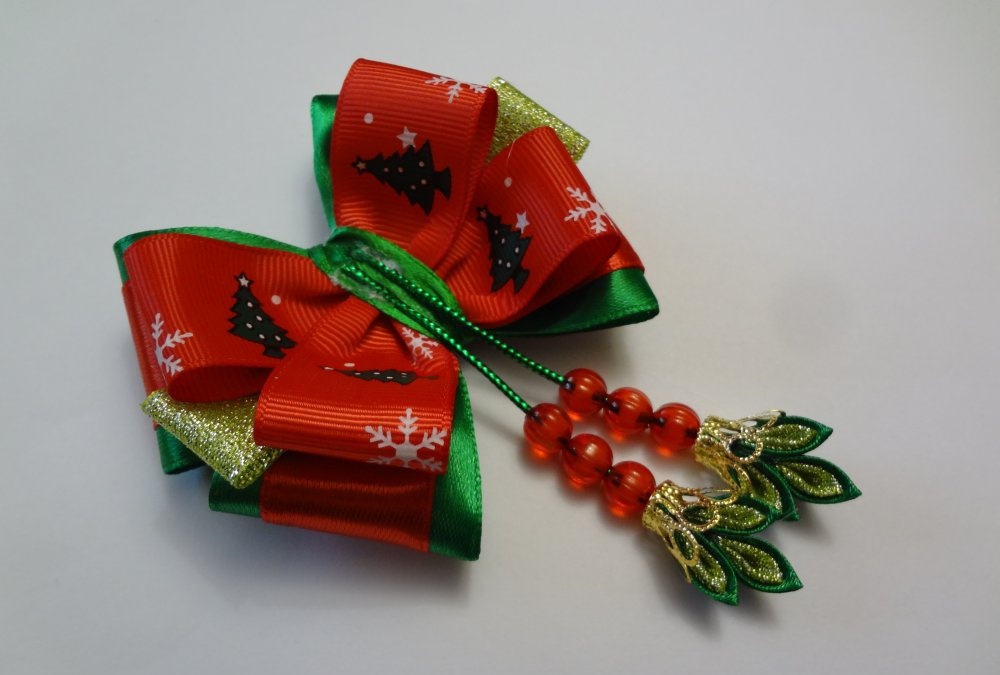
2. A red grosgrain ribbon with a New Year's design (Christmas trees, snowflakes) looks very beautiful. This is the first highlight of the proposed decorations. Burn the pieces on both sides with a lighter and make loops. The type of loops is shown in the second photo.
3. Another layer of the bow will be satin, made up of green and red stripes. Align the lengths as shown in the third photo and singe the ends.
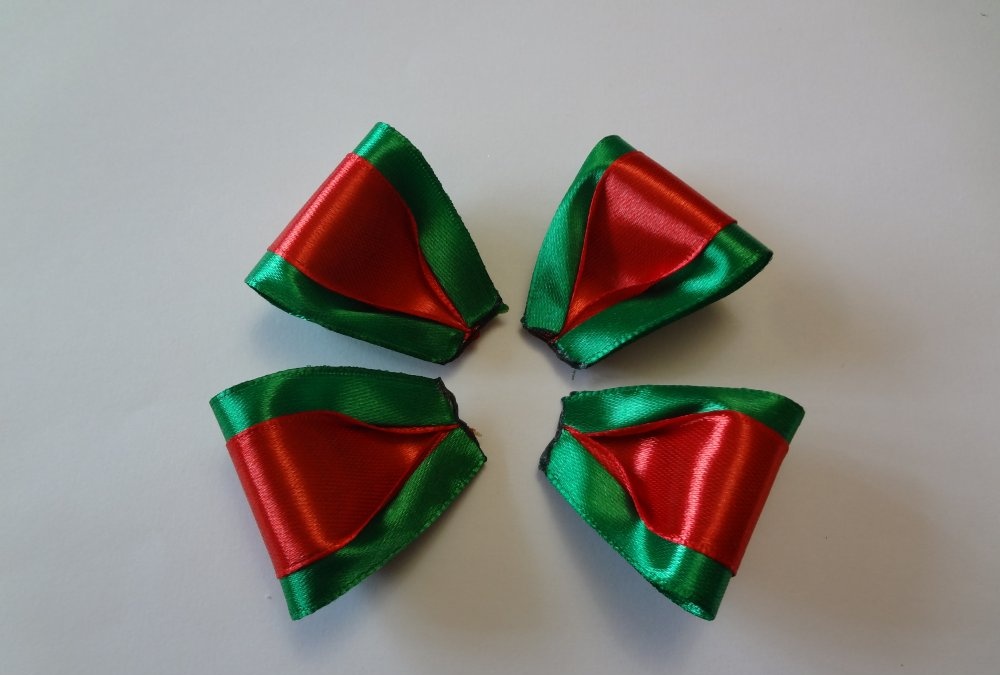
4. Make 4 more red-green loops.
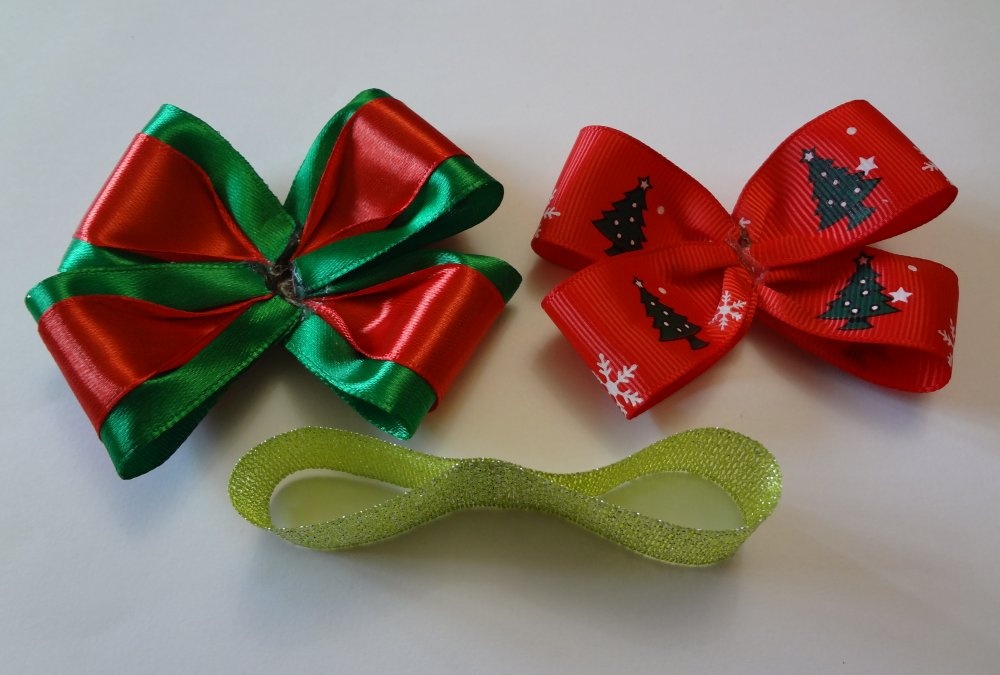
5. Glue the prepared loops together according to grades. The fifth photo shows that you should get X-shaped rep and satin blanks. From the brocade strip, make a double loop for the bow, gluing both sides in the center.
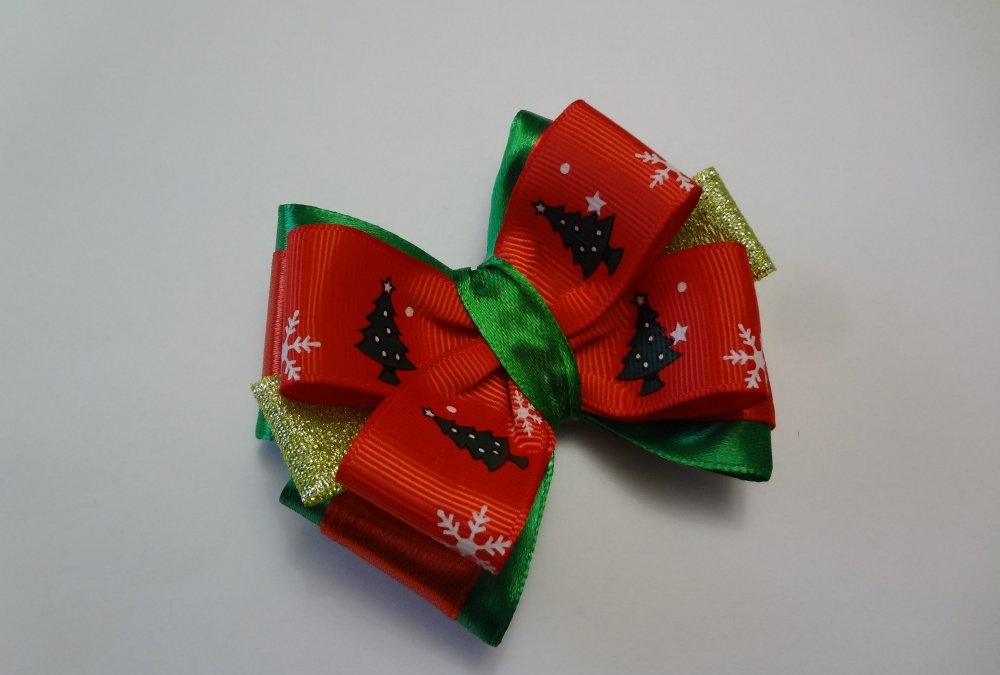
6. Make the base of the decoration as shown in the sixth photo. Use all the previously prepared layers, as well as a thin green ribbon for wrapping.
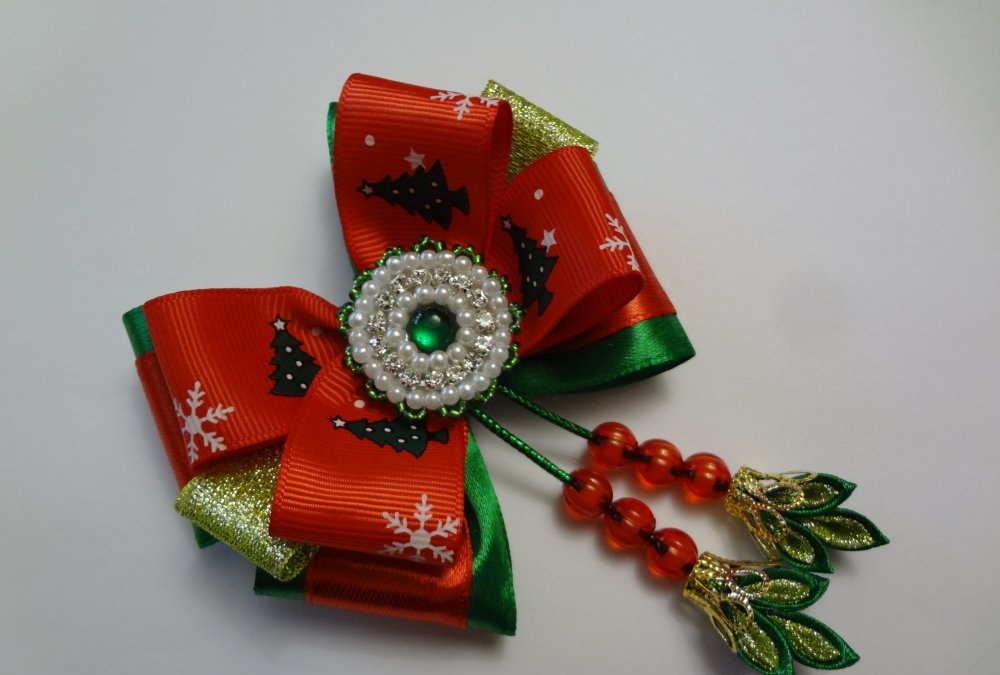
7. A beautiful middle is another highlight proposed in this lesson. It’s easy to do it yourself, using the seventh photo as a guide. Glue a green half-bead onto a piece of white felt. Next, sew around it with white beads, but the thread should not be visible. After this, stick a rhinestone chain around the circumference. At this stage, you can stop or continue modeling.
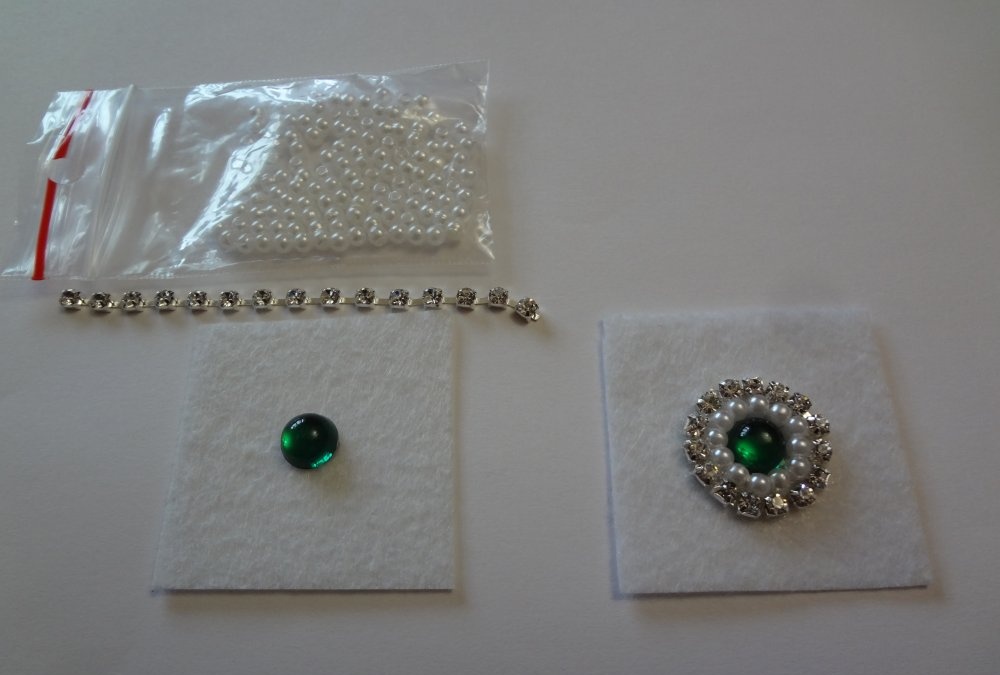
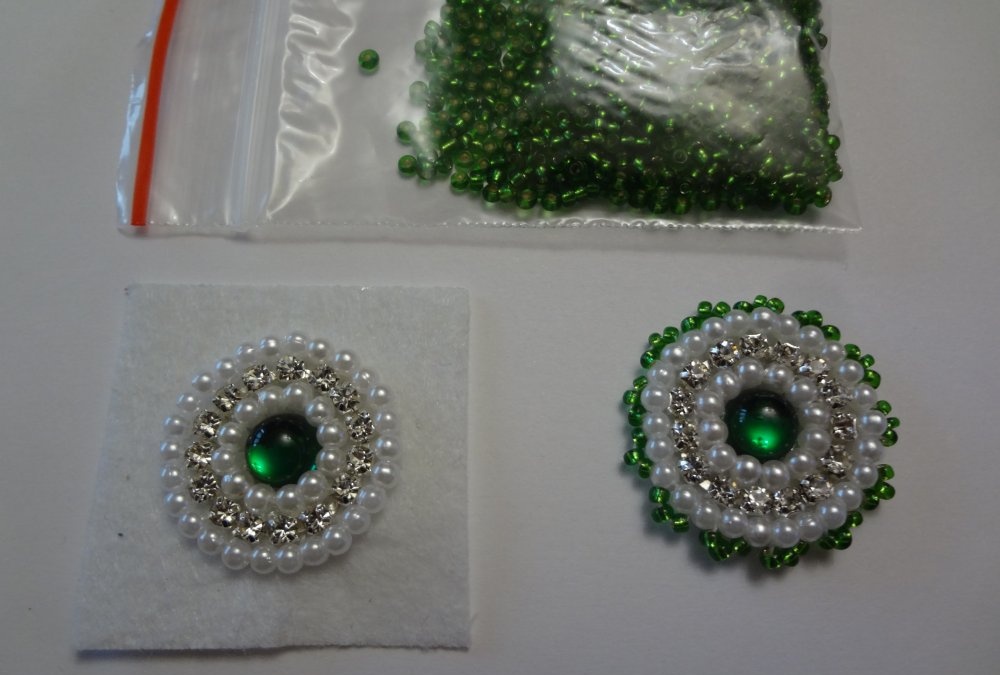
8. If you want to make a chic center, then add another row of white beads around the circumference. Then sew on green beads. Only then trim off the excess felt with nail scissors. In the eighth photo you can see that the first row of beads consists of 12 pieces, the second - of 24 pieces.
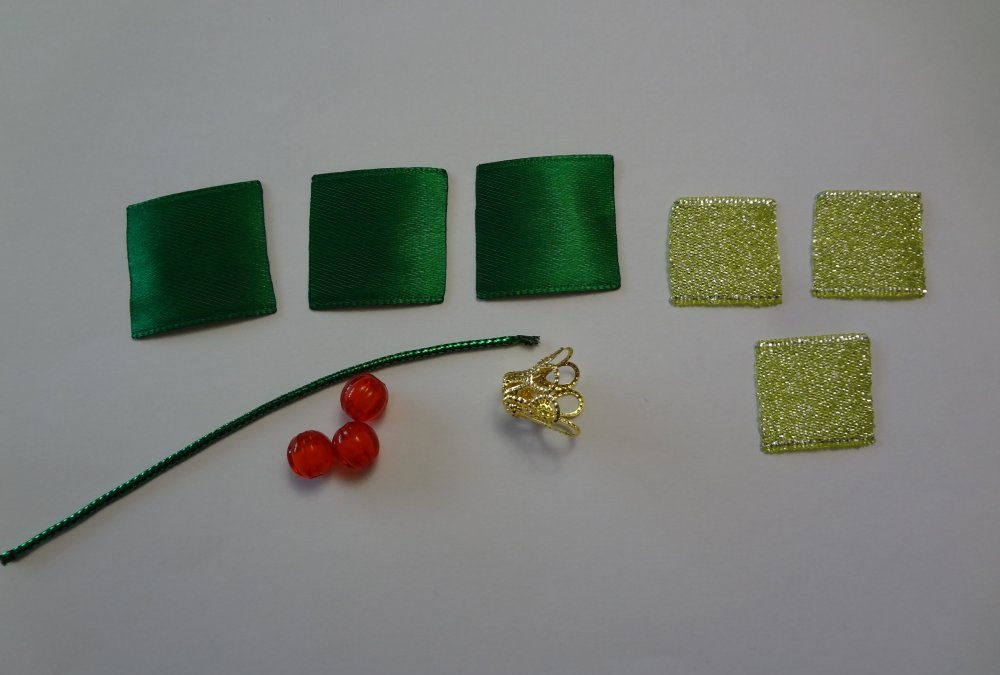
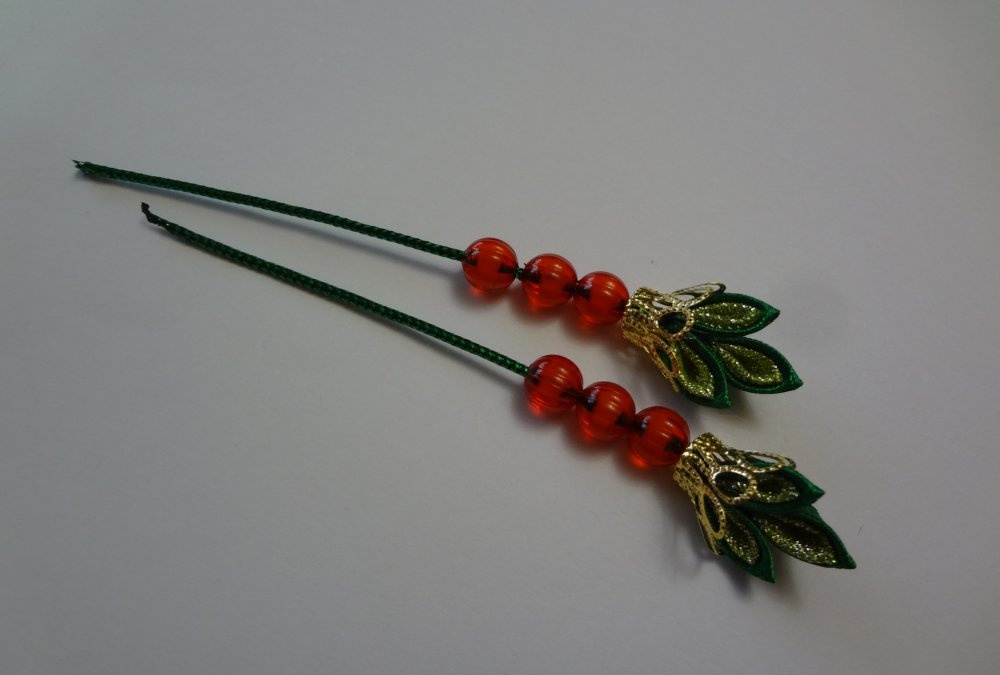
9. Now take care of the brushes, having looked at the ninth photo to see what you need for the job. Prepare square pieces of green satin and brocade, green laces, huggers and beads.
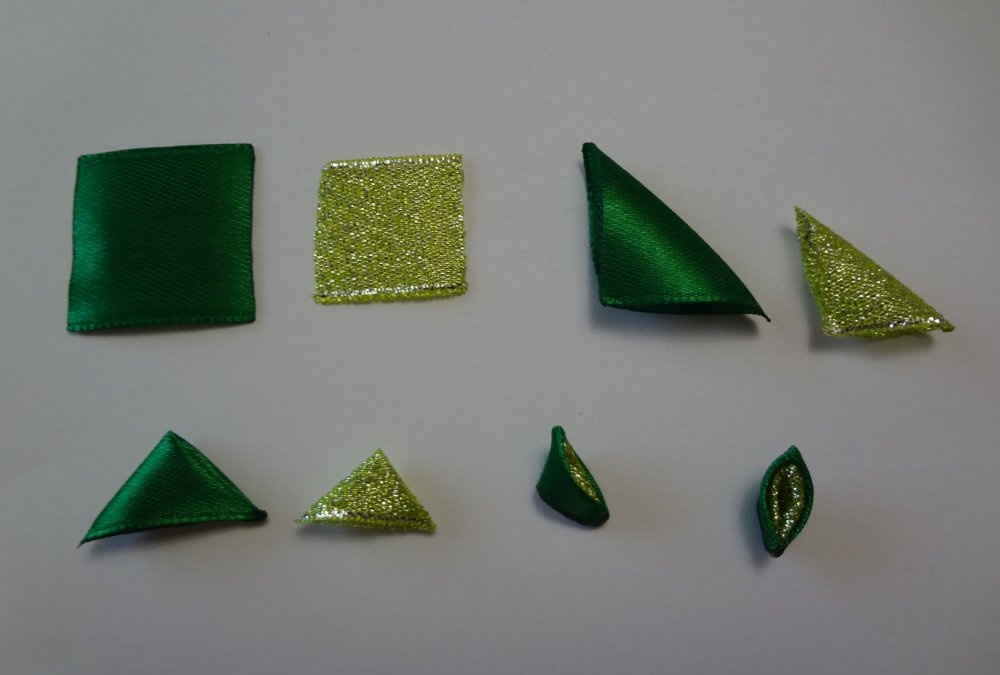
10. Form beautiful sharp petals from pairs of squares kanzashi. The modeling stages are clearly shown in the tenth photo.
11. Make long tassels using laces as a base. In the eleventh photo you can see that the upper edge of the laces should be left free, and on the opposite side, stick 3 sharp double petals, press the resulting bouquets with huggers, and string red beads.
12. Glue the top ends of the laces to the middle of the bow.
13. Glue a shiny homemade center on top.
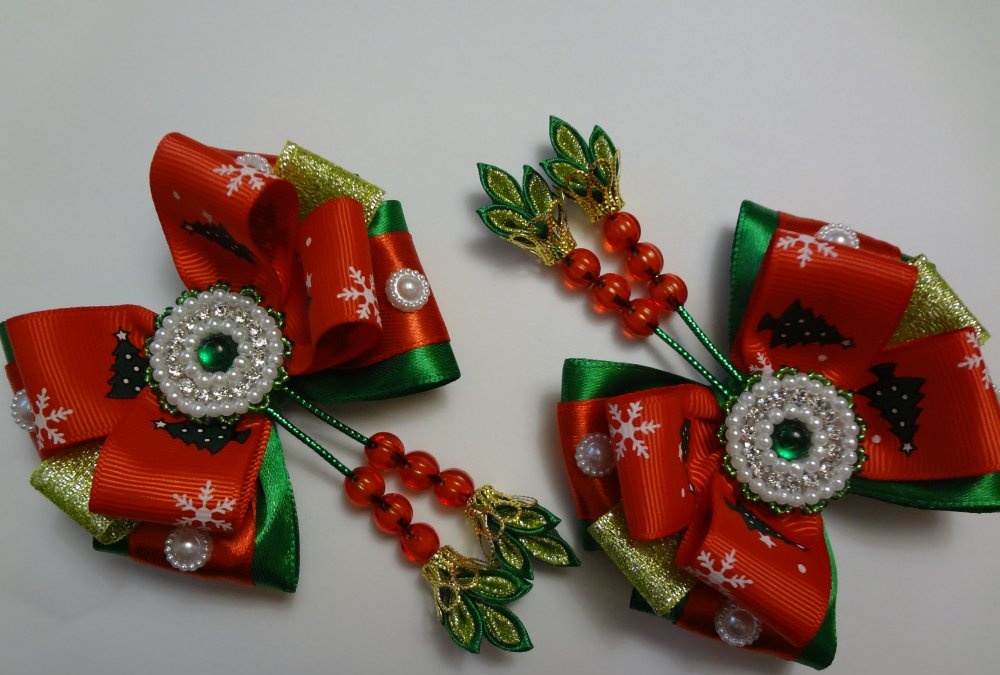
Make a beautiful pair of Christmas bows and glue your chosen base to the back.