Where to start? It's simple: from finding the paper from which you plan to make a flower. You can choose colored paper of any color, or you can simply use white square tear-off sheets.
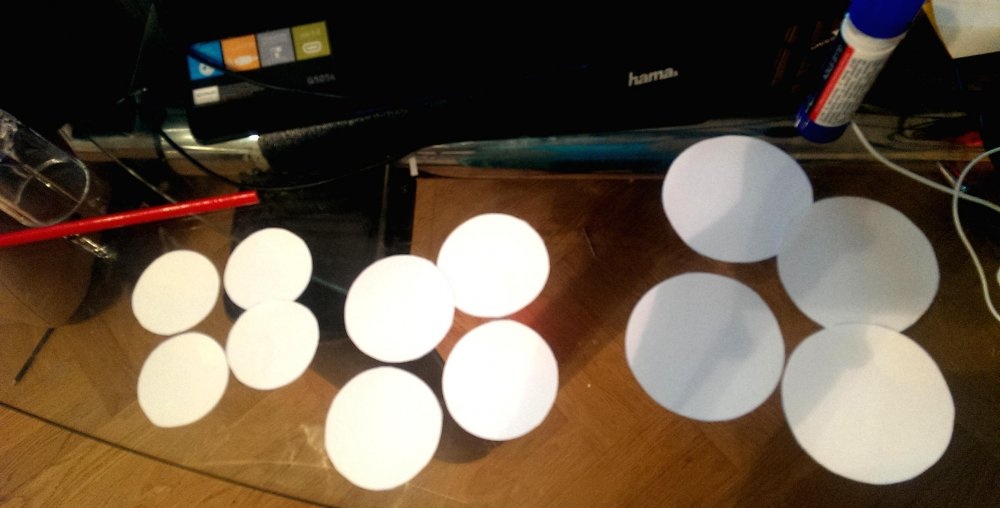
Such sheets will need only 12 pieces. Divide these sheets into 3 groups of 4 each. Then it is necessary to cut out respectively 12 circles of different diameters: 4 pieces of the largest, 4 more pieces of medium size, and the last 4 circles of the smallest diameter.
Determine the size of the circles yourself. It will depend on what size flower you need. In this workshop, paper squares of 7 cm in size were used, so the maximum diameter of the largest circles did not exceed 7 cm, respectively.
It must be clarified that if you decide not to use tear-off square sheets, but a solid sheet of colored or white paper, then you just need to cut 12 circles of different diameters on it: 4 circles of each size.
For cutting circles at home, in the absence of a compass, you can use, for example, mugs of different sizes as a stencil, and even a glass for small circles.
In general, there are many options, most importantly, the result should be such a group of 12 circles:
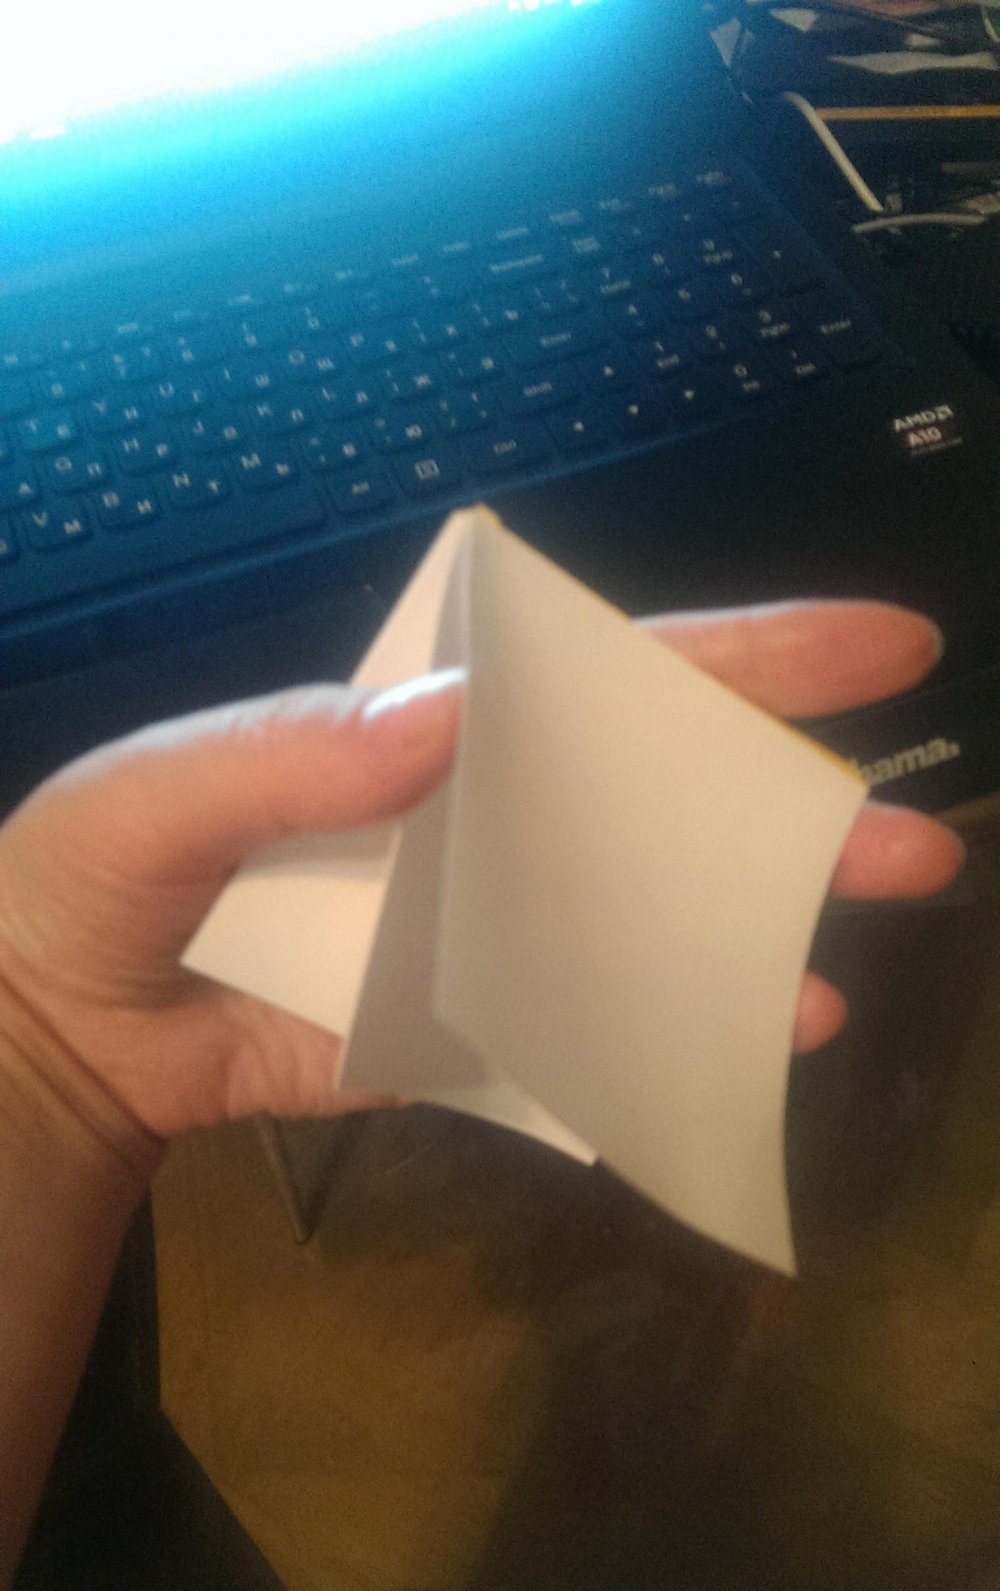
Then it's time to move on to turning these paper circles into flower petals. To do this, each circle must be folded in half.
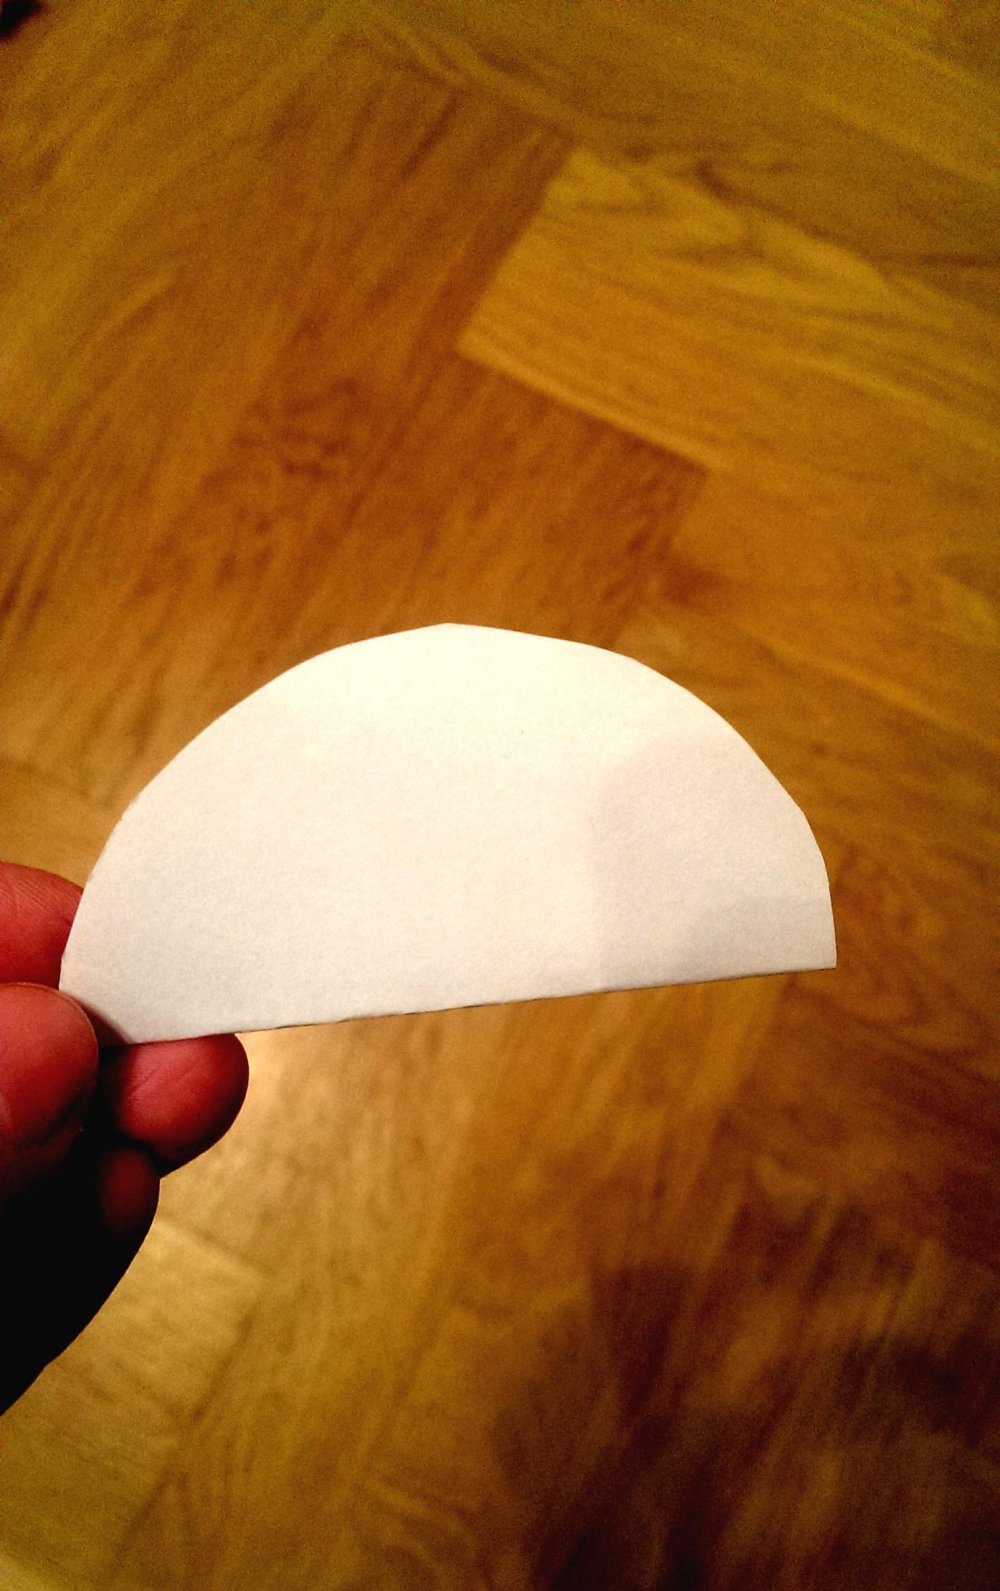
Then again in half:

And again in half:
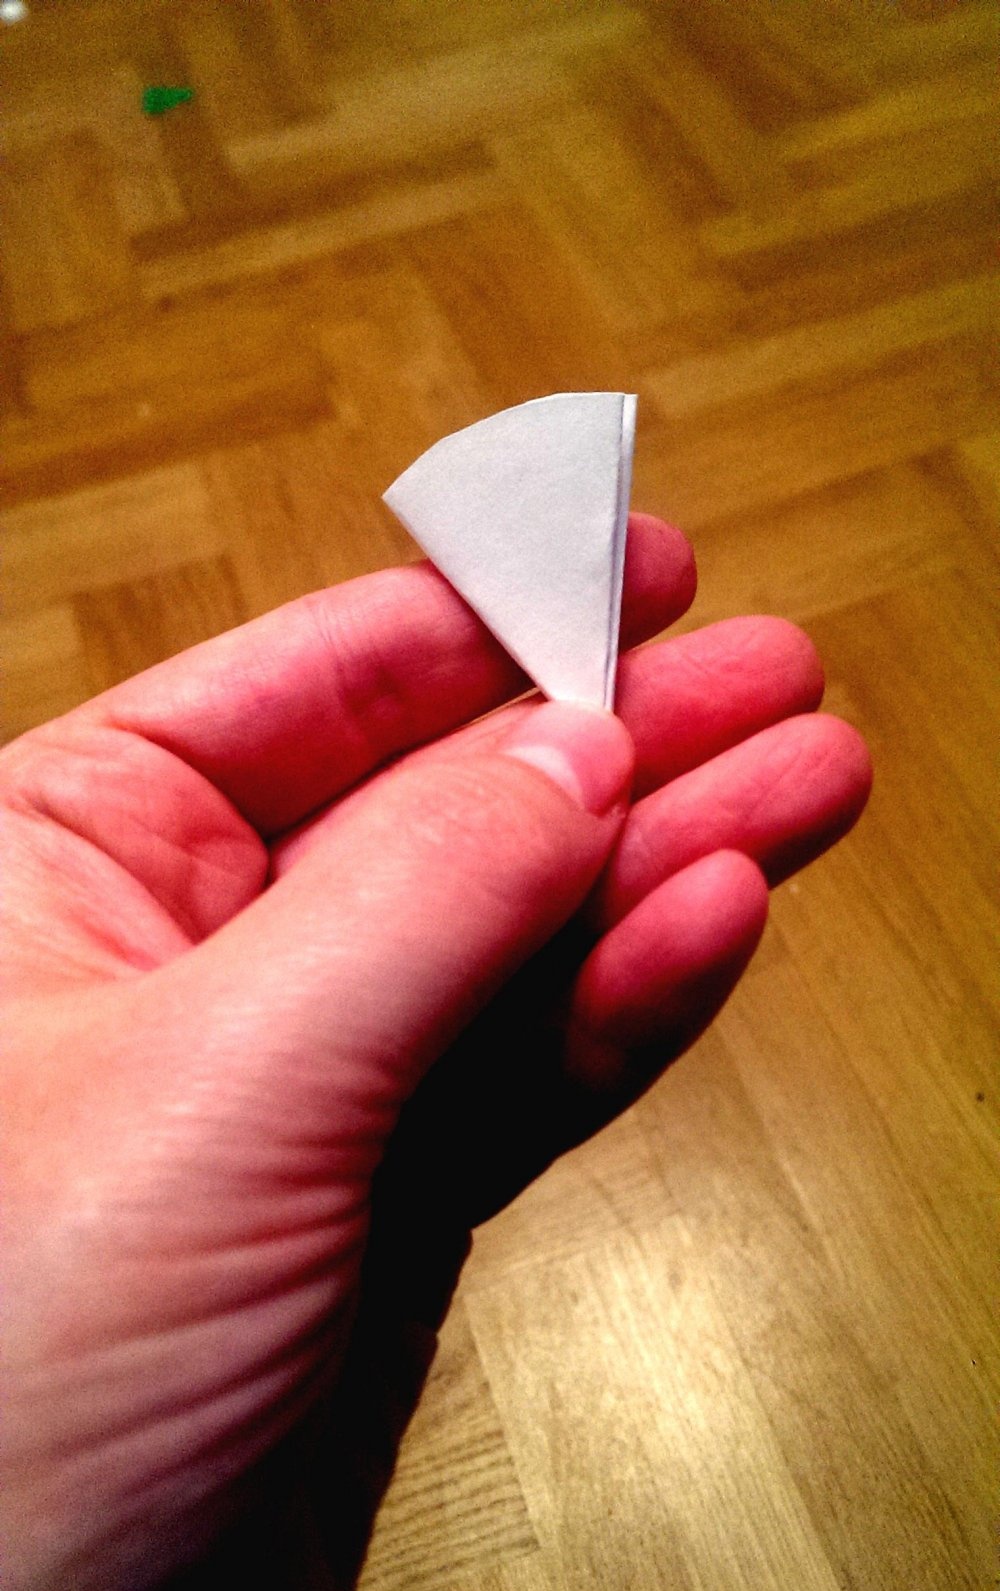
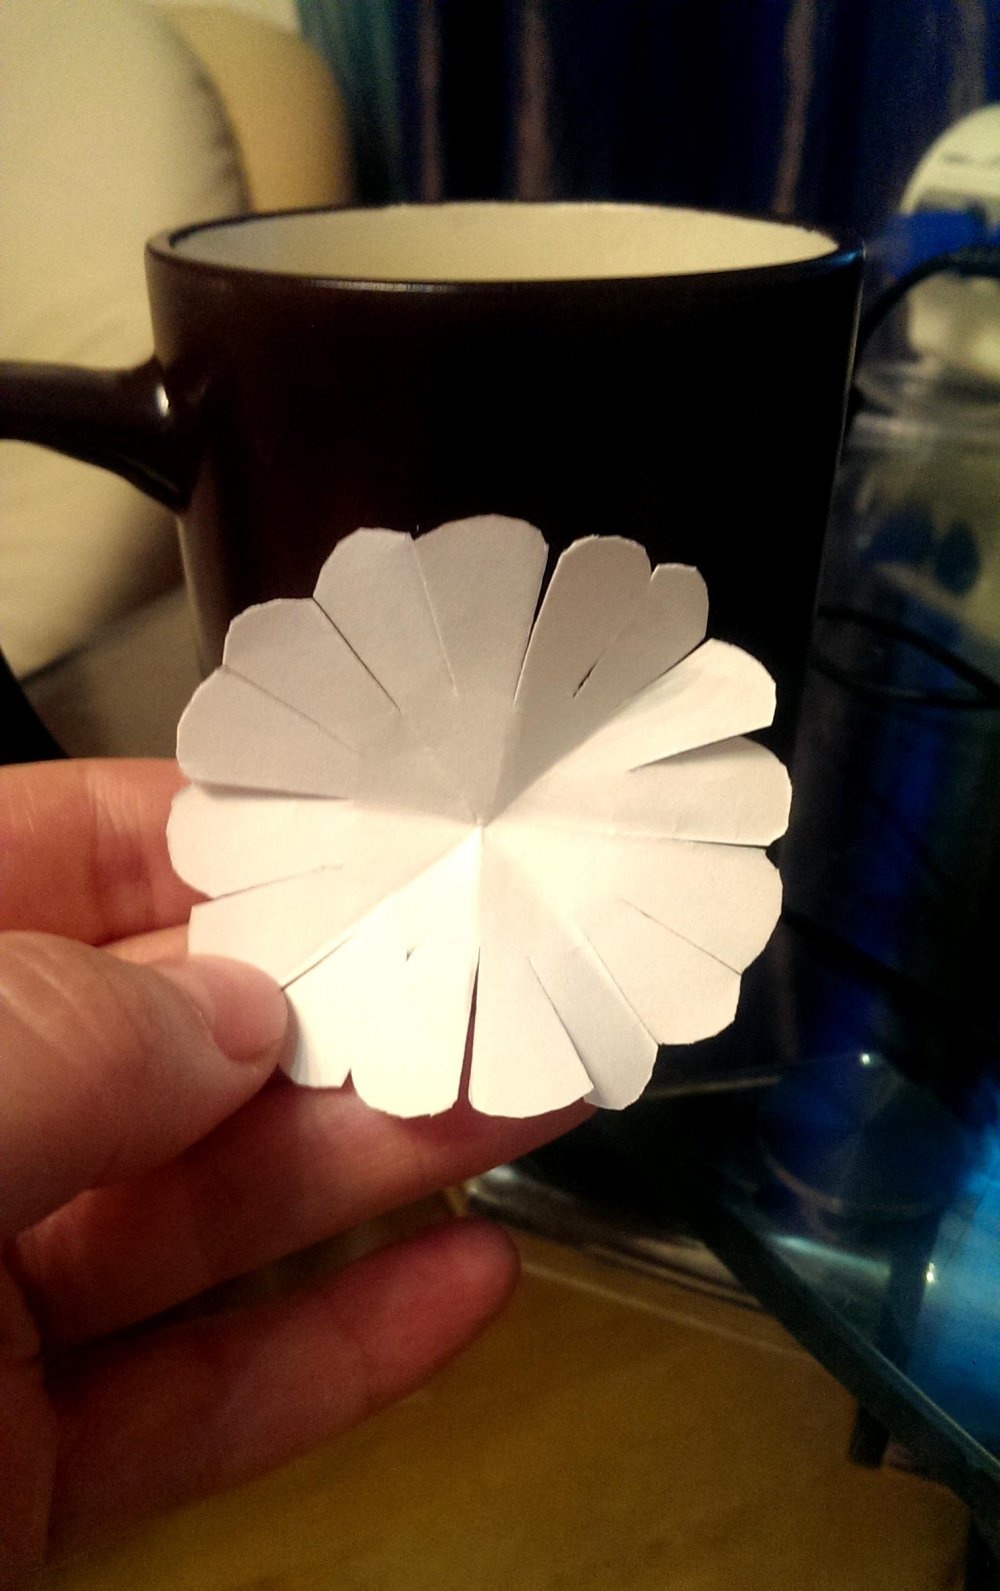
From the resulting piece, you need to cut the petals. To do this, just draw a contour along which you will then cut.

On a cut blank, it is necessary to make a cut almost to the center:
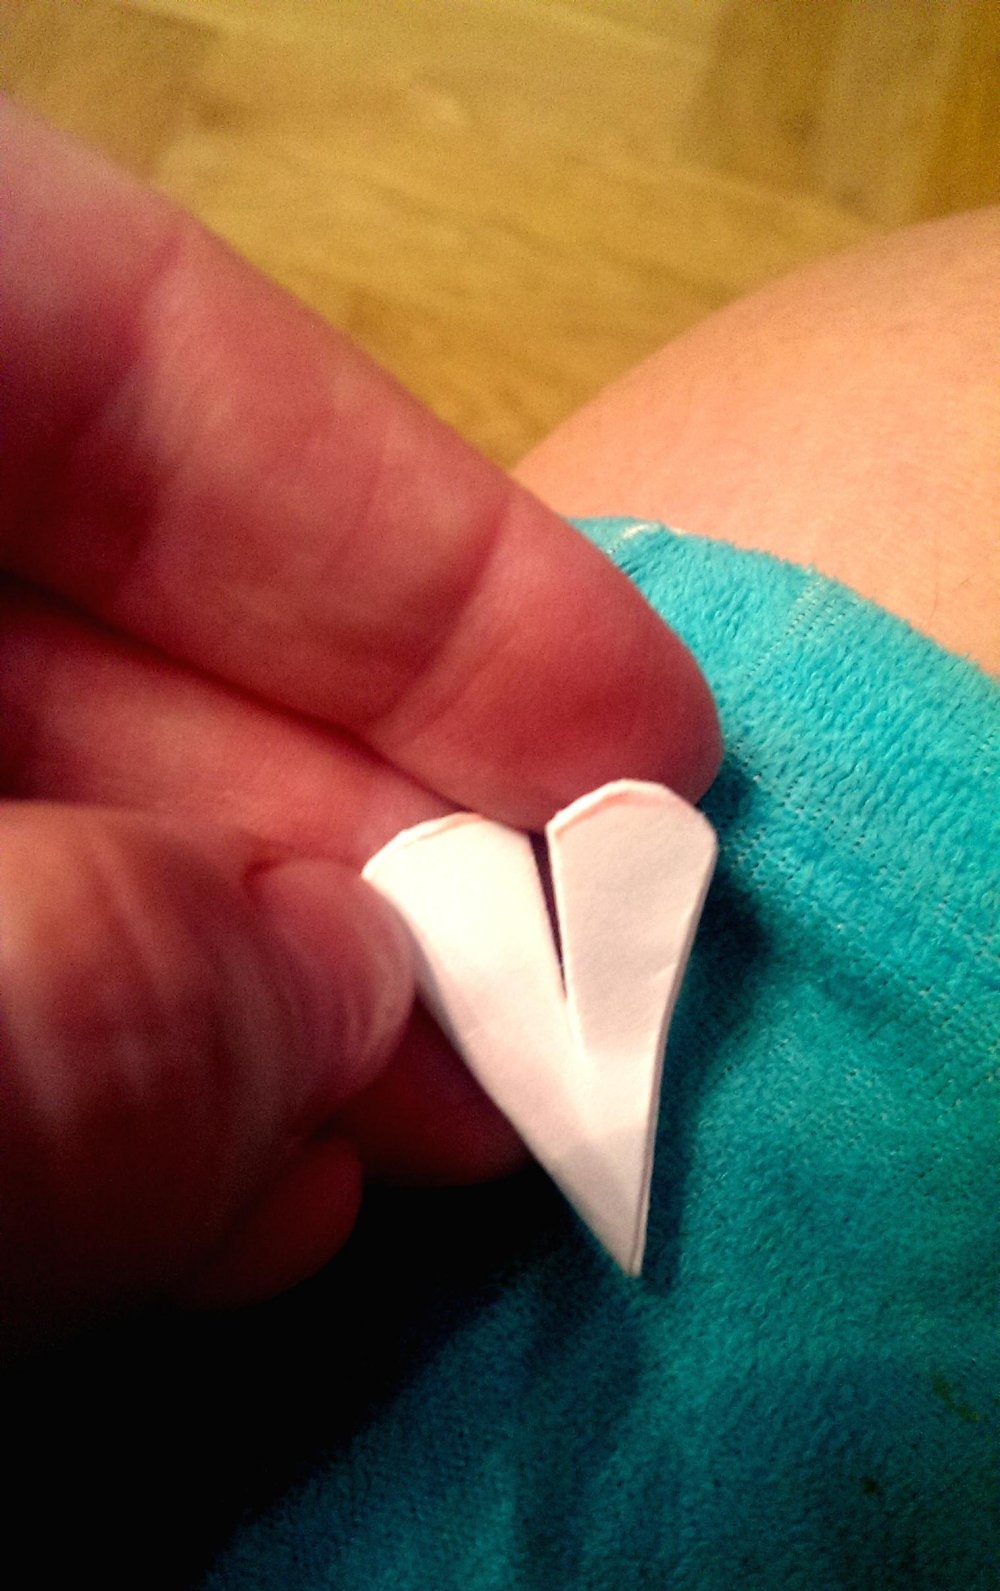
Then the entire workpiece must be deployed, simultaneously making cuts at the junction. The result should be this:
For greater beauty of the flower, you can make the tips of the petals contrasting. Any colored pencil or paint will help. And even a five-year-old child will cope with this task (verified and approved by this master class).

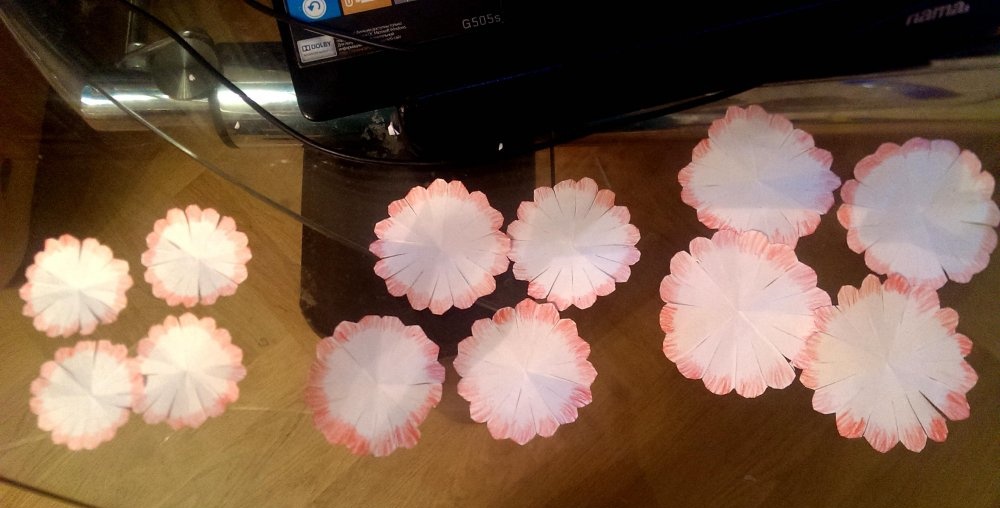
A similar “transformation of a white circle into a beautiful petal” must be repeated with each workpiece of all sizes. The result should be like this:
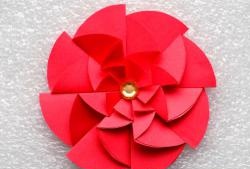
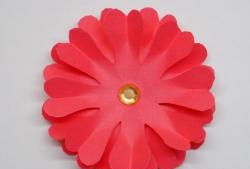
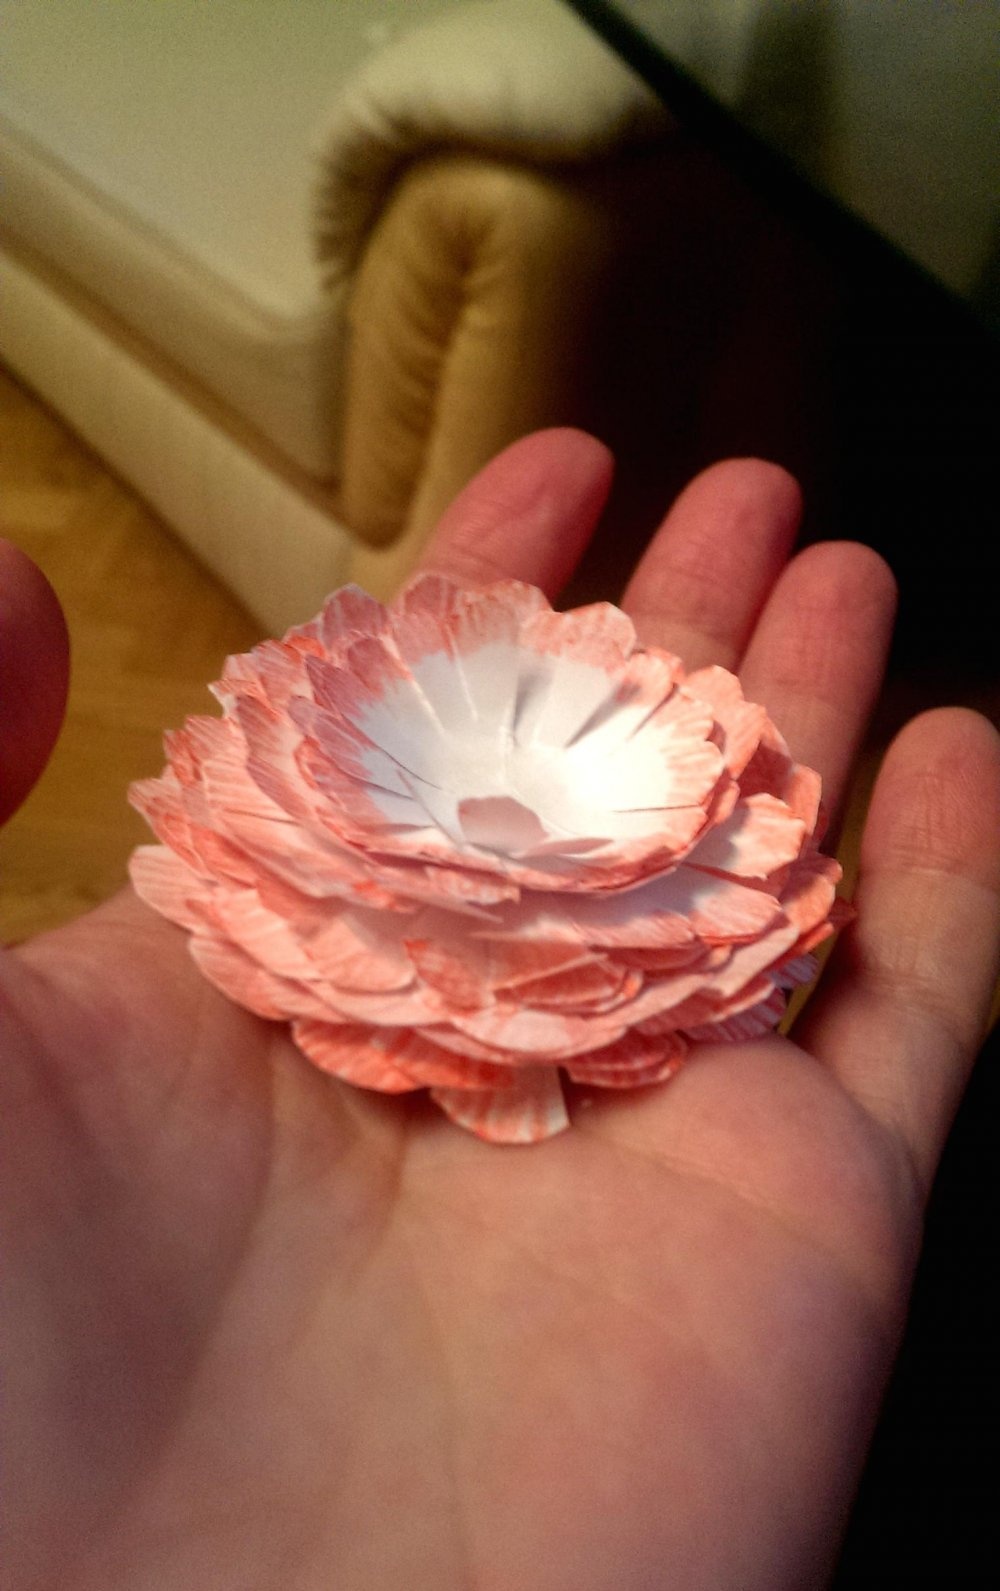
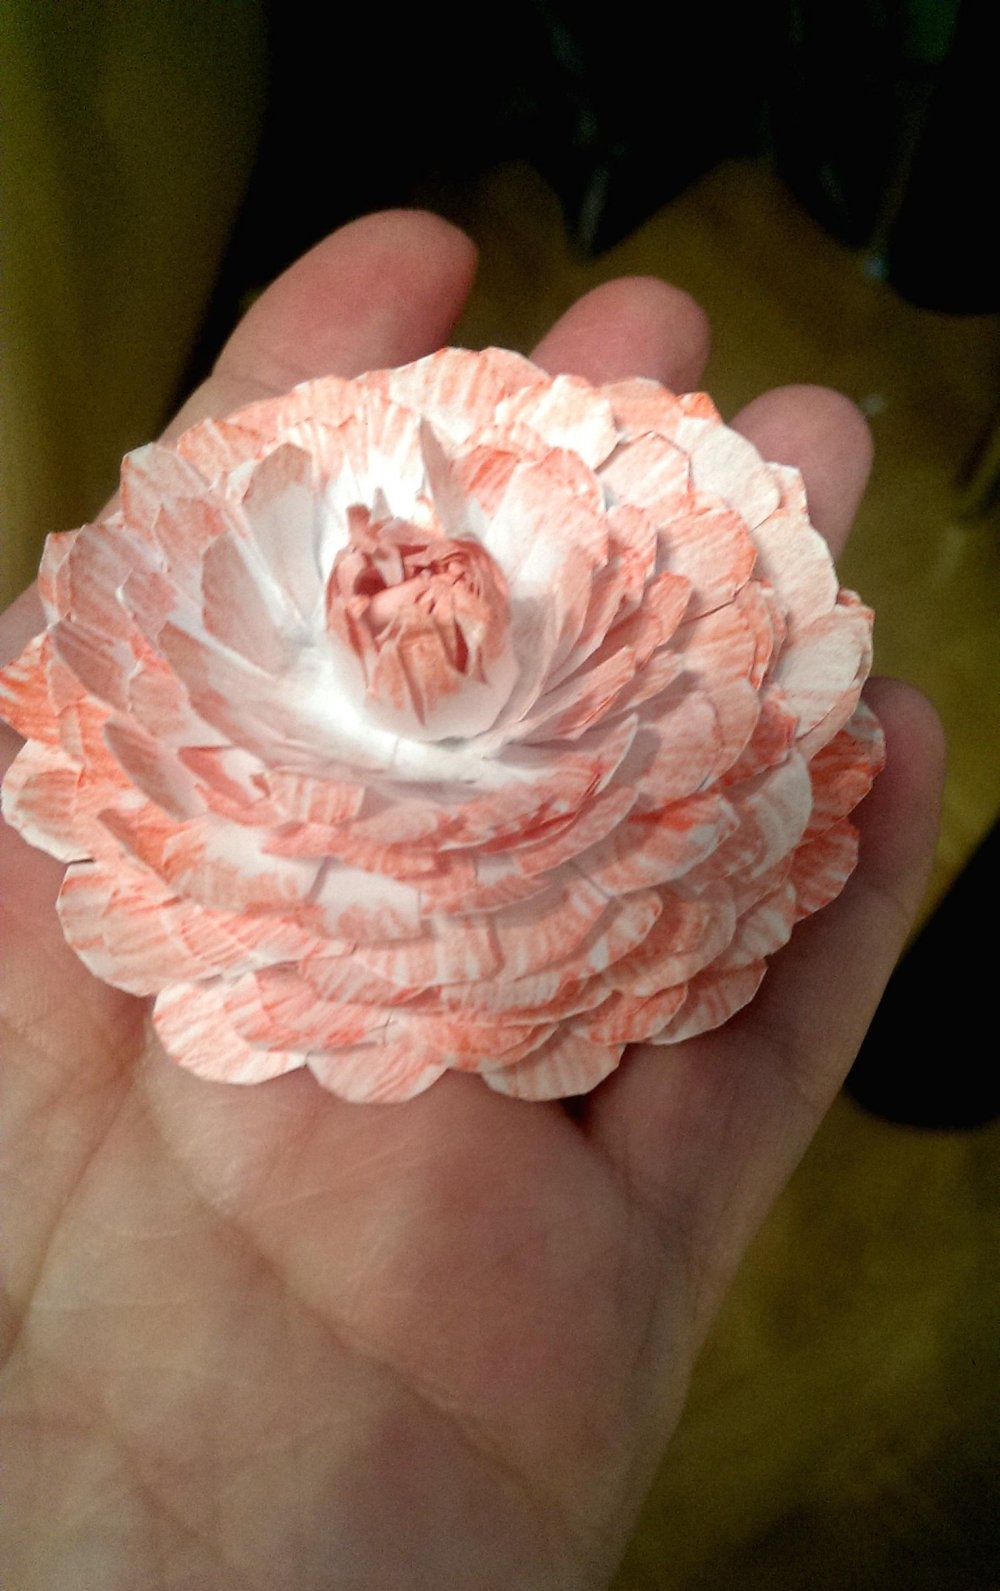
Now you can begin the process of directly assembling the flower. At this stage, everything is simple: you need to glue all the workpieces from larger to smaller. Glue only the central part of the petals.In the end, you get such a "semi-finished product" of 3d chrysanthemum:
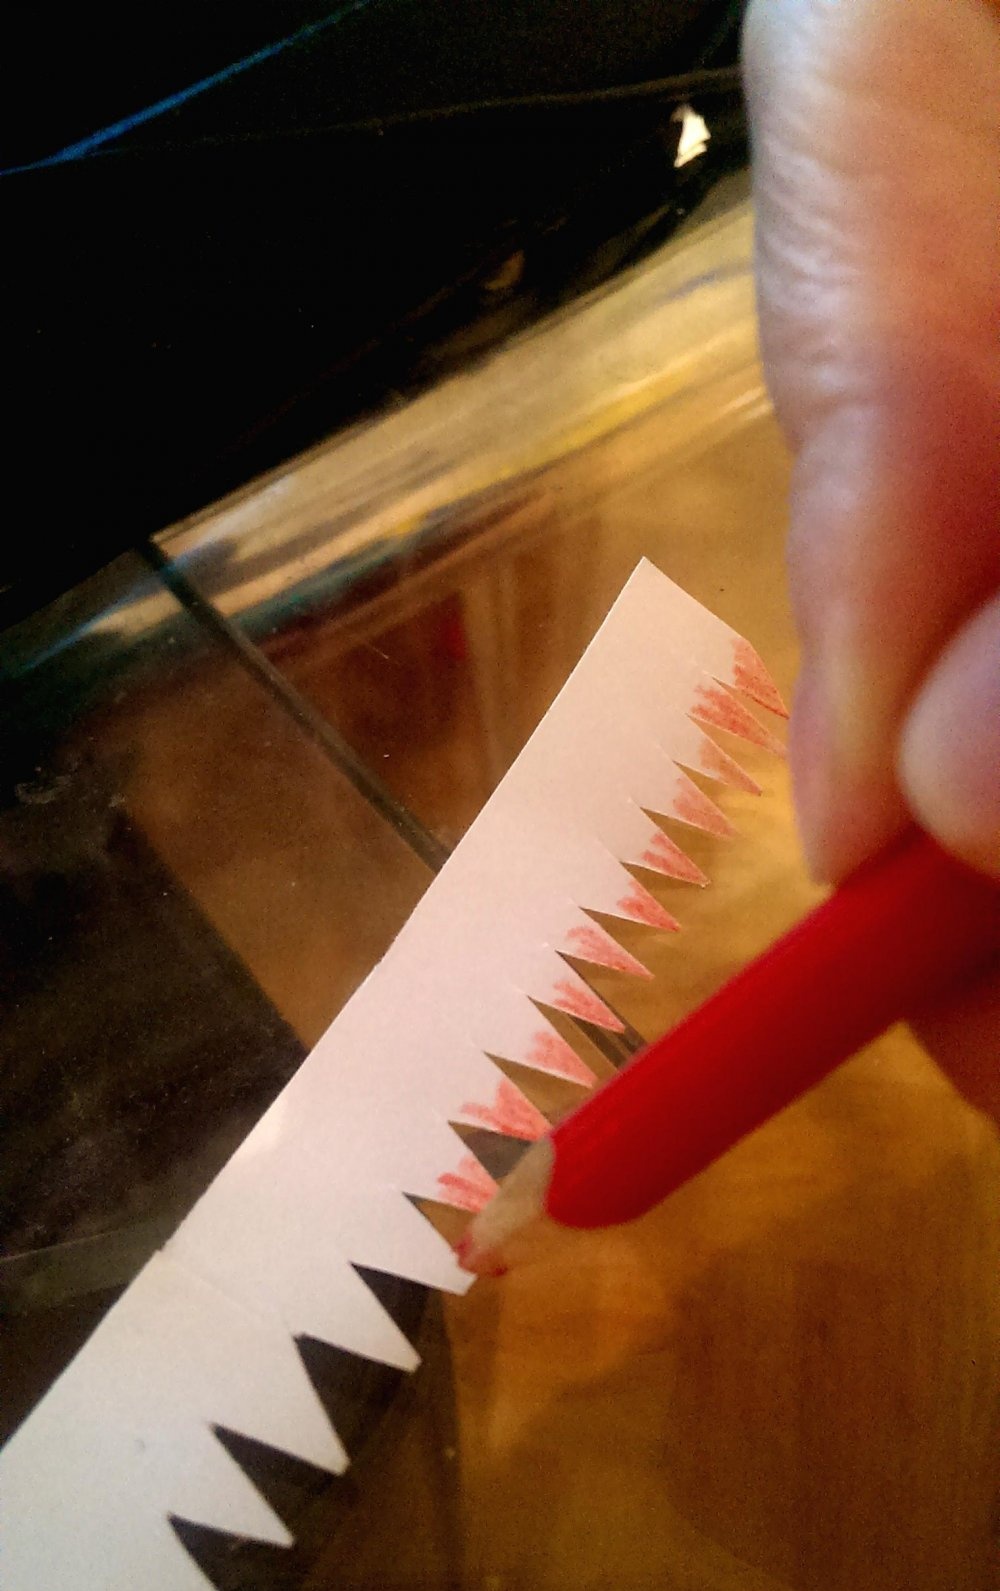
Why is the "semi-finished product"? Because in this chrysanthemum there is not enough core. To make it, you need to take a strip of paper 1-1.5 cm wide and cut a sort of "fence" on one side along the entire length.
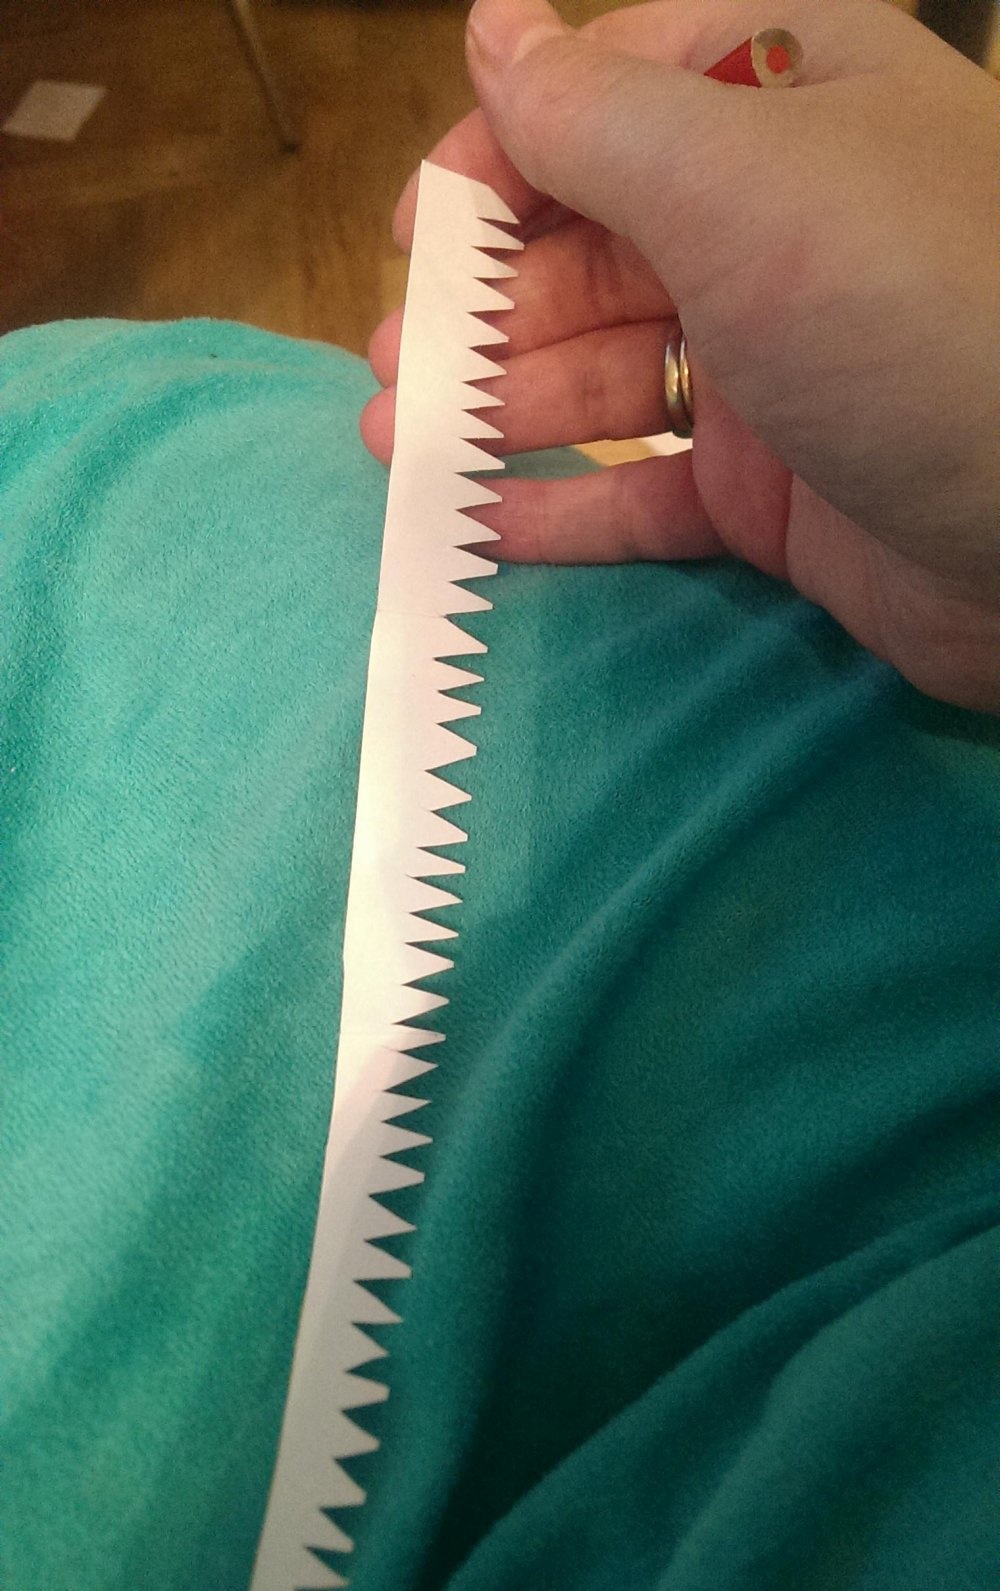
Paint the ends of the “fence” in the same color as the ends of the petals themselves.
Then the ends of the core must be twisted with scissors inward.
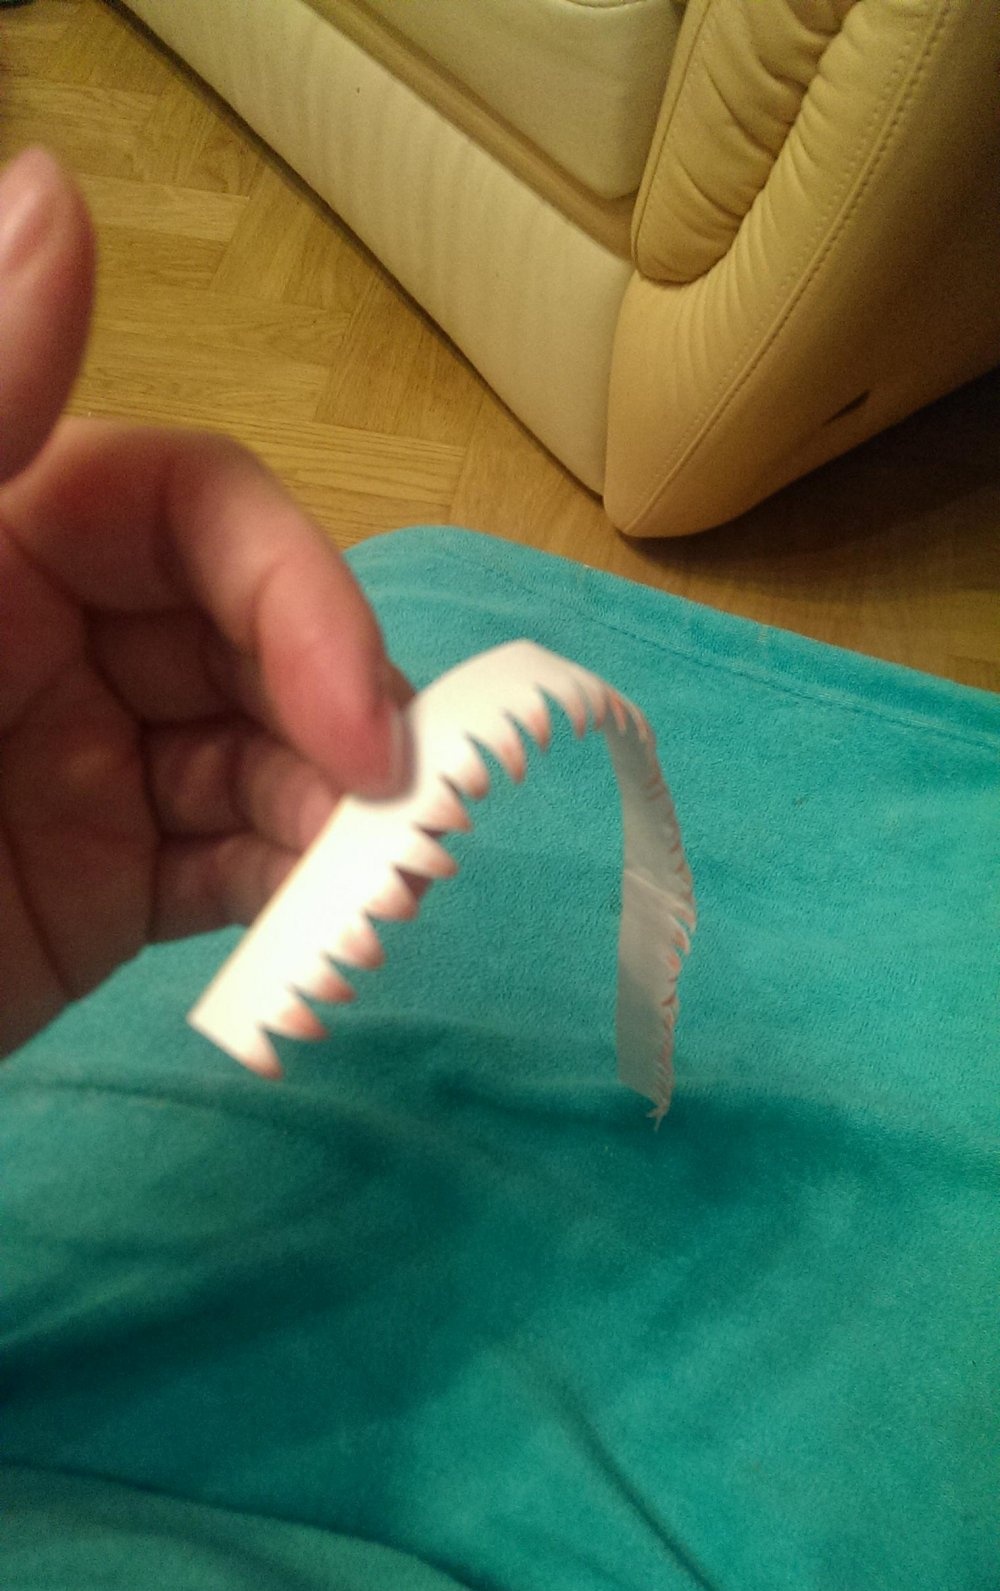
Then twist the whole “fence” with a roller and stick it in the center of the flower. 3D paper chrysanthemum is ready!
All a pleasant creation!