Do it yourself
Life hacks, master classes, useful tips, recipes.
home » Present » Postcards » New Year card with a Christmas tree inside
We all remember very well the magical children's books with three-dimensional images. Why not use this technique when making a New Year's card?
New Year's panorama card with a three-dimensional internal image of a Christmas tree

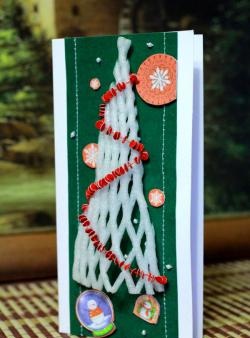
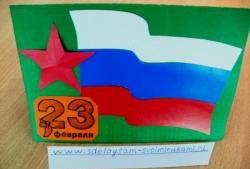
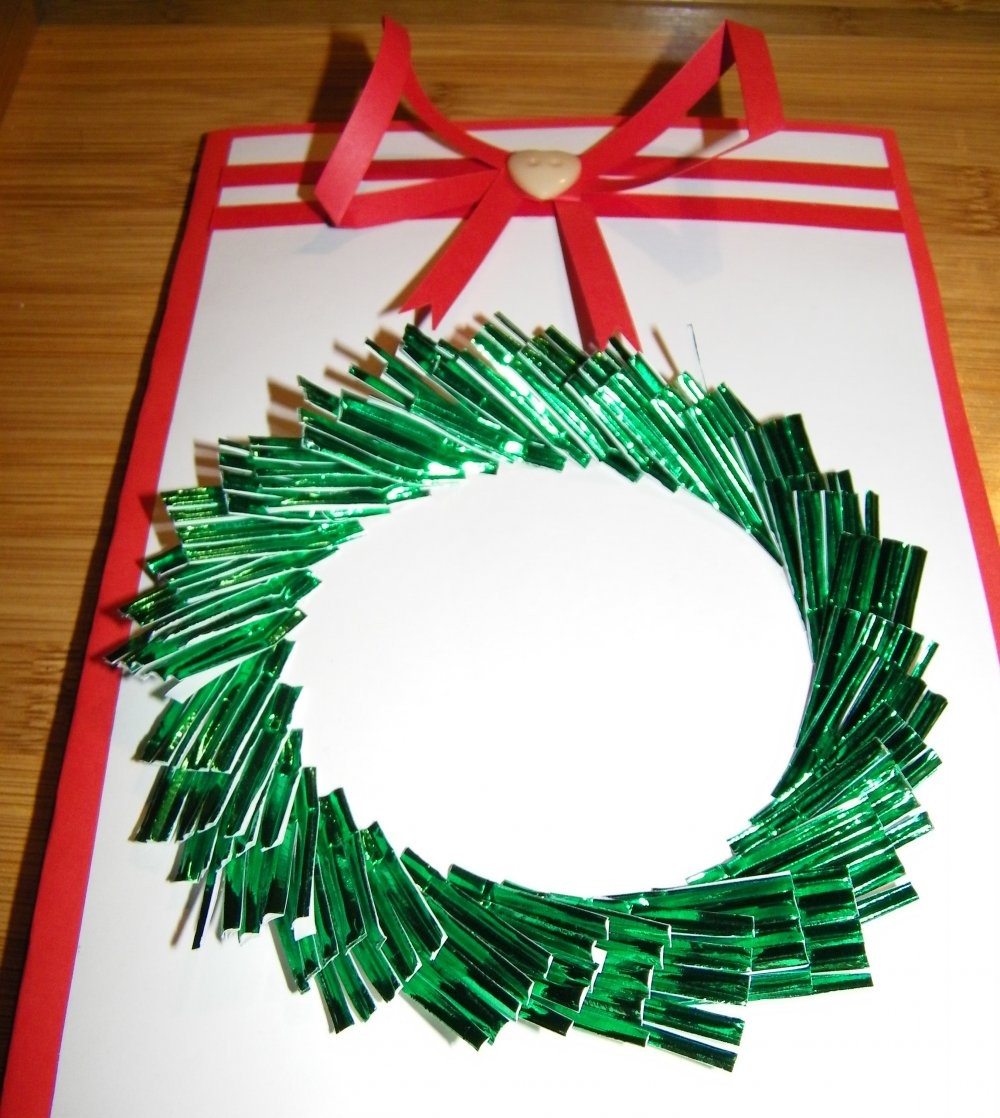
With a little time, simple equipment and some simple techniques, you can get an amazing New Year's panorama card with a three-dimensional internal image of the Christmas tree.
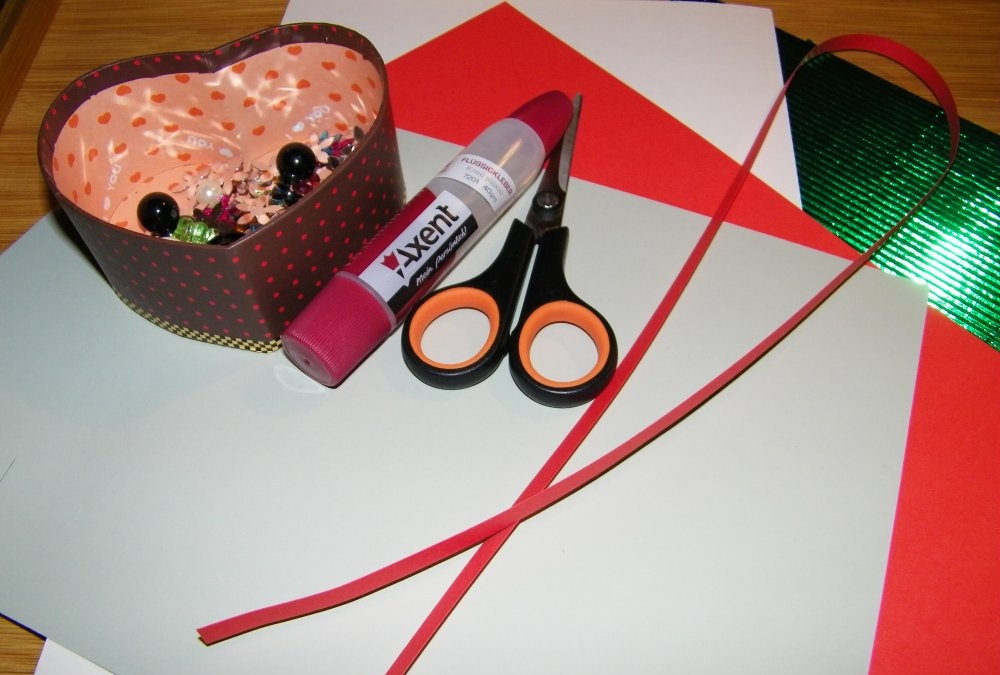
To bring this idea to life, you need to have the following materials on hand: thick double-sided colored cardboard, glossy corrugated cardboard, strips of quilling paper, colored paper, double-sided tape, glue, pencil, ruler, scissors and beautiful decorative little things (half beads, sequins, buttons and etc.).
New Year's panorama card with a three-dimensional internal image of a Christmas tree

Creating a New Year's panorama card with a three-dimensional internal image of a Christmas tree takes place in three main stages: making the base, decorating the interior, and decorating the exterior.

Making the base


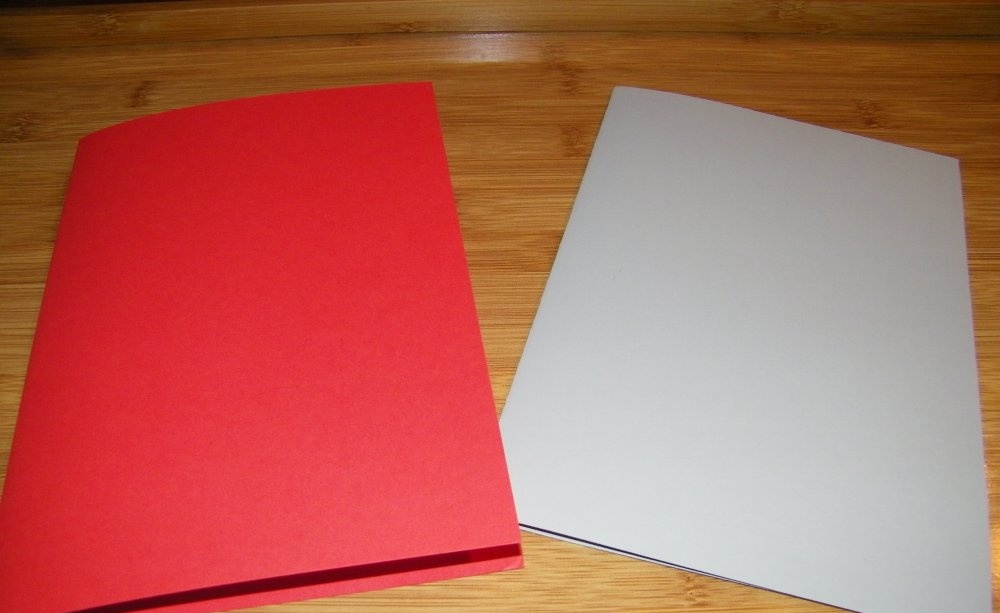
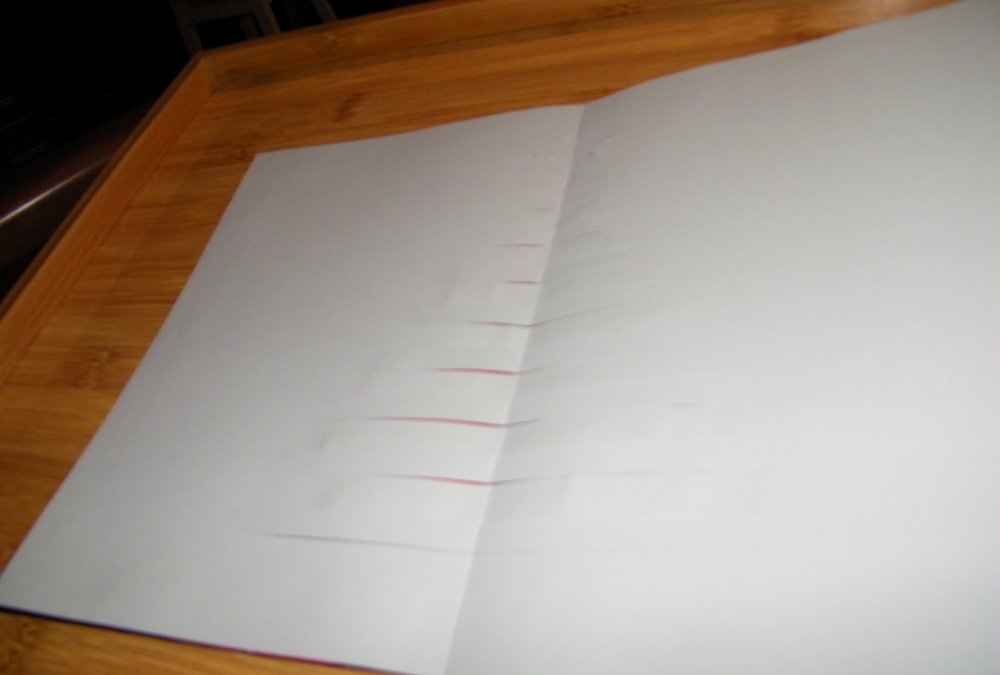
The basis of a three-dimensional New Year's card will consist of two A-4 format parts - double-sided colored cardboard in a bright (preferably red) shade and a sheet of light gray colored paper. Both parts must be carefully folded in half.
New Year's panorama card with a three-dimensional internal image of a Christmas tree

Interior decoration


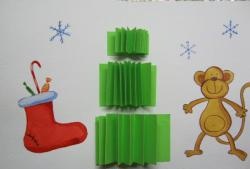
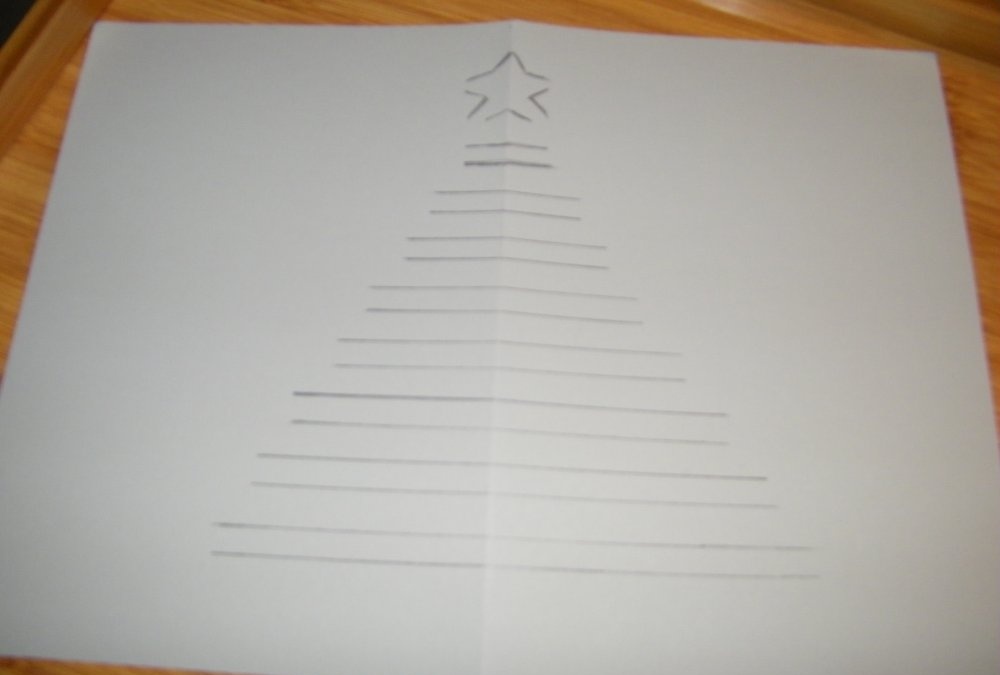
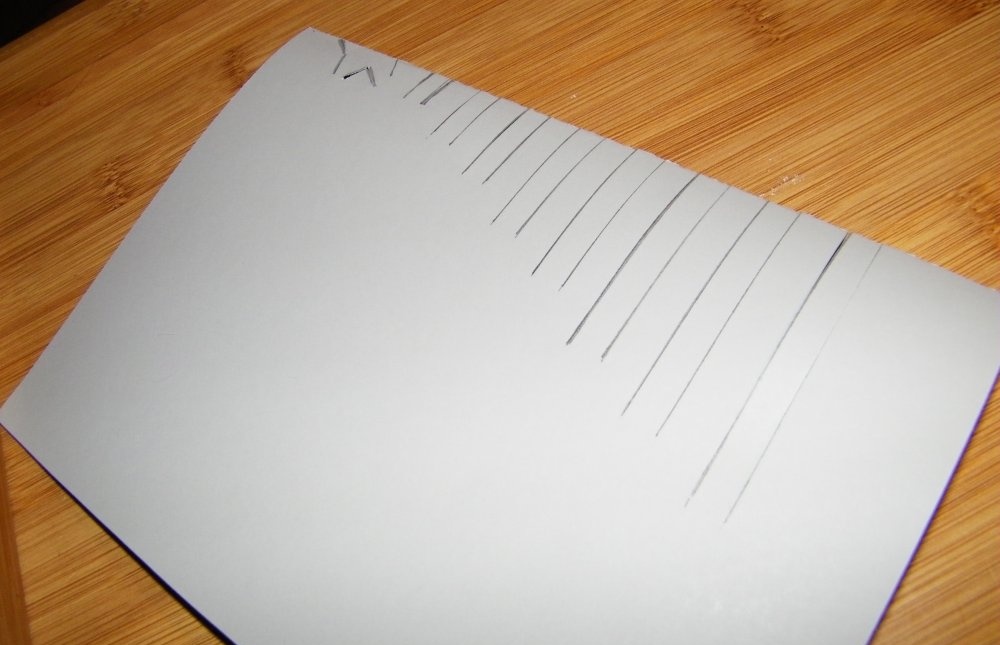
The highlight of this New Year's card is the voluminous inner tree, which is very easy to make. On the “wrong” part of a sheet of colored paper we apply the image of a star and transverse stripes of different widths, forming an isosceles triangle. Then we fold the part in half and make cuts along the lines.
New Year's panorama card with a three-dimensional internal image of a Christmas tree

New Year's panorama card with a three-dimensional internal image of a Christmas tree

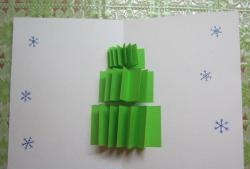
Now the two base parts can be carefully glued together by applying glue around the perimeter of the parts. As for the Christmas tree, glue should be applied to every other strip.
New Year's panorama card with a three-dimensional internal image of a Christmas tree

New Year's panorama card with a three-dimensional internal image of a Christmas tree

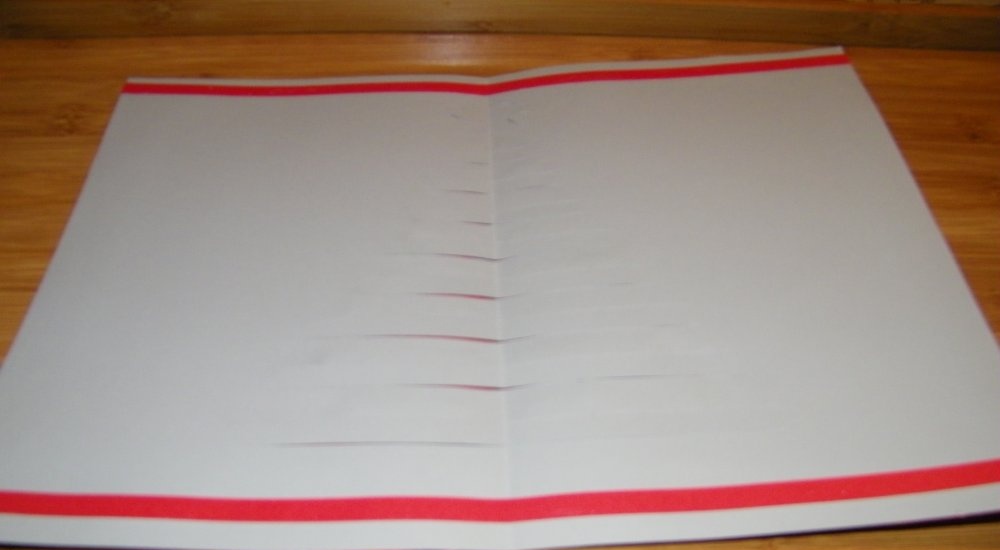
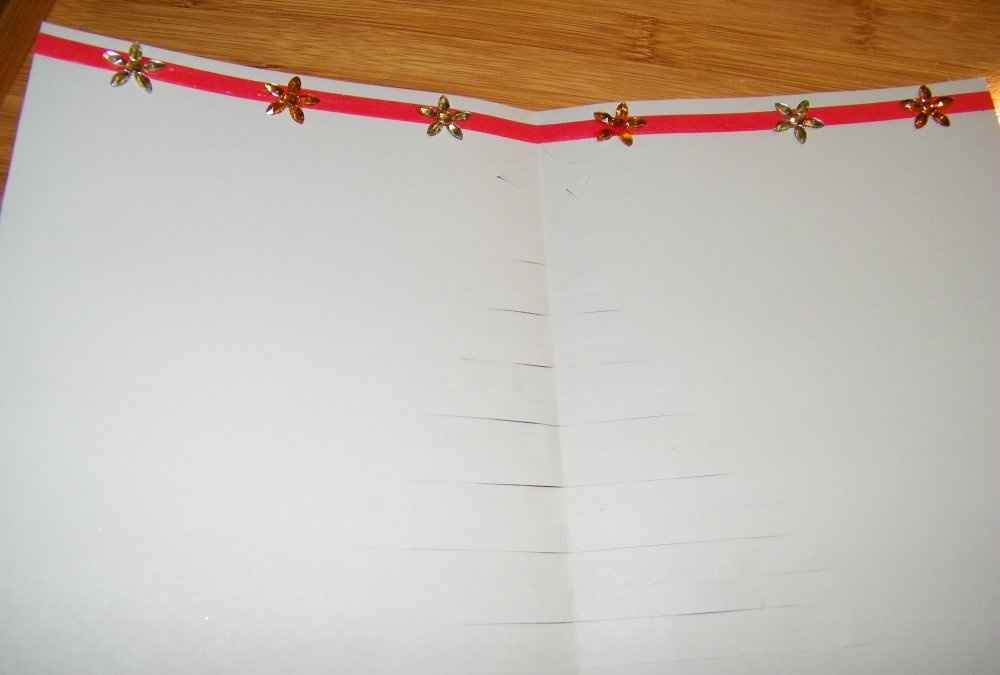
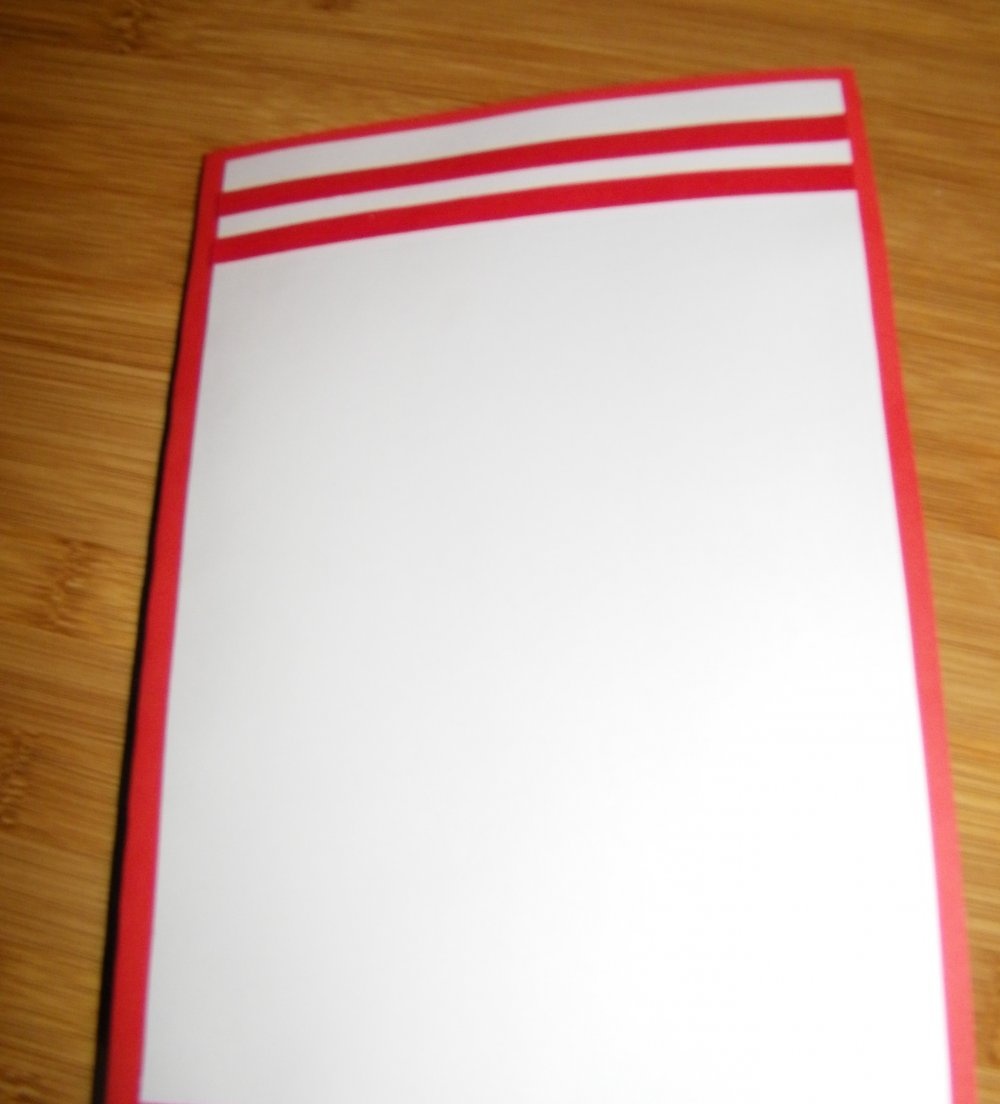
At the top and bottom inside the card, parallelly glue two strips of quilling paper of the same shade as the outer part of the product. We decorate the top strip with decorative elements of our own choosing.
New Year's panorama card with a three-dimensional internal image of a Christmas tree

New Year's panorama card with a three-dimensional internal image of a Christmas tree

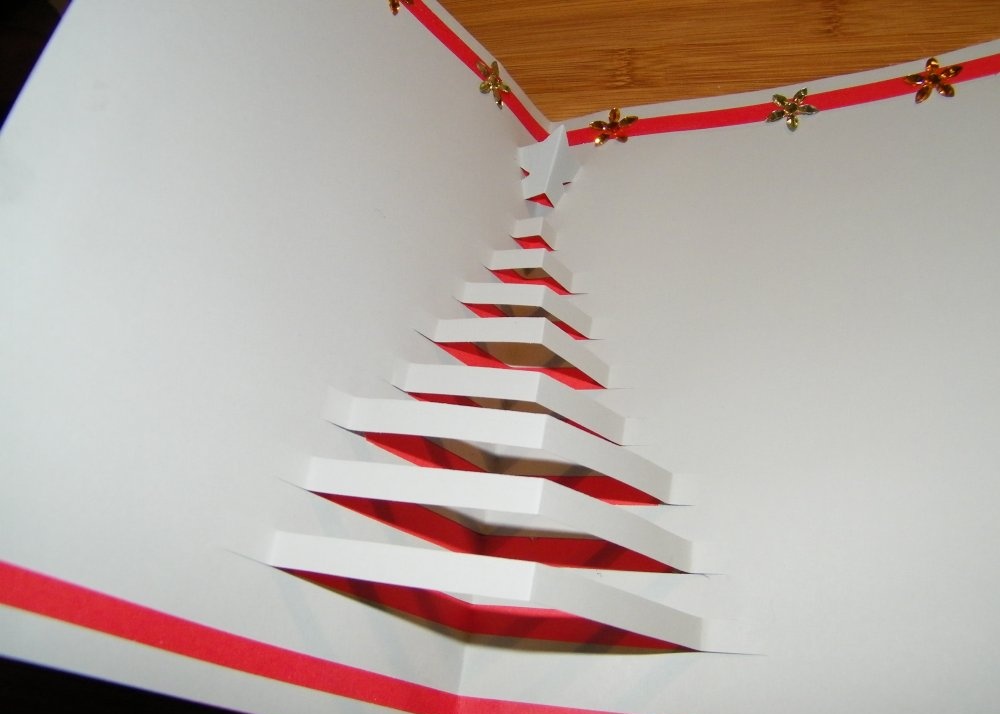
Now all that remains is to carefully peel back the non-glued elements of the tree, which will stand out very favorably, contrasting with the bright outer layer of the card.
New Year's panorama card with a three-dimensional internal image of a Christmas tree

Exterior decoration


To decorate the outer part of the postcard, you will need a rectangle of white cardboard, 1.5 centimeters shorter and narrower than the outer part. First we glue it, and then we glue two strips of red quilling paper to its top.
New Year's panorama card with a three-dimensional internal image of a Christmas tree

New Year's panorama card with a three-dimensional internal image of a Christmas tree

New Year's panorama card with a three-dimensional internal image of a Christmas tree

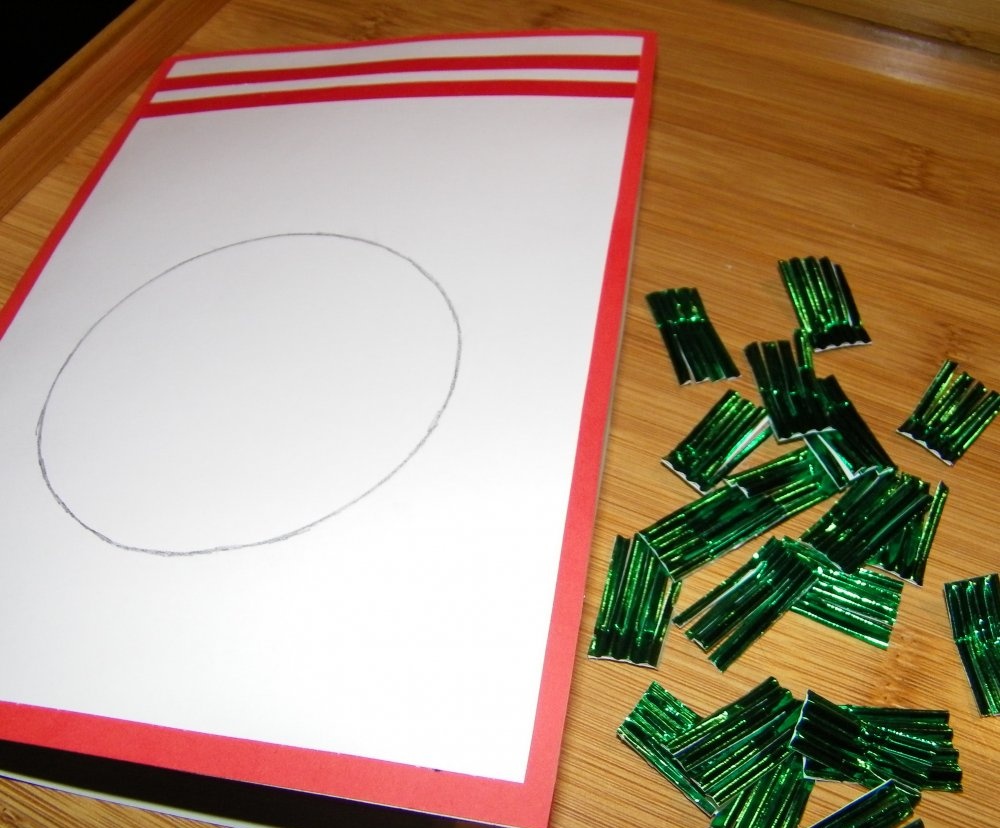
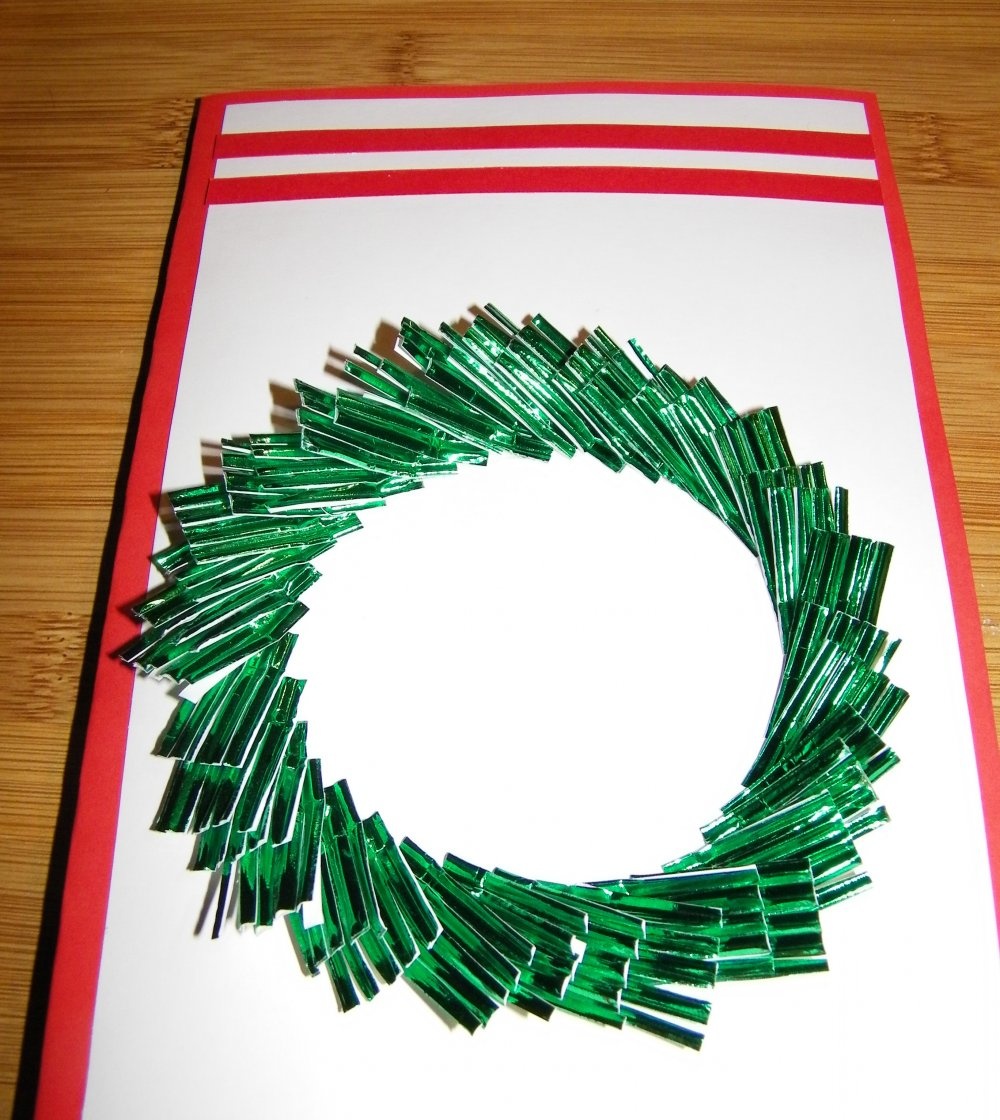
In the middle of the white rectangle, using a compass or an appropriately shaped object at hand, draw a circle and cover it with double-sided tape around the perimeter. We cut glossy green corrugated cardboard into small rectangles (approximately 1x1.5 cm), which we glue in the shape of a circle. The result is a wonderful New Year's wreath.
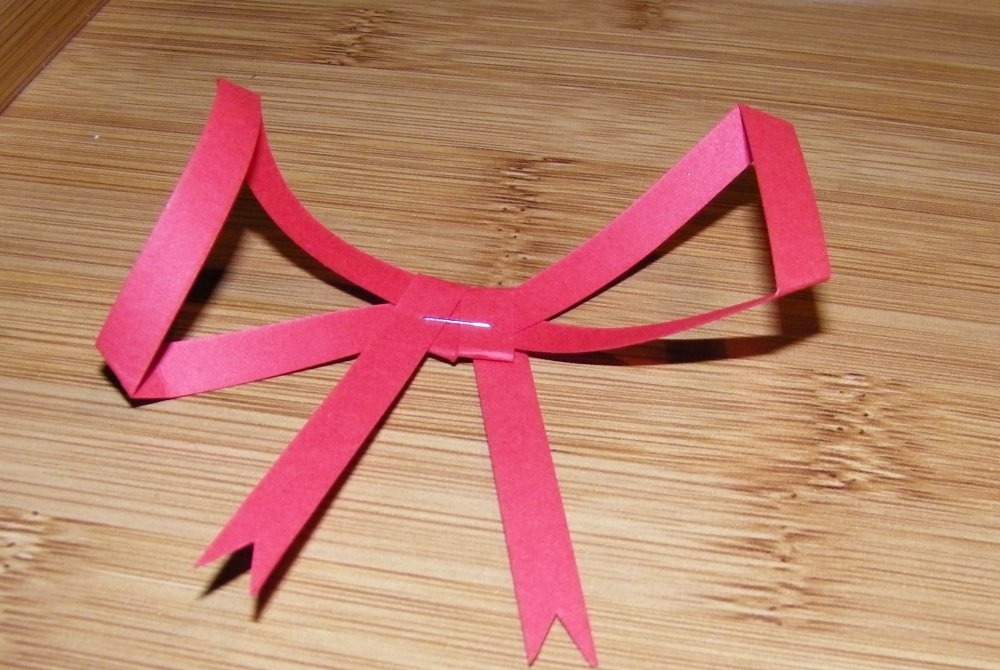
The final touch is a flirty bow between strips of quilling paper, topped with a decorative bead or button. That's all - the postcard is ready.
New Year's panorama card with a three-dimensional internal image of a Christmas tree

New Year's panorama card with a three-dimensional internal image of a Christmas tree
Comment
  • bowtiesmilelaughingblushsmileyrelaxed relaxedsmirk
    heart_eyeskissing_heartkissing_closed_eyesflushedrelievedsatisfiedgrin
    winkstuck_out_tongue_winking_eyestuck_out_tongue_closed_eyesgrinningkissingstuck_out_tonguesleeping
    worriedfrowninganguishedopen_mouthgrimacingconfusedhushed
    expressionlessunamusedsweat_smilesweatdisappointed_relievedwearypassive
    disappointedconfoundedfearfulcold_sweatperseverecrysob
    joyastonishedscreamtired_faceangryragetriumph
    sleepyyummasksunglassesdizzy_faceimpsmiling_imp
    neutral_faceno_mouthinnocent
5+two=
Comments (0)

Do it yourself - crafts and master classes | Page 22

Electric guitar made from a shovel | Do it yourself

How to make a floor mirror with your own hands

How to give an old screwdriver new functions

«Do it yourself - with your own hands» - a site of interesting homemade products made from scrap materials and items at home. Step-by-step master classes with photos and descriptions, technologies, life hacks - everything a real master or just a craftsman needs for needlework. Crafts of any complexity, a large selection of directions and ideas for creativity.

We recommend reading

Washing machine error codes