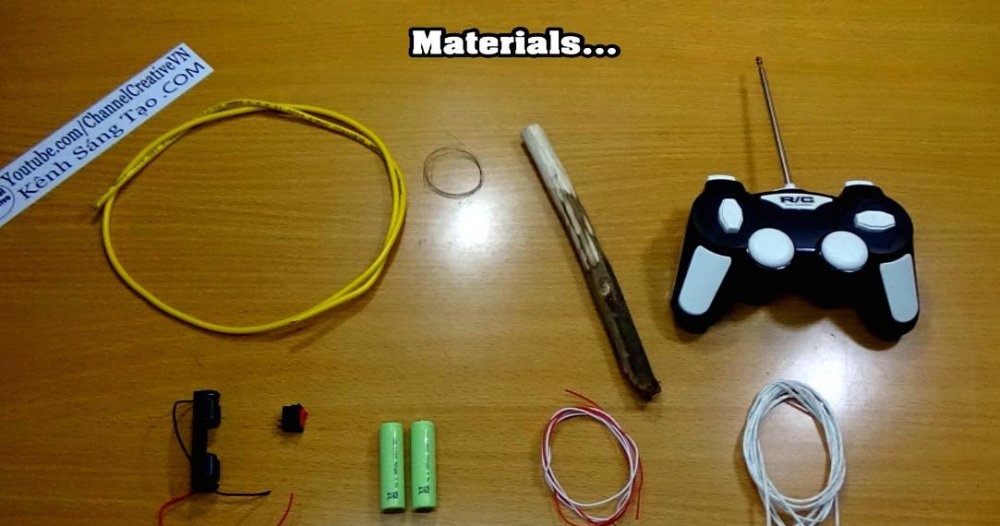
And so, what will be needed to make a mini soldering iron?
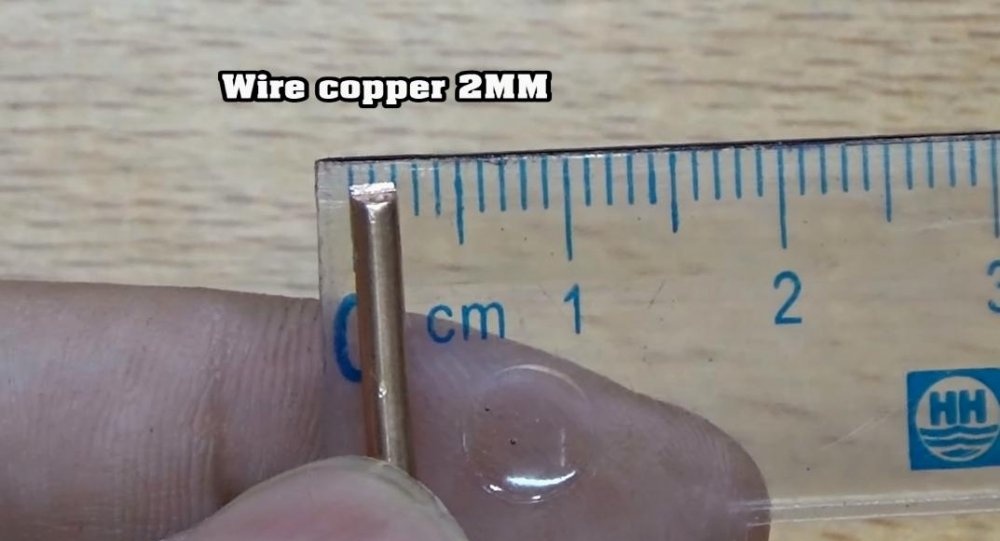
- Single core wire with a core diameter of 2 mm.
- A piece of telescopic antenna.
- Nichrome, 0.2 mm wire. 10 cm long.
- Reinforced fiberglass cambric.
- 3.7V battery
- Battery compartment for this battery.
- A piece of round piece of wood.
- Switch.
- Thin single-core wire 0.3-06, diameter (multi-core can be dissolved).
Making a mini soldering iron
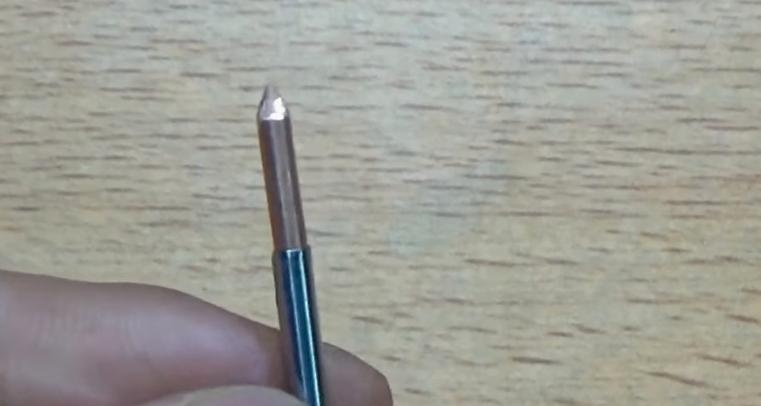
Take a thick single-core wire with a diameter of 2 mm section. Remove insulation with a chancellor’s knife or other means.
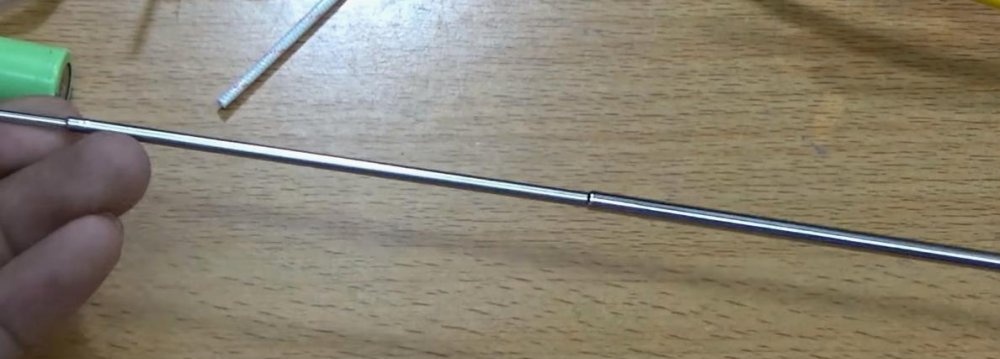
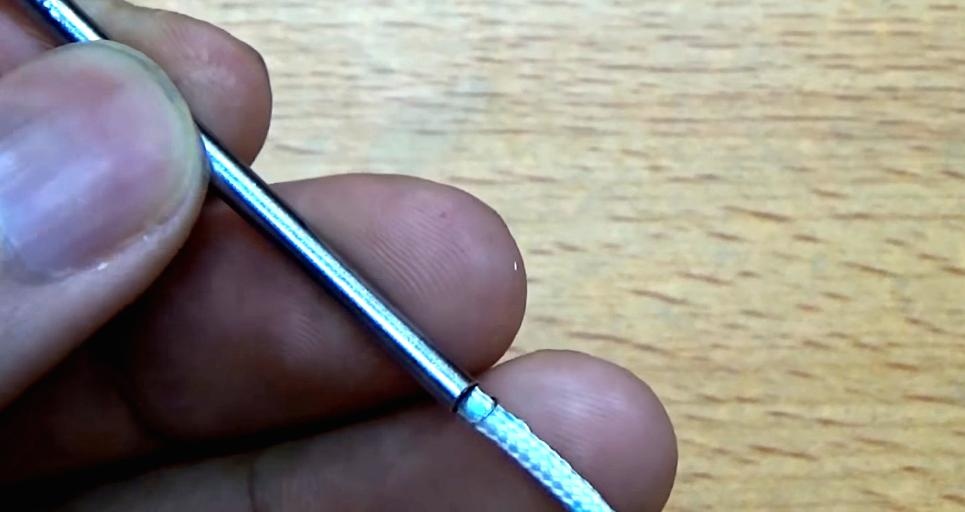
Then take a telescopic antenna from any receiver, joystick or walkie-talkie and disassemble it. We need to find a tube into which our core from the wire will tightly enter. Once the knee of the antenna is matched, the remaining parts can be removed.

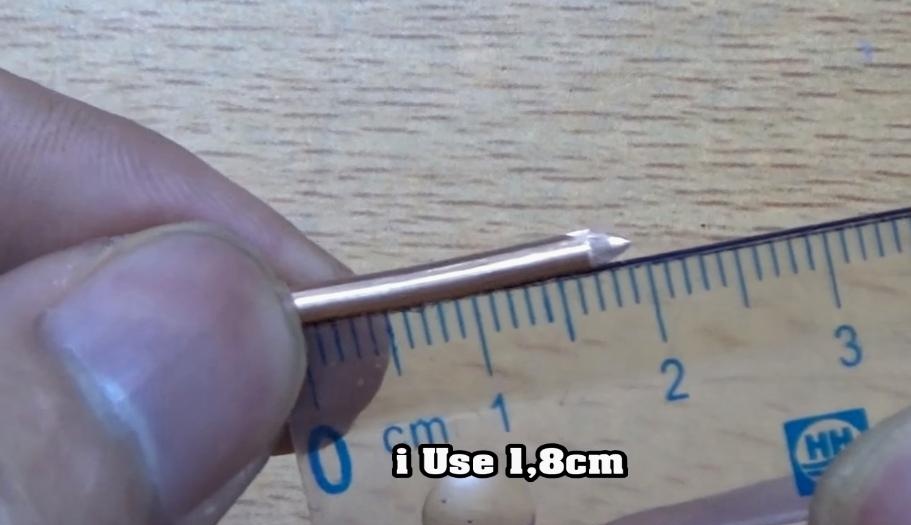
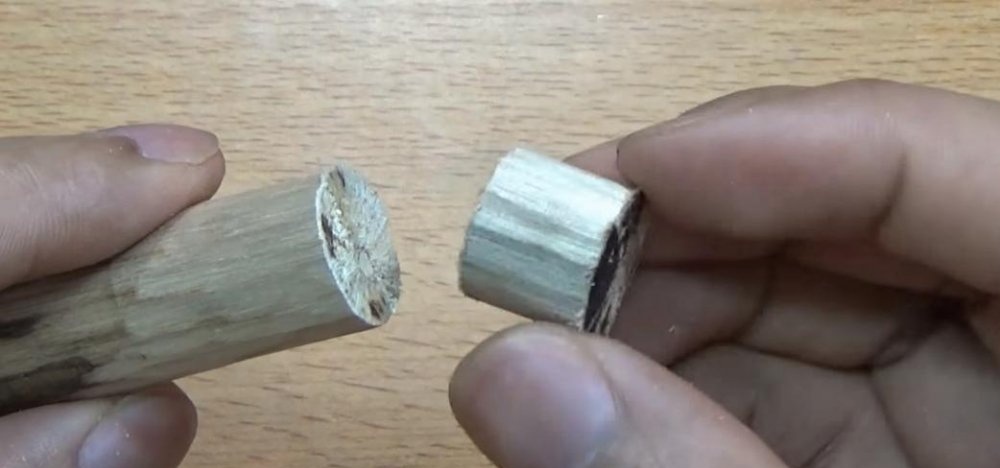
Using a machine tool or a file manually grind a thick wire core under a cone - that will be a soldering tip.

Cut off with a hacksaw about 1.8 cm.
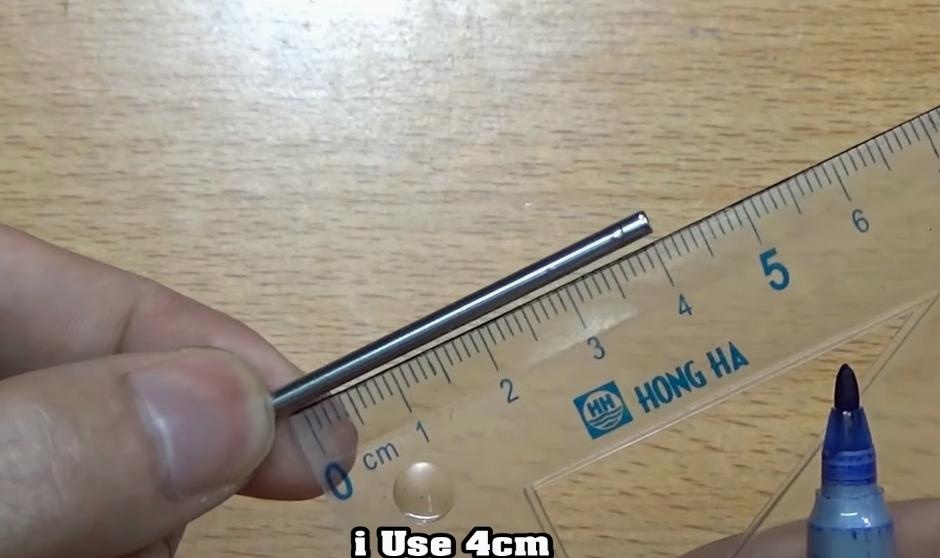
Cut off about 4 cm of the tube, which was taken from the antenna.
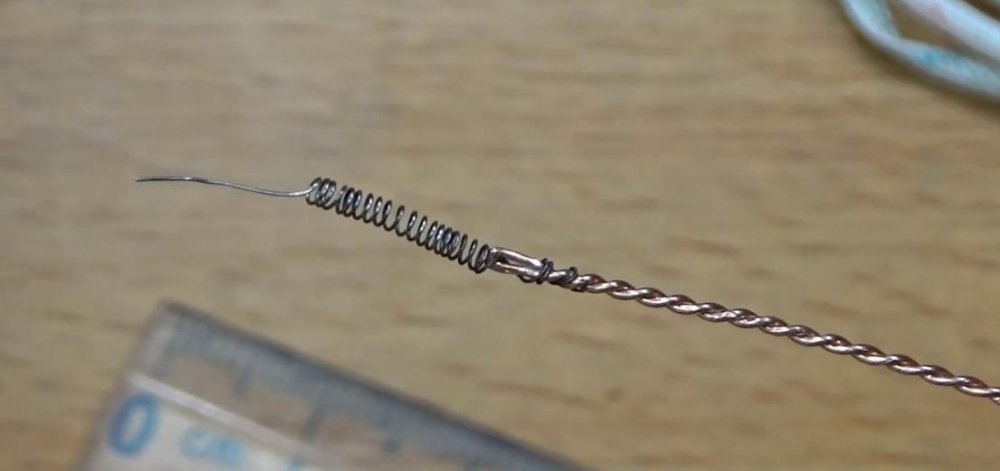
We take a nichrome wire and measure out 10 centimeters, cut off the rest.

Take a wire with a diameter of 1.2-1.8 mm. It is needed only for winding the coil, in the future we will not need it. Its material does not matter. We wind a nichrome wire, leaving the ends about 1 centimeter.
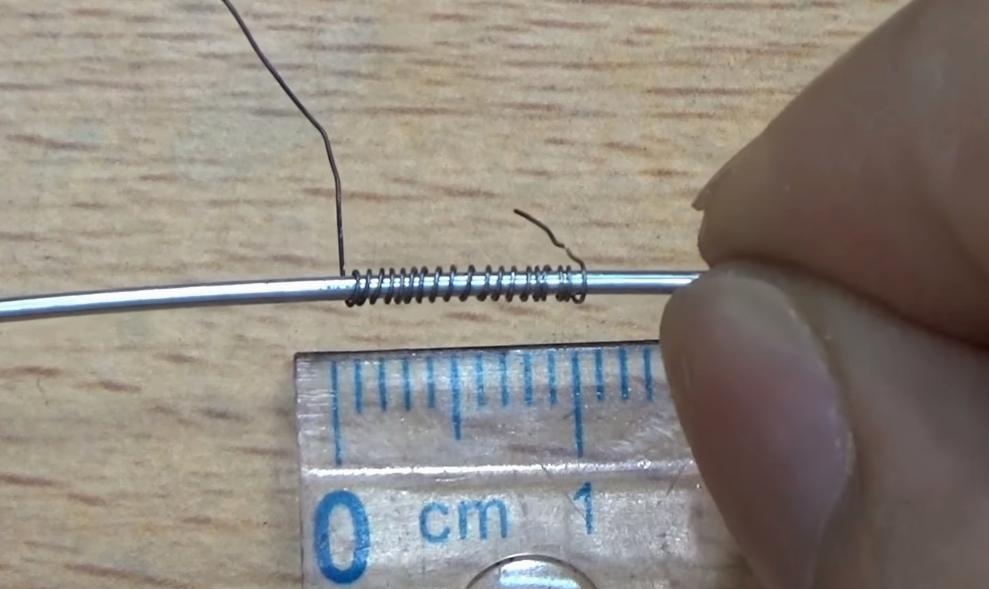
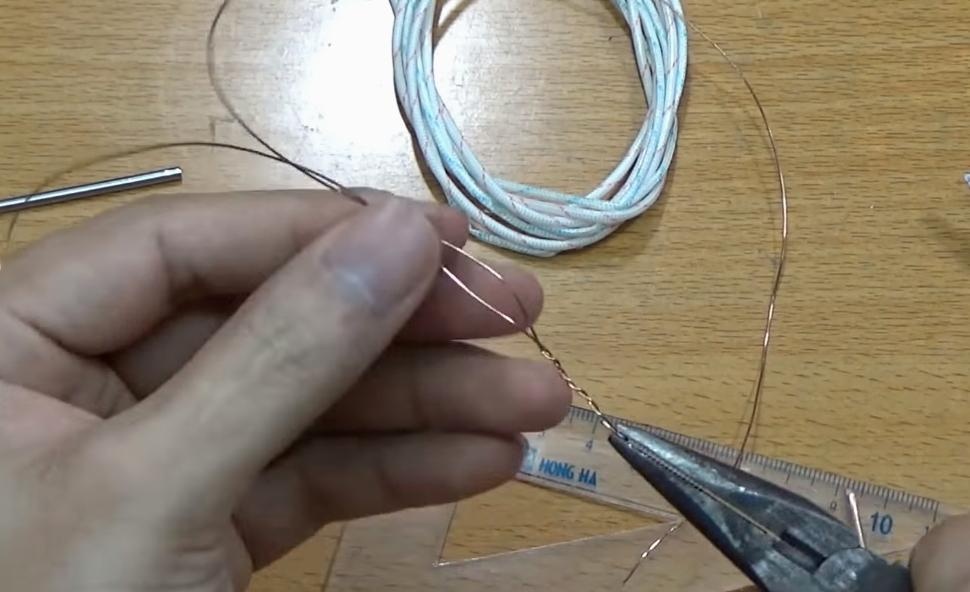
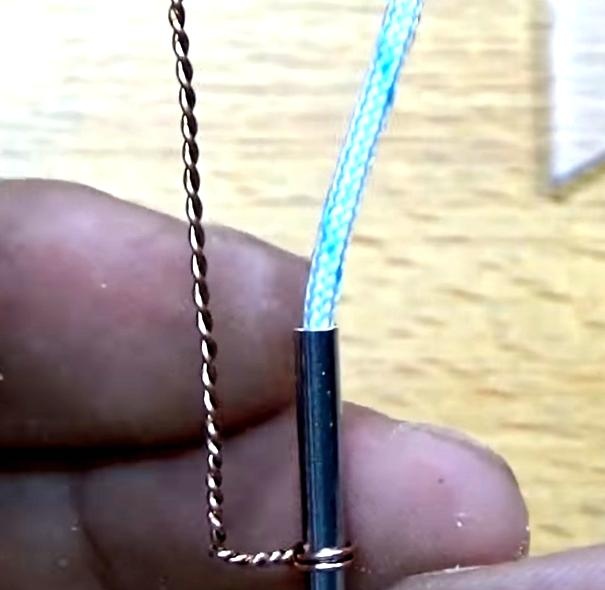
Then we take a thin core from a copper wire, fold it in half and twist it with wire cutters.
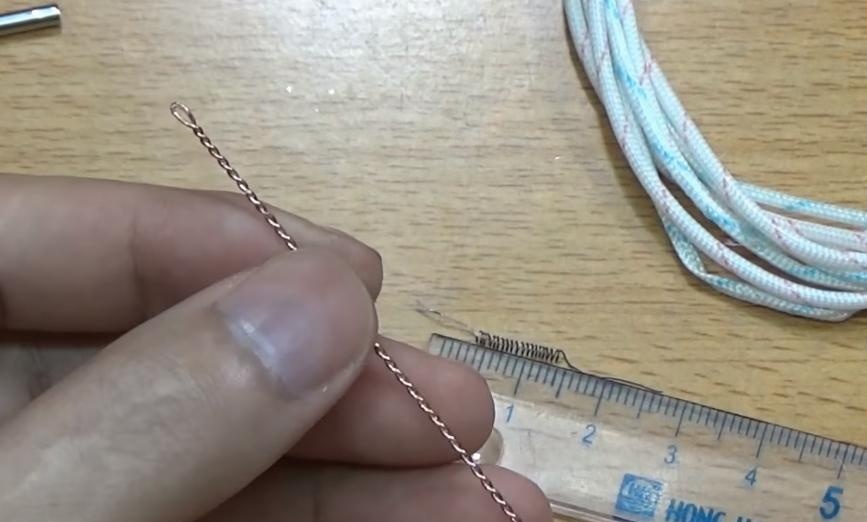
We will extend the nichrome wire into the resulting ear and twist the ends around the copper wire. And for now, put it off.
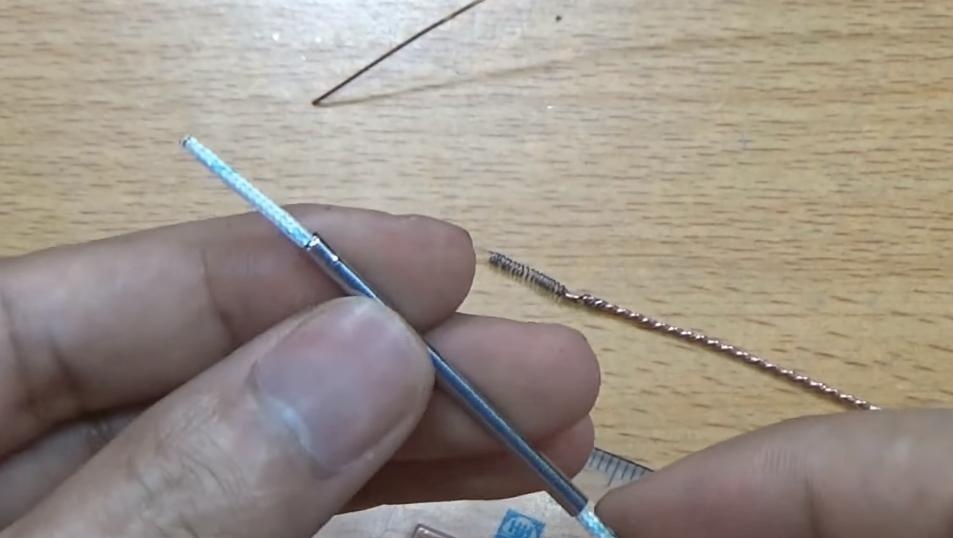
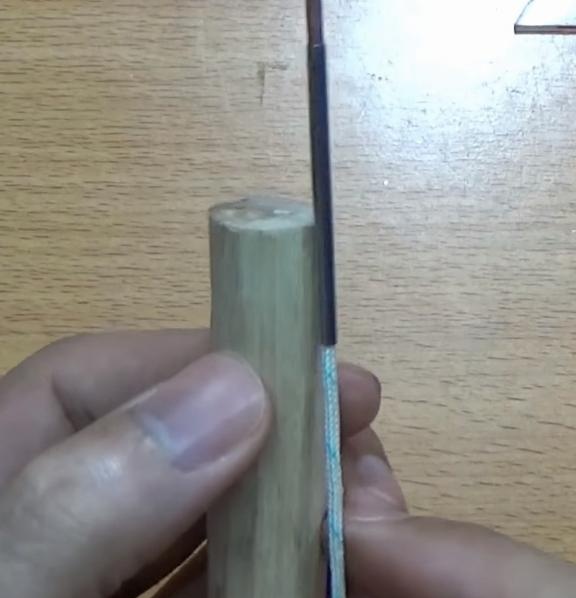
Take the tube from the antenna and cambric made of reinforced fiberglass we will extend into the tube. If your cambric is larger, you can make a longitudinal incision and fit it to the diameter of the tube.
We take everything together and collect.
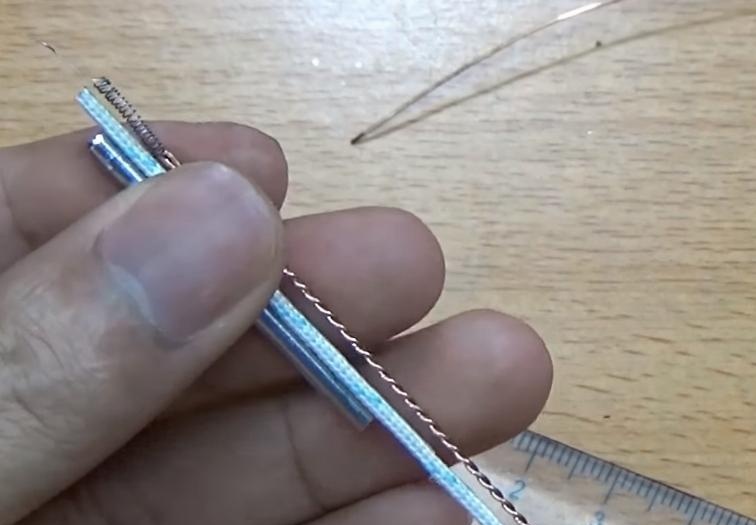
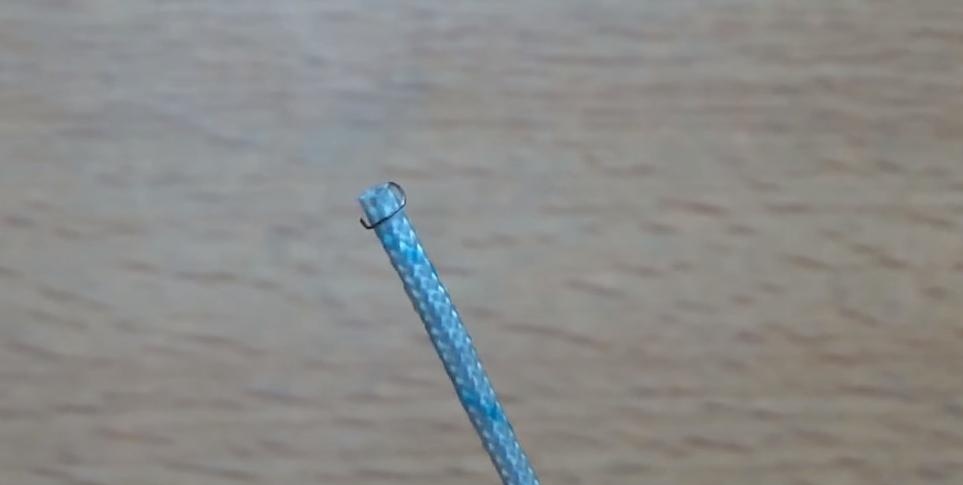
We thread a nichrome coil with wire in a cambric so that only 1 cm long sticks out from the outside. From this centimeter we make a coil around thermal insulation. It will be a thermocouple.
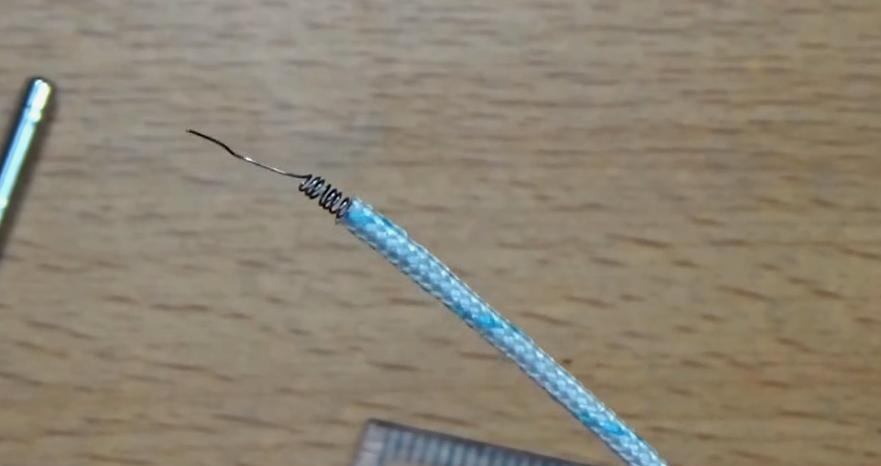
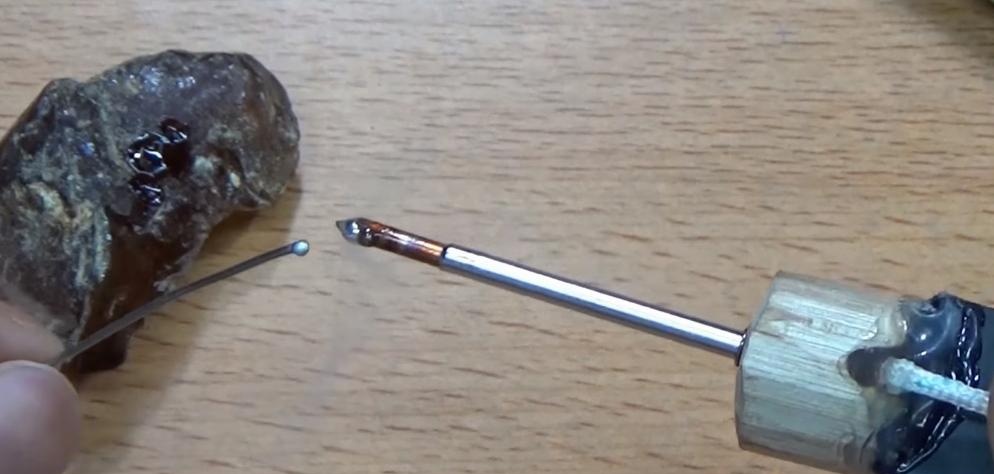
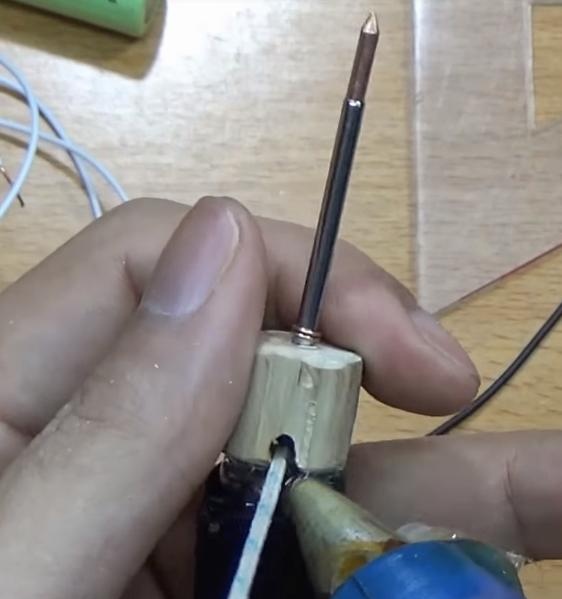
We take our sting and insert it into the tube from the antenna.
On the other hand, we fully insert our thermocouple.
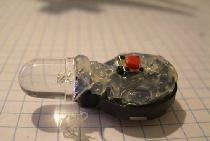
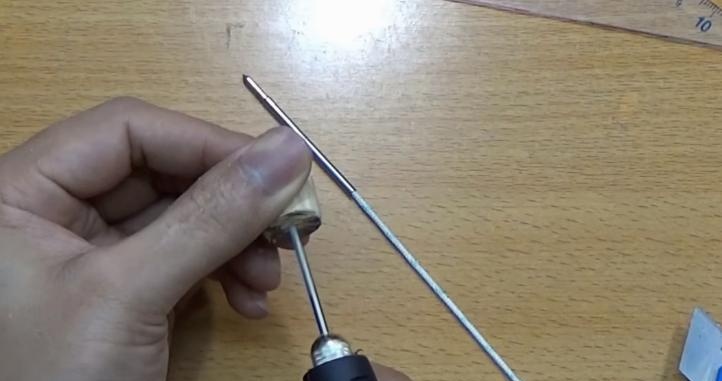
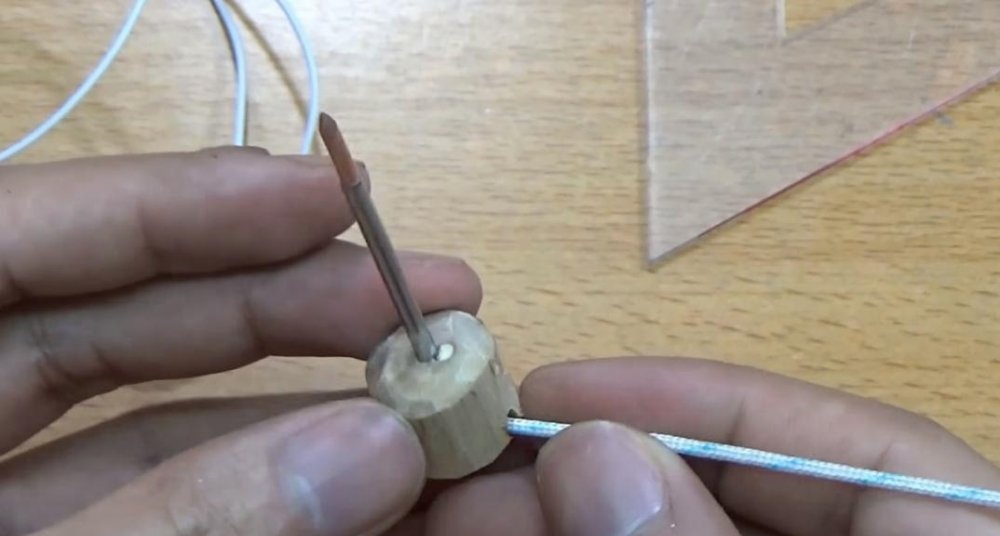
Take a round piece of wood and saw off about 2-3 cm.
In the center, drill a hole for the soldering element.
From this hole we cut the groove with the same drill, see photo.
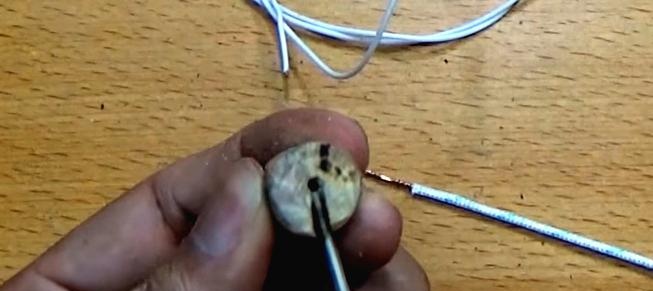
Insert the soldering iron tip with the thermocouple assembly. And bend the tail into the groove.
We drill more holes, but of a smaller diameter and a little further from the center.

We take a thin copper wire and make a loop on the tube and bend it. This will be the second contact.
We insert everything into a round piece of wood.

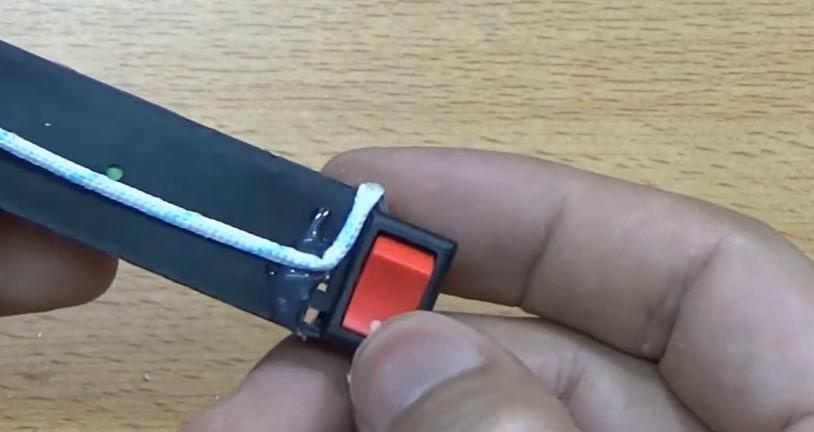
We fix the bent conductor with hot glue. And glue the battery compartment. Polarity does not matter.
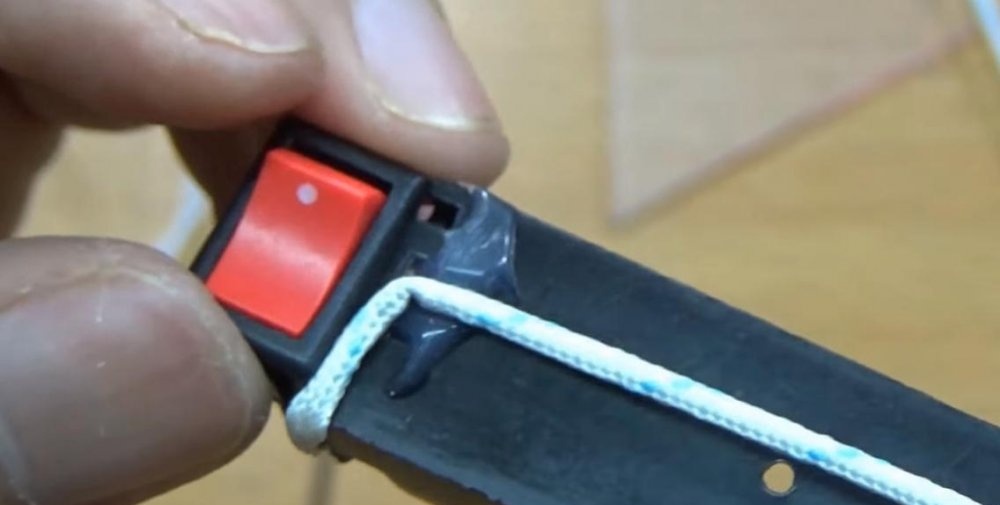
On the other hand, we glue the switch to the battery compartment. We also fix the conductors with glue. We connect everything in series: thermocouple, switch, battery.

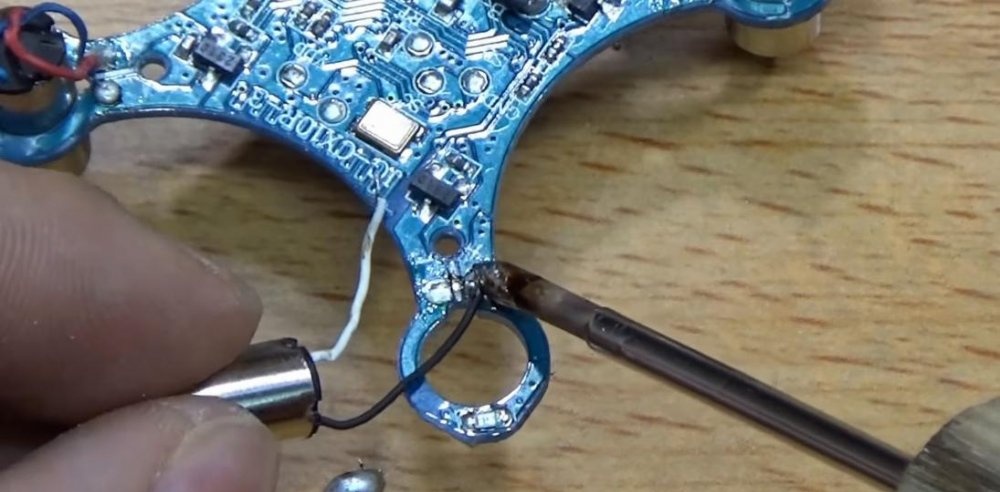
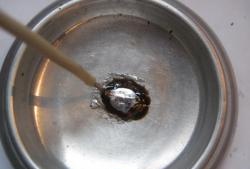
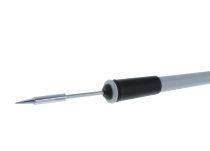
That's all - the mini soldering iron is ready.We insert the charged battery, turn on the switch and try to solder.

Heats up almost immediately. It is very good to solder small SMD elements or another trifle with such a soldering iron.