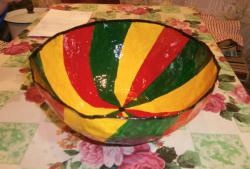
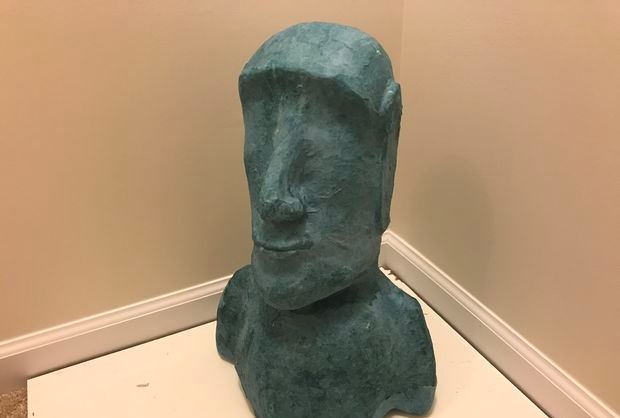
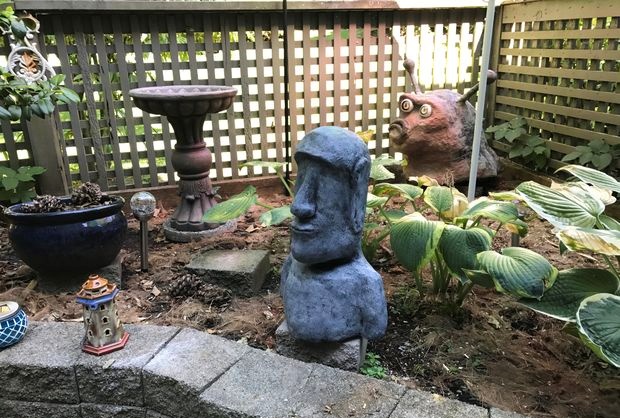
Moai are stone statues located on Easter Island in the Pacific Ocean. These monolithic statues fascinate with their mystery. After watching enough documentaries about Moai, I decided to decorate my side with such figures, making papier mache.
In this master class I will use a waterproof papier-mâché composition so that the figurine will stand for a long time and will not fall apart in the rain and will be ready for any street adversity.
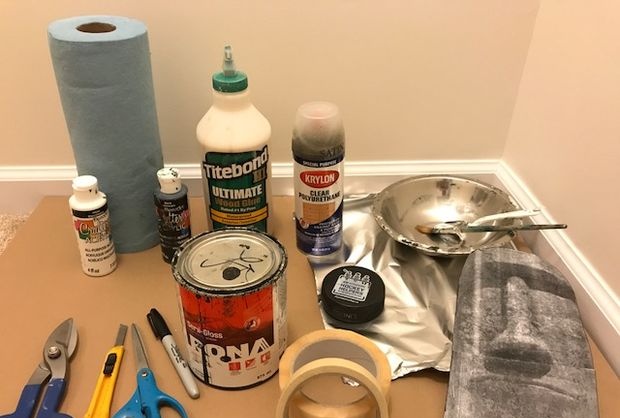
Materials
- Durable cardboard for the frame.
- Newspapers.
- Masking and regular tape.
- Blue paper towels.
- Waterproof wood glue.
- Flexbond cement mortar with polymer (you can try replacing it with tile adhesive).
- Semi-gloss acrylic latex paint black.
- Acrylic paint white and black.
- Polyurethane spray.
- Photos of Moai statues.
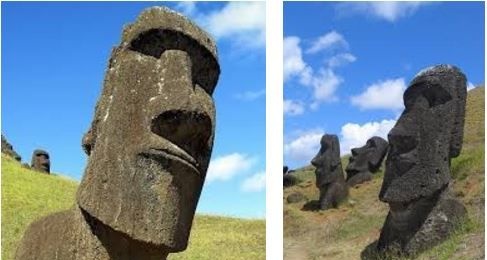
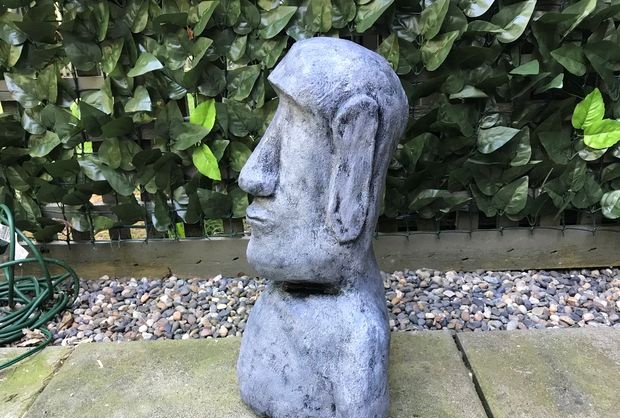
The first thing you need to start with is searching for a photograph of the statue in front and profile. This is a prerequisite for creating a 3D model. We print the drawings on a printer. We attach it to the cardboard and cut out both types from the cardboard.
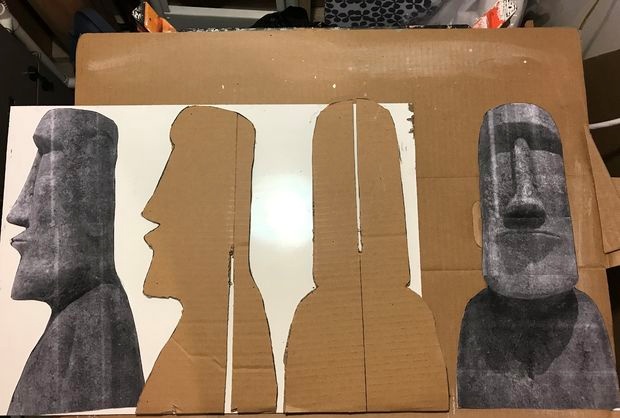
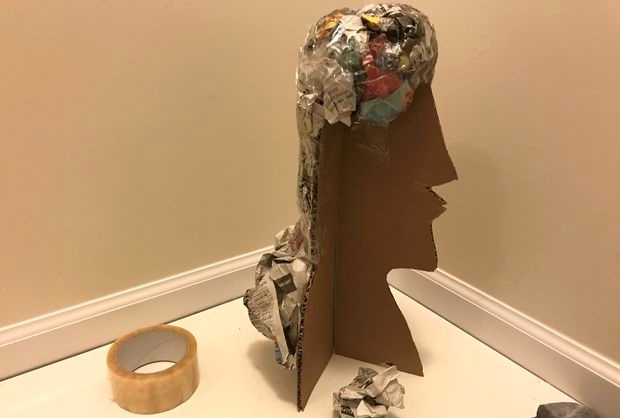
Cardboard frame
In cardboard types, we make cuts down the center to the middle. One has a top view and the other has a bottom view. We connect and we get a statue frame made of cardboard.
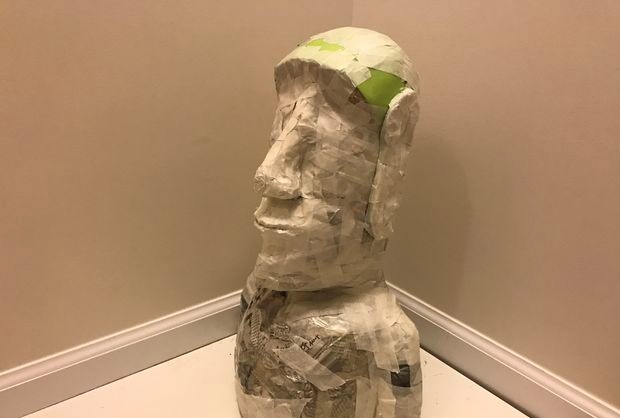
Forming the head of the statue
We crumple the newspaper into tight lumps and secure it to the frame with ordinary tape. We continue to shape the statue until the outline becomes more realistic.
Complicating the figure
It is difficult to sculpt smooth or detailed surfaces with newspaper.
I added stiff cardboard to create a flat forehead and long skinny ears. I added cardboard to the bottom to create a flat base. Used foam pieces to form the forehead. Tin foil is great for detailed areas like the nose.
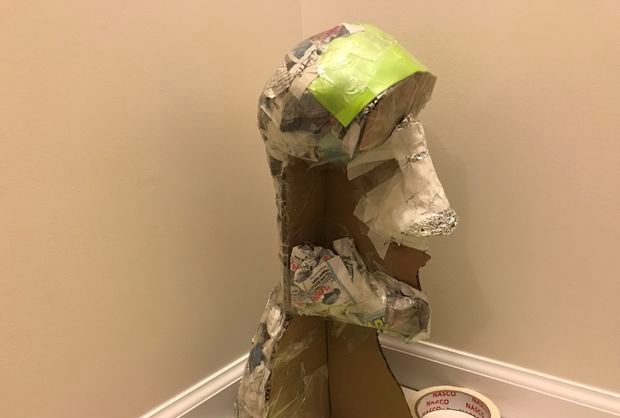
We use masking tape
As the head begins to form, we switch from regular tape to masking tape. It is easier to use for working on small areas.
Waterproof layer
Take paper towels or napkins. We wet them with waterproof wood glue. And we glue these wet towels onto the entire surface of the statue, forming a waterproof layer. It is necessary to make 2 - 3 layers of such towels or napkins.
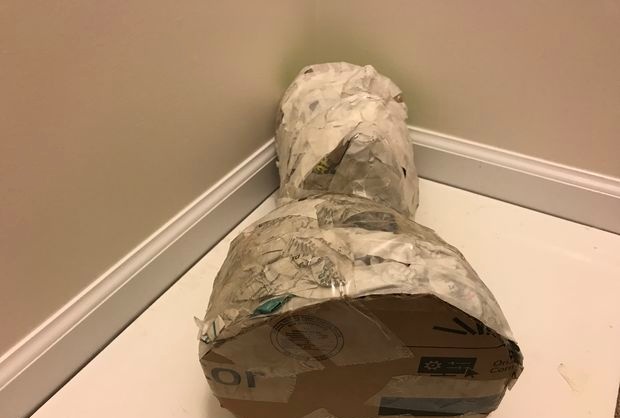
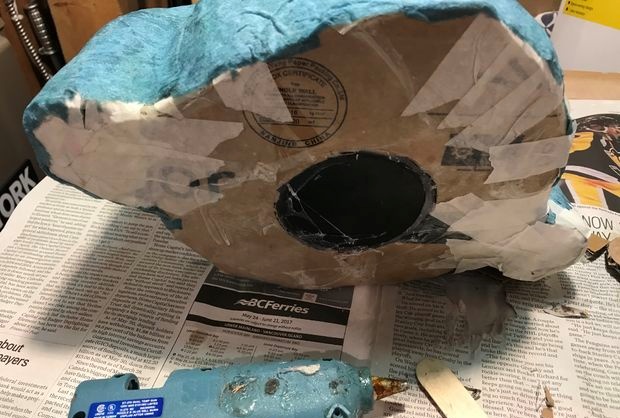
Add weight to the bottom
The statue turned out to be light, which made it unstable. I decided to increase the mass at the bottom for stability. To do this, I made a hole in the bottom stand and glued in a hockey puck - I have a lot of them. You can use any piece of iron or sinker. You can also pour cement for weight.

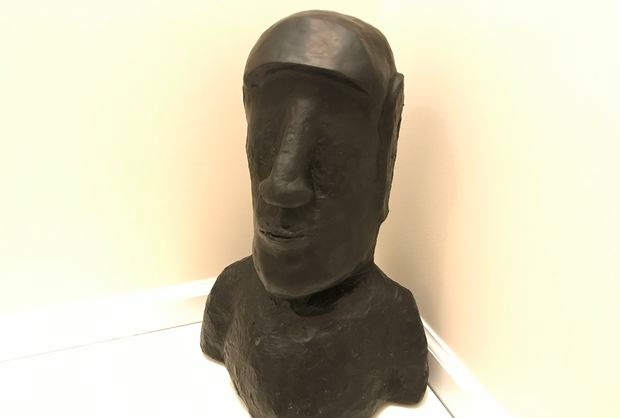
Paint-glue
Mix some waterproof glue and latex paint. I used black, but it doesn't matter. Cover the entire statue to create a waterproof layer around the paper mache.
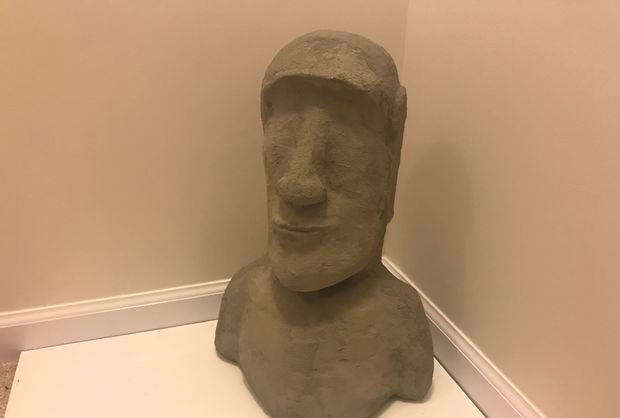
Coating with cement mortar
We dilute the composition of the cement adhesive mortar. We take pieces of newspaper. Dip it in the solution and paste it over the statue. It is necessary to make 2-3 layers. Wait until everything dries. The last layer must be applied without newspaper to smooth out all the unevenness and roughness.
Painting the statue
Apply a coat of black exterior paint. Let dry.
Then paint a layer of light gray using acrylic paint to make the statue look like stone. I applied a gray layer with a sponge in a dry brush technique that kept the deep cracks of the black to give it some texture. These are the kind of stains that are on the real heads of Easter Island.
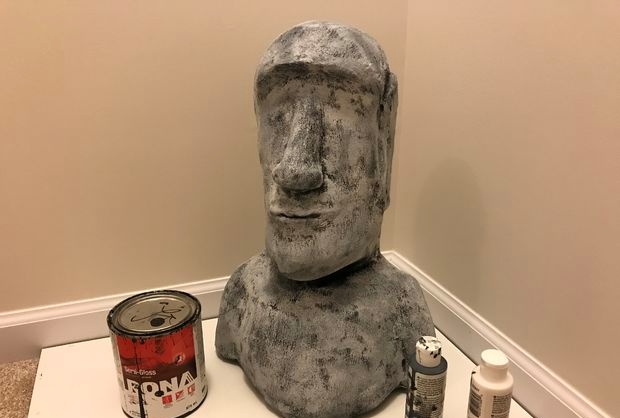
You can also incorporate brown into your color scheme to make the heads even more realistic.
Finishing touches
Mix a small amount of acrylic paint with water to make a very thin mixture of black paints (approximately 10 to 1 ratio).
Cover parts of the head with this mixture. And immediately wipe it with a paper towel. The black will remain in the deep cracks to provide some contrast, and the light gray color will be darkened to a medium gray, more like real concrete.
Polyurethane spray
Apply a coat of polyurethane spray to seal the acrylic paint. One layer will certainly not be enough to make your head waterproof. Therefore, it is necessary to cover your head with several layers of spray.
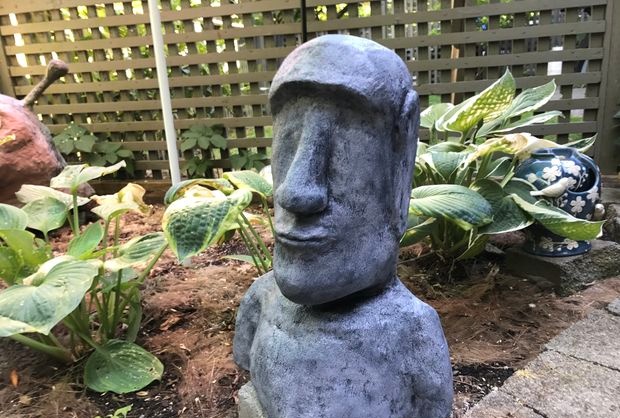
Waterproof glue, a layer of paper mache on a waterproof backing, and exterior paint are the keys to a waterproof sculpture.
Watch the making video.
Original article in English