Do it yourself
Life hacks, master classes, useful tips, recipes.
home » Games and toys » DIY spinner
Spinner mania has taken hold of both old and young. Once I noticed an adult man had an unusually shaped spinner; as it turned out, it was homemade. Without thinking twice, I wanted to repeat this homemade product in order to conquer my friends with a trinket of an unusual shape.
I will tell you in detail what I did and how.
DIY spinner

To make a spinner I needed:
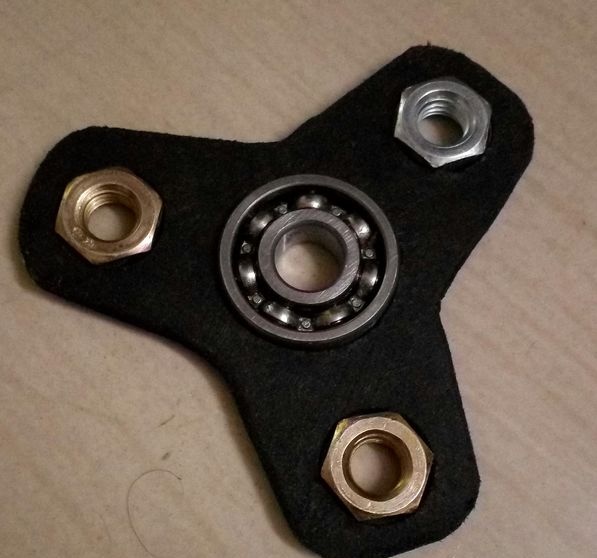
  • A piece of MDF 4 mm.
  • Bearing.
  • 3 nuts.
  • Super glue.
  • Black acrylic paint.

DIY spinner

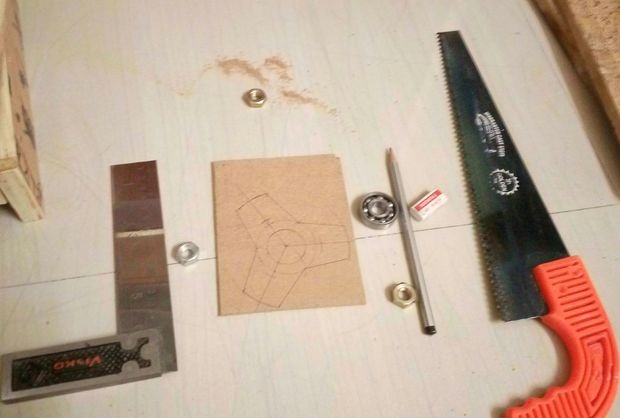
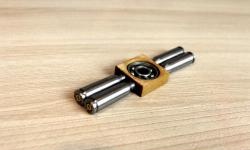
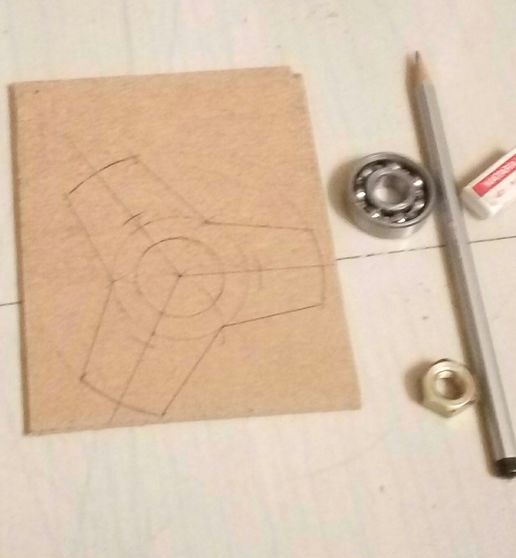
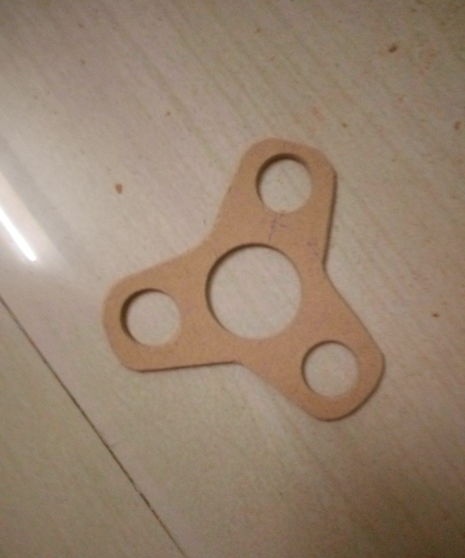
Let's get started. Take a piece of MDF or other suitable material; in addition to wood, you can even use plastic, plexiglass or plexiglass. Start by measuring the outside diameter of your bearing. Take a compass and draw a circle with the required diameter (100 - 80 mm) - this will be the external size. Then draw a circle that matches the diameter of your bearing. Next, the circle is larger by 10 - 8 mm. Connect everything with guides as shown in the figure. Draw circles on three sides for the nuts.
DIY spinner

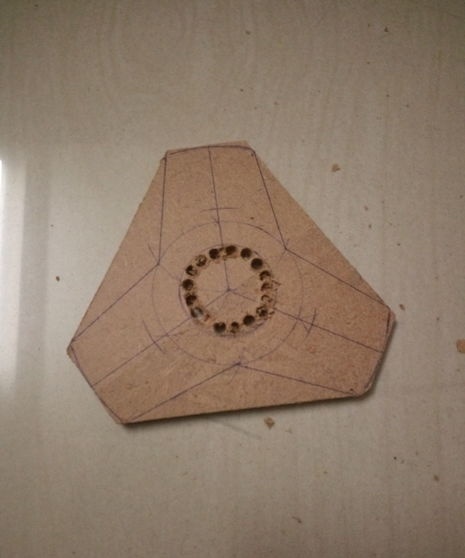
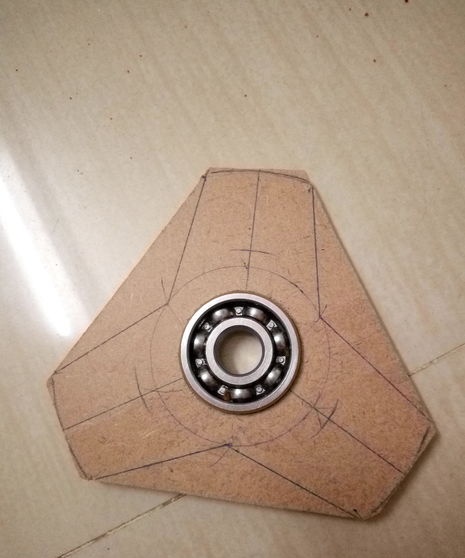
Then, using a hacksaw or wood jigsaw, we cut out the outline of our spinner. To cut holes for the bearing and nuts, you need to use a special drill bit, but as always, I didn’t have it on hand, so I started drilling a hole in a circle.We remove the irregularities with a file and adjust the bearing to the mounting hole. The bearing must fit tightly in the seat, so the main thing here is not to overdo it.
DIY spinner

DIY spinner

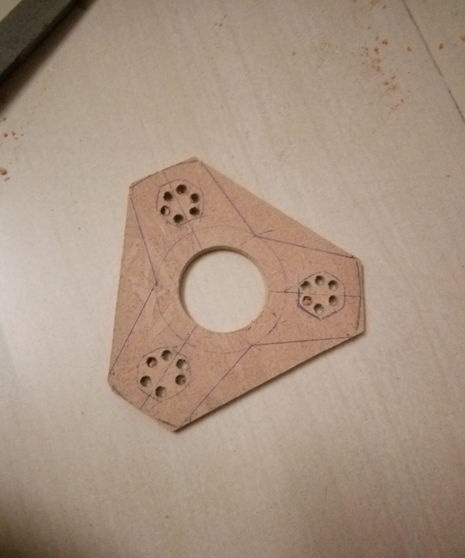
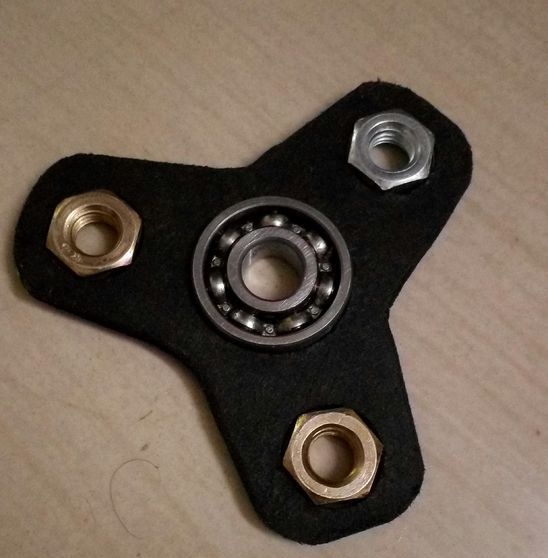
When we have dealt with the central bearing, we move on to inserting the nuts. The technology is the same.
DIY spinner

When you're done, go over it with sandpaper to remove all the burrs and unevenness of our base.
DIY spinner

Clean the surface of our base from dust. Cover with acrylic paint. Can be varnished.
While we are waiting for it to dry, we will blow off any dust and dirt from the bearing and lubricate it a little.
When everything is dry, take super glue, coat the ends of the base where the nuts and bearing are inserted, and insert the bearing and nuts into the seats.
DIY spinner

We wait about fifteen minutes - our spinner is ready!
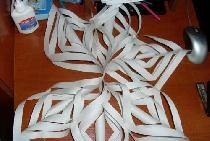
This spinner has a classic shape, but it can also be made non-classically:
DIY spinner

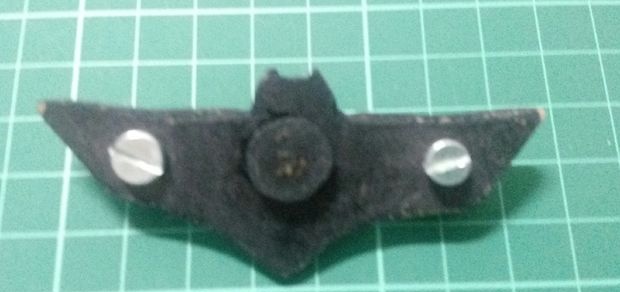
You have a large field for activity. You can use any shapes, colors and designs. Be brave, friends!

Original article in English

Do you have a desire to make a spinner yourself?


come back
Comment
  • bowtiesmilelaughingblushsmileyrelaxed relaxedsmirk
    heart_eyeskissing_heartkissing_closed_eyesflushedrelievedsatisfiedgrin
    winkstuck_out_tongue_winking_eyestuck_out_tongue_closed_eyesgrinningkissingstuck_out_tonguesleeping
    worriedfrowninganguishedopen_mouthgrimacingconfusedhushed
    expressionlessunamusedsweat_smilesweatdisappointed_relievedwearypassive
    disappointedconfoundedfearfulcold_sweatperseverecrysob
    joyastonishedscreamtired_faceangryragetriumph
    sleepyyummasksunglassesdizzy_faceimpsmiling_imp
    neutral_faceno_mouthinnocent
5+two=
Comments (2)
  1. Den
    #1 Den Guests 20 August 2017 16:58
    0
    Yes, it’s a Kotlas thing when your hands itch.
  2. MMddMM
    #2 MMddMM Guests 23 August 2017 23:39
    0
    As an engineer, I advise you to take a smaller and thinner bearing - the one in the photo will spin weakly. And the nuts for inertia are heavier!

How to make a screw auger with your own hands

Crafts with children

USB twisted pair extension cable

Secrets and tricks of working with a jigsaw with your own hands

«Do it yourself - with your own hands» - a site of interesting homemade products made from scrap materials and items at home. Step-by-step master classes with photos and descriptions, technologies, life hacks - everything a real master or just a craftsman needs for needlework. Crafts of any complexity, a large selection of directions and ideas for creativity.

We recommend reading

Washing machine error codes