This is an instruction (guide) on how to make a cheap, convenient and portable machine for spot welding metal from a damaged microwave oven.
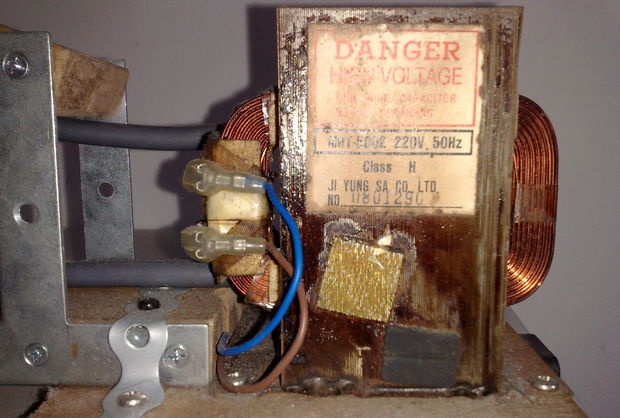
Please note that this is dangerous, as evidenced by the inscription on the transformer: “DANGER, HIGH VOLTAGE", take all possible precautions by following these instructions:
Materials
The meager cost of this spot welding can be reduced to zero if you can find the following components without having to purchase:
1. A very old microwave oven - can be found in a landfill.
2. Wooden board.
3. T-brackets.
4. Screws.
5. A 1cm diameter solid core cable, stranded will do, but make sure each strand is at least 1mm in diameter.
6. Other woodworking tools and electrical connectors.
7. 3-pin connectors (optional).
8. Metal jumper for fastening, at least 15 cm long (optional).
9. Connector from the PC power supply (optional).
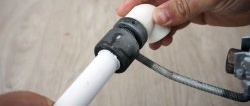
10. Terminal block (internal diameter 1 cm).
Removing the transformer from the microwave
This step describes how to remove the transformer from the microwave oven.
1. Disassemble the microwave oven without touching any parts on the circuit boards.
2. Find the high voltage capacitor, it should be attached to the capacitor and look like a pistol magazine with 2 wires coming out of one end.
3. Short-circuit the capacitor using a screwdriver. WARNING: DO NOT LOOK AT THIS, THE SPARK IS VERY BRIGHT AND MAY DAMAGE YOUR VIEW.
4. Remove the transformer.
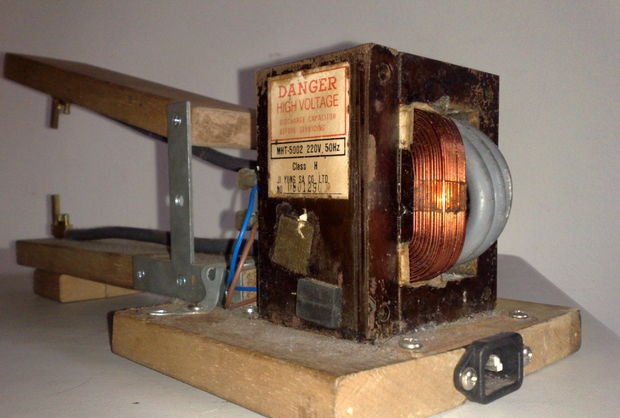
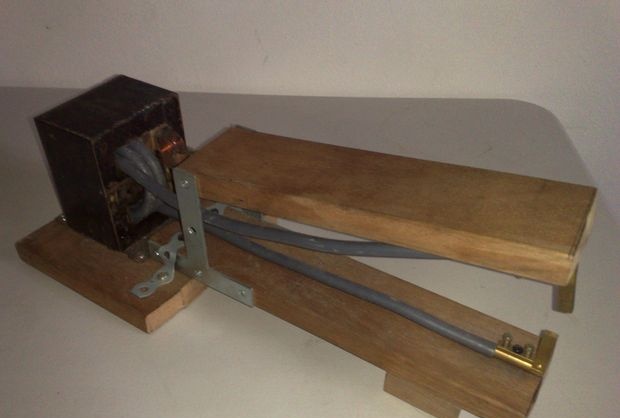
Structure of a resistance welding machine

This entire structure is made from a single wooden plank and the only modification that needs to be made to it is to cut the plank to a certain length, so that all parts are the same height.
As can be seen from the figure, the two middle parts form the base on which the transformer is mounted, between them there is a power connector for the power supply.
The front panel has two long pieces connected by T-brackets (do not tighten the top screws, it should be a flexible connection).
The front end is missing two electrodes, attach them to the bottom of the long piece, attach the long piece to the short piece for extra stability and support.
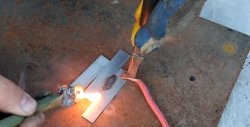
Electrodes
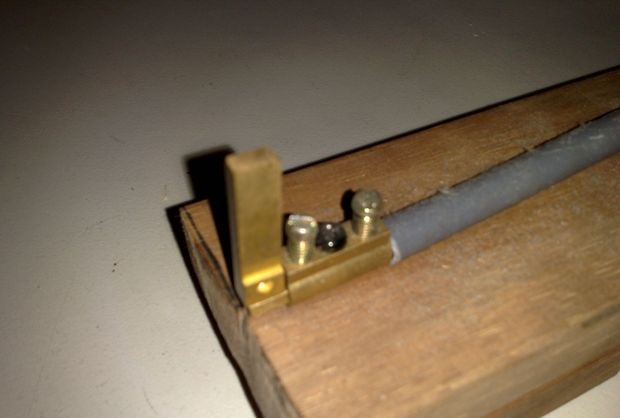
Anyone with experience in welding knows that in extreme temperatures electrodes melt very quickly, I was racking my brain to solve this problem and realized that the ground pin of 3 pin plugs can be used as electrodes, they are widely available and cost pennies, and then developed a way to attach them to welding equipment and a strategy for replacing them (so they could be replaced as easily as a drill bit). Below is an example of creating your own electrodes for this unit:
1. Separate the 2 3-pin plugs and remove the ground pins (longest pin).
2. Separate the two parts of the terminal block and assemble the metal parts.
3. Screw the ground pin into a piece of scrap copper and place it into the metal pin of the terminal block, tighten the metal pin until it stops.
4. Screw the metal pin of the terminal block into the wooden board with the free end facing the transformer, they will be attached to the ends of the 1cm diameter cable.
Electrical modifications of the device
The secret to successful spot welding is to control the flow of a large amount of current through the weld point and produce the required temperature, which is quite difficult to achieve due to the resistance of the materials.
However, the secondary winding of a microwave transformer has the opposite purpose, it causes a significant increase in the mains voltage by reducing the current, so it must be modified if you want the welder to work. How to do this is described below:
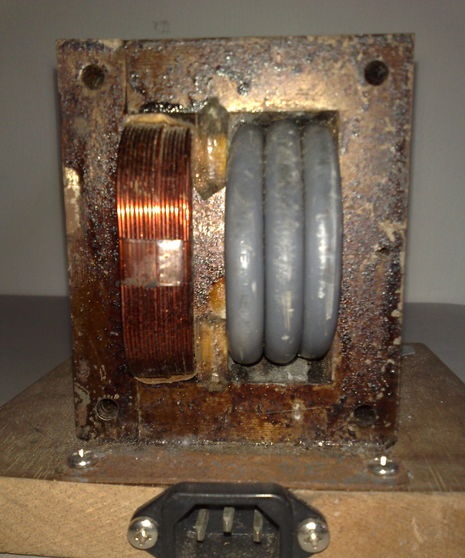
1. Remove the secondary winding of the microwave transformer (this is the winding that is not connected to the mains, has a smaller diameter wire and more convolutions), for this I used an angle grinder with a cutting blade to cut through the entire piece. While the primary windings cannot be damaged by spot welding, I would advise caution.
2. Using a 1cm diameter cable, make as many loops as possible through the space where the secondary windings used to be (in my case it was 3), then extend the rest of the cable to the front part where the electrodes are and attach them, after screwing the finished one transformer onto the base plate of the structural frame.
3. Some of you may notice the PSU power connector under the transformer, I took it from a damaged computer power supply.
Other details
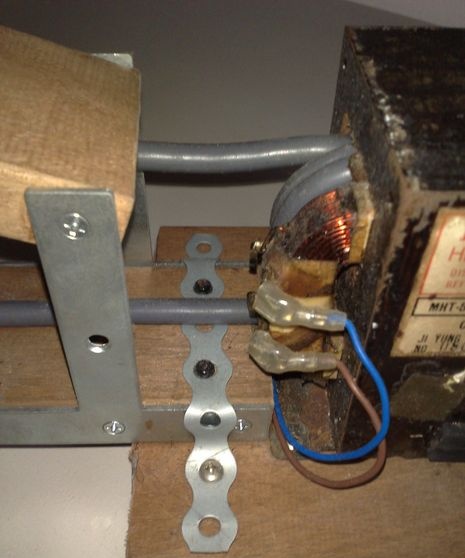
Notice how I reinforced the structure by securing the middle board with a metal header. The microwave transformer is incredibly heavy.
The brown and blue wires that are attached to the primary coil are connected to the power connector mentioned above.
Some other improvements that could be made are to completely enclose the transformer (create an external protective casing) and add a cooling system inside to ensure safety and extend the life as it gets hot during use, however I prefer the harsh option as it is now.
Original article in English