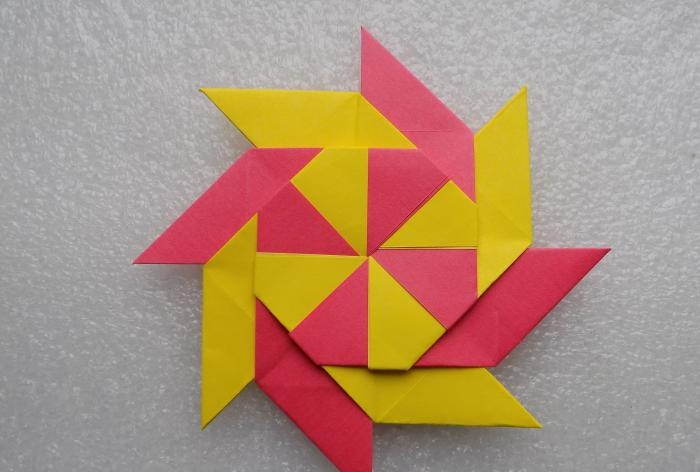
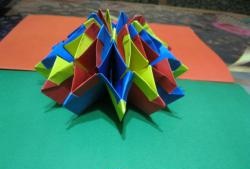
Transformable paper star
Not only children love toys. Many adults are also not averse to having fun, especially when it comes to cheerful groups when they want to have an interesting time. And here it can come to the rescue origami, since it was in this technique that the original transforming star, capable of modification, was made. Another name for this crafts is a ninja star whose transformability will surprise many.
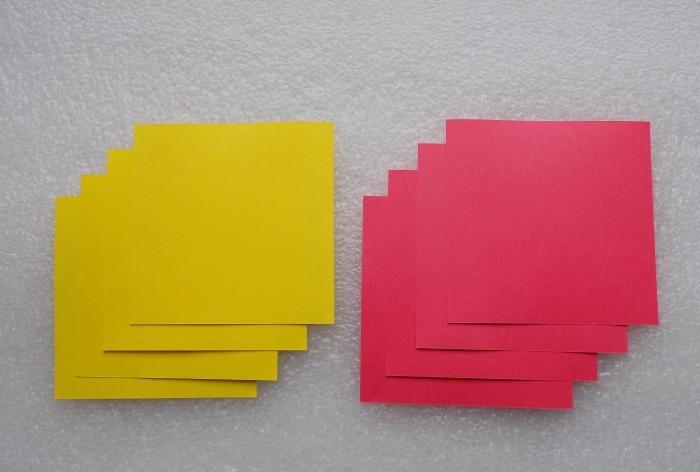
To create such a star you will need 8 small sheets of square paper, it is better to take them in different colors - 4 of each.
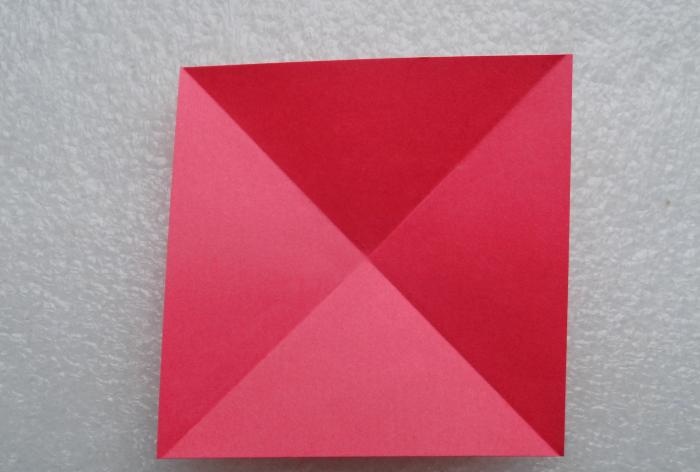
We begin to put together one module. To do this, we make folds along the diagonals.
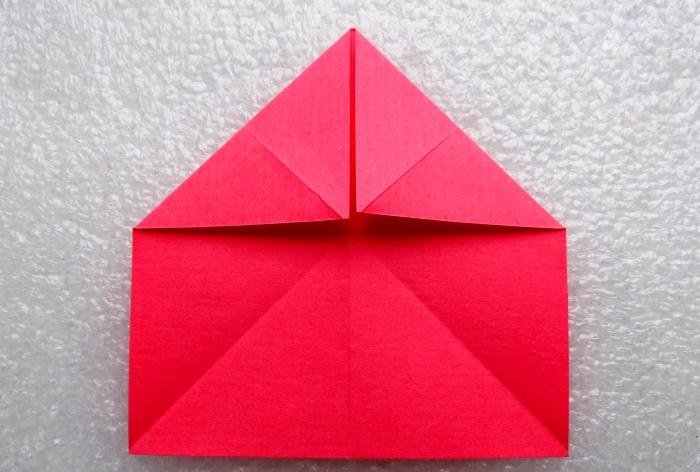
Then we make another fold in the transverse direction.

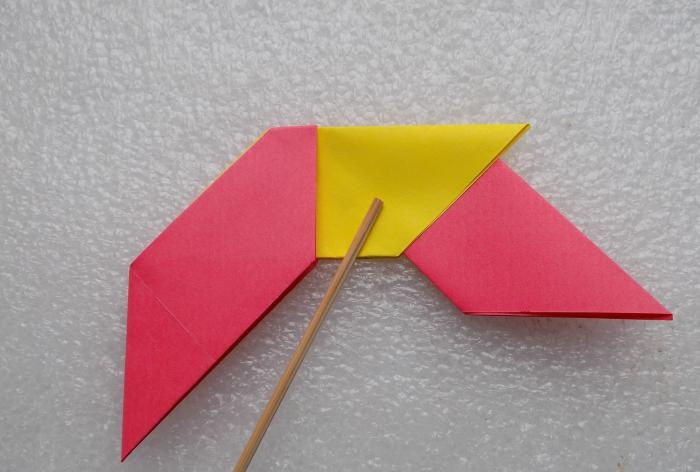
Having arranged the workpiece as follows, we make folds in the upper corners.
Now we fold one of the blanks of the future star in half, making a fold in the vertical direction.
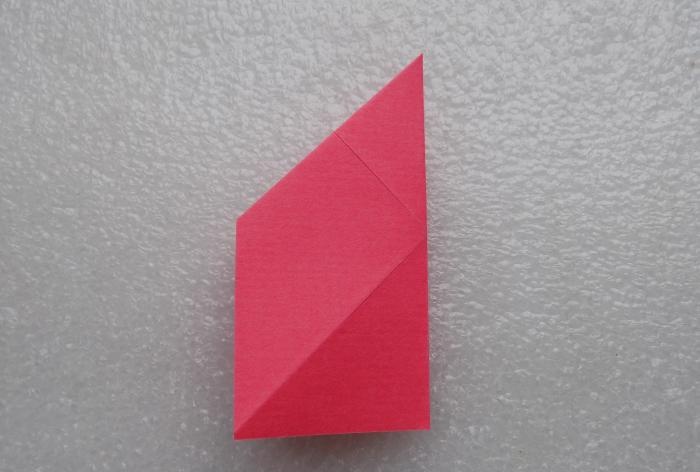
The lower right corner needs to be carefully tucked inward along the previously made folds.
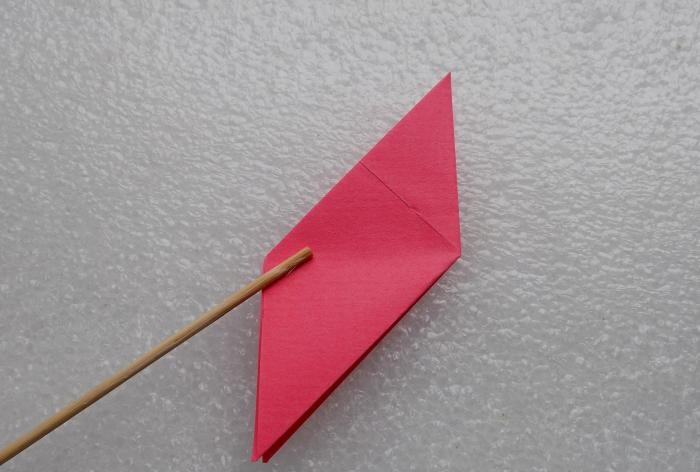
Using the same principle, it is necessary to make 7 more modules - one half of which is red and the other half yellow.
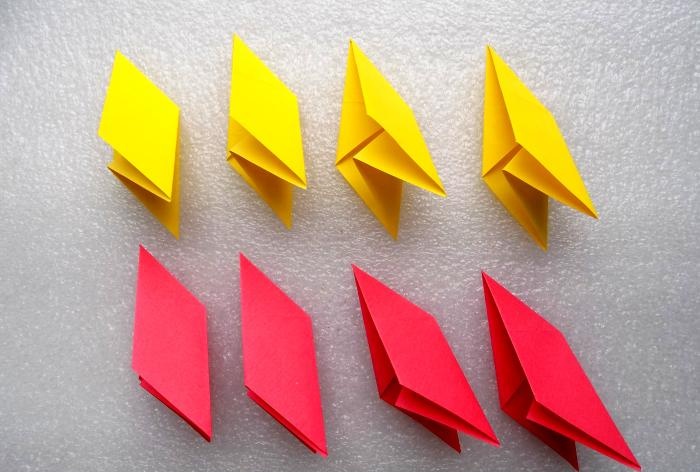
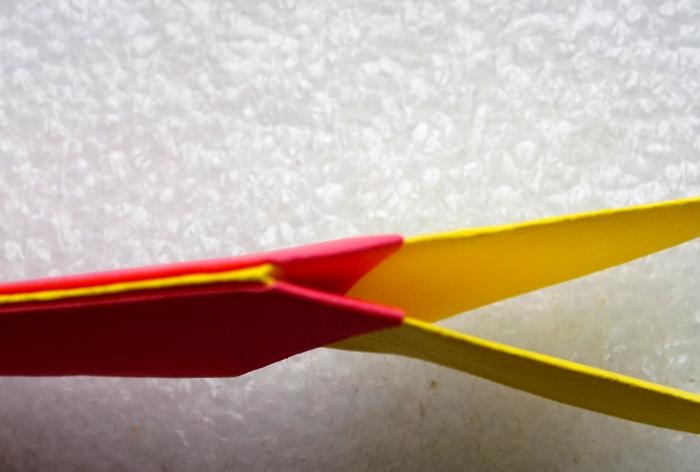
Now we proceed directly to assembling the star. To do this, take modules of different colors and place one inside the other.
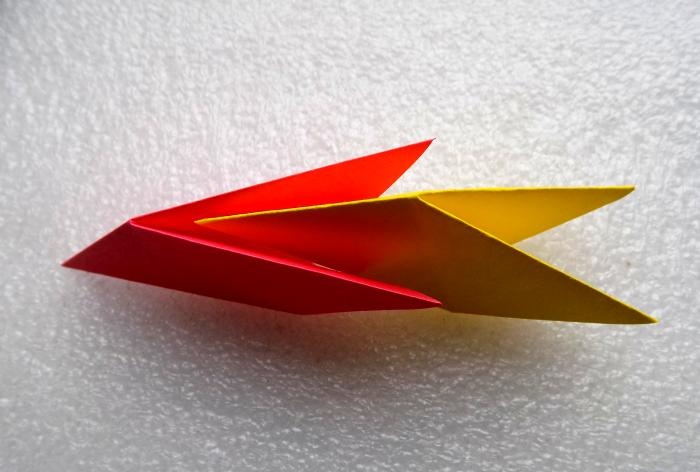
On the plane it should look like this - the top edge of the red and yellow module should be located on the same line.

The protruding corners of the red blank must be bent inside the yellow module. This is how the first connection was made.
We continue to connect the modules in the same way, alternating colors.
The end result should be a ring of 8 modules.
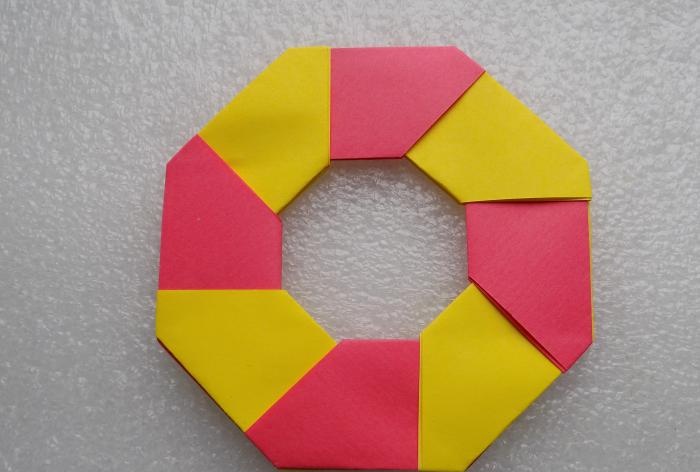
If you gently press on it from all sides, the individual elements begin to move and our craft takes on the appearance of a star, as in the photo. You can return the star to its original position by moving all the modules to the sides in the same way.
To create such a star you will need 8 small sheets of square paper, it is better to take them in different colors - 4 of each.
We begin to put together one module. To do this, we make folds along the diagonals.
Then we make another fold in the transverse direction.
Having arranged the workpiece as follows, we make folds in the upper corners.
Now we fold one of the blanks of the future star in half, making a fold in the vertical direction.
The lower right corner needs to be carefully tucked inward along the previously made folds.
Using the same principle, it is necessary to make 7 more modules - one half of which is red and the other half yellow.
Now we proceed directly to assembling the star. To do this, take modules of different colors and place one inside the other.
On the plane it should look like this - the top edge of the red and yellow module should be located on the same line.
The protruding corners of the red blank must be bent inside the yellow module. This is how the first connection was made.
We continue to connect the modules in the same way, alternating colors.
The end result should be a ring of 8 modules.
If you gently press on it from all sides, the individual elements begin to move and our craft takes on the appearance of a star, as in the photo. You can return the star to its original position by moving all the modules to the sides in the same way.
Similar master classes


Particularly interesting


Comments (0)
