A step-by-step workshop on knitting bookmarks for crocheting books will help you learn new knitting skills or effectively consolidate existing ones. Illustrations will help you control the process, avoid mistakes. Do not rush, trying to finish quickly knitting bookmarks - this small work will not take you more than a day. Are you ready to start? Let's see if everything is ready for you.
What you need: list of accessories
To start crocheting bookmarks, prepare:
- thin cotton threads.
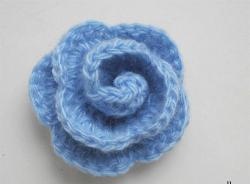
For MK I took Yarn Art Lily 50m / 225m in bright blue. You can use threads of a similar thickness or thinner. Using a larger yarn will allow you to create very delicate, thin crochet bookmarks that will not leave creases between the pages of a book.
- a hook that matches the number of your chosen yarn.
I took No. 2 - the smaller of the recommended ones to get an even dense canvas. However, keep in mind that the finer the yarn and the smaller the hook number, the more you will get a crocheted bookmark.
- scissors for thread trimming. A sharpened tool will not wrinkle and loosen the tip.
Crochet bookmark: sizes
Now let's talk about what our crocheted bookmark for books will represent.
The pattern repeat is 15 loops wide and 7 rows high. Above, I explained how to choose the optimal width of the bookmark, its length will depend only on the number of repetitions of the rapport in height.
What concepts will we be talking about? This will help you determine whether crocheting bookmarks for books will be difficult or easy for you personally. If you do not know how to perform this or that element, we advise you to first acquire these skills, and then proceed to knit the entire bookmark.
PP - lifting loops;
ST - column, in this master class apply single crochet (stbn), with 1 and 2 crochets (st1n and st2n, respectively);
BU - lateral pattern (this abbreviation is used only in this description in order to reduce the description of knitting the same sections of the fabric).
Crochet Bookmark: Rapport Knitting
Dial 15 air loops.
1 row start with 3 p. Rise. In the 15th loop of the initial row, knit st1n, 2 vp, 2 st1n. In 1 row, the lifting stitches replace 1 column with 2 crochets, but we will knit it starting from the second row. This side pattern (CU) is repeated left and right. After completing the side pattern, we knit the middle pattern. To do this, we knit after stsn 4 vp, in the 10th loop - stbn, 6 vp, in the 6th loop of the initial row we knit stbn, 4 vp and in the last loop we knit cu (2 st1n, 2 v. n., 2 st1n).

2 row: 4 points of climb, BU in the arch of 2 VP, which we knitted between pairs of st1n BU in 1 row. Then 1 vp, knit a fan of 9 st2n, 1 vp, CU (as at the beginning of this row and further on), 1 st2n in the central arch of the 1st row (out of 6 vp) 3rd loop of raising the bottom row.

3 row: lifting loops (4), control unit, transition from 3 vp, over the fan we perform 4 stbn (in the 1st, 3rd, 6th and 9th st2n), knitting 3 in between .P. It should turn out 5 stb with 4 gaps between them. Then we knit a chain of 3 VP, BU, st2n in the last lifting loop (as in the 2nd row).

4th row: we start a row of 4 vp, then we execute a control unit, then 3 vp, stbn into the central loops of 4 gaps of a tying fan. Between the columns is also 3 vp Total 4 stbn, 3 intervals. Then we knit 3 vp, BU, st2n at the end.

5 row: 4 lifting loops, control unit, 4 VP., Stbn in every second VP the gap between the columns - arches of 3 vp Total we have 3 stbn with 2 arches. Next, we finish the row 4 vp, BU, st2n in the 3rd paragraph.

6th row: the beginning is knitted similarly to the 5th row, only instead of 4 vp we knit here 5 vp We also form 2 stbn with an interval of 3 vp Next 5 vp, BU, the end of the row - a column with 2 crochets.

7th row: 4 pp, BU, 8 vp, 1 stbn in the 2nd loop of the arch of the lower row (between stbn). Again, a chain of 8 VP, knit BU, in 3-th VP transition - st2n.

Repeat the rapport in height, starting from the 1st row, another 3 times. In the 8th row, we knit the bn columns in the 5th and 4th loops of eight-loop arches, respectively.

Pattern completion
We finish crocheting bookmarks on rows 28-31. The rounded shape of the top is obtained by reducing the loops of the pattern between the side elements of the ornament.
We knit the 28th row as the 7th.
29 row: 4pp, BU, 3 VP, BU, st2n in the 3rd loop of raising the bottom row.
30 row: 4 pp, BU, 1 VP, BU, st2n
31 row: 4 pp, BU, BU, st2n.

Edge trim
In 18 loops of the initial row we knit 18 stb. In each arc, which is formed by the side loops of the transition from row to row, as well as columns with 2 yarn, replacing them, we knit 2 stbn, a picot of 3 vp, 2 stbn.

Having tied the bookmark round and returning to the 1st row, under st1n BU we knit 3 stbn and connect the pattern into a ring.
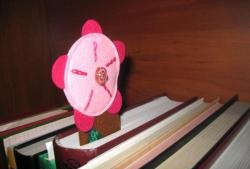
Congratulations! The original bookmark for books crocheted by you personally has been completed and is ready to lie between the pages of your favorite work!