Do it yourself
Life hacks, master classes, useful tips, recipes.
home » Present » Postcards » DIY anniversary card
An anniversary in the life of every person is not just the date of the next birthday, but it is a round number, for example, 20, 30, 40, 50 years and so on. It doesn’t matter what the date is, what the number is, but the main thing is that the person feels somehow important and noble on this special day, since the closest, dearest and most important people in this person’s life came to congratulate him on this day. So you are going to go to someone’s anniversary, either a relative or an acquaintance, and you simply cannot do without a greeting card for the anniversary. And in order not to be a banal congratulator, you need to surprise the hero of the day with something and congratulate him especially, in a new way and with taste. So, a scrapbooking master class will help us very well with this, which will help us make not just a greeting card, but a complex fold-out anniversary card.
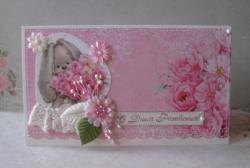
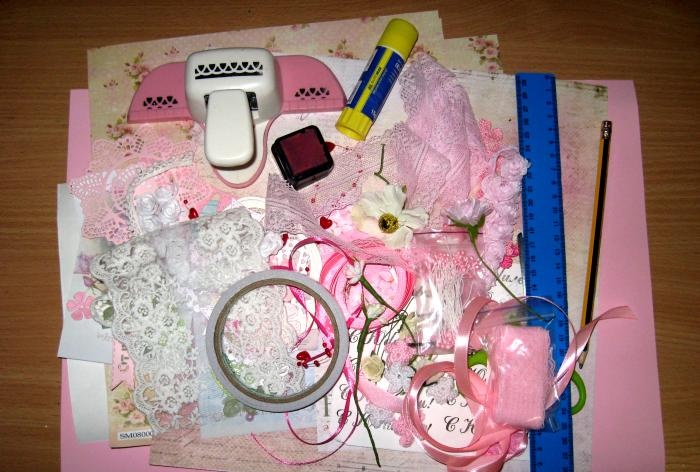
For the master class we take:
  • Pink pastel paper A3 format;
  • Paper for scrapbooking in pink shades, berm two sheets 30*30 cm;
  • Pictures: orchid flowers, roses, inscription;
  • Cutting: pink napkin, white pearl and lettuce leaves, butterflies, hearts;
  • Knitted flowers are white, pink and crimson;
  • Pink lace;
  • White ribbon with small pompoms;
  • Raspberry satin ribbon with white polka dots;
  • Pearl half beads;
  • Chiffon roses on a ribbon;
  • Happy Anniversary stamp and black ink;
  • Burgundy ink for tinting;
  • White cardboard;
  • Glue stick, double-sided tape, ruler, scissors and pencil;
  • Border hole punch.

DIY anniversary card

DIY anniversary card

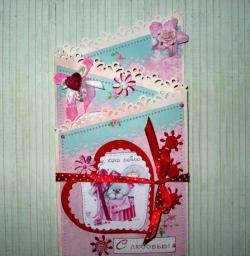
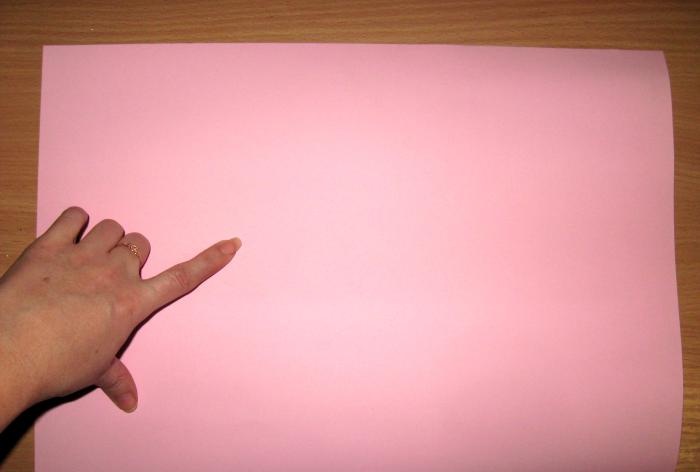
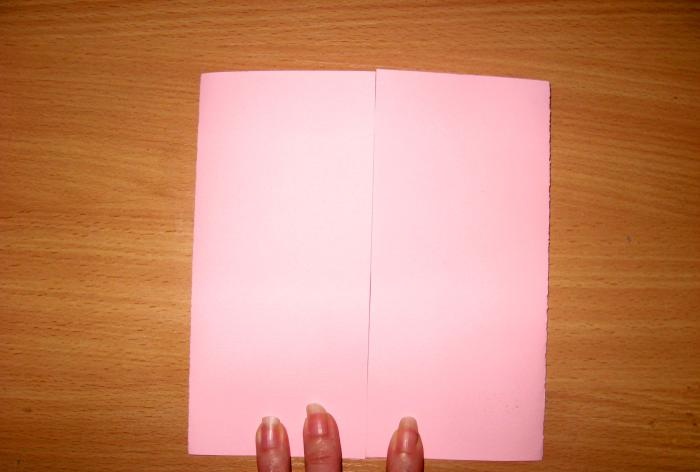
Take a sheet of large pastel paper and cut a 17*32 cm rectangle from it. Cut it and divide it into three parts.
DIY anniversary card

DIY anniversary card

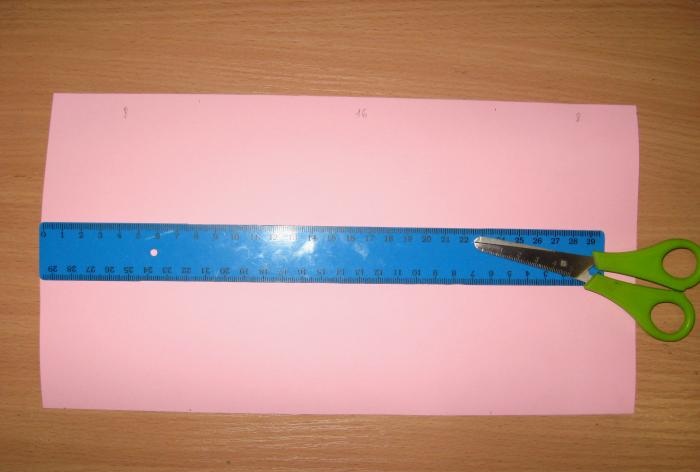
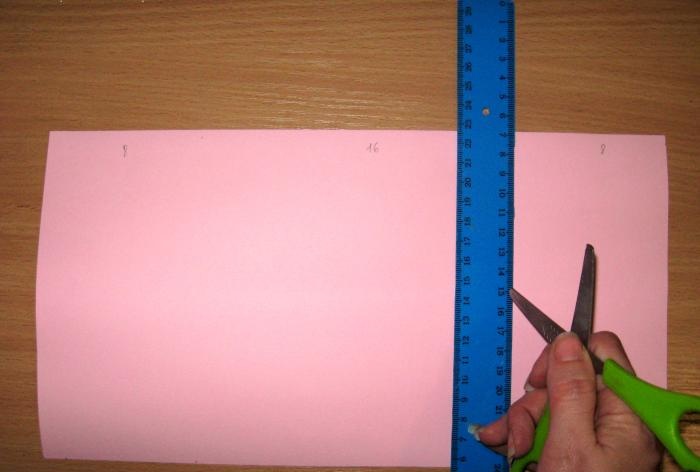
We divide along the side that is larger into parts 8 cm * 16 mm * 8 cm. We divide and draw bend lines. Fold the base as in the photo.
DIY anniversary card

DIY anniversary card

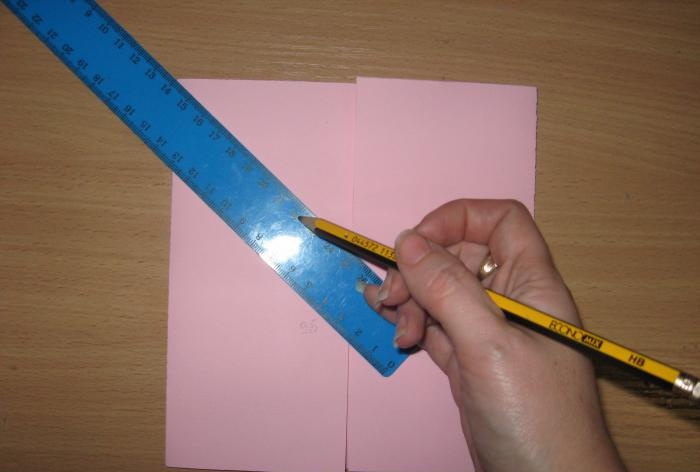
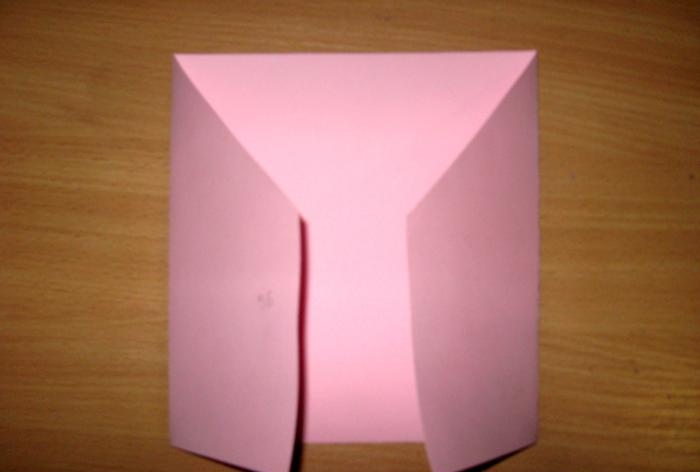
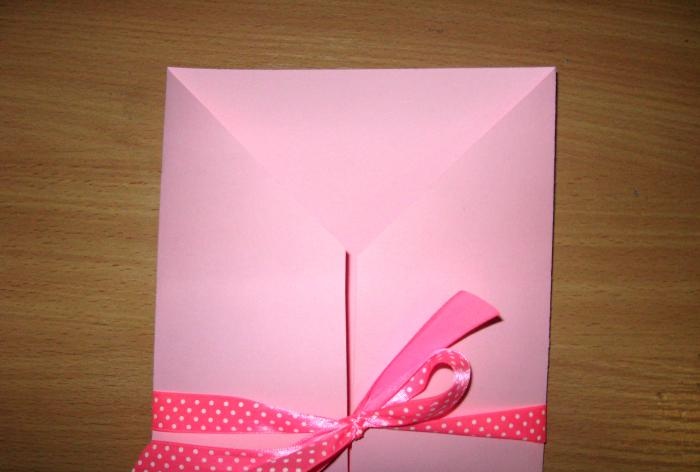
We measure 9.5 cm from the bottom and draw lines to the corner along which we make oblique cuts. This way we get a half-open base for the postcard.
DIY anniversary card

DIY anniversary card

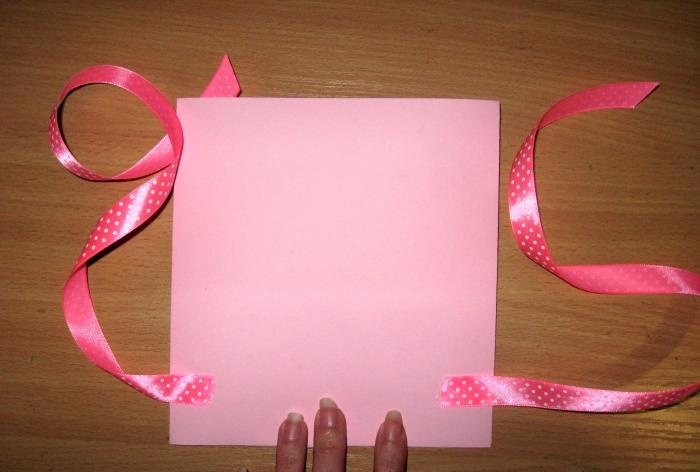
We glue a piece of ribbon on the back so that we can tie a bow at the front.
DIY anniversary card

DIY anniversary card

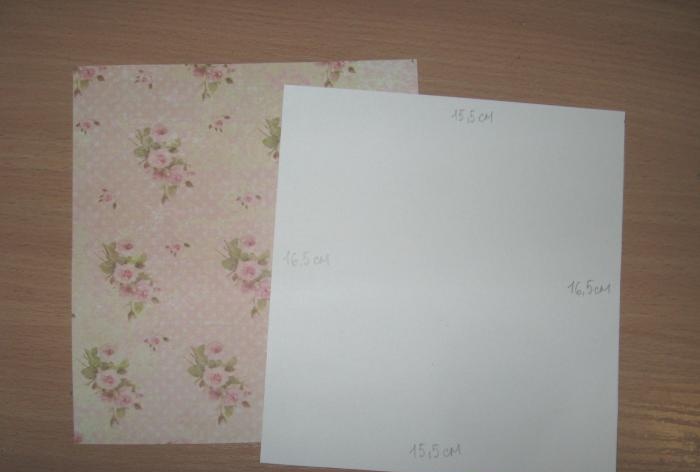
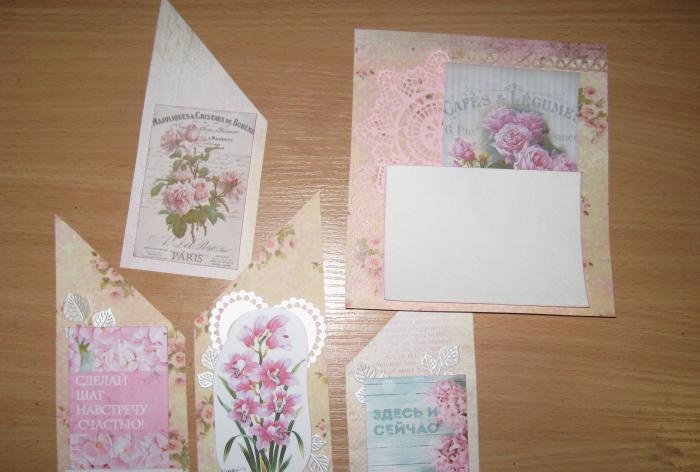
Now let's take scrap paper. From it we need to measure two quadrangles 15.5 cm * 16.5 cm.
DIY anniversary card

DIY anniversary card

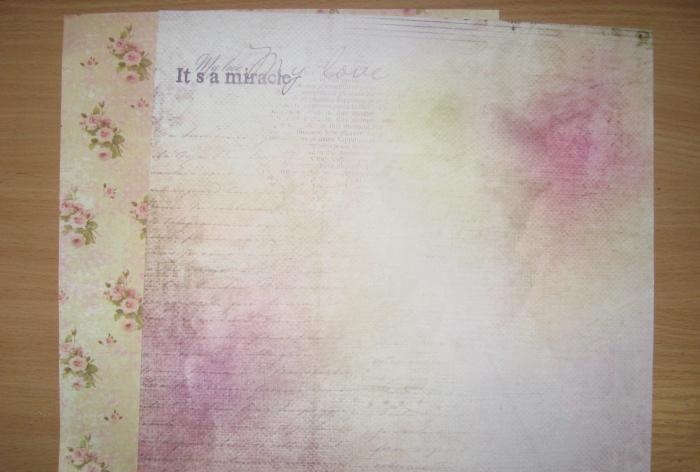
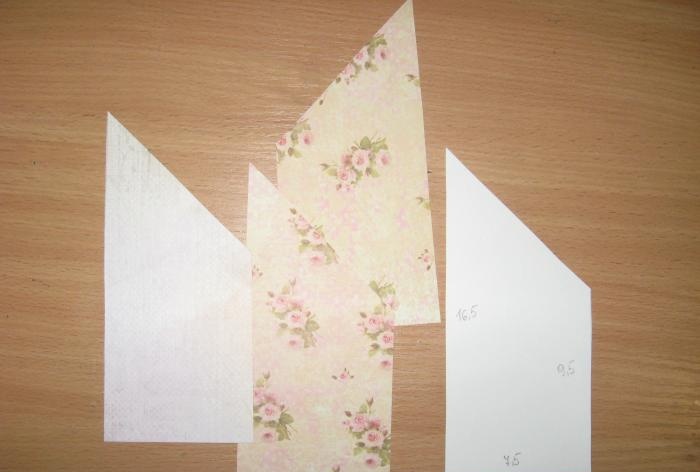
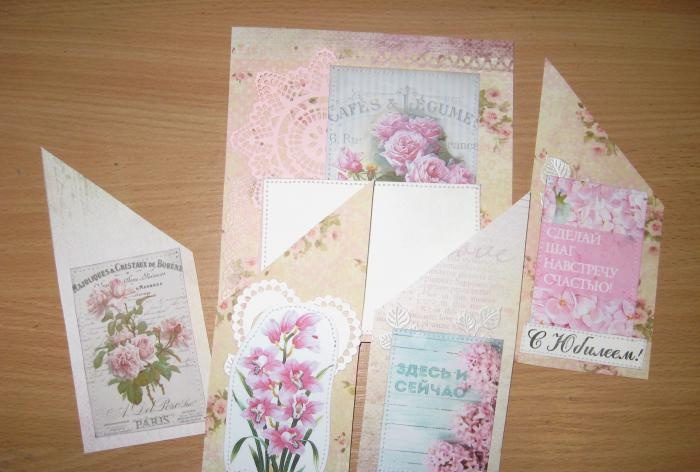
And also four irregularly shaped rectangles of the same size. Now we decorate the scrap paper with cuttings and pictures, including gluing a cardboard rectangle for the inscription.
DIY anniversary card

DIY anniversary card

We sew on all the elements that were glued to the scrap paper. Now all parts of the scrap paper need to be glued to the base using double-sided tape. Now all sides of the card from the front side need to be sewn on a typewriter.
DIY anniversary card

DIY anniversary card

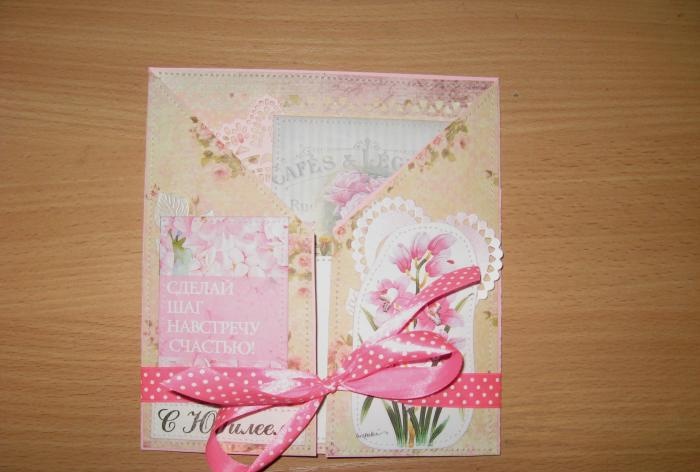
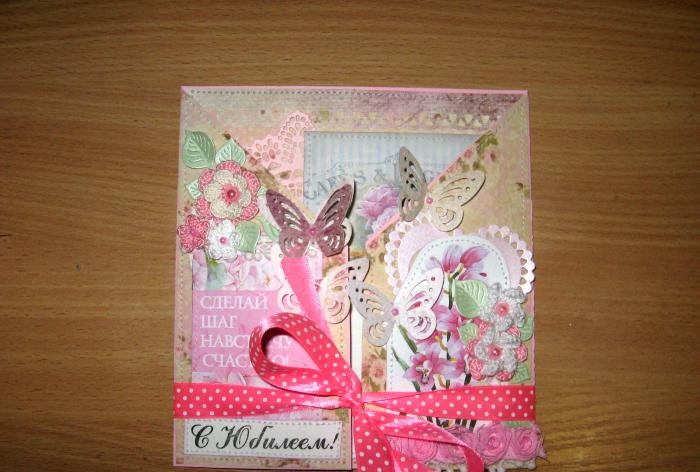
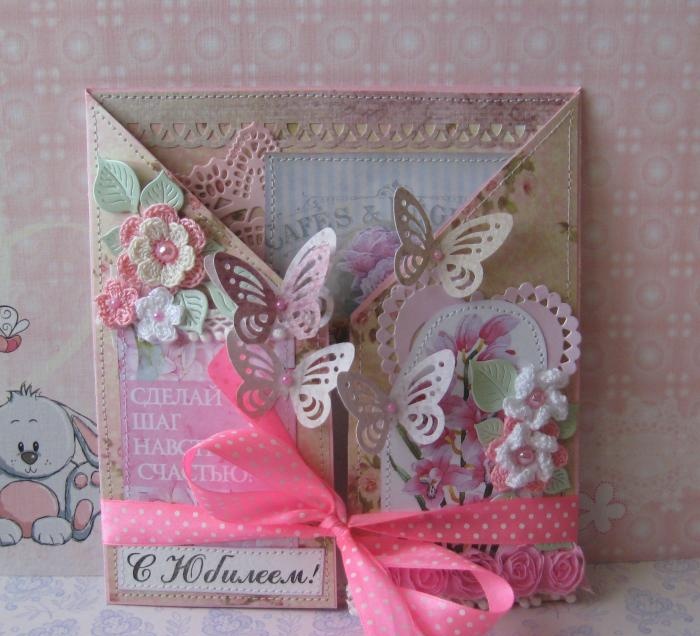
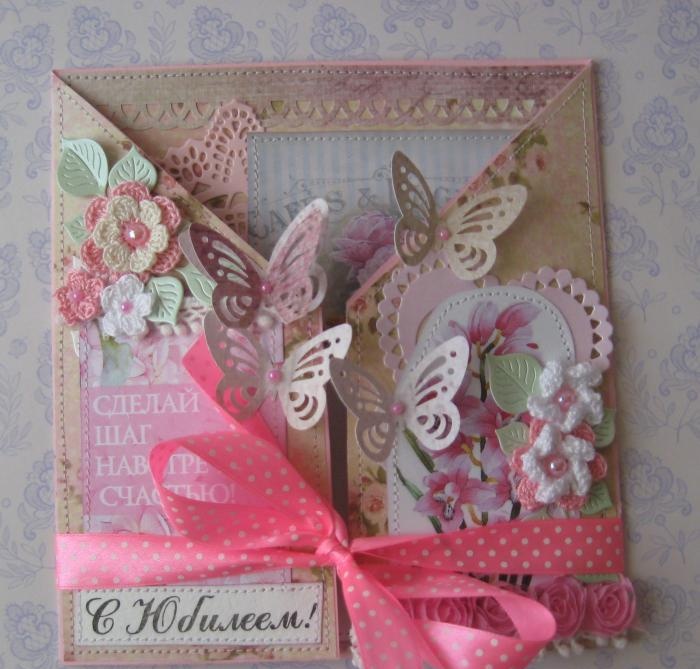
All that remains is to decorate the card with flowers, half beads, cut out leaves, lace and ribbons. So we get such a tender anniversary card, which will be a wonderful addition to any gift, and believe me, it will greatly delight and surprise the person for whom it was made. Thank you for your attention and many thanks to everyone!
DIY anniversary card

DIY anniversary card

DIY anniversary card
come back
Comment
  • bowtiesmilelaughingblushsmileyrelaxed relaxedsmirk
    heart_eyeskissing_heartkissing_closed_eyesflushedrelievedsatisfiedgrin
    winkstuck_out_tongue_winking_eyestuck_out_tongue_closed_eyesgrinningkissingstuck_out_tonguesleeping
    worriedfrowninganguishedopen_mouthgrimacingconfusedhushed
    expressionlessunamusedsweat_smilesweatdisappointed_relievedwearypassive
    disappointedconfoundedfearfulcold_sweatperseverecrysob
    joyastonishedscreamtired_faceangryragetriumph
    sleepyyummasksunglassesdizzy_faceimpsmiling_imp
    neutral_faceno_mouthinnocent
3+three=
Comments (1)
  1. Angelinka
    #1 Angelinka Guests 22 August 2017 23:49
    0
    It looks very elegant. I've seen these crafts in stores, I always thought that this was factory work, not artisanal work. It turns out that you can sculpt such a miracle yourself. The work, of course, is very painstaking, it will take a lot of time, you need to be careful, but what an amazing result! For the holiday, parents will be especially pleased that such a delightful card was made by the hands of their relatives.

Dahlia | Do it yourself

Smoked chicken drumstick: recipe with photo

Snow Maiden made of colored paper | Do it yourself

How to cook real Italian Lardo from lard

«Do it yourself - with your own hands» - a site of interesting homemade products made from scrap materials and items at home. Step-by-step master classes with photos and descriptions, technologies, life hacks - everything a real master or just a craftsman needs for needlework. Crafts of any complexity, a large selection of directions and ideas for creativity.

We recommend reading

Washing machine error codes