Content
1. The purpose of the cooker hood.
2. What the system consists of, and the necessary set of tools.
3. Preliminary work.
4. Installation of the exhaust system.
5. Testing the kitchen hood in the winter.
A cooker hood is located above the stove, designed for ventilation and cleaning of polluted air (soot, odors) or its movement outside the premises. Installing a kitchen hood is a time-consuming process if you do not have a ventilation opening that requires basic knowledge and skills in the field of electrics, if you need to transfer or reconnect the outlet. The rest of the work is not difficult, the main thing is to have practical skills in construction.
What the system consists of, and the necessary set of tools and materials.
The provided built-in domestic exhaust system consists of:
- a fan with a grease trap and local lighting;
- exhaust duct;
- transition elements;
- corrugations, with a diameter of 115 mm;
- air duct, 300 mm long and 130 mm in diameter;
- a ventilation peak with a check valve with a diameter of 130 mm.
Power is supplied through a power outlet, which is located in the inner zone of the hood for hoods.
Preliminary work.
The installation of a kitchen hood starts with determining its location. After that, circles are drawn on the supporting wall under the duct, with a section of 130 mm and a socket with a diameter of 65 mm. Through a punch and a long drill, through holes are drilled along the contour of the future ventilation opening and in its center. A hole with a diameter of more than 130 mm is knocked out with a peak through the holes. A crown or a drill (6 - 12 mm) and a lance prepares a place for the box under the outlet. From the junction box, observing the installation standards for electrical systems, a strobe is punched or cut to a socket, and a two-wire copper wire is laid with a cross section of two millimeters, so that its ends hang from the listed boxes by 150 - 200 mm. Alabaster is fixed box under the outlet and wire. An air duct with a section of 130 mm is installed on the cement mortar, at an angle of 5-10 degrees to the street side.

After the solution dries, the wall is aligned with start and finish putty.

Upon the solidification of the solution, finishing work is performed. The ends of the embedded wire are cleaned from insulation and connected to the phase, zero and the terminals of the outlet, which is then installed in its regular place.
Mounting the exhaust system.
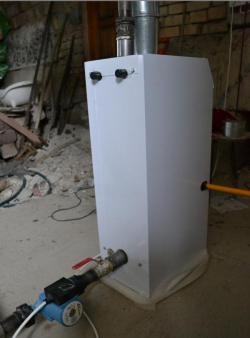
1. Installation of a peak. On the facade of the building, a visor with a check valve is attached in level.

In the event of a strong deviation along the vertical axis, the valve will be in the ajar position while the air removal system is idle.
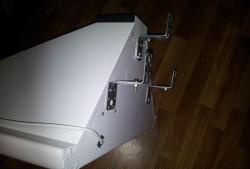
2. Preparation of the box. The built-in hood is mounted in a box 305 mm deep, made of laminated chipboard (16 mm thick), and is closed by a MDF facade. The remaining dimensions are shown in the photo.

In the back wall and in the shelf from the chipboard, the through elements under the corrugation (140 mm cross-section) and the socket, the end of which is protected from moisture by silicone, are cut out with a jigsaw. On the inner shelf, closer to the corner, a hole with a diameter of 8 - 10 mm is drilled to establish an electric cable.

The hood box is connected to other hinged kitchen cabinets.
3. Mounting the hanging drawers to the wall. Adjustable awnings are attached to the boxes.

On the wall, marking and fastening of the bar for canopies is carried out. Boxes are hung and set according to level.
4. Installation of the transition.A transition from section 125 (outer dimension) to 115 mm (inner diameter) is inserted into the duct from the inside of the duct.
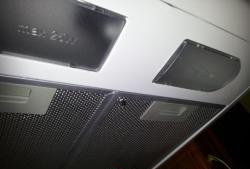
5. Installing a kitchen hood. A cable is threaded through the prepared hole of the shelf, and the exhaust device is immediately fixed to it. A plug is connected to the cable. One end of the aluminum corrugation 115 mm is inserted into the duct, the other is clamped on the nozzle of the device.

The plug is inserted into the socket and all modes of operation of the device are checked.
Testing the kitchen hood in the winter.
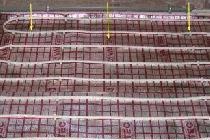
During the study, at -20 0С and a simple stove (more than 12 hours), it turned out that if condensation forms, it does not enter the kitchen or the building facade, the valve always remains free and the system works without interruptions. Based on the data obtained, it can be concluded: small exhaust systems up to 1.5 m with an air duct installed at an angle will not be covered with ice in the winter.