Methods for restoring mounting posts
As practice shows, first of all, in a case made of low-quality materials, the racks under the tightening and fastening bolts break.
The stand consists of a plastic cylinder, which at one end is fixed to the body and has stiffening ribs, and at the other end, at the end, there is a metal nut. Most often, the stand may break at the base of the connection with the body, or a soldered metal nut will pop out of it. Let's look at how these two breakdowns can be repaired.
Restoring the metal nut fastening:
1. If there is a threaded bushing disconnected from the stand, do not screw the bolt into it completely, and holding it with tweezers, heat it over a gas burner.
2. Quickly immerse the heated nut, with the thread at the top, into the area to be repaired, flush with the surface of the plastic cylinder, and to stop immersing the nut in the plastic, cool it with water.
3. Remove the bolt from the cooled repair unit.
4. Check the reliability of adhesion of the soldered area.
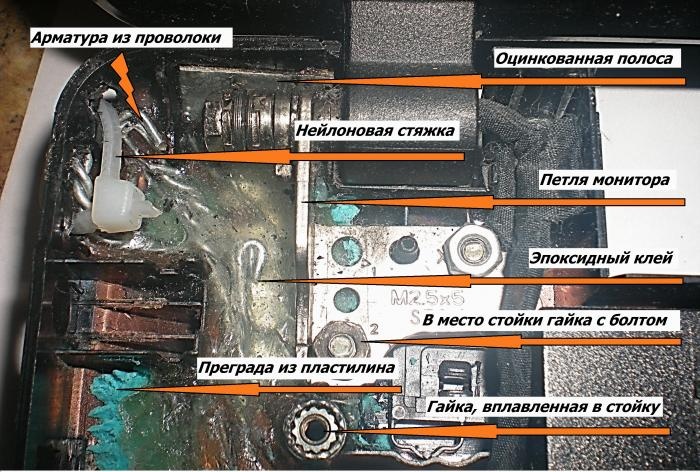
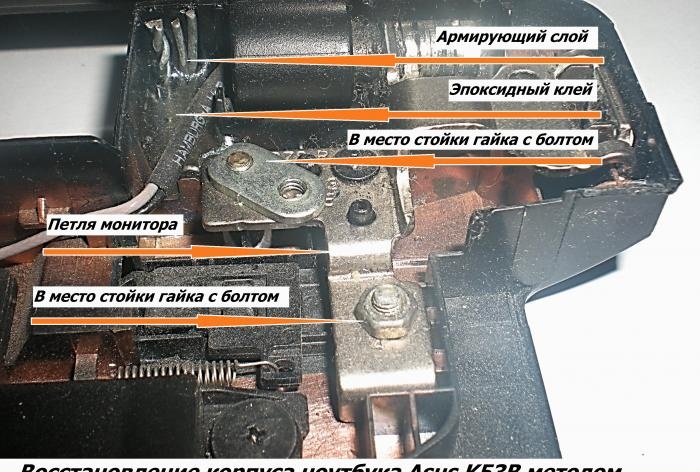
Also, in some places of the case where it is connected, for example, to a monitor, you can not restore the mounting strips, but screw the monitor hinges directly to the case.
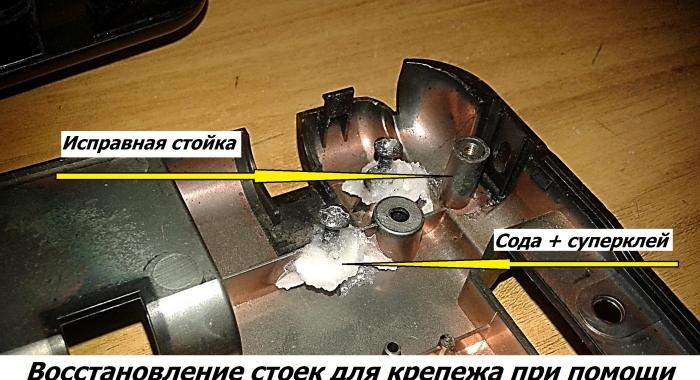
Restoring the fastening between the stand and the body:
1. To repair a damaged element, prepare baking soda and super glue. Screw the bolt into the broken part of the post.
2. Apply super glue to the broken end of the stand and to its installation location in the case.
3. Join and press the two parts treated with glue. Hold them in this position for about a minute.
4. Spread baking soda on the body as close to the stand as possible so that it covers the broken area well.
5. Apply super glue liberally to the baking soda.
6. Do this procedure 3 - 4 times.
7. After drying, check the adhesion of the repaired part for strength.
The reaction of combining soda with super glue generates heat, which ensures reliable joining of plastic parts at the molecular level. It will be easier to break a part of the body nearby than to damage the surface treated in this way.
Hull repair
A crack or chip may appear on the housing. The troubleshooting technique is almost the same, but has some nuances.
Stages of restoring a damaged surface:
1. Connect and fix the crack (chip).This can be done using nylon ties, plasticine, etc. When chipped, some, not large, part of the body may be missing. To prevent glue leakage, cover the resulting openings with plasticine or attach adhesive tape or electrical tape to the front side.
2. To reduce the area of glue spreading around the entire perimeter, make a barrier of plastein.
3. Place a reinforcing layer on the inside of the part in a fenced area so as to create rigidity in the weakened area. As reinforcing materials, you can use wire, paper clips, pieces of galvanized strip, fiberglass (it is better to lay fiberglass with epoxy glue), etc.
4. When using epoxy glue as a fixer, mix the fixer and hardener in the required volume. And then pour it onto the fenced, damaged area.
If fixation will be carried out with soda and super glue, then the damaged area should be covered with a layer of soda and glue. There must be at least three such layers.
5. After the glue has reliably hardened, remove unnecessary elements (plasticine, screeds, etc.) and check the strength of the repaired part.
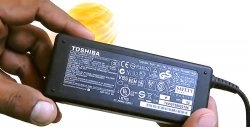
The photo shows possible repair options for the Asus K 53 B laptop case.