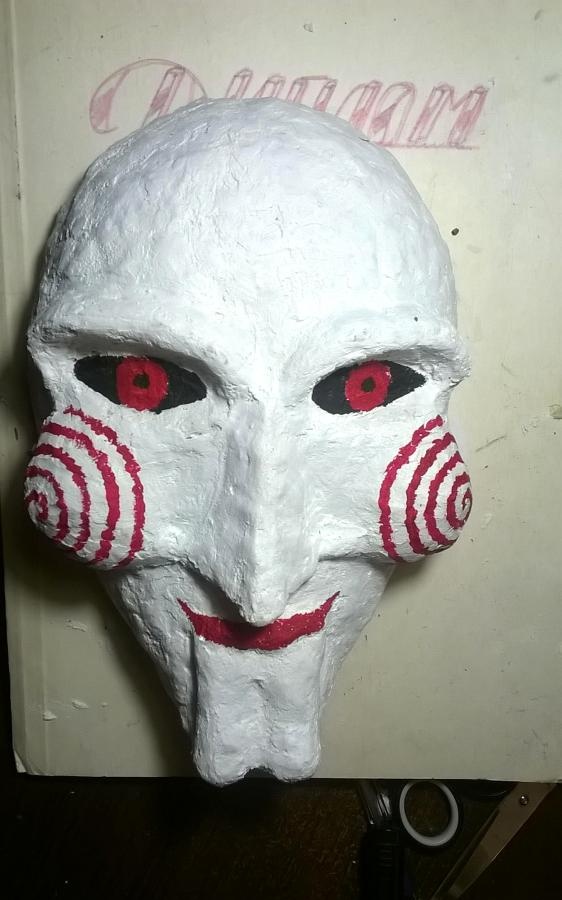
Making a mask from papier mache - a fun activity with which you can express yourself and a great opportunity to use the mask itself both at a costume party and as a gift.
This article contains step-by-step instructions for making a mask, accompanied by examples for a clearer understanding.
Sketch
Draw a sketch that will contain all the details of the future face to facilitate subsequent work. If it is planned that there will be some unusual details on the face (clown nose, absence of a nose), it is necessary to display this on the sketch and, if possible, calculate the size of these changes.
For reference: approximately a person's face measures 24 by 16.5 cm.
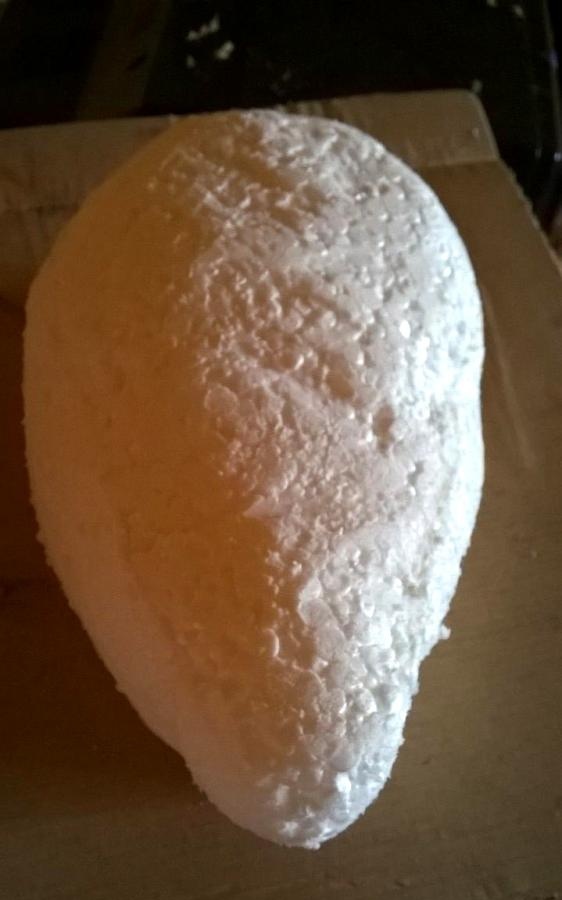
Expanded polystyrene mockup
- From three pieces of 40mm polystyrene foam, cut out ovals the size of the required face. A hacksaw blade for metal is suitable for cutting.
- Glue the resulting figures together using PVA glue. Apply glue closer to the middle, not along the edges.
- Give the layout the approximate shape of a face (without nose, eyes, etc.).
- Clean the resulting layout with fine sandpaper (number 240).

For reference:
- Instead of polystyrene foam, polystyrene foam is also used, but it crumbles a lot.
- Expanded polystyrene and polystyrene foam can be purchased at hardware stores.
- You can use polystyrene foam of a smaller thickness, but then you need to make more layers (for a thickness of 20 mm you need 6 pieces, etc. The total thickness should be approximately 120 mm or 12 cm).
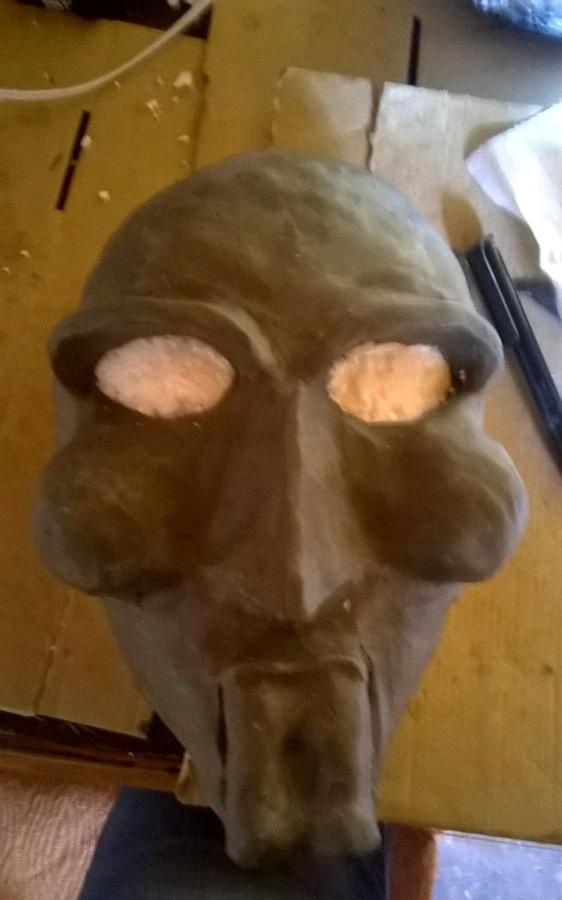
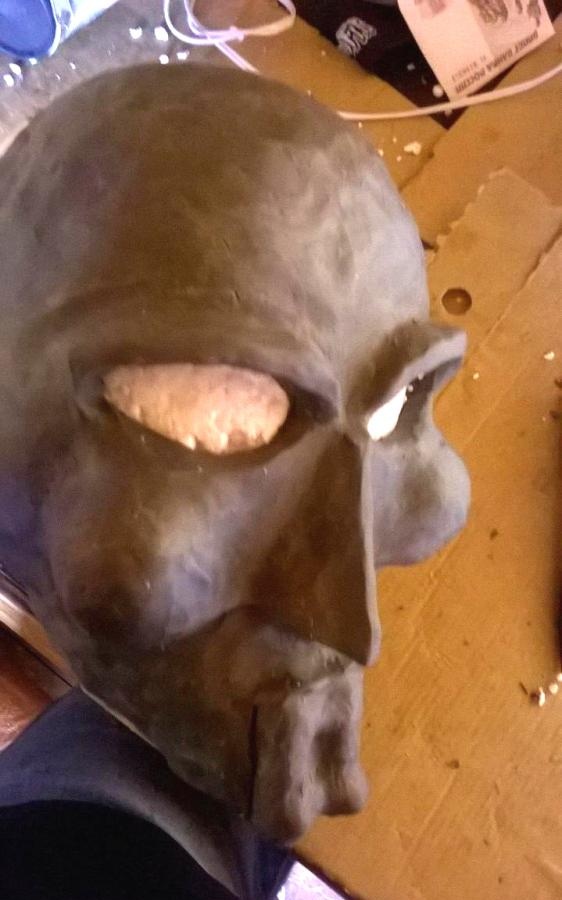
Application of sculptural plasticine
- Cover the model with plasticine, then sculpt the facial features.
- It is necessary to cut off a layer of plasticine from the most convex parts of the face so that when further covering with papier-mâché, these areas do not look bulky.
For reference: instead of sculptural plasticine, colored plasticine is used.
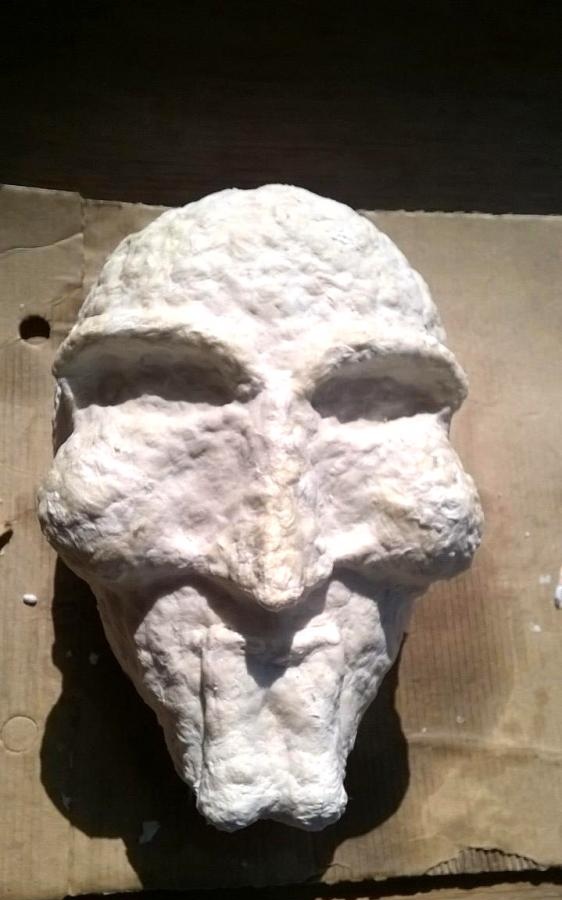
Papier-mâché coating
Wrap the workpiece in cling film or, if it is not available, grease it with vegetable oil (this is done to make it easier to separate the workpiece from the papier-mâché later).
Apply papier-mâché to the workpiece.
- Leave the mask to dry for approximately 48 hours.
- Separate dried papier-mâché from plasticine and polystyrene foam.
For reference:
- Instead of papier-mâché, polymorphus is used; in addition, it dries less.
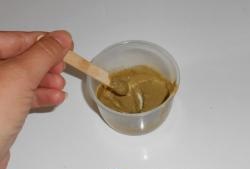
- If papier-mâché is not available, you can make it at home.
To do this you need glue, toilet paper and some soap.
- Tear the toilet paper into small pieces.
- Pour water into a saucepan, put it on fire and put pieces of toilet paper in it.
- Stir while waiting for the water to boil.
- Place a towel over the sink drain and carefully pour the contents of the pan onto it. The steam is hot!
- After the resulting mass has cooled, wrap a towel around it and squeeze well.
- Add PVA glue and a little soap to the resulting mass so that it does not stick to your hands.
Painting
- Before painting, sand the mask with coarse sandpaper.
- Apply a layer of wood putty and wait for it to dry.
- Clean the mask again.
- Mix putty and PVA glue and apply another layer to the mask (it will take about 4 hours to dry).
- Clean the mask again and cover with a thin layer of PVA.
- Paint using acrylic paints to make the mask last longer. It is better to mix paint in the palette, and not on the mask, so that there are no unnecessary stains.
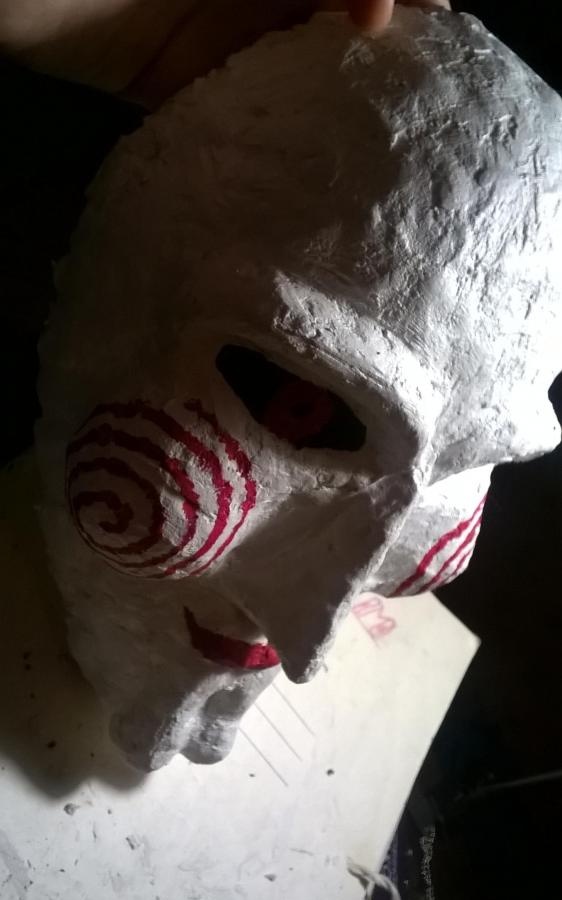
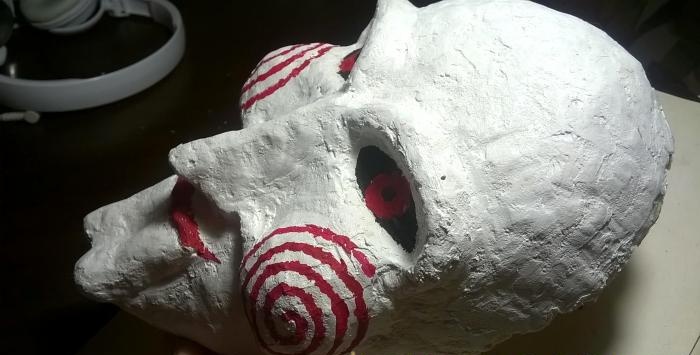
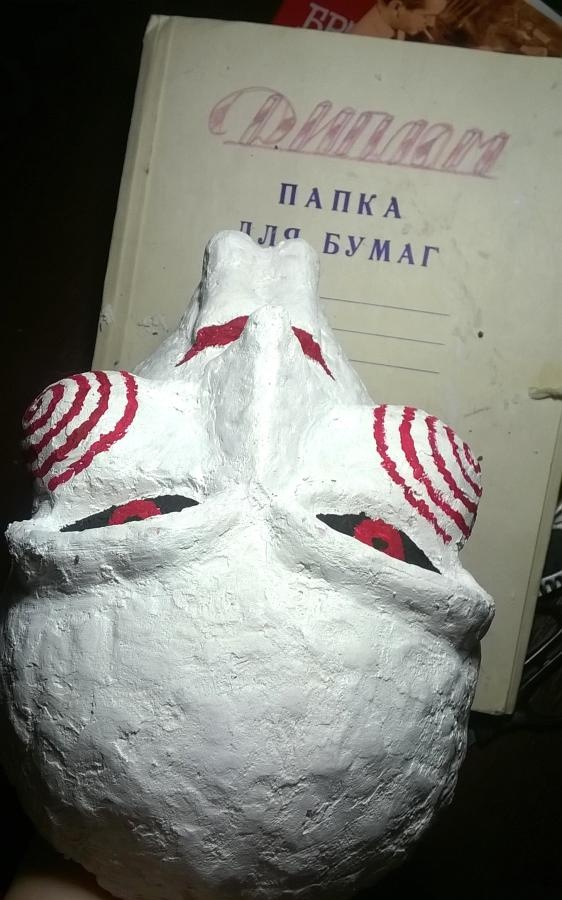
For reference: in order for the mask to shine, you can coat it with enamel before painting.
The mask is ready! All that remains is to glue an elastic band of suitable thickness to it (usually a thickness of 20-30 mm is used) to put it on.