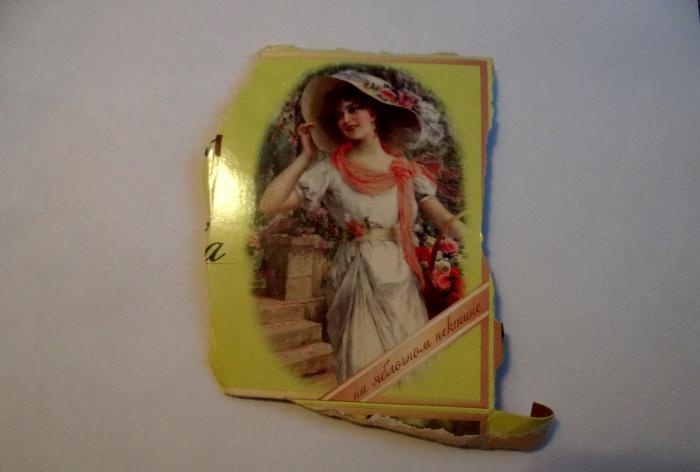
I suggest decorating champagne using the technique decoupage, napkin technology. It has been gaining popularity among needlewomen lately. As a basis for the composition, however, I will take not a napkin, but a cardboard label from natural apple marshmallows. In this article I will tell you in detail how to prepare such a picture for decoupage.
It is very important that for a gift of this kind a good, expensive drink is purchased, so that there is no contrast between the contents and the beauty of the container. I took Russian champagne, costing about 300 rubles, with a characteristic notch in the upper third of the bottle.Before washing off the labels, I captured them in photographs.

Bottle preparation
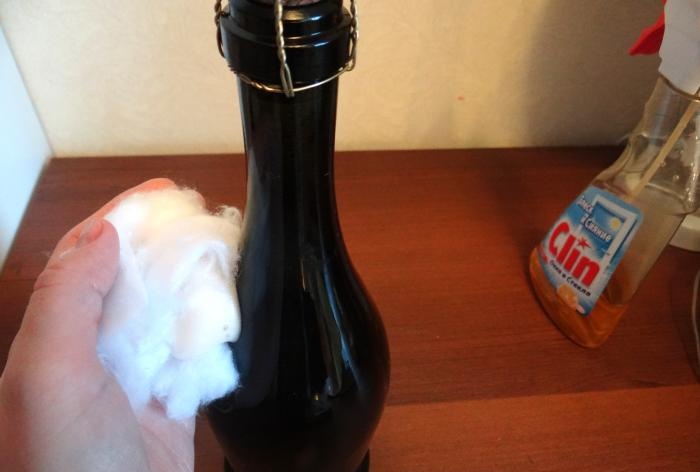
In order to prepare the surface for decoupage, you must first remove all the “original” labels. Keep the bottle in water at room temperature for several hours, then use a sponge or brush to remove the label. Remains of glue will be removed with cotton wool soaked in vegetable oil.
The next stage is degreasing. It is necessary to remove all remaining oil so that the paint adheres well to the glass. You can clean the bottle with alcohol, a special degreaser, or a window and glass cleaner containing alcohol. Walk over the surface with cotton wool and the above mentioned products, blot with a dry towel.
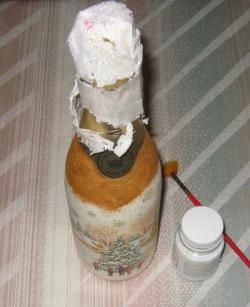
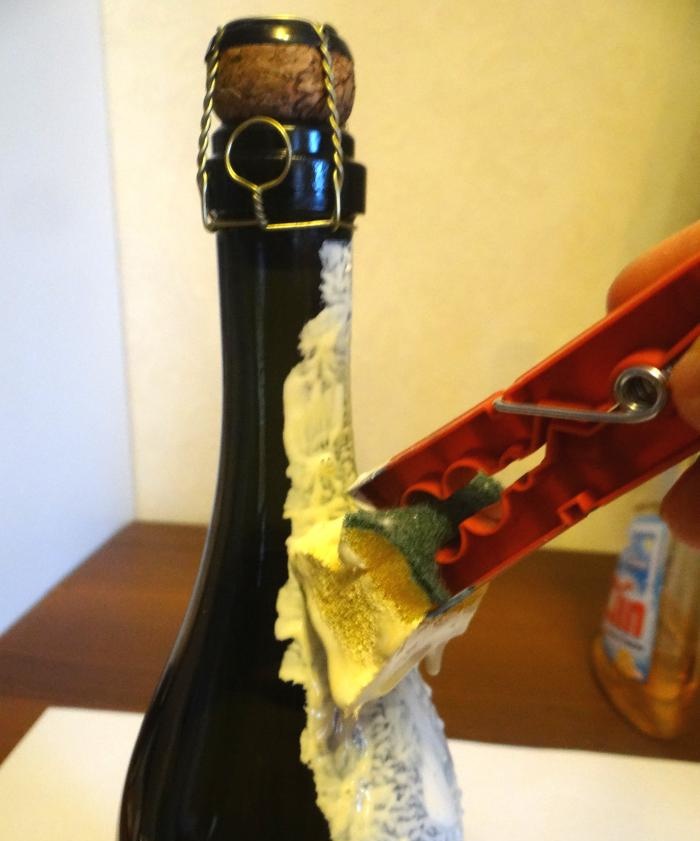
It is more convenient to apply paint to the bottle not with a brush, but with a piece of dishwashing sponge. For convenience, attach it to a plastic clothespin. We prime it with not pure white paint, let’s make the color matte: add yellow and black colors.
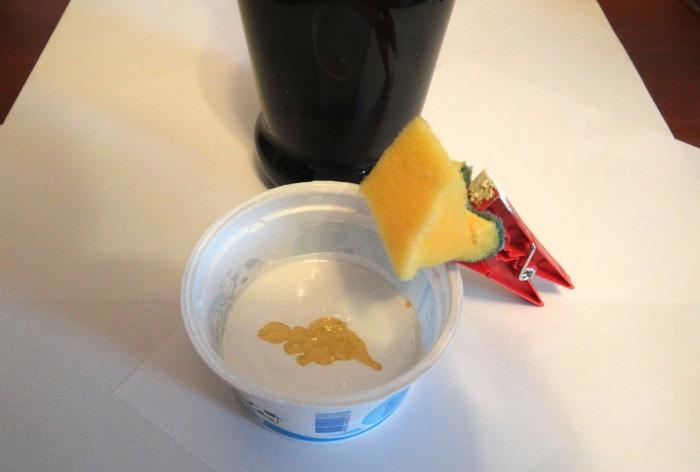
Apply sequentially, with mandatory drying, two or three layers of acrylic primer or paint. Paint bubbles that appear on the surface will need to be broken out with a sponge for quite some time.
Preparing the main picture
So, while the paint dries, you can start painting. Here she is.
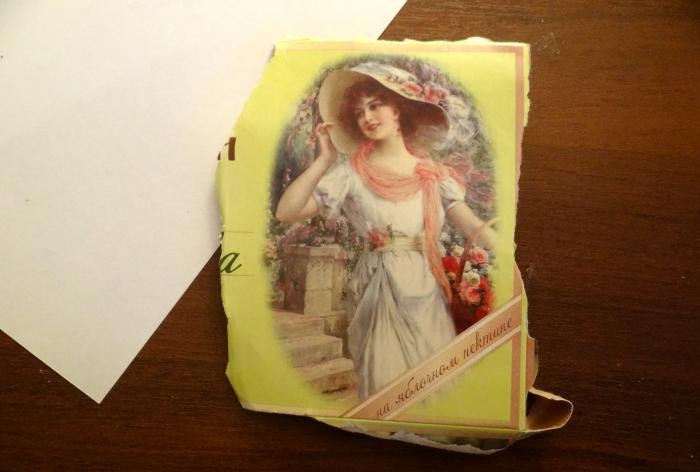
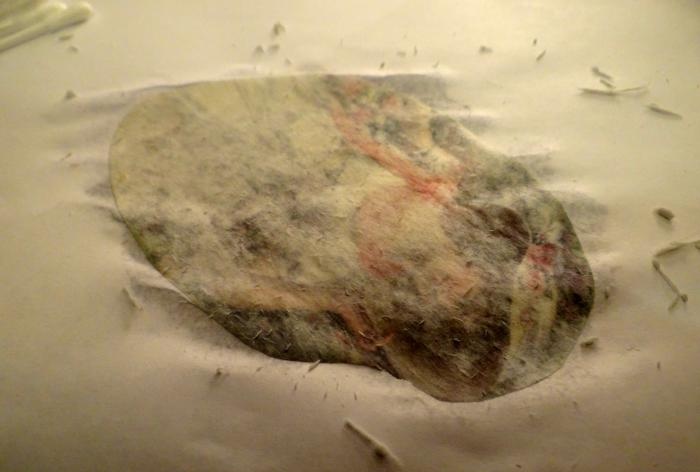
This is cardboard, and any cardboard is several layers of paper. The top layer is glossy, as if it had already been varnished; the design is applied to coated paper. The lower layers are darker and denser.
Turn the picture over and carefully pull the edge of the peeling cardboard. Just as shown in the photo.
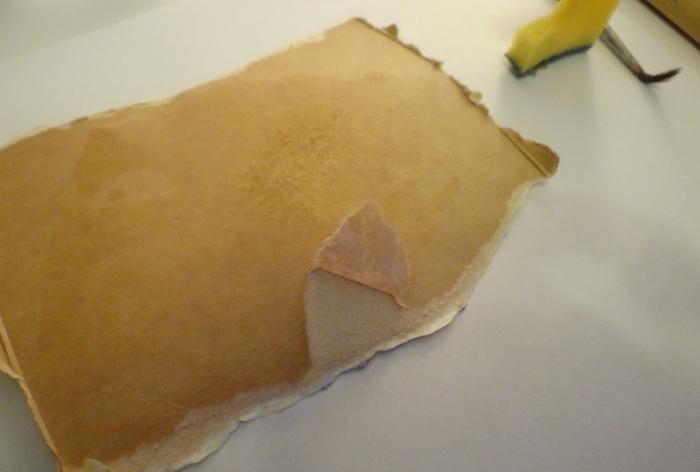
Be extremely careful not to damage the paint layer!
The next step is to rub a finger dipped in clean water over the surface of the cardboard, as if rolling the excess paper into small rolls.
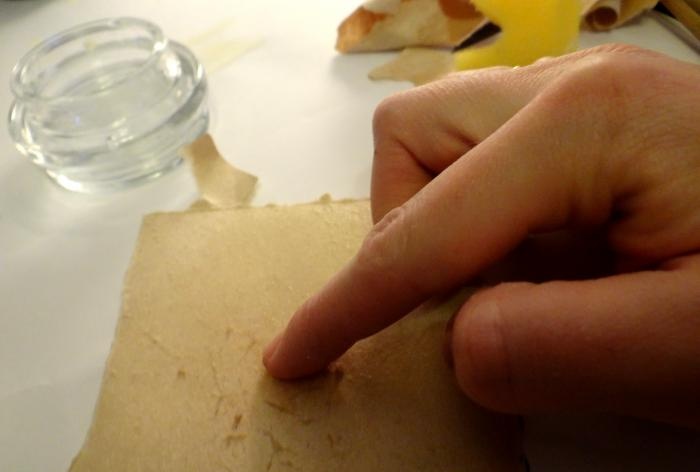
If you find that the cardboard can be layered again, then do so.
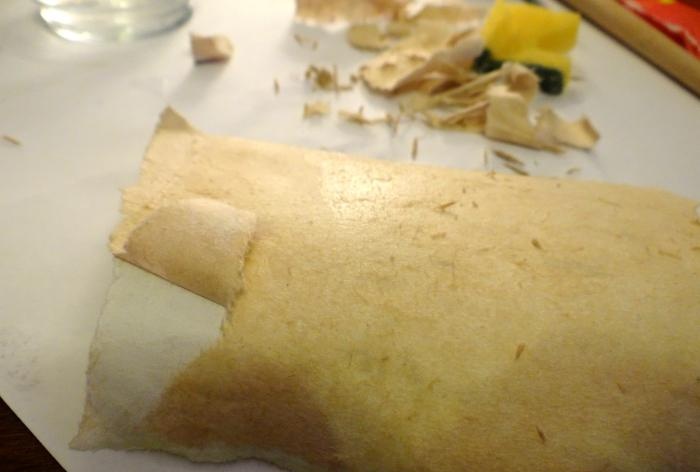
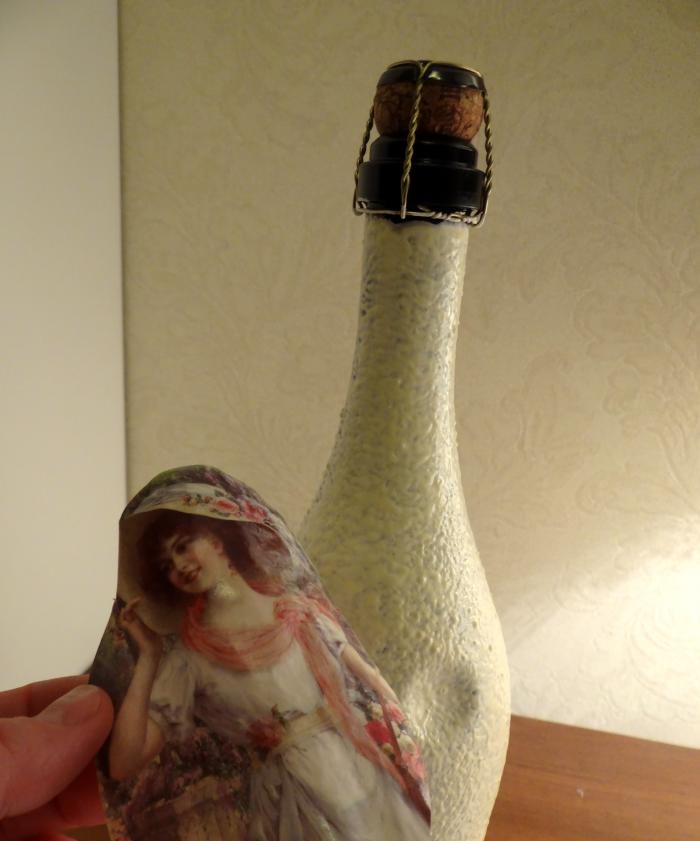
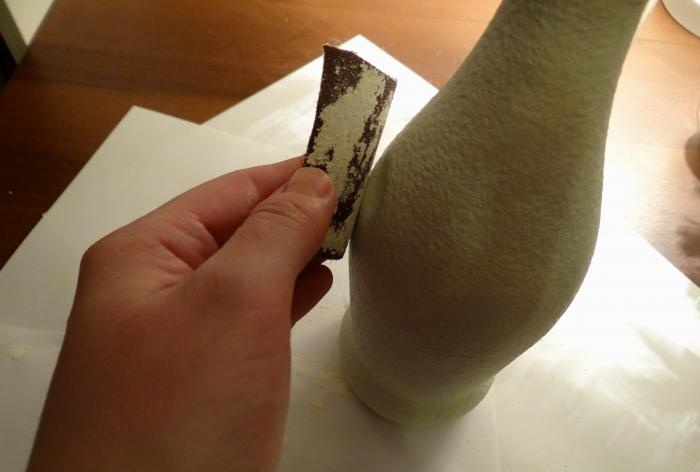
Try the picture on the bottle. It really looks noble.
The last stage of preparing the picture: place the drawing on white paper with the colorful side, moisten it quite generously and continue to remove excess paper with a cotton swab or finger (note, this is already white, not light brown paper). It is important here not to overdo it so that a hole does not form in the drawing.
Attention! Don't try to remove the picture from the white paper until it's dry! If you can't wait to continue working, dry the image with a hairdryer.
Finishing work with the surface and image
Now the dried layers of paint on the bottle need to be sanded with sandpaper. Even if the exterior is smooth, small depressions will still form. They can either be left unfilled, or a very thin, literally 0.1 mm layer of putty can be applied on top (applied with a plastic card or even with your finger).
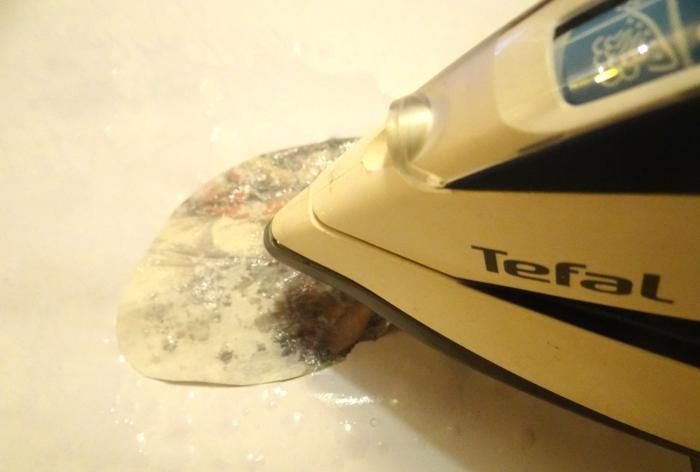
Iron the picture from the inside out with an iron (medium temperature).
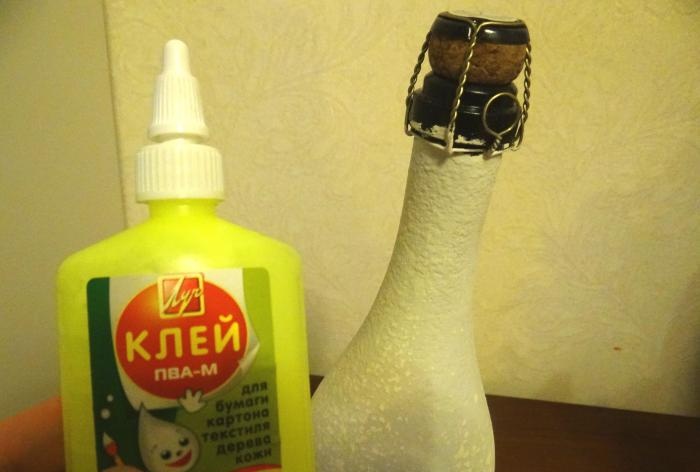
To glue the first and main motif, prepare PVA glue. It will need to be diluted with water 1:1 (one part of glue and about the same amount of water), and mixed thoroughly.
Decoupage
Coat the bottle in the place where the main plot will be located with PVA glue and water, including the periphery. To do this, place the champagne on its side on a towel that you don’t mind getting dirty with liquid glue.
Carefully iron the picture with a brush or fingers. Since this is not a napkin, it is problematic to damage the paint layer, especially since the cardboard was like varnish.By the way, when ironing with an iron, small cracks could form on the surface; this can be called the aging effect, which is often specially used by craftswomen.
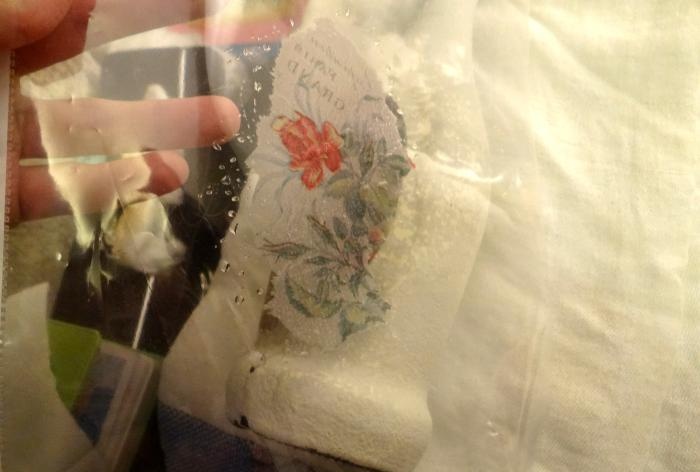
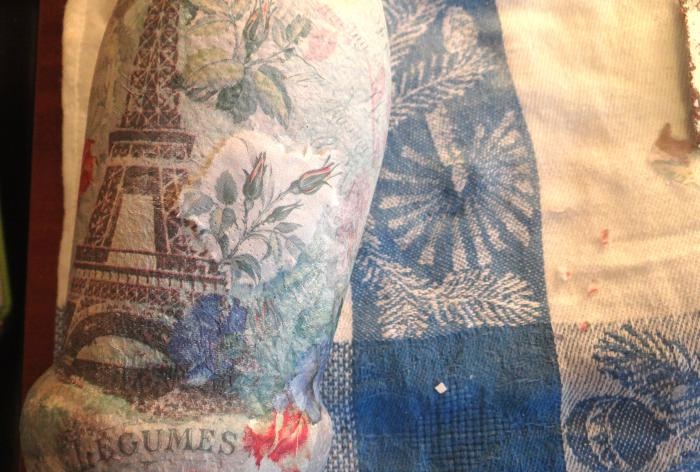
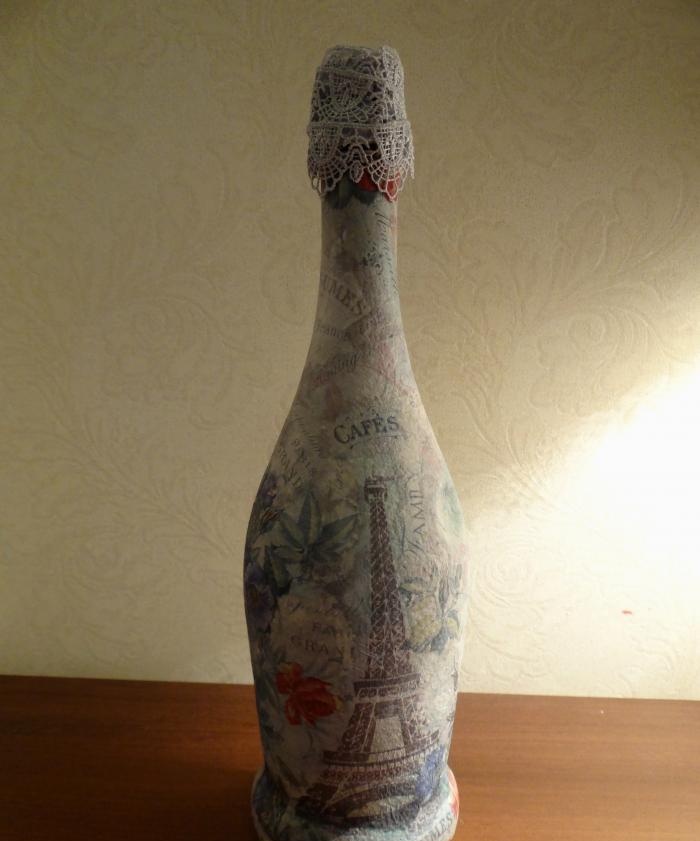
We need to select a suitable napkin for the main motif in advance; then we will work with it using two techniques: decoupage with a file and direct decoupage. We won’t finish painting the background with paint; it will be enough to take motifs that match the color. I chose a serving napkin with a picture of Paris: it has floral fragments, the Eiffel Tower, inscriptions (though for some reason in English), and the names of Parisian streets.
I recommend treating the words carefully and tearing them off the napkin so that they can then be easily read on the bottle. For me these words are: “family, home, time” and others. You can also read the following phrases: “Having someone to love ia family” and “Having someone to go is home.” Pleasant words that can be addressed to the person for whom the gift is intended.
So, we gradually tear the napkin into motifs. Sometimes you need to look at images for a very long time and think about where to place this or that flower. Do not forget that when moistened, the napkin expands; the surfaces that dry and wet paper will cover are different. There is no need to separate all motives at once. Some may get lost in the process, or suddenly it turns out that the drawing is too small.
At first, the fragments will be quite large, but towards the end of the work you will glue increasingly smaller motifs or background elements, up to 2x2 mm.
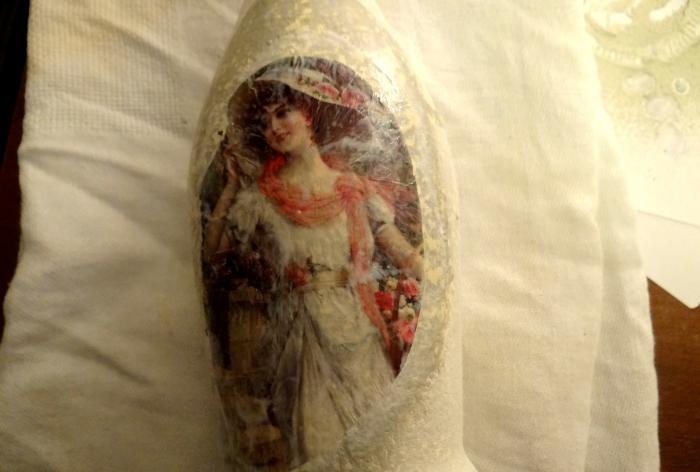
I took the floral motif first, since such a beautiful lady as in our main picture must certainly be surrounded by flowers.I place the drawing face down on the file, moisten it with water and expel air bubbles from under the napkin with a soft brush.
I carefully place the picture in the right place on the bottle. I remove the file, the picture remains on the surface. And only now I coat the napkin with glue. Liquid glue impregnates the motif and firmly attaches it to the bottle.
In the same way I glue other larger pieces of napkin. In the photo below you can see the intermediate result. Important! Before each next step, I dry the surface with a hairdryer, sometimes it is necessary to touch up the napkin with a brush or hand, but this must be done very carefully.
I place flowers around the girl.
This is how I try on a dry napkin with a motif and decide where to glue it. In this case, this floral motif ended up in a completely different place.
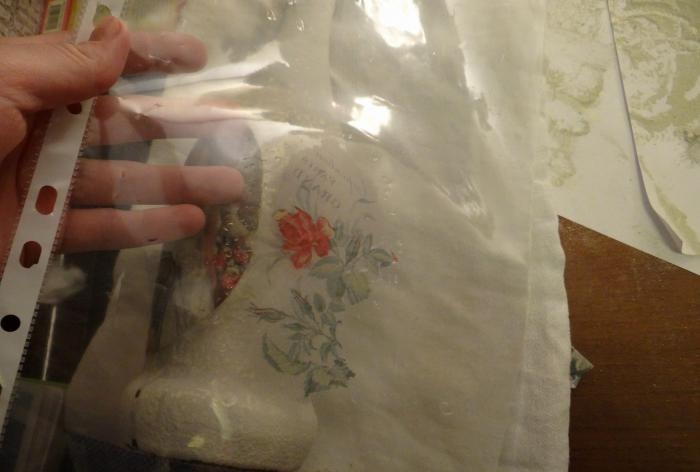
In the same way, I cover the entire bottle, turning it towards me, first one side, then the other. Sometimes it’s more convenient to put it on the bottom, and sometimes to put it on a napkin. It happens that I need to smooth the surface with sandpaper or tint the background (if the glue has spread), each time I use a hairdryer to dry it. I glue small fragments of the napkin without a file, using direct decoupage. I coat the top of a dry cloth with glue and gently smooth it with a brush.
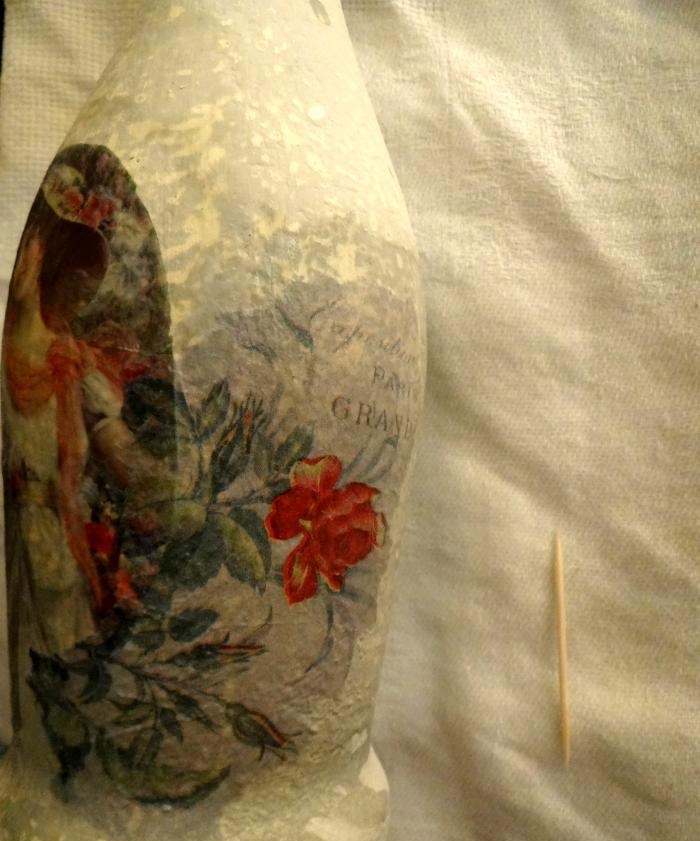
Some flowers were not fully depicted on the napkin. The color scheme of this work is as follows:
- gray, brown – colors of the background, inscriptions and the Eiffel Tower;
- red is the color of a rose;
- blue is the color of carnations;
- green is the color of the leaves.
I place incomplete flowers at the bottom or top of the bottle, so that there is a feeling that the whole flower is simply not visible.
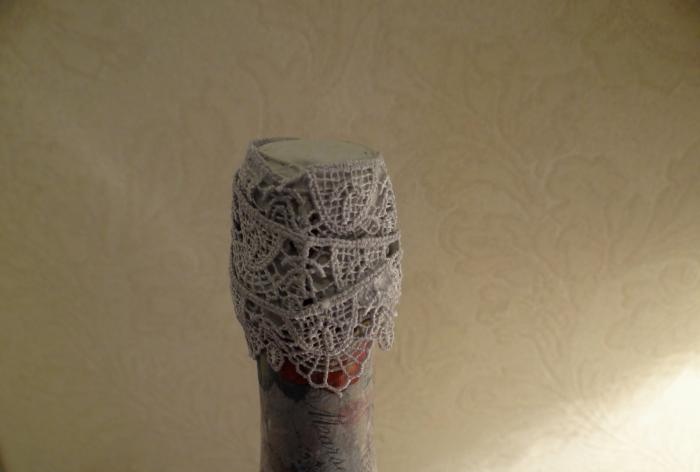
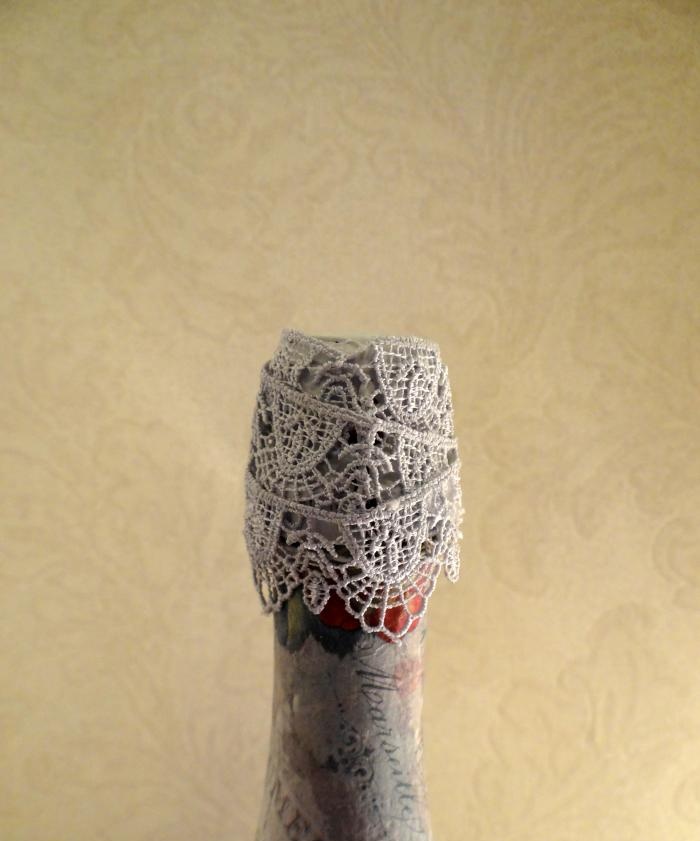
At the very end of the work, I decorate the cork using tape and a glue gun.
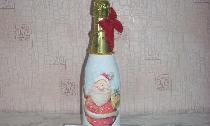
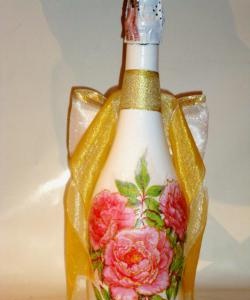
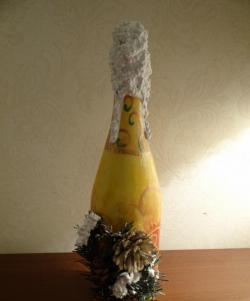
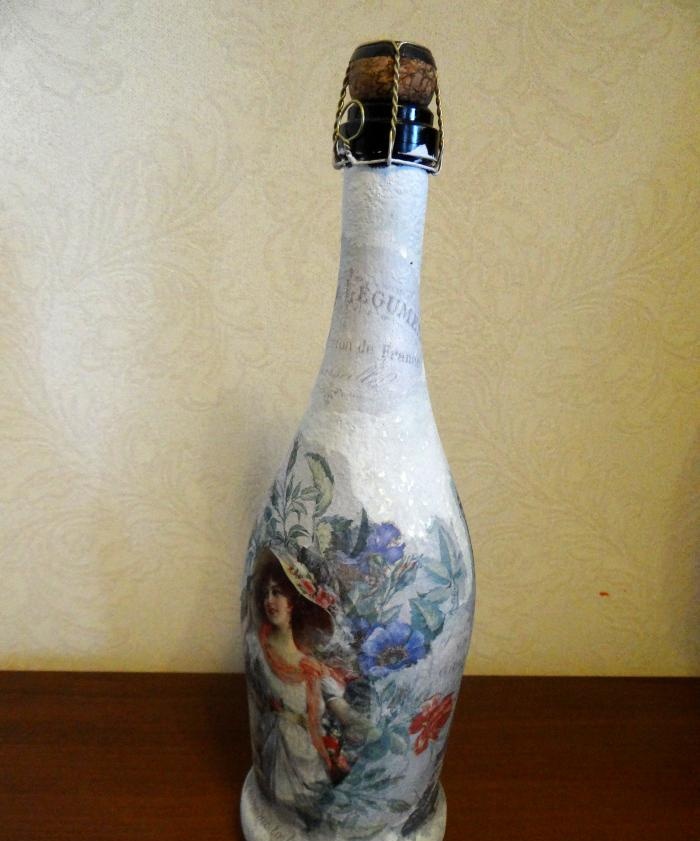
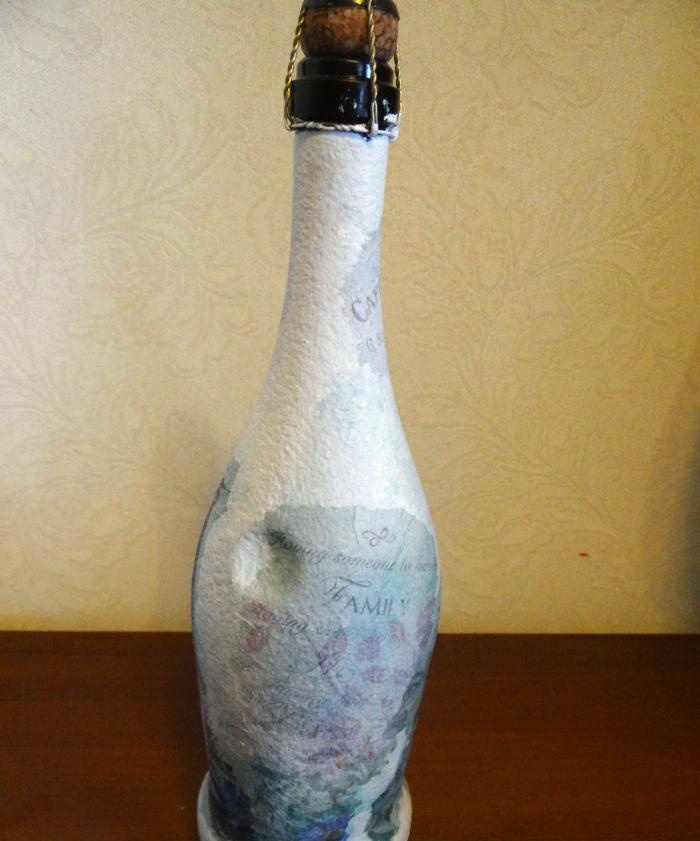
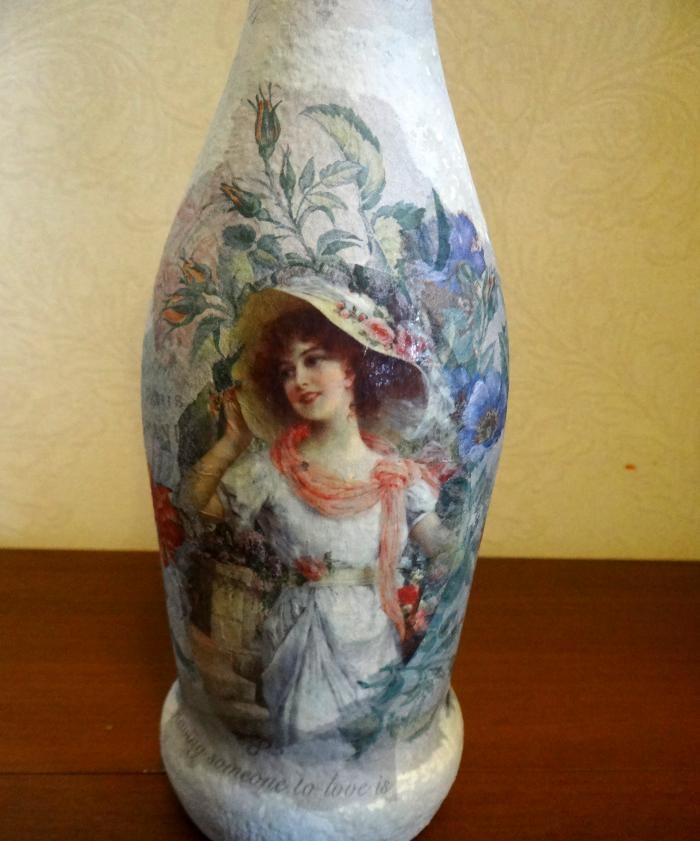
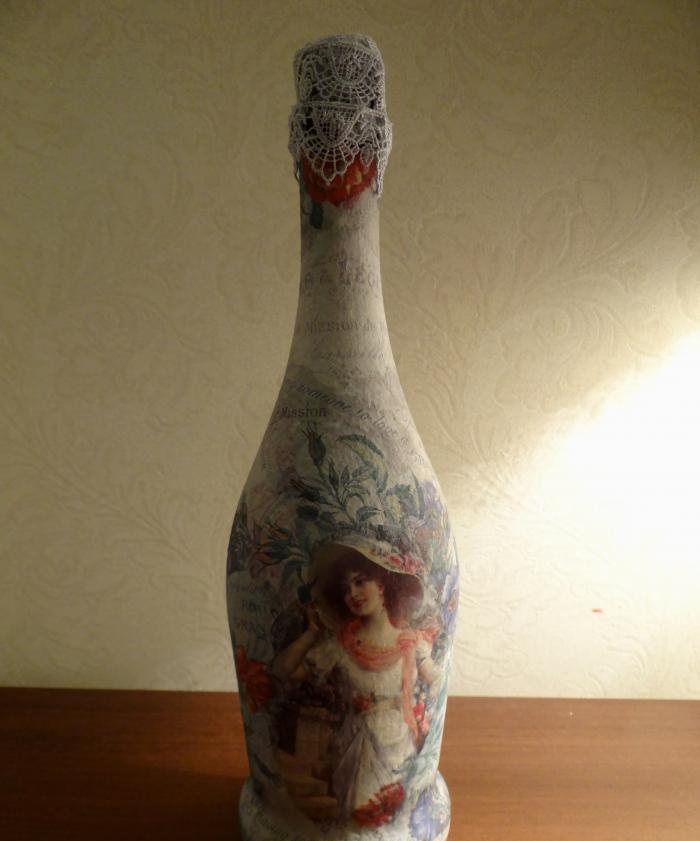
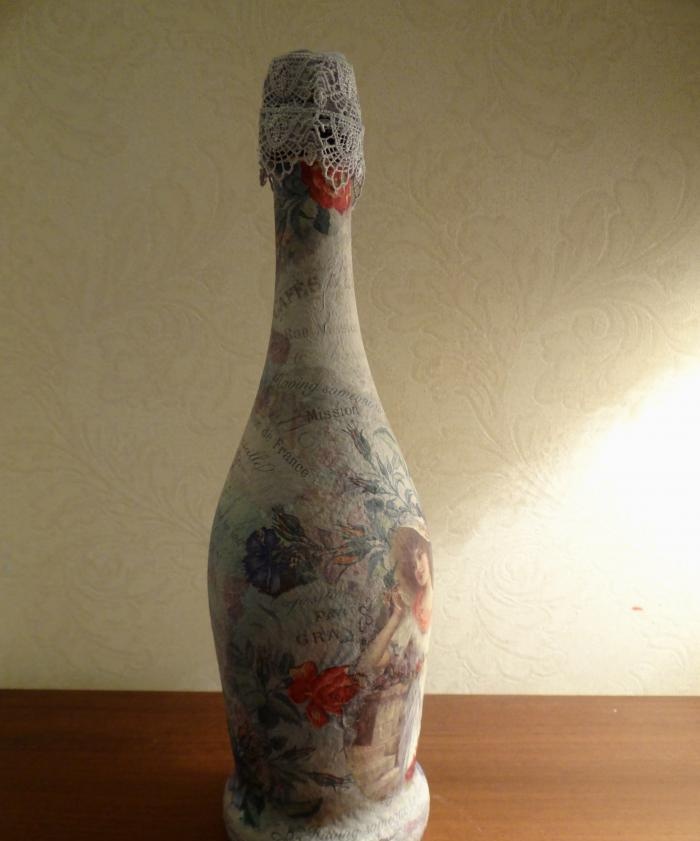
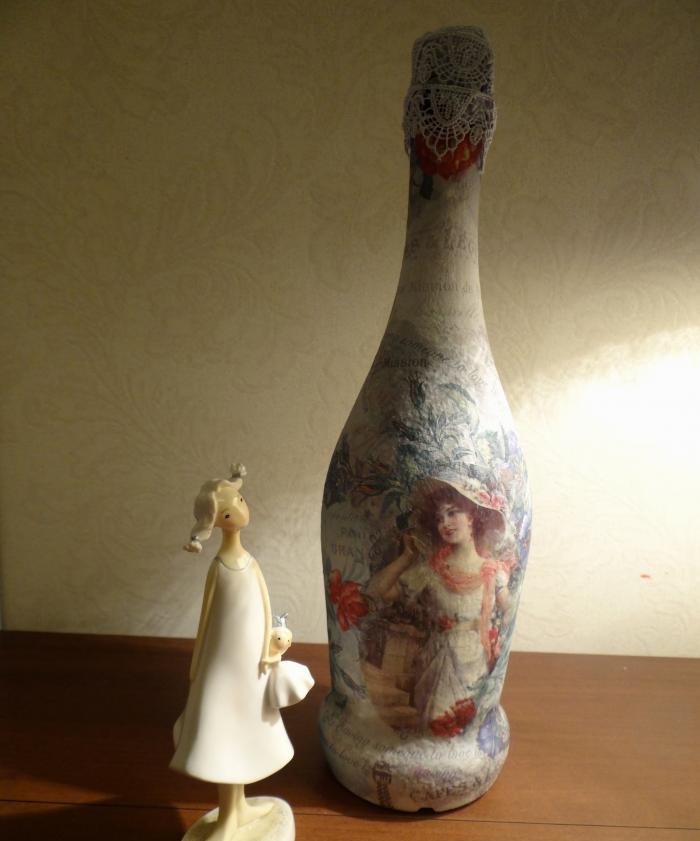
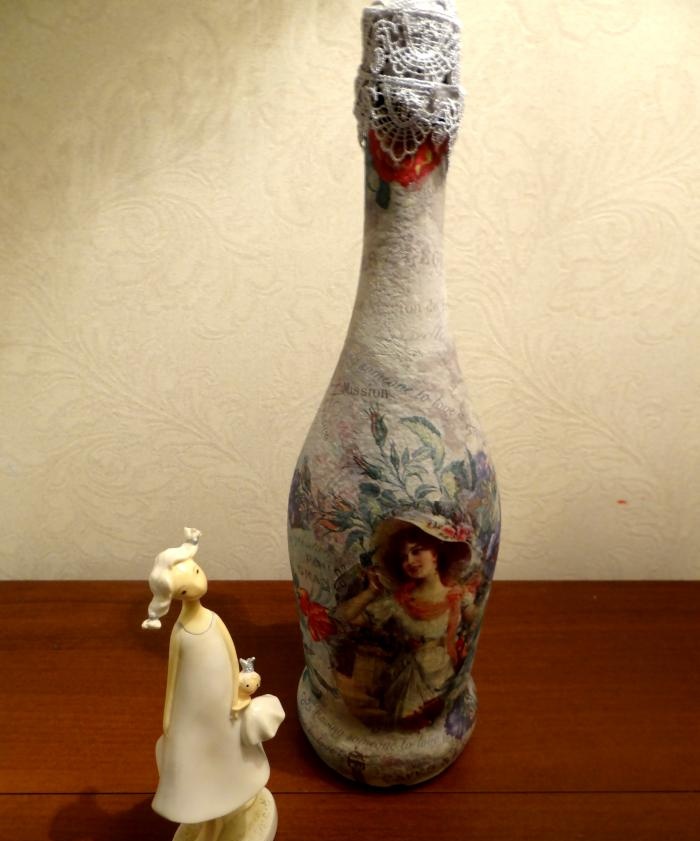
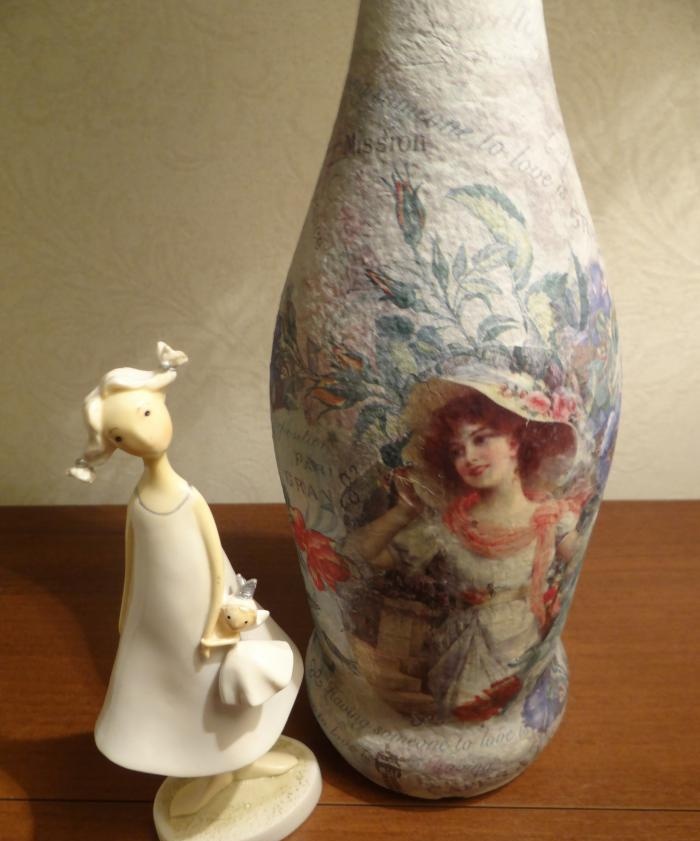
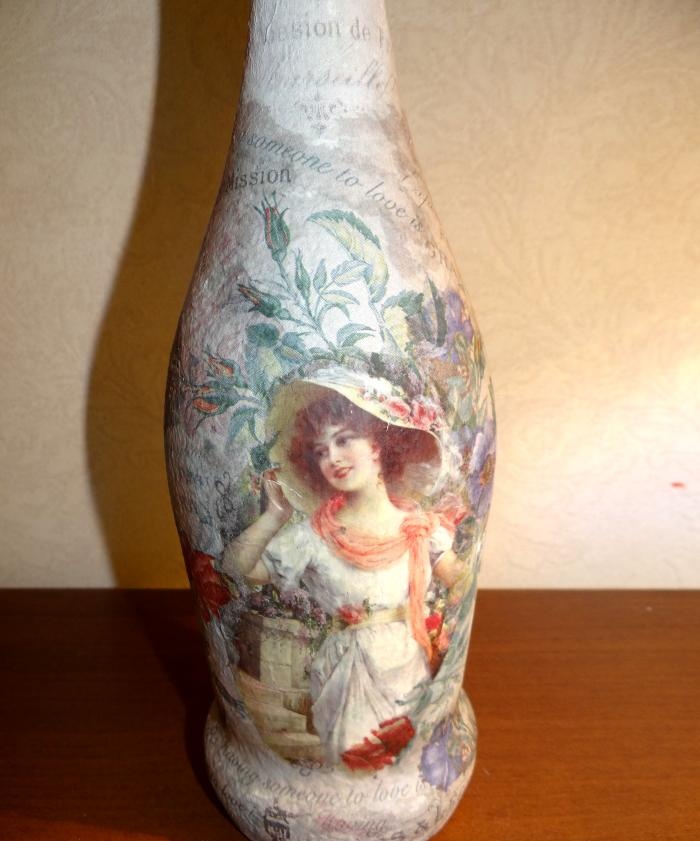
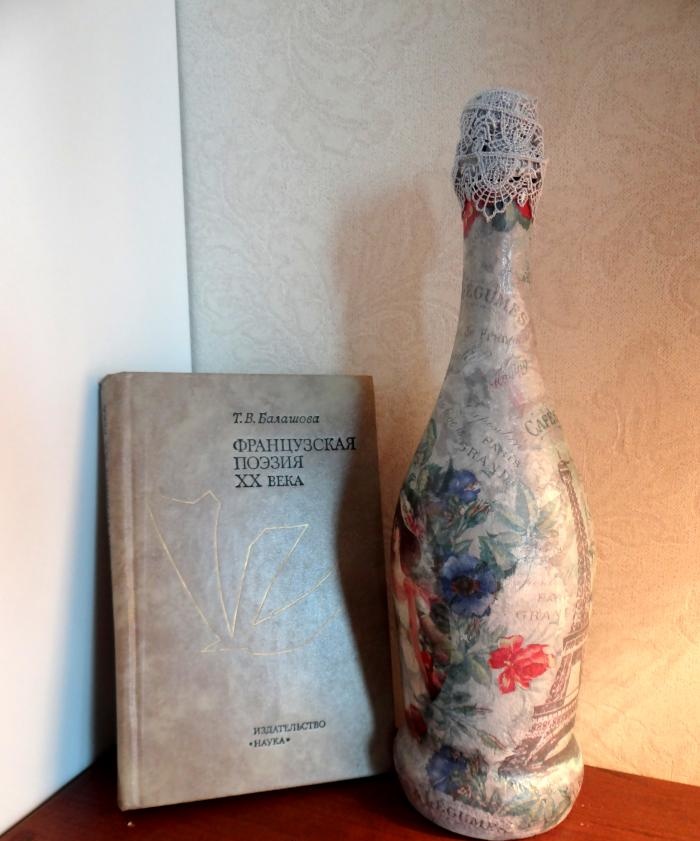
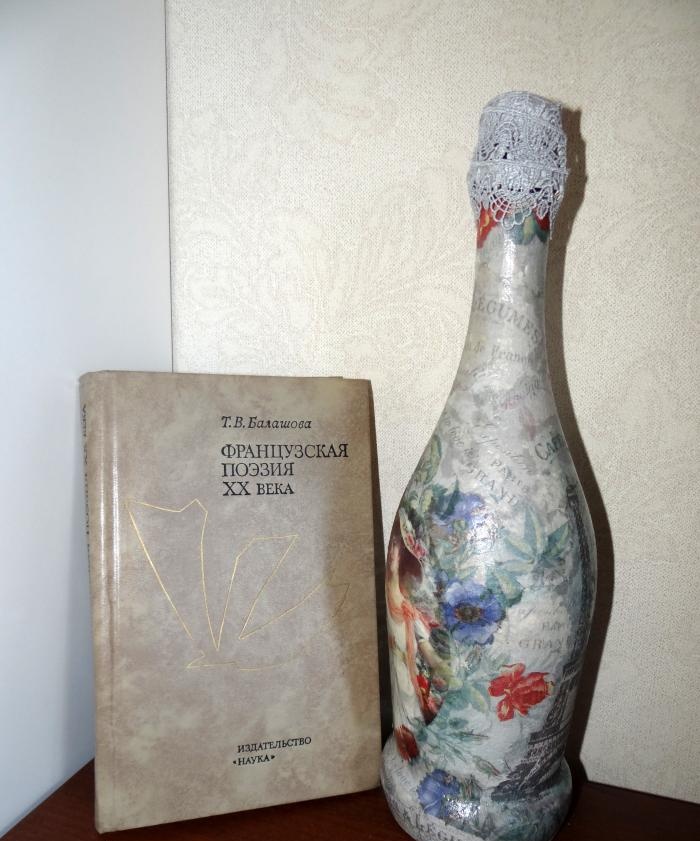
This is the result, look at the photos.
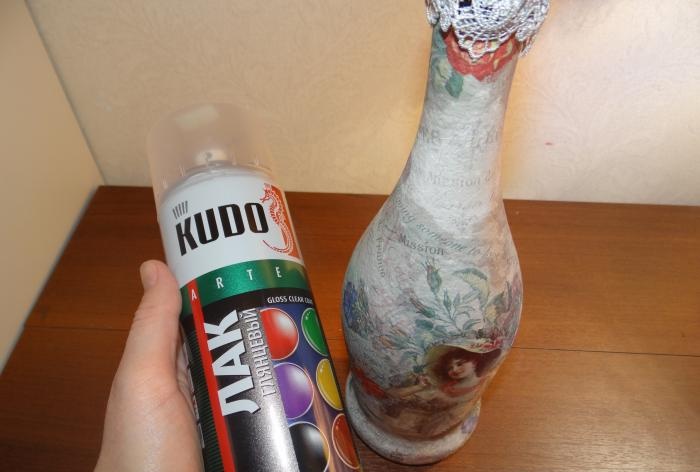
Carefully inspect the bottle from all sides. Do you have a desire to correct something, paint on something? Then all that remains is to coat the work with varnish.
It is better to coat the work with acrylic glossy varnish for 2-3 layers.

Some areas will not dry immediately, it takes time.
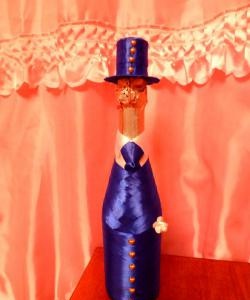
So, the work is ready! The bottle exudes French romance, and in the lovely girl depicted on it, you can recognize yourself or your loved ones! This is how the picture from the packaging of apple marshmallows unexpectedly came in handy. Be attentive to the world around you, it is full of wonderful things!

I will send the remaining final photos to the buyer via PM, the system does not allow adding more images.