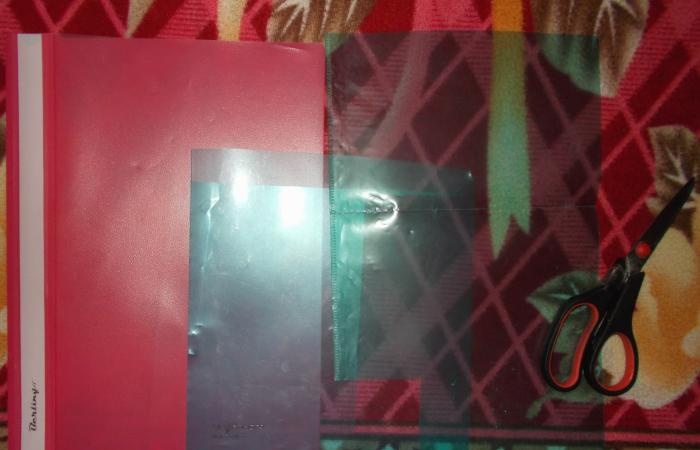
- 5 - 6 unnecessary plastic sheets or folders of different colors;
- Scissors, tape;
- Stapler;
- Medium-sized beads in white, blue, pink and brown colors;
- Needle;
- Green threads.
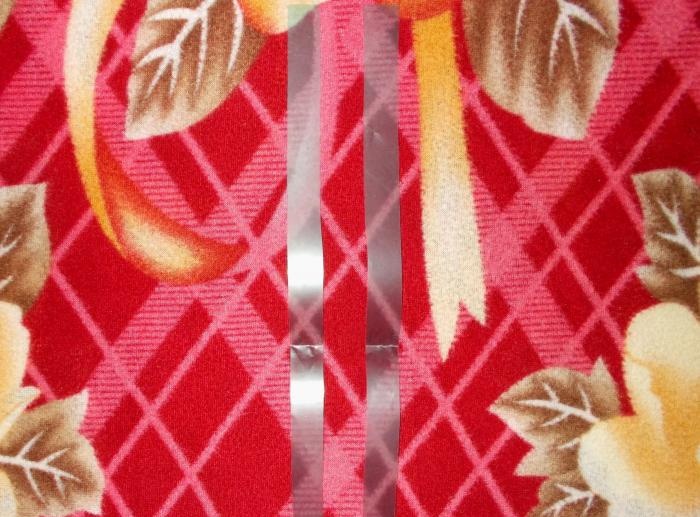
From a translucent sheet of an unnecessary folder, we cut out two strips (full length) 1.5 cm thick:
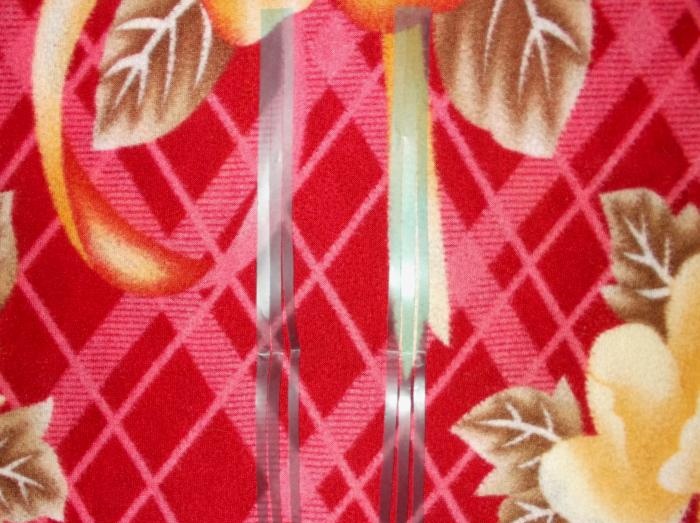
These strips need to be cut into three parts, leaving the upper edges uncut:
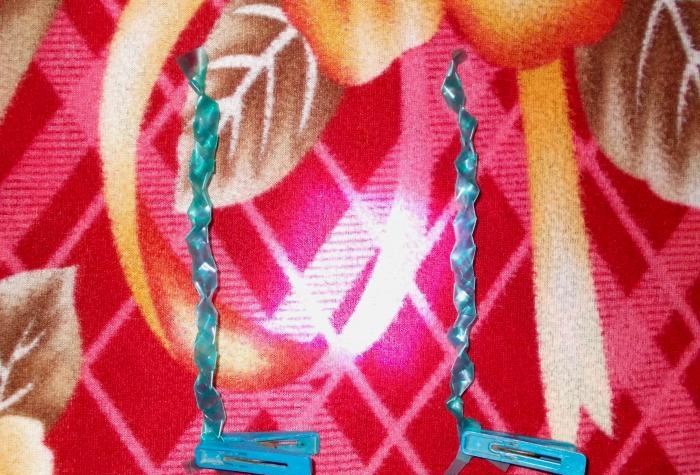
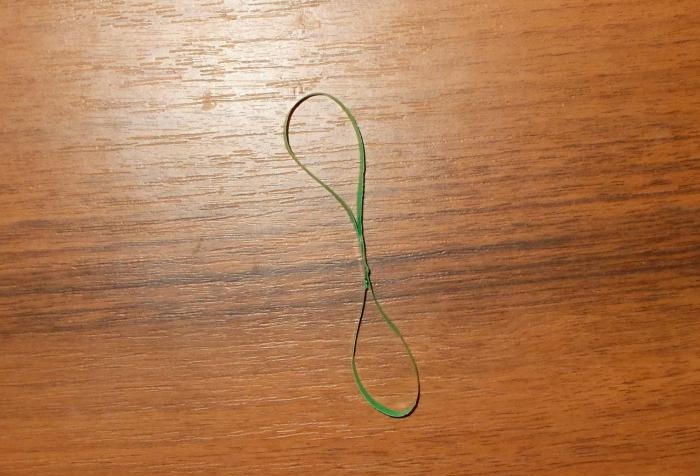
The resulting strips need to be braided and secured with clothespins, then connect (glue) the lower end of one “braid” to the other using a stapler or tape:
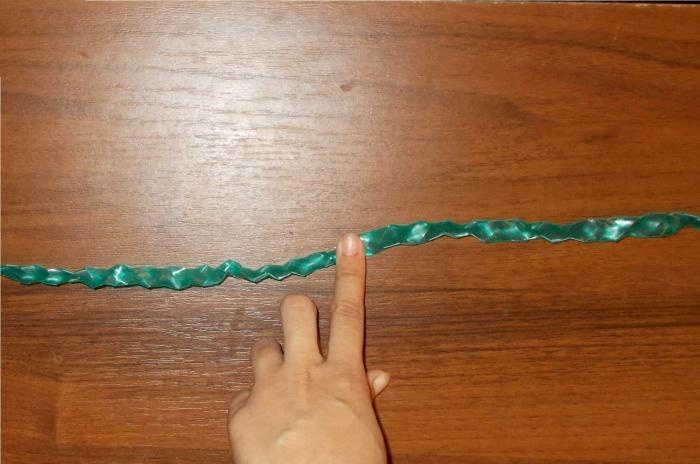
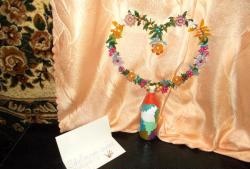
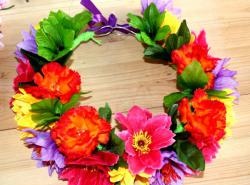
First we decided to make a wreath, so the resulting figure was secured at the ends with seams:

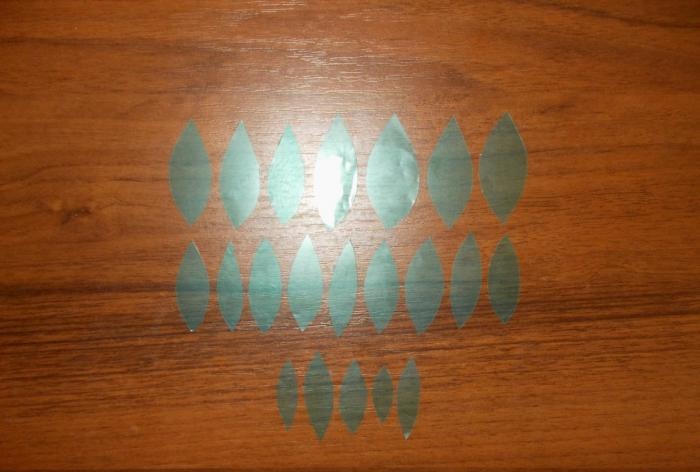
After this, we cut out up to 25 pieces of leaves of different sizes from a green translucent sheet:
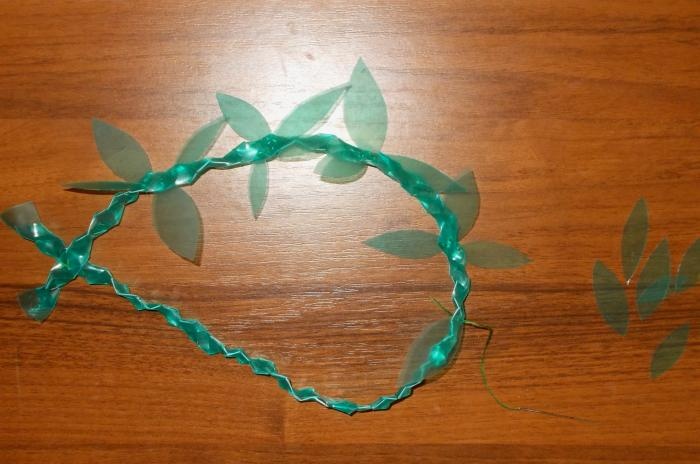
We need to sew these leaves to a plastic “stem-pigtail” using green threads (most matching the color of the stem):
When sewing leaves to the craft, we decided to increase their number from 21 to 31 pieces:
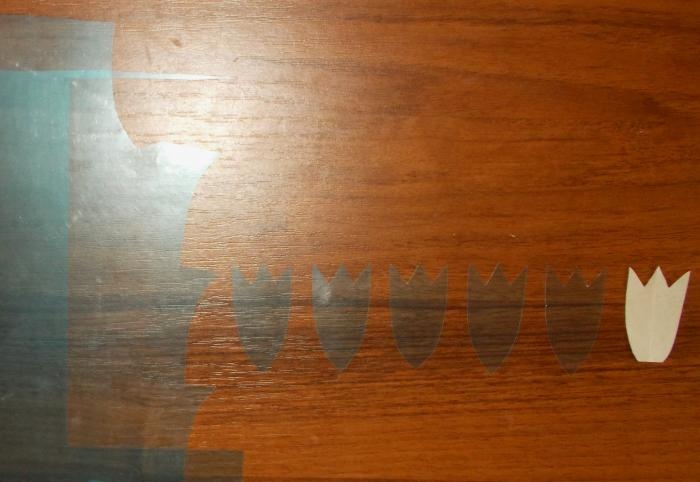
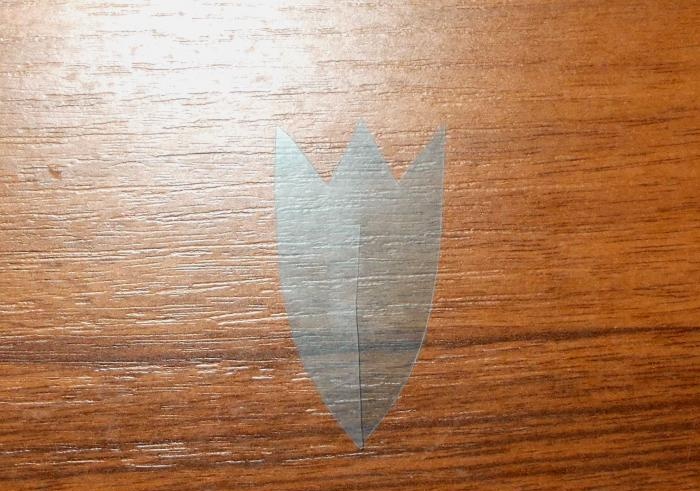
Next, to create an artificial flower, we cut out five of these petal shapes from a translucent blue plastic sheet:
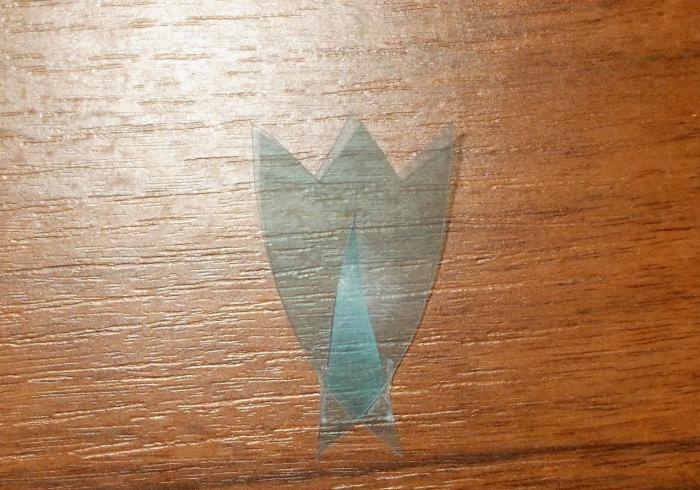
We need to cut each of the figures in the middle, but not to the end:
We then stack the cut ends of the petals on top of each other and glue them with tape:
Having glued all six petals in this way, we sew them together and connect a bead to the middle:
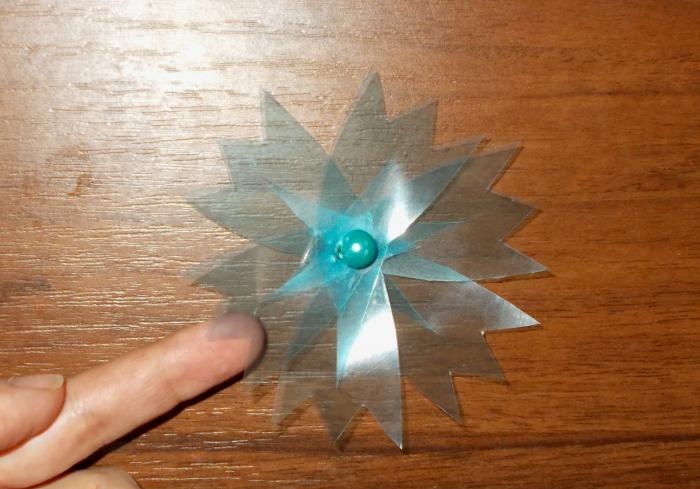
After this, our first DIY plastic flower is ready. Next, we make the rest of the flowers in this way: first, we cut out a couple of samples of different sizes from cardboard, according to the shape of which we will later need to cut out ten petals from plastic:
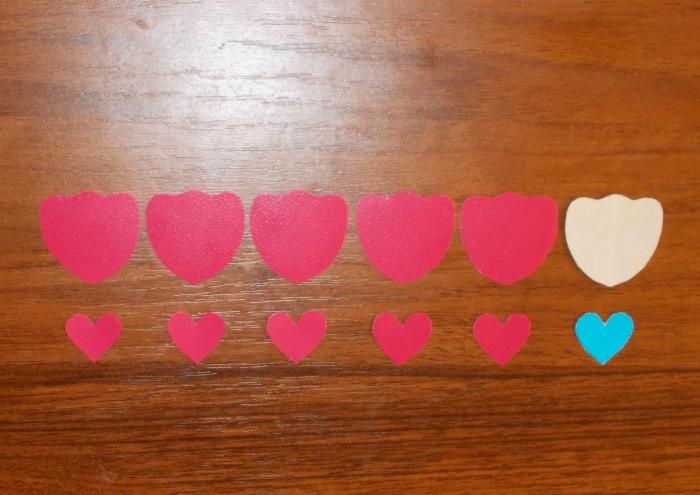
In the same way we cut and glue these petals:
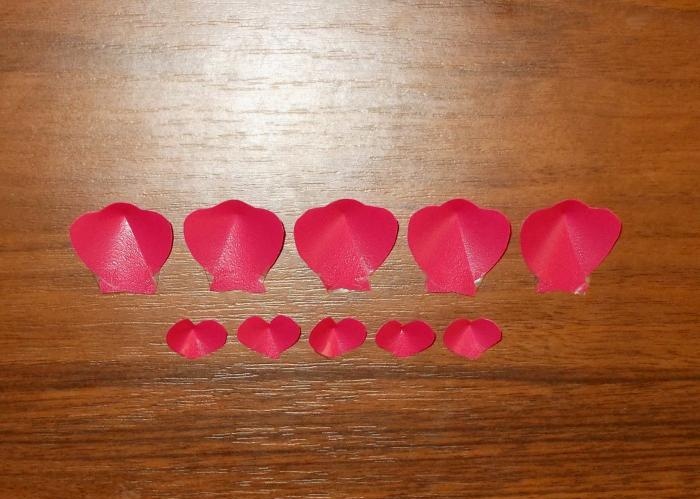
Next, we make artificial flowers from the resulting petals. Here we first glue together large shapes, and then small ones, after which we connect them, superimposing one on top of the other:
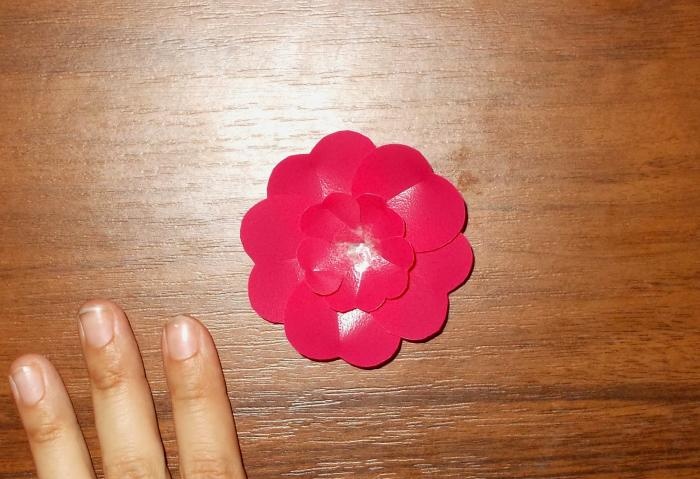
Next, we need to sew the shapes together, attaching a bead to the middle of each of them.
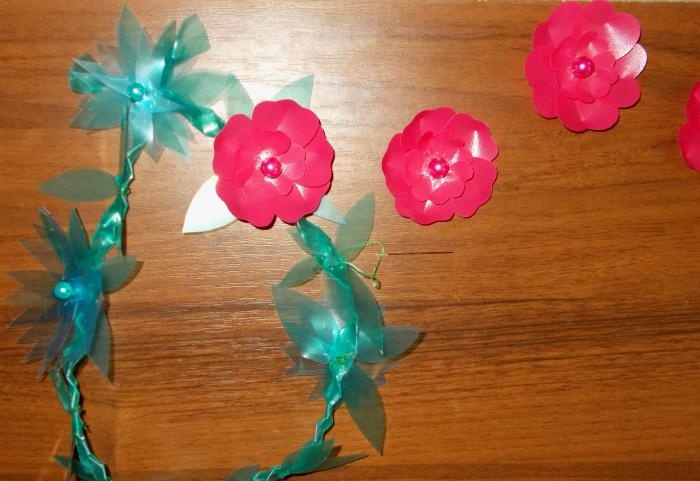
Having made five flowers in this way, we sew them to the base crafts:
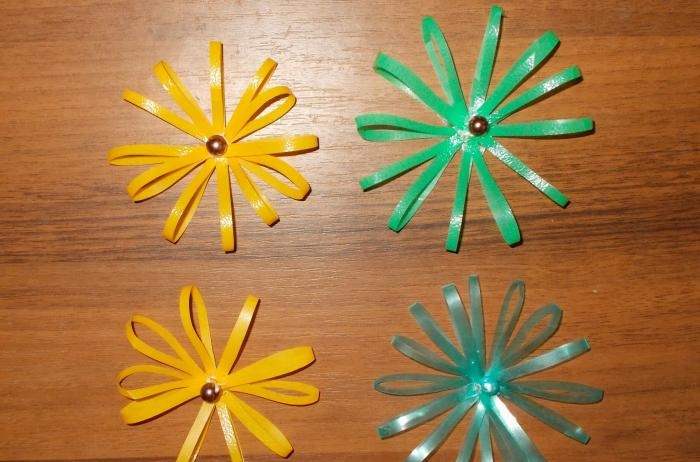
Next, from another plastic sheet we cut out 5 to 8 thin strips up to 15 cm long to create new flower shapes. We fold the ends of these strips towards the middle and glue them together:
Composing flowers from the resulting figures, we sew them in the middle and sew on a bead to each:
We sew the resulting flowers to the main craft:
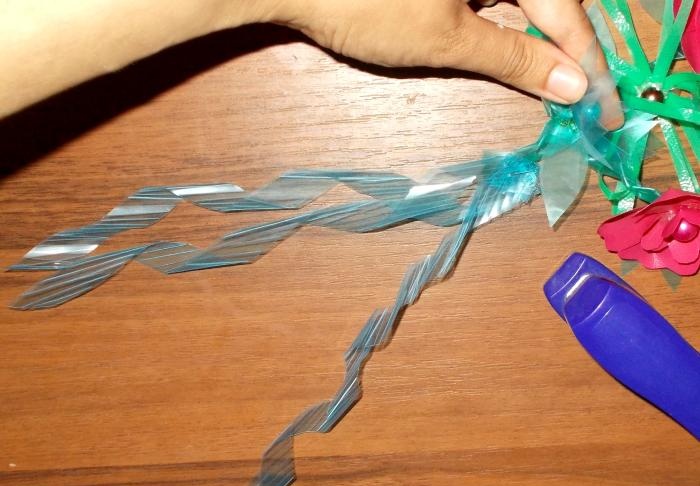
After this, we set about making three curly “ribbons” of plastic for a wreath (if desired): taking three blue plastic strips, we bend and “curl” them, giving them a voluminous shape:
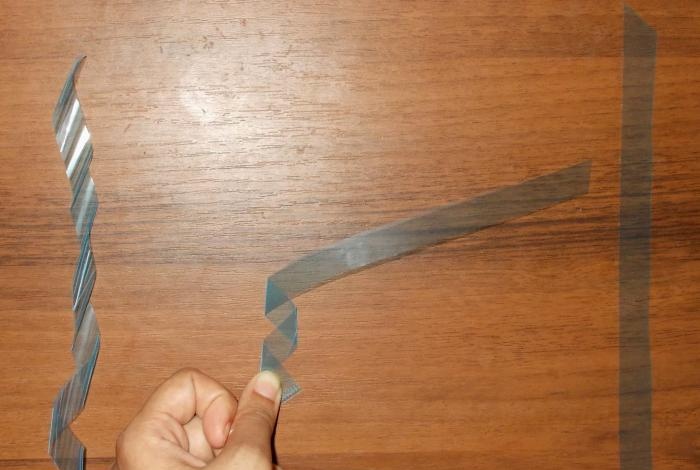
We need to make three such curled strips, after which, connecting them at the ends, attach them using a stapler to the back side of the base of the wreath, where its ends are fastened:
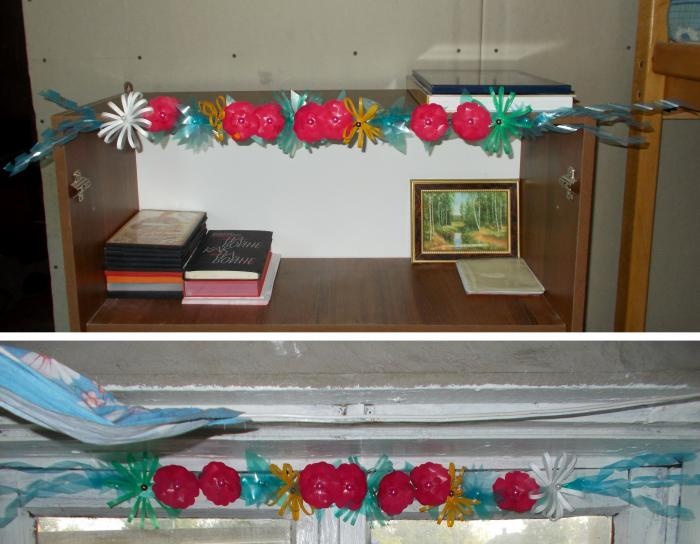
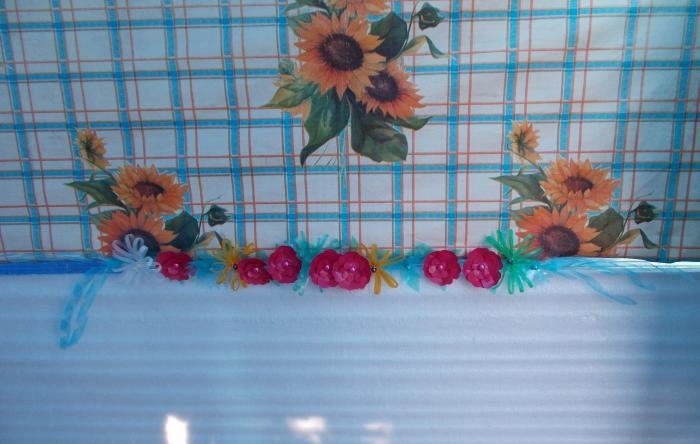
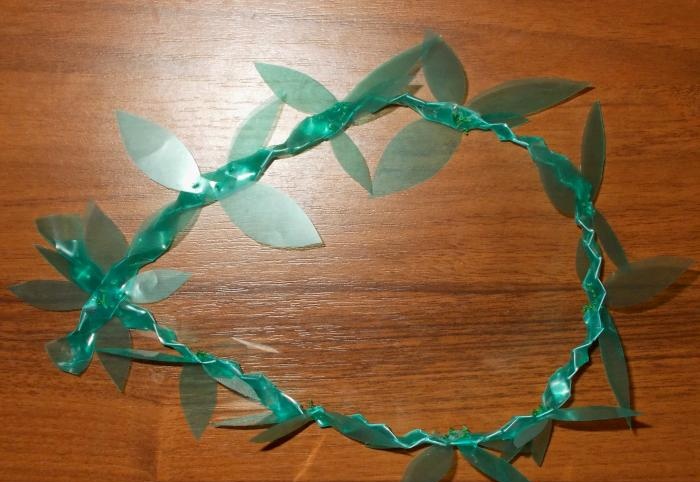
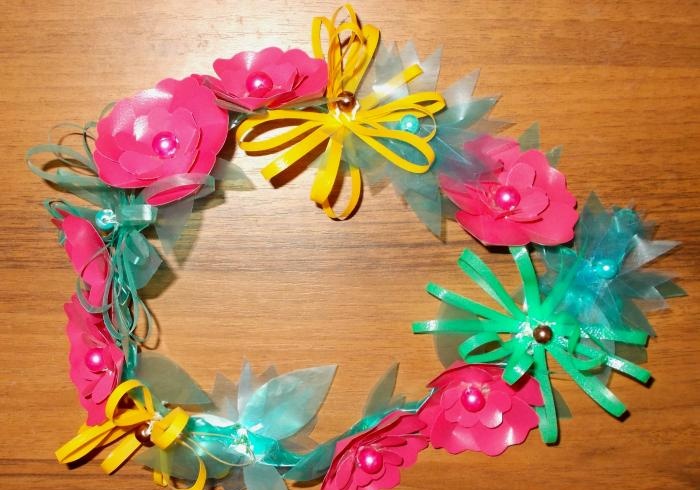
After that, that’s it - our wreath is ready.

It can be made into a nice home decoration if the seams holding both ends together are removed and three new curled plastic "ribbons" are added to the other end:
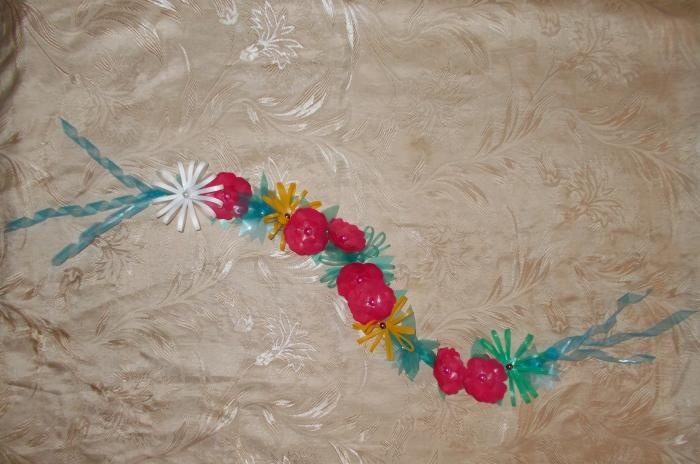
After this, our decoration will be ready and it can decorate a mirror, a window in a room, or a shower stall.