Do it yourself
Life hacks, master classes, useful tips, recipes.
home » Handicraft techniques » Scrapbooking » Scrapbooking cover » Folder for girl's children's documents
Like any citizen of any country, at birth, every girl in the first weeks of her life receives the first and most important document, her birth certificate. No matter what happens in life, and no matter how fate turns in the future, this testimony is the most important document. According to it, upon reaching the age of 16, the child receives a passport, an individual tax number is now also assigned from birth, so it is also issued according to the certificate. Even now, every child also receives a foreign passport from an early age, so no matter what, the birth certificate is the very first and most important document, which should be kept safe for life. Now the world does not stand still and creativity wins in our time, so it would be important to make a special folder for this document with your own hands. Firstly, it is interesting and very beautiful, and secondly, your baby’s documents will be securely stored.In such a folder you can put a certificate, a medical policy, an individual tax number, as well as various certificates of the baby.
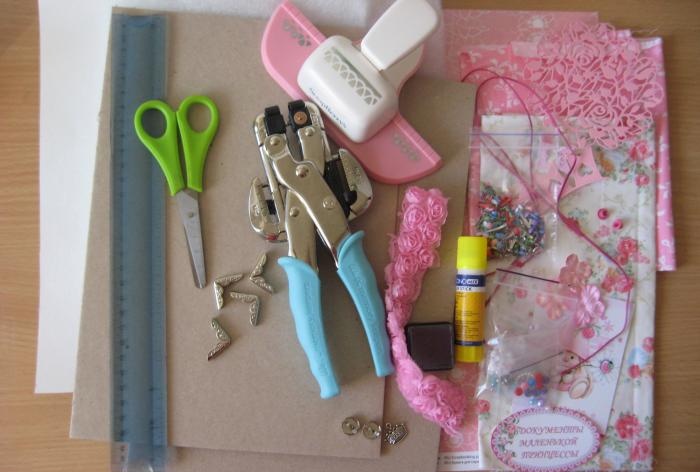
So, to sew and make a folder for the baby’s important documents, we take:
• A4 blanks of thick binding cardboard 2 pcs;
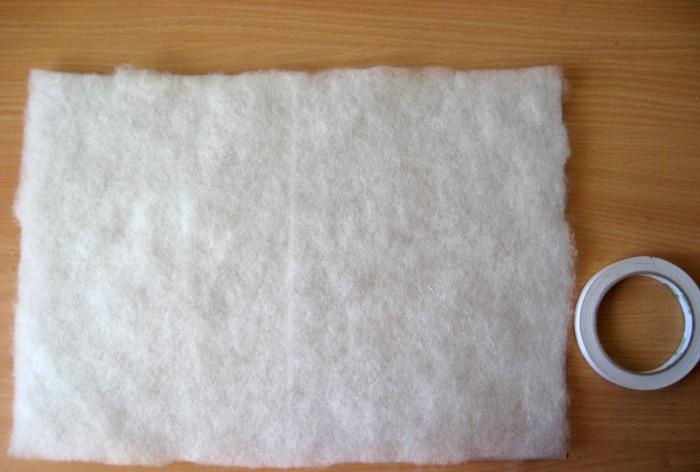
• Sintepon size 30*40 cm;
• Three large pieces of scrap paper in pink shades;
• Pink fabric with a white bow and milky fabric with flowers, thick Korean cotton;
• Thin pink elastic band;
• Two pink eyelets and an installer for them;
• 4 pieces of silver metal corners;
• Two pink paper napkins;
• Crown pendant;
• Pink paper and knitted flowers;
• Brads with pink pebbles, plain metal brads;
• Large pink epoxy brads;
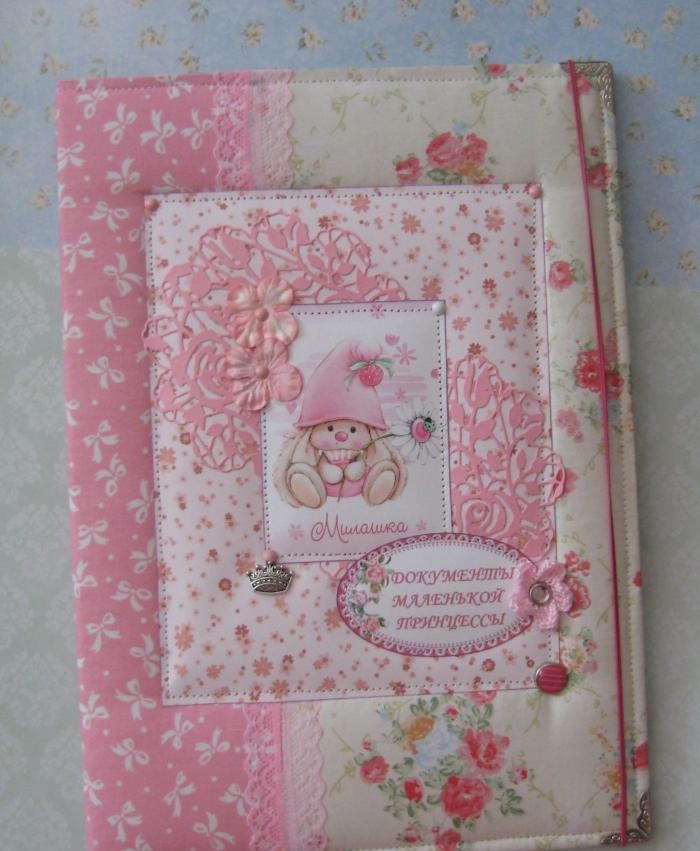
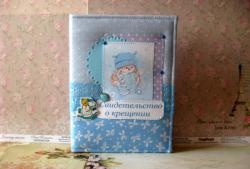
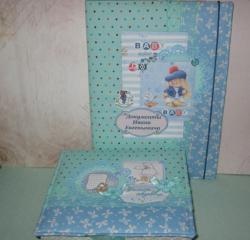
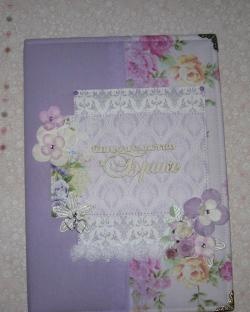
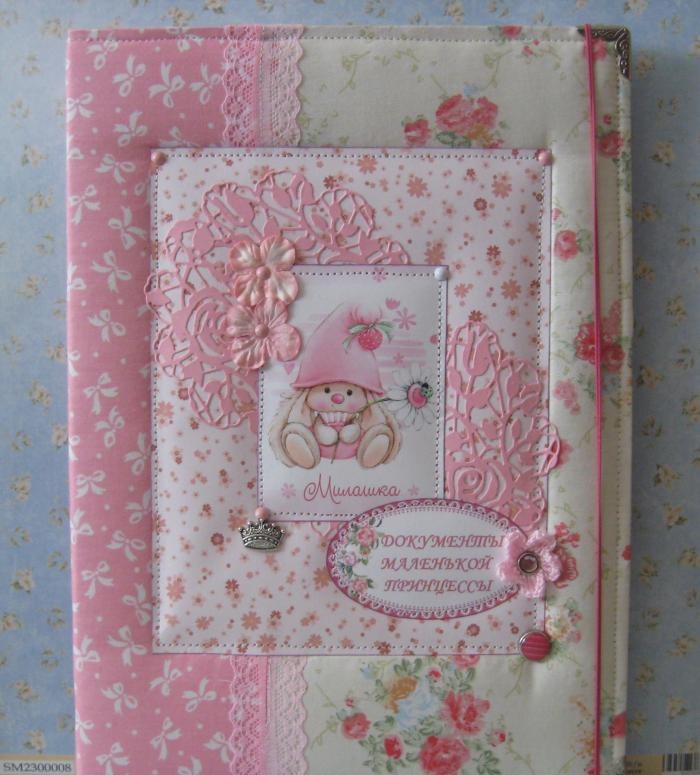
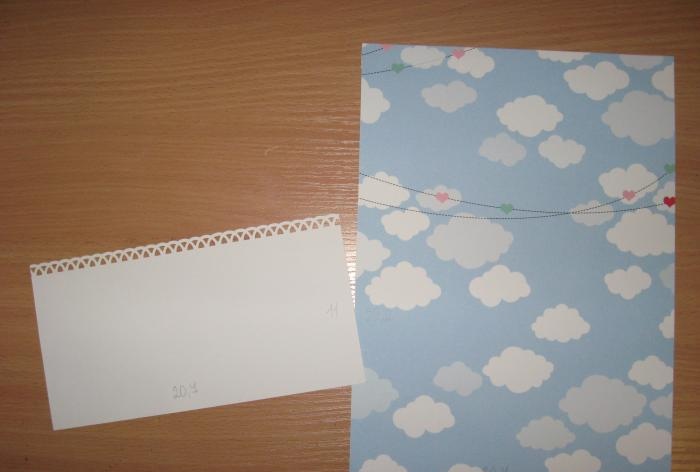
• Picture with a cute bunny;
• A picture with the inscription “Documents of the little princess”;
• Pink double lace;
• Ruler, simple pencil, glue stick;
• Hole puncher with openwork edge;
• White cardboard 5.5*30 cm;
• Scissors, double-sided tape, “Scotch tape effect” glue;

Folder for children's documents

Folder for children's documents

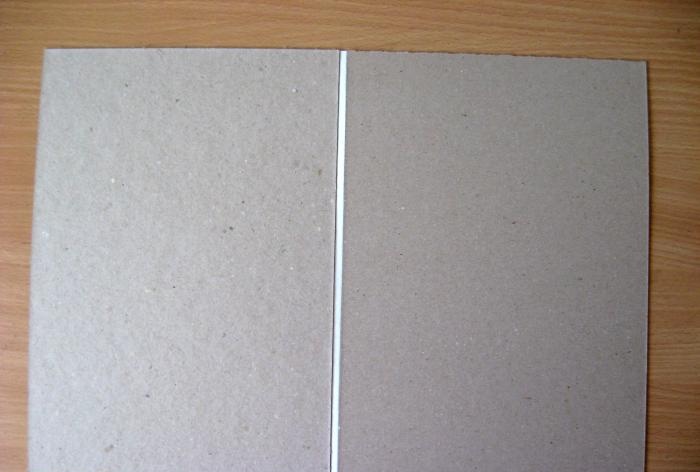
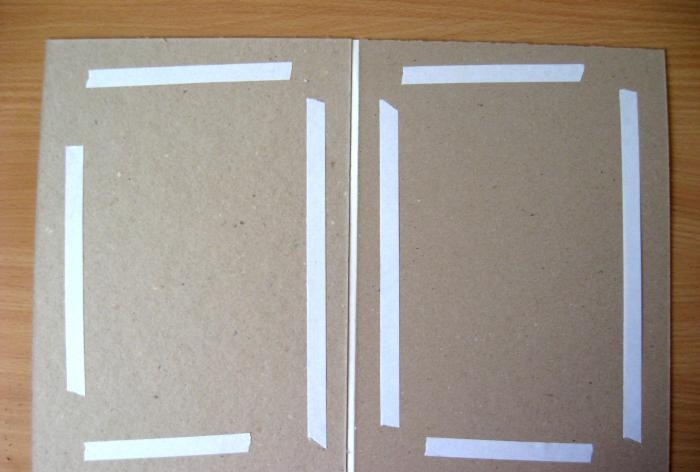
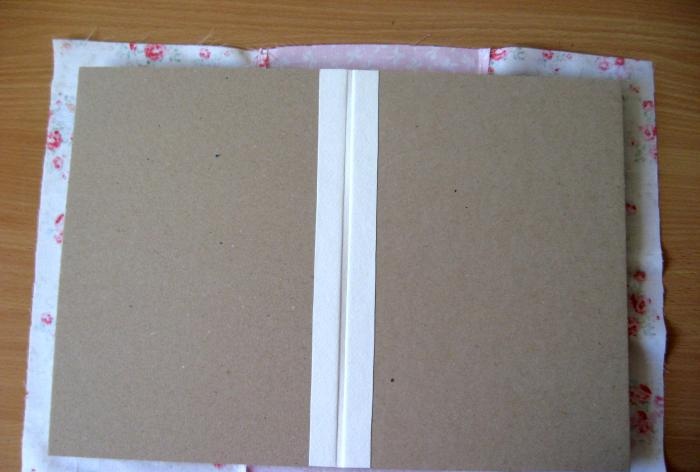
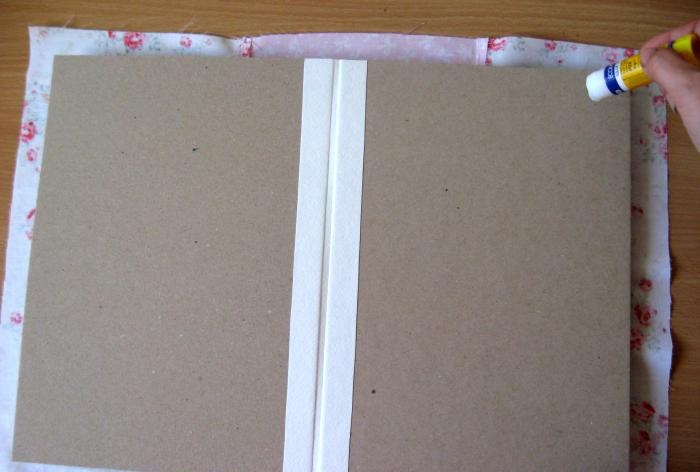
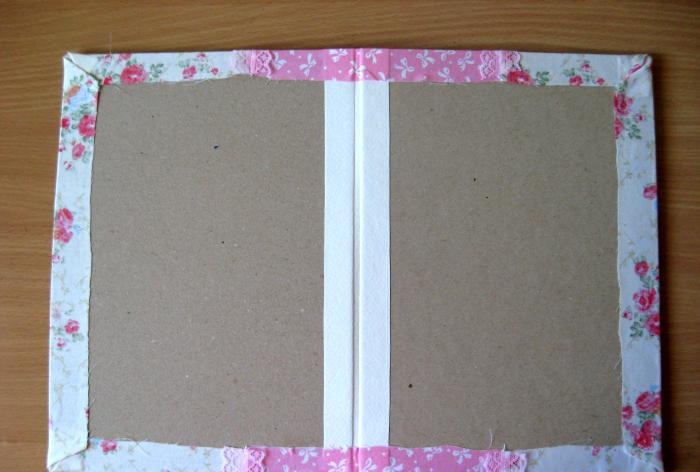
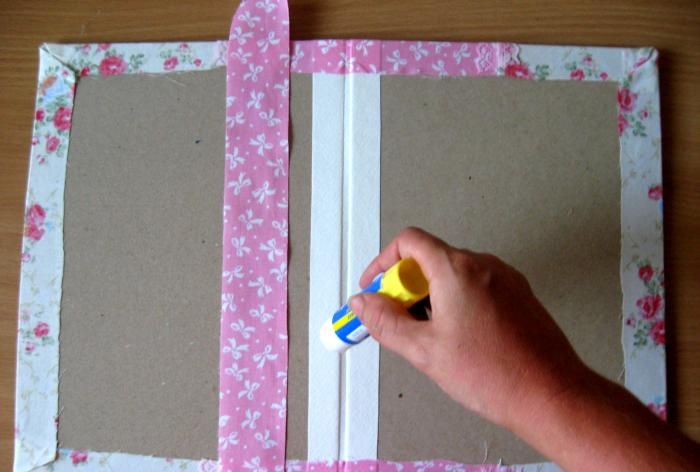
We place two binding sheets and a strip of white cardboard in front of us. We divide the strip into three parts so that in the center there is a space of 0.5 cm between the sheets. Therefore, we divide the strip into 2.5 cm, 0.5 cm and 2.5 cm. We spread the strip on the sides 2.5 cm with a glue stick and connect binding cardboard in one cover.
Folder for children's documents

Folder for children's documents

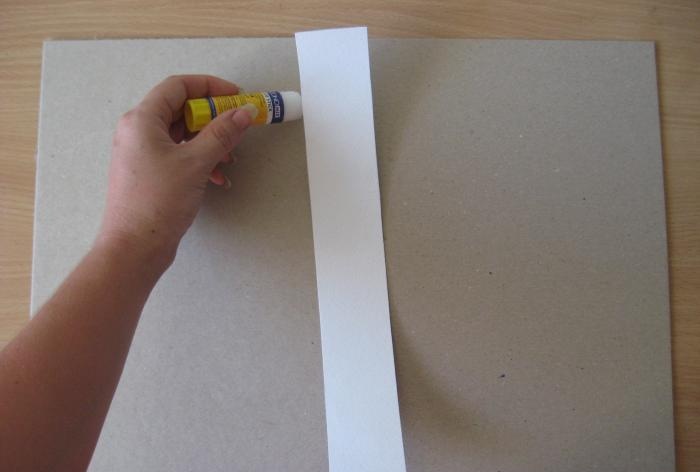
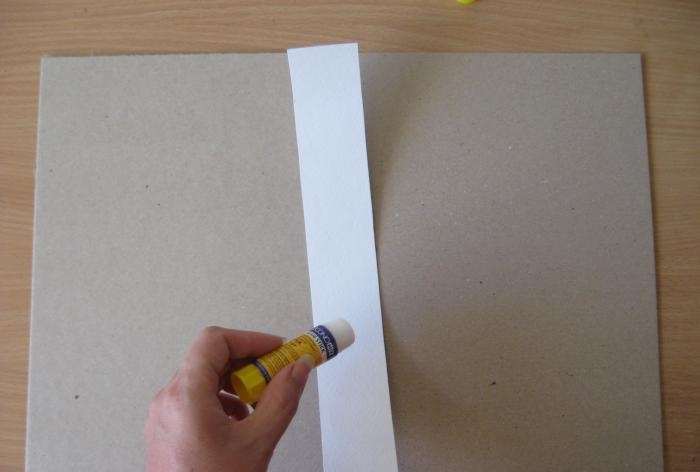
We draw two lines with scissors and just get a space of 0.5 cm.
Folder for children's documents

Folder for children's documents

We glue strips of double-sided tape and glue the padding polyester.
Folder for children's documents

Folder for children's documents

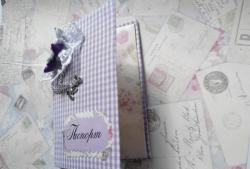
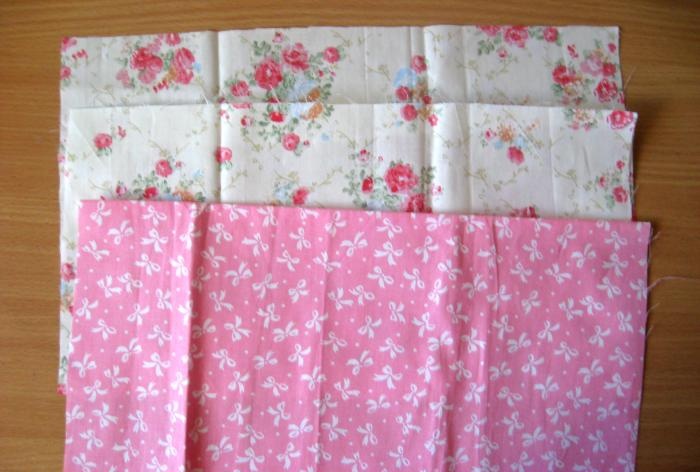
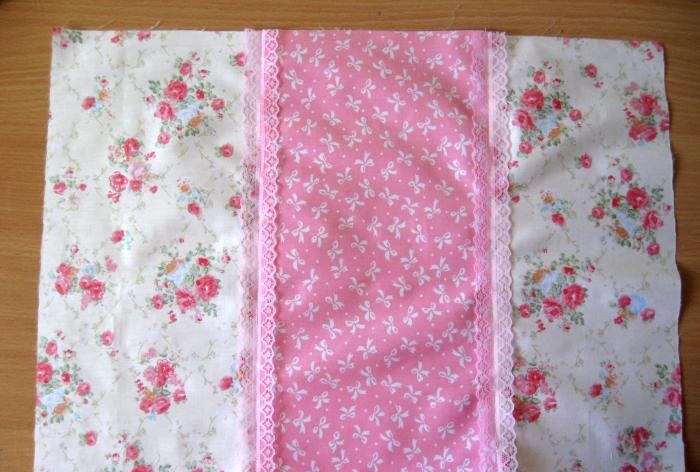
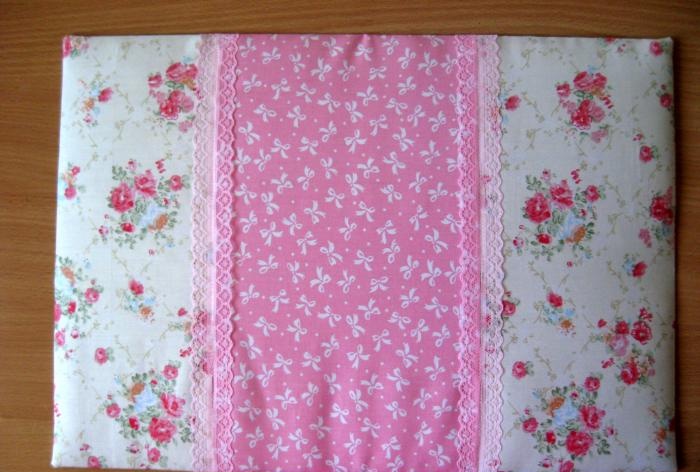
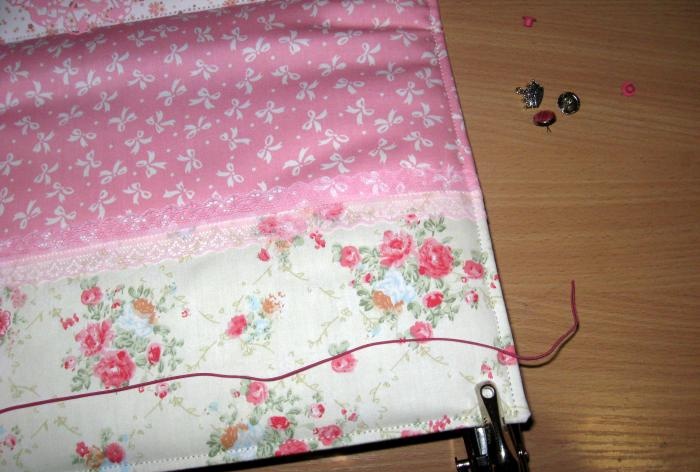
Now we cut the fabric, inside there is a solid piece of a pink bow, along the edges there is a cut with flowers. At the joints of the fabrics, cut strips of lace.
Folder for children's documents

Folder for children's documents

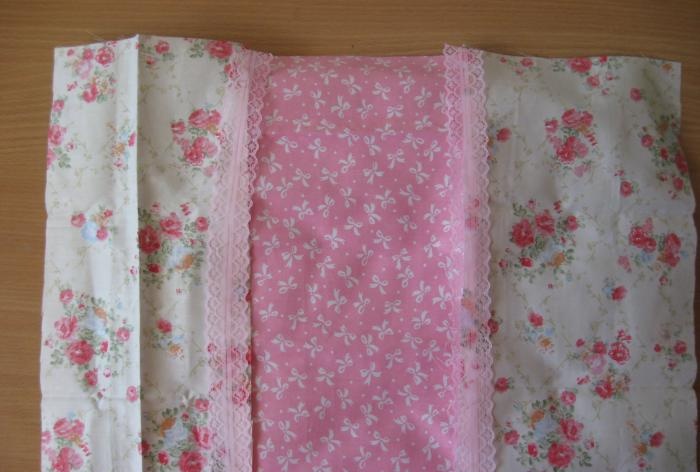
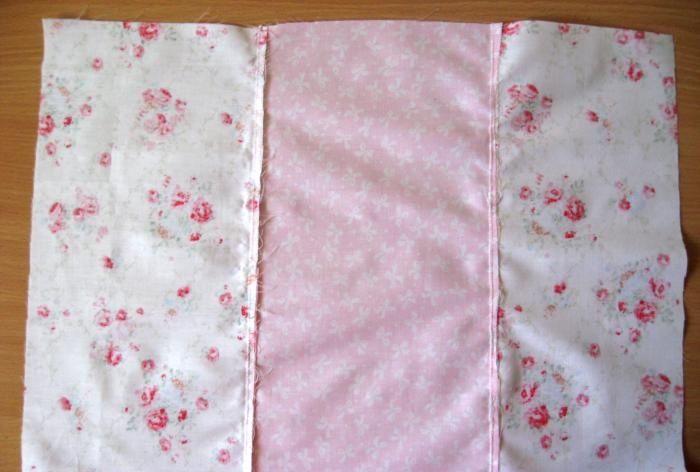
We smooth the fabric well, sew it into a single piece and sew on the lace.
Folder for children's documents

Folder for children's documents

Now the binding cover needs to be wrapped evenly with fabric.We spread the corners and wrap around the entire perimeter of the cover.
Folder for children's documents

Folder for children's documents

This is what it should look like.
Folder for children's documents

Folder for children's documents

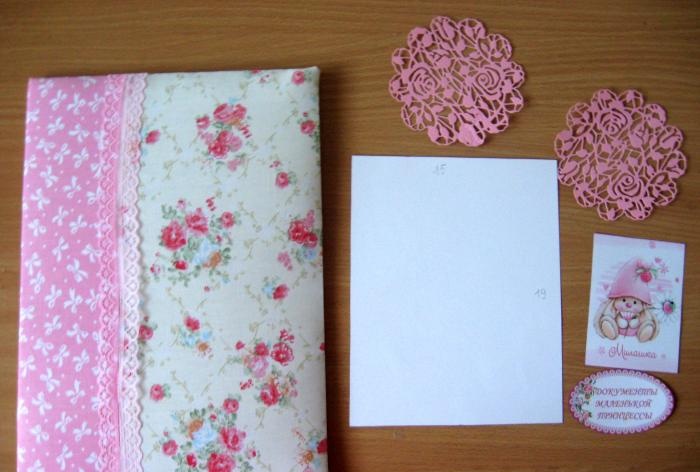
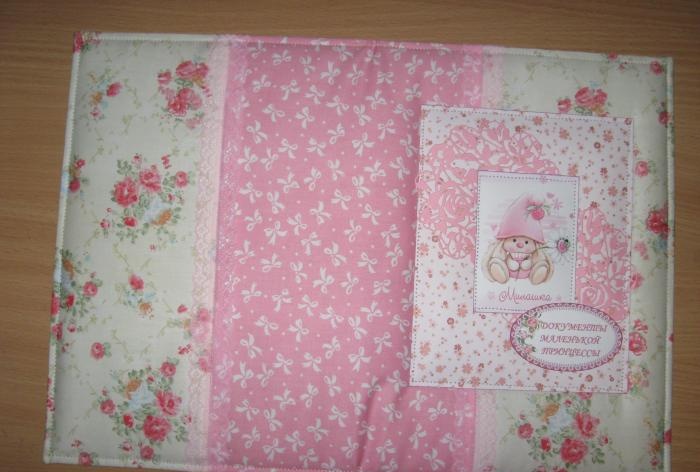
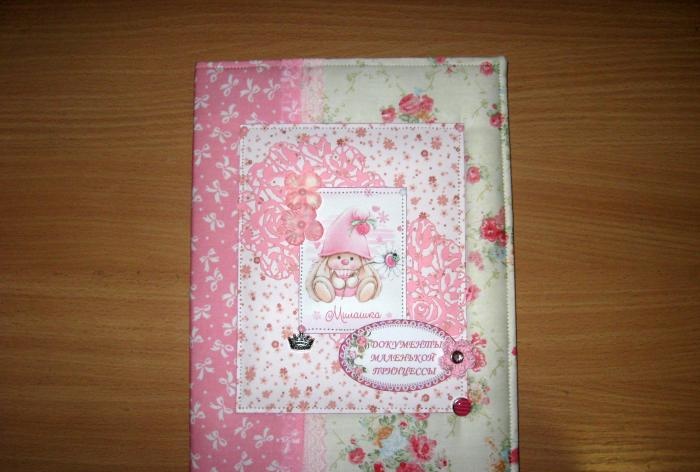
We fold and try on paper, design and decor. We cut a scrap rectangle 15*19 cm, put two napkins, a picture with a bunny and a card on it.
Folder for children's documents

Folder for children's documents

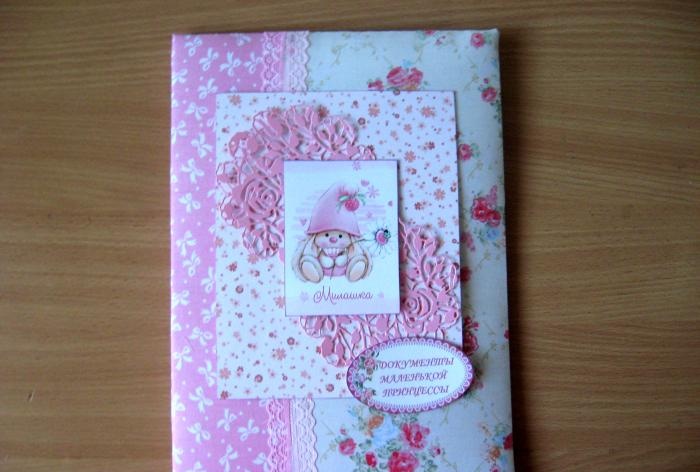
Inside the cover, you also need to glue a fabric strip to the joint so that the folder can be easily opened and closed. Spread and glue. We sew the entire cover along the edge, paper, picture and card.
Folder for children's documents

Folder for children's documents

Now on the back we need to attach an elastic band to the eyelets so that the folder closes and stays closed.
Folder for children's documents

Folder for children's documents

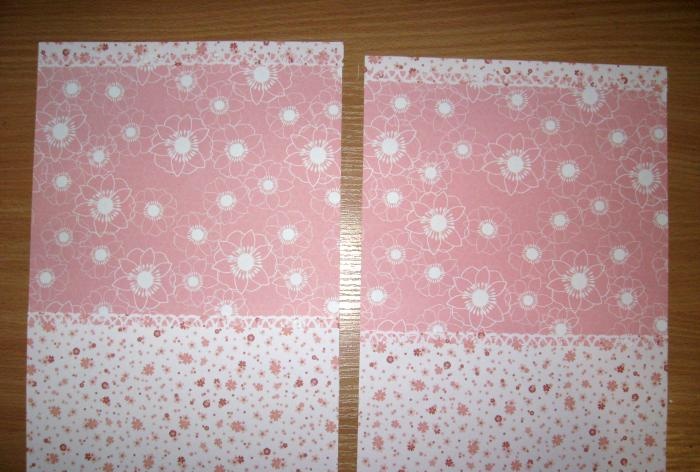
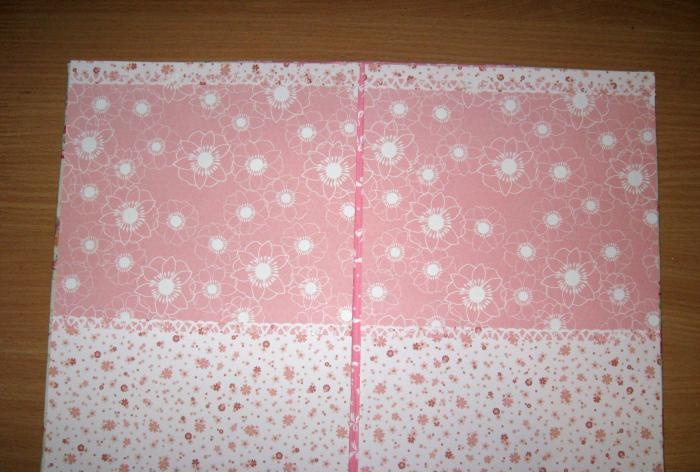
We insert the flowers into the eyelets and attach the pendant to the eyelet. Now you need to decorate the cover inside and make pockets. We take two identical sheets, cut off rectangles 20.7 * 29.2 cm, cut out pockets 11 * 20.7 cm from another paper, also 2 pieces.
Folder for children's documents

Folder for children's documents

We make the pockets at the top patterned, and we also make patterned stripes on top of the rectangles. We glue and sew the pockets along the edges.
Folder for children's documents

Folder for children's documents

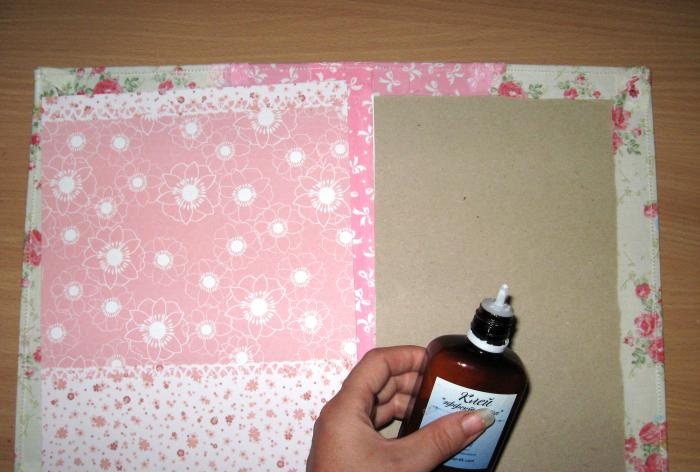
Glue both rectangles inside and place them under something heavy to firmly fix the glue.
Folder for children's documents

Folder for children's documents

Now we attach metal corners to all four corners, close the folder with an elastic band and you're done. The folder came out beautiful, soft and very tender. Just right for a little princess. Thank you for your attention, good luck to everyone and bye!
Folder for children's documents

Folder for children's documents
come back
Comment
  • bowtiesmilelaughingblushsmileyrelaxed relaxedsmirk
    heart_eyeskissing_heartkissing_closed_eyesflushedrelievedsatisfiedgrin
    winkstuck_out_tongue_winking_eyestuck_out_tongue_closed_eyesgrinningkissingstuck_out_tonguesleeping
    worriedfrowninganguishedopen_mouthgrimacingconfusedhushed
    expressionlessunamusedsweat_smilesweatdisappointed_relievedwearypassive
    disappointedconfoundedfearfulcold_sweatperseverecrysob
    joyastonishedscreamtired_faceangryragetriumph
    sleepyyummasksunglassesdizzy_faceimpsmiling_imp
    neutral_faceno_mouthinnocent
5+two=
Comments (0)

Crafts - Do it yourself, step-by-step master classes | Page 7

White roses | Do it yourself

Useful and interesting | Do it yourself

New Year's ball made of beads | Do it yourself

«Do it yourself - with your own hands» - a site of interesting homemade products made from scrap materials and items at home. Step-by-step master classes with photos and descriptions, technologies, life hacks - everything a real master or just a craftsman needs for needlework. Crafts of any complexity, a large selection of directions and ideas for creativity.

We recommend reading

Washing machine error codes