A stylish interior is, above all, thoughtful details. They are the indicator of a good impression of the room. Such important details include lighting. It so happens that the lamp that once pleased the eye is tired or does not fit into the room's environment that has been updated after repair. Do not rush to get rid of the old lamp, this workshop will help a nondescript subject of furniture gain a second life. The classic shape of the desk lamp blends perfectly with the Shabby Chic style.

This trend in the interior arose in England, mainly characterized by shabby or aged furniture in light shades, soft lace, pastel colors and floral motifs. To achieve the effect of antiquity, the master class will use decoupage and craquelure techniques.
Materials for work:
1. Primer acrylic white;
2.Bronze acrylic paint;
3. The varnish for craquelure is one-component;
4. Acrylic paints (white, blue, green);
5. Matte decorative varnish;
6.Flat synthetic brush;
7. A napkin with a flower pattern;
8. Scissors;
9. PVA glue;
Decoration Steps
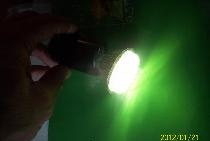
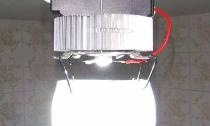
The first step is to unscrew the light bulb and remove the lampshade. We cover the dry clean surface of the lamp base with soil and leave to dry.

We cover the base of the lamp with two layers of bronze-colored paint, leave to dry.

We apply varnish for craquelure, leading the brush in one direction, for example, only from top to bottom. We dry one and a half to two hours. The readiness of the lamp for further work is checked with a finger, it should only slightly adhere to the surface. Check carefully in an inconspicuous place so as not to leave prints.

Mix white, blue and green colors to make a pastel turquoise color. To do this, add a little blue and a drop of green to the white paint, now mix to a homogeneous, soft turquoise hue. We paint the base of the lamp, remembering that you can’t drive with a brush twice in the same place. We are waiting for the appearance of the craquelure effect.

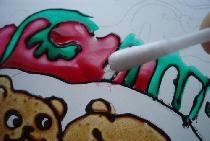
After the cracked layer has dried, we proceed to decoupage. We cut out the floral arrangements from the napkin, separate the top layer and try them on to the lamp.

To stick flowers, it is convenient to use the file. Put the drawing on the file with the wrong side facing you, moisten the surface of the napkin with a brush with water.


Attach the file to the selected location on the lamp and translate the picture. From above, gently coat with highly diluted water with PVA glue. We are waiting for drying.

We cover the base of the lamp with matte acrylic varnish and dry.

It remains only to assemble the lamp, and the table lamp in the style of shabby chic is ready!