To create the kit we take:
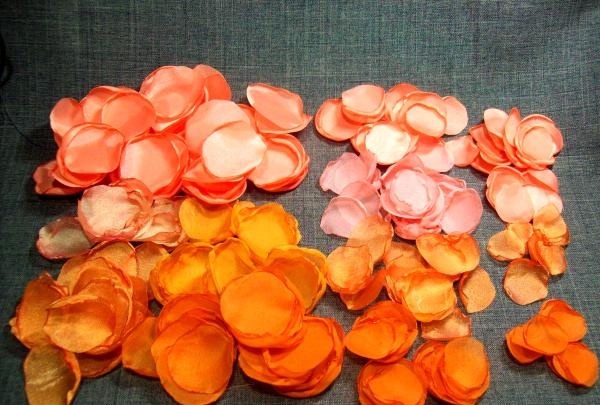
- silk, nylon, pink and orange chiffon in various colors and 2 types of green fabric.
- scissors.
- candle.
- tweezers.
- foil.
- a piece of foam rubber.
- long needle and thread.
- thin wire.
- the basis for the brooch.
- headband.
- thin tape for winding the base.
- “Moment” glue.
- a few beads on a fishing line for decoration.
- glue gun.
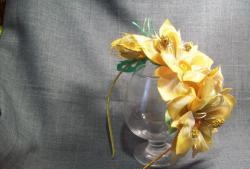
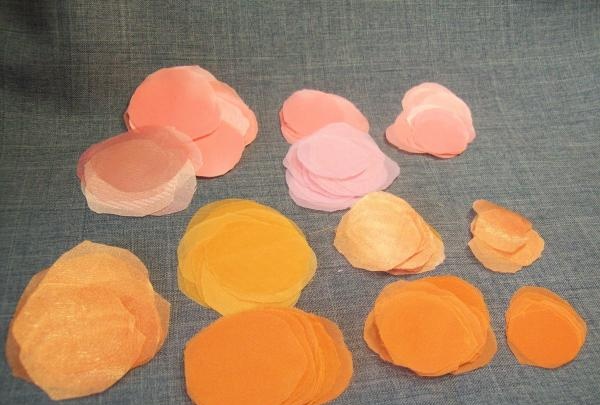
And let's start work by cutting out circles from fabrics. First, let's decide on the color of the roses. Which colors will there be more, pink or orange? And from this you can calculate the number of petals needed. For one rose you will need 10 large petals with a diameter of 5 cm. An average size of 4 cm will also need to be prepared 10 pieces. And the smallest ones, with a diameter of 3 cm, should be cut into 10 petals. All that remains is to calculate the required amount of a certain color, and the total will look like this: 90, 108 and 108 pieces.Additionally, we took into account the petals for the buds. For one, 6 petals of medium and small sizes are enough.
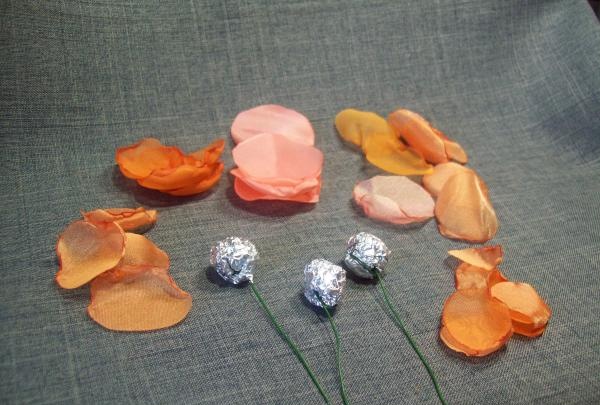
Now you need to process the edges of all the blanks with a candle flame. You can apply it with tweezers or just with your hand.
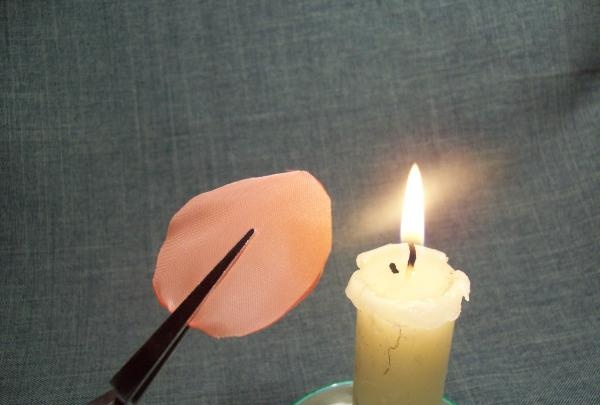
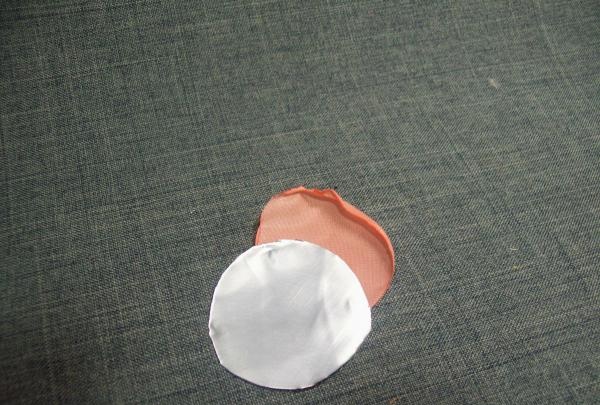
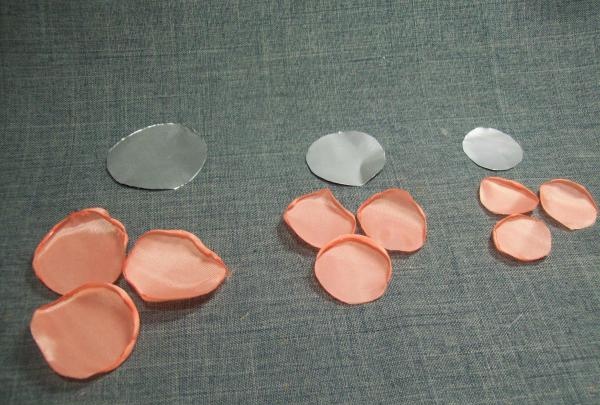
And for further processing of the petals you need to make a simple tool. From foil folded in 6-8 layers, cut out circles that will correspond to the diameters of the workpieces. These are 5, 4 and 3 cm. Next, we place the foil on the fabric, leaving the edge of the petal a little free. We place this blank over the candle, with the foil facing the flame. And thanks to the rigid base, the edge of the petal makes an even bend.
It takes a little patience to process all the silk blanks.
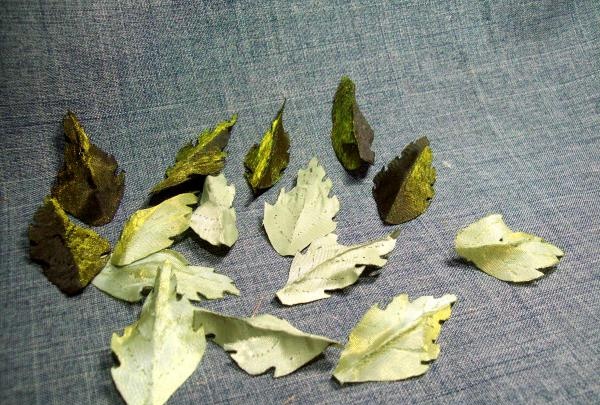
But there were still two types of green fabric left. From it we will cut leaves in the shape of a boat, 4 cm long and 2 cm wide. You will need 15 leaves, each in several dark and light tones. And since the fabric is thin, it should be glued with “Moment” twice. When the pieces have dried well, you can cut the cloves along the edge. Next, we bend the sheet in half lengthwise and bring it to the candle with the fold, pressing it with our fingers. This results in the main middle vein.
Now let's start assembling the roses. And for this we will prepare a piece of foam rubber and a long needle and thread.
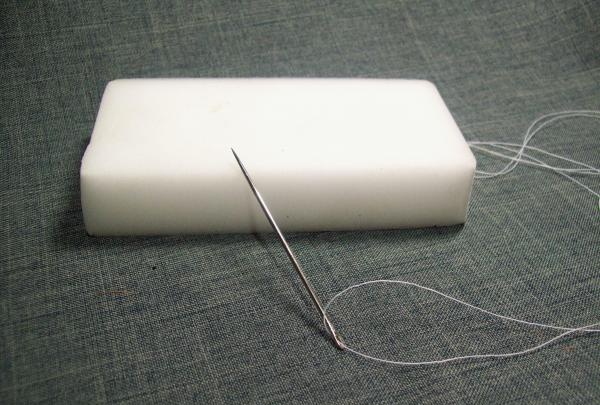
We stick the eye of a needle into the middle of the foam rubber. We select petals in the same color, but from different fabrics. We will collect the entire flower in reverse, from larger to smaller size. We use 10 large blanks first, simply pin them on a needle at the edge opposite the fold, 0.8 cm from the edge. But we turn the first 5 petals with this fold towards the foam rubber in a circle.
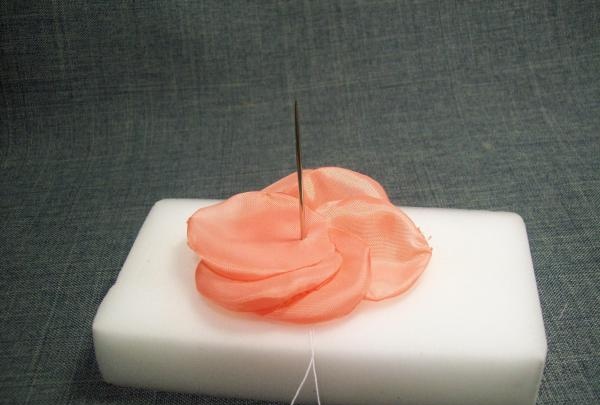
All other blanks should look towards the center of the rose. Next we place 10 medium-sized petals, beautifully arranged in a circle.
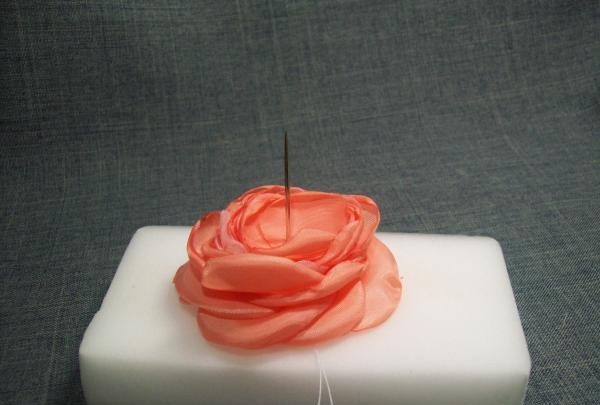
We also add 6 small blanks.And remove the entire flower with the needle from the base. We make the fastening by passing the needle and thread through all the petals, without cutting it off. We fold the remaining four small petals into a fan and twist them into a bud. Then we pierce it with a needle and pull it into the middle of the rose, securing it well.
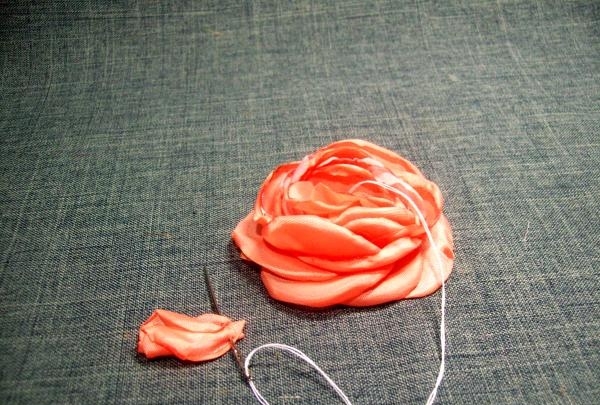
Now we bring the needle to the wrong side and do not cut it off again. Now, take 2 green leaves of different colors and thread them onto the needle together.
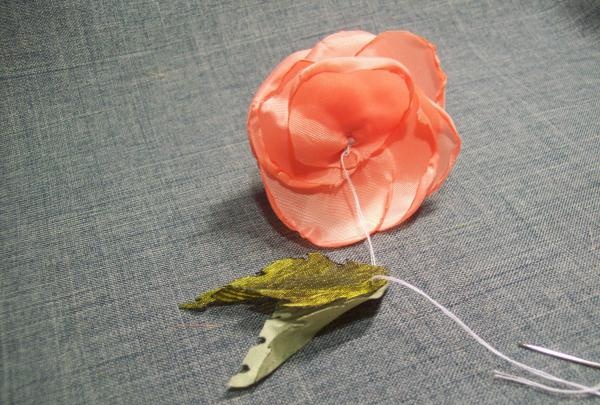
And fix it on the flower.
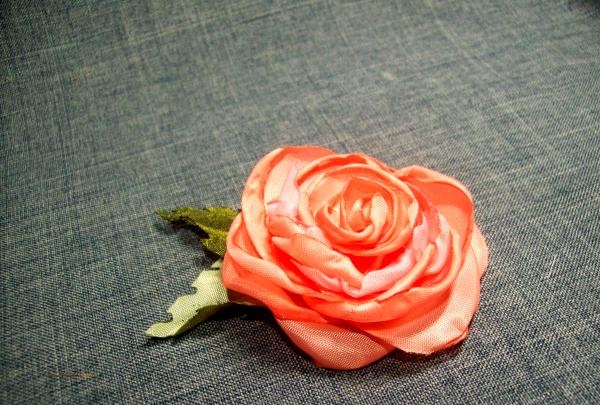
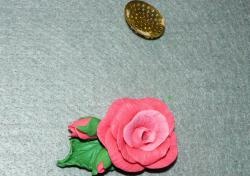
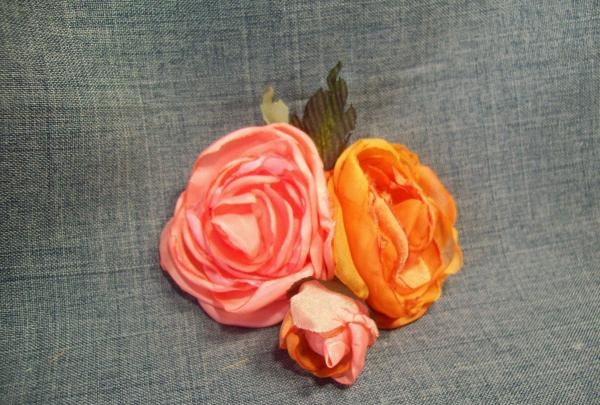
We perform the remaining 8 roses in the same sequence, but without fixing the green leaves. Next you need to complete 3 buds. We take the remaining petals and three foil bases attached to wires. The size of the base should be smaller than the small petal.
But the buds will be assembled using a glue gun and in a different sequence. First you need to cover the foil with small petals.
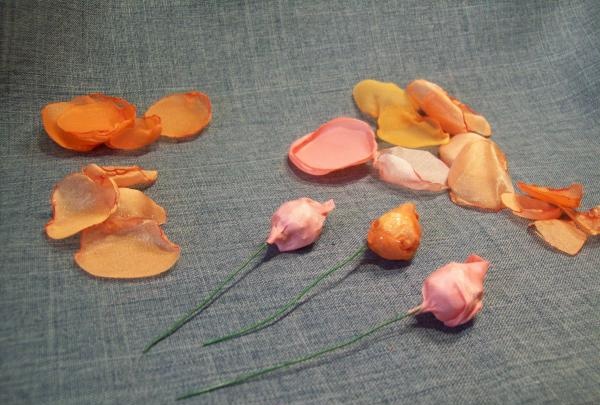
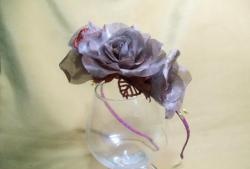
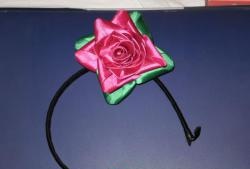
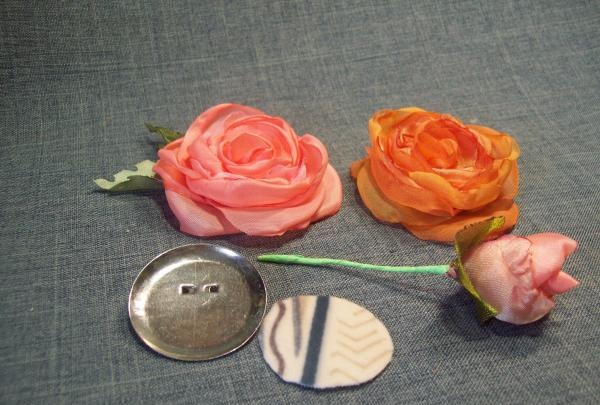
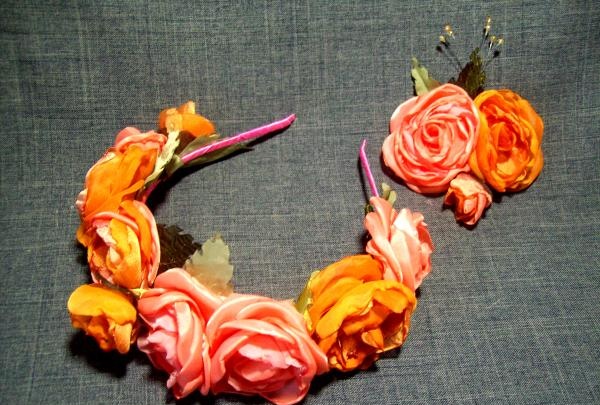
Then we fasten the remaining small ones in a circle, and then arrange the rest of the blanks. Additionally, we cut out a circle of green fabric in one layer and glue it to the bottom of the roses, piercing it with wire. And we cover it with a green stripe. The buds are ready. Now let's start assembling the kit. Let's start with the brooch. We take a rose with leaves and another one of a different color, 1 bud, an iron base for a brooch and a circle of thick fabric, smaller than the base.
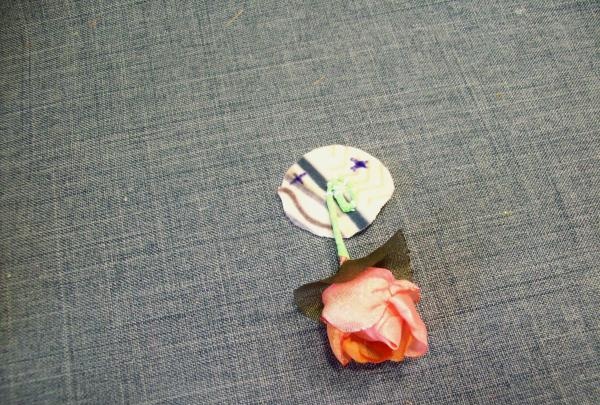
Let's start attaching everything to the fabric base. We bend the lower edge of the wire into a ring and use it to sew the bud to the middle of the base. We put crosses and marks for future attachment of flowers.
We sew our two roses into the designated places. If desired, at this stage you can sew bead decorations on the fishing line. Then use a glue gun to secure the two bases together.
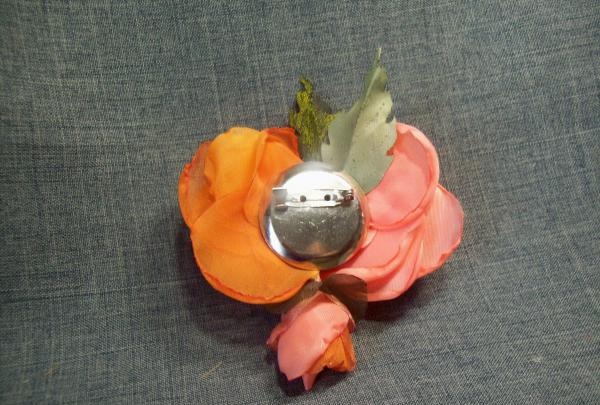
The bud will be directed down the brooch. One part of the kit is ready.
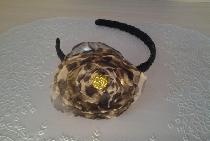
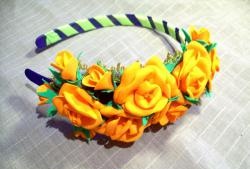
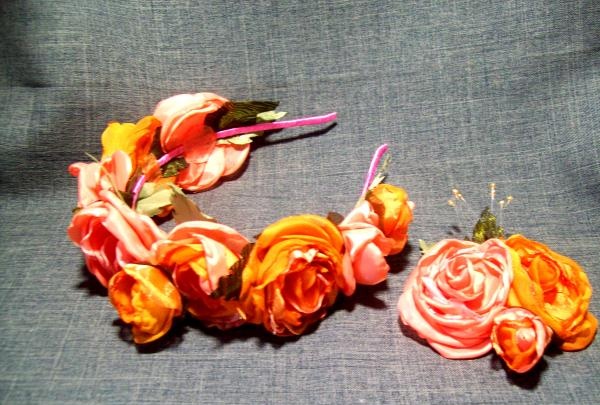
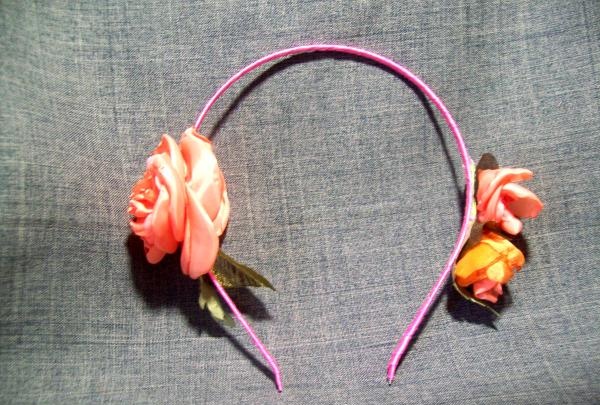
Now let's move on to the rim.For better fastening, you need to cover it with tape to match the colors. Then we were left with 2 buds, 7 roses and leaves.
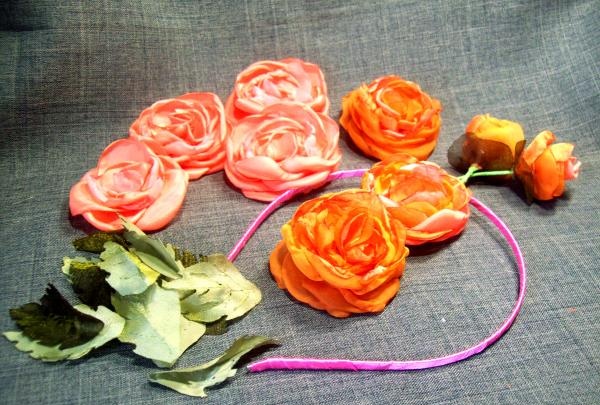
Since there are many flowers, you should pre-arrange them without securing them around the rim. Distribute the leaves and buds to be sewn on.
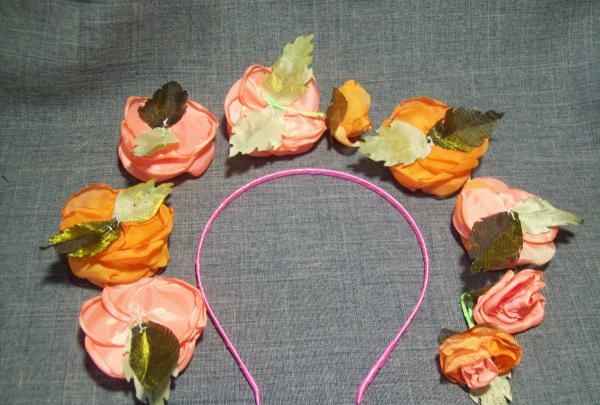
Now let’s start attaching the roses to the rim. We glue the lowest flowers first, which should be at least 10 cm from the beginning of the rim. On one side there is a rose, and on the other there will be a flower with a bud.
Now in the middle of the rim we place another rose with a bud.
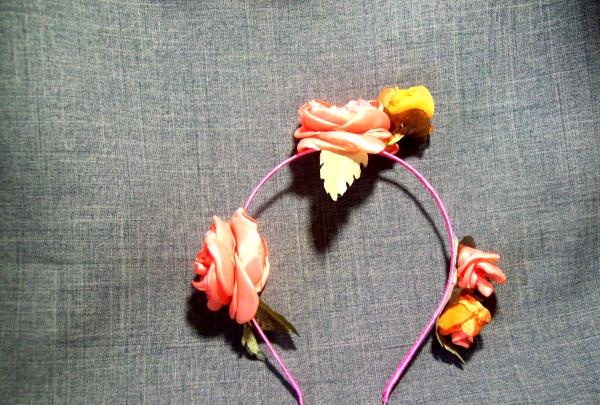
And now between the two flowers we glue two roses, matching them by color.
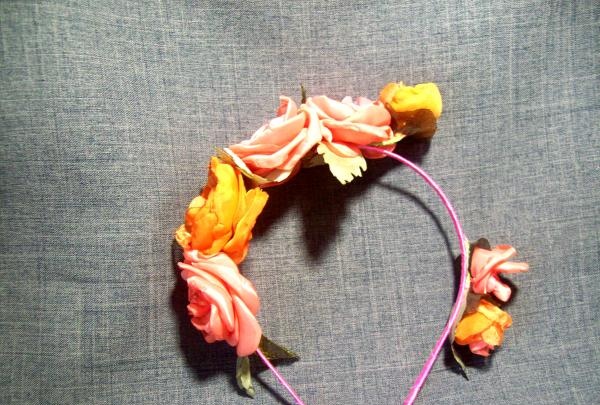
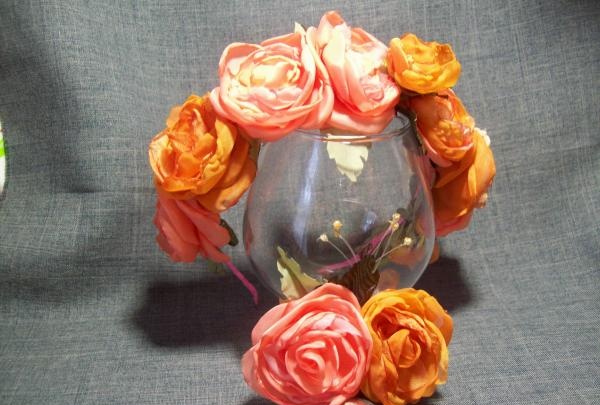
All that remains is to add 2 more flowers on the other side and the headband is ready.
But for additional reliability of fastening, small circles should be cut out of fabric for flowers. And on the wrong side, glue them through the rim to the flowers. The decoration is ready.
Good luck to all!