So, to create such a masterpiece, we need to take:
• Binding cardboard, two blanks 15 * 21 cm;
• Thick Korean-made cotton is dark brown in large white peas and beige in small peas;
• Tinted coffee and vanilla A4 sheets of about 45 pieces;
• Sintepon;
• Scrap paper in brown-gray tones, so to speak in a coffee scale;
• A lot of different color pictures on the culinary theme;
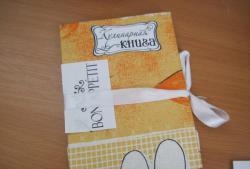
• The inscription "My favorite recipes";
• A sheet with the inscriptions “First courses”, “Baking”, “Desserts”, etc., we will need these inscriptions for the color dividers of our notebook;
• Cut down napkins made of white paper and craft paper;
• Metal pendants associated with the kitchen;
• Cotton lace in white;
• Metal multi-colored brads;
• Decorative twig with buds;
• A piece of burlap;
• Dried cinnamon stick;
• Dried star anise;
• Tape brown-white with a width of 25 mm;
• Gold eyelets and eyelet installer;
• Twine;
• Waxed dark brown cord;
• Double-sided tape;
• Glue stick;
• Glue with the effect of adhesive tape;
• Puncher lace border;
• Ruler, scissors, pencil, sewing machine.


Our entire notebook will be made absolutely from scratch. It will consist of a paperback and tinted sheets. There is no special recipe for tinting sheets, I did everything by eye. For about 300 ml of warm water, take 3-4 teaspoons of instant coffee and 2-3 bags of vanillin. We paint each sheet with a brush and dry it naturally, hanging it on a rope. For our notebook you need about 45 album sheets.
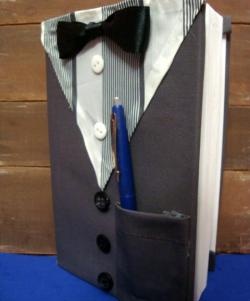
So, we start with making a paperback.


We take binding cardboard, we have two rectangles 15 * 21 cm, glue strips of double-sided tape and glue the synthetic winterizer on top.


Now we cut two strips of each fabric, measure it so that there are reserves for the turn, 2 cm on all sides. We measure the lace at the place of stitching.


Now the handiwork of the iron. Smooth all the pieces of fabric and tinted leaves well under the steam.


Sew the fabric together, and sew lace at the seam. Now we lay out the fabric with the pattern down and put the sintepon down on the binding blanks. Spreading with a glue stick, starting from the corners, we stretch and glue the fabric.


We get such blanks, they are well-fitted.


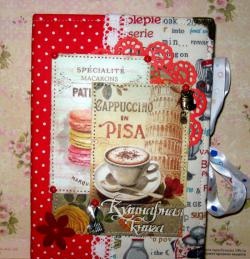
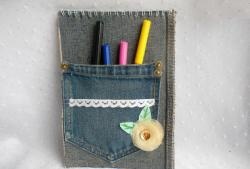
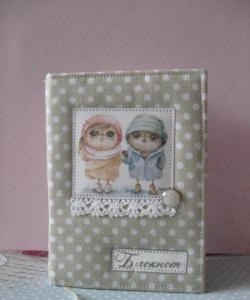
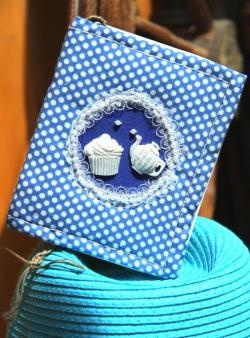
Now spread decor on the front of the notebook. First, craft a napkin, then pictures, shifting them, the inscription on the left and a piece of burlap. Sew each picture separately. Now we take a scrapbook paper sheet 30 * 30 cm and from it we make bookends on the cover and pockets for notes.


We cut two rectangles 14.5 * 20.7 cm. Pockets 9 * 14.5 cm and a small pocket 8 * 9.5 cm.


We make pockets on top with lace. We smear the edges of the pockets with glue stick and glue them to the flyleafs.


Now on the cover you need to fix the twig and pendants using metal brads.We also attach a piece of twine to the brads, into which we will then tie cinnamon.


Glue bookends with glue with the effect of adhesive tape.


Under the flyleafs we put on a cut of the tape, so that later we can tie our notebook. Sew both sides of the cover on the edge of the machine.


Now, at the right distance, we make holes and insert the eyelets.


Now go to the sheets and separators. We divide all the sheets in half and cut, they turn out to be 14.5 * 21 cm in size.


Now we are preparing six rectangles of 14.5 * 21 cm from scrapbook paper.


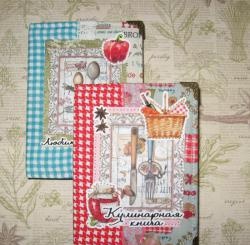
We are now collecting the dividers. Consider the example of soups. We glue a napkin, pictures and the inscription "soups". Sew each item on a typewriter. Behind a sheet of scrapbook paper we apply a tinted sheet and sew along the edge. Thus, all seams are closed and there is a back seat for your favorite recipe.


Putting together all six separators. Now we take a cover, we put it on a separator and pages and we measure out places where it is necessary to make holes.


We break holes in all dividers and in all sheets.


Now cut three pieces of waxed cord and twine, fold them in pairs and thread them into the holes on the bottom cover.


Now we string the separator, then 10-12 sheets and the separator again, and so on, until we collect the entire notebook, ending with a cover on top. We tie the cords in all three places on the bows. All the notebook is almost ready. We tie a cinnamon stick and glue star anise and our fragrant kitchen assistant is ready.


Thank you and good luck to everyone and new ideas!