One of the most popular and useful things for hand-made manufacturing is a container for small items. There are a lot of source materials from which they can be made. And each time, jars for storing all sorts of things are special, not like the others.

One of the options is brought to your attention. The container is made of two plastic bottles with a volume of about 2 liters. You need two identical bottles. In this case, it is important that the bottles are not with parallel walls, then it will be possible to select the diameter of the cut so that the container can close tightly, i.e. one diameter was slightly larger than the other with the goal of making the container itself from one part, and a cover for it from the other.


We estimate the ratio of diameters on the slice. The edge of the plastic will need to be processed to give it a density, so when trying on there should be a gap between the lid and the bottom of about half a centimeter.


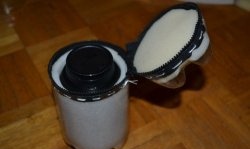
Both sides of the container are heat cut. To do this, we use a suitable size pan with a thin bottom. We heat the pan by turning the bottom up, then we attach the plastic bottle with a slice to a hot surface and slightly rotate it without strong pressure in a circle. When exposed to heat, the plastic begins to curl inward, forming a hard edging that will fix the edge, the container will keep its shape.

Now we select the threads to create the outer decorative shell of the container. The binding should be tight, not transparent, therefore, the yarn should be thick enough. Also suitable knitting in several threads. We select the main thread of red color, accompanied by a strong synthetic thread of pink color. We get a fairly thick double thread. We also select the hook for tight knitting, in our case N3.5.


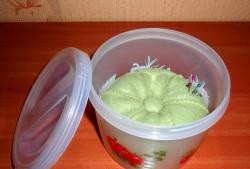
We start knitting from the bottom circle according to the standard pattern. Add loops, try on a plastic base until its bottom is completely covered with a knitted circle. Then we stop adding loops and raise the knitting to the level of the edge of the plastic form. Similarly, we knit for the second half of the container.
When both halves of the knitted shell are ready, we pull them onto plastic molds. It is most convenient to fix a knitted cover on a plastic form with the help of a thermo picture. To connect, put a drop of hot glue on the bottom. Then we put on the knitted part and also glue along the contour of the top.
Similarly, we fix the knitted cover on the second part of the container. It is important for the bottom of the container to leave a free plastic edge of at least 1 cm so that you can close the lid.

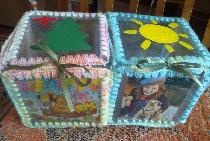
For decoration, we use fragments of lace ribbon, sequins, a flower made of yarn. A flower can be knitted or made on a machine to create flowers from threads, as in our case.


From the lace ribbon we cut out the elements along the tight contour of the embroidery and combine the butterfly applique out of them. The application can be sewn with small inconspicuous stitches, or glued with hot glue. The joints are decorated with shiny hearts.


If both parts of the container are selected correctly, both in terms of diameters and design, we will get a very nice, tight-fitting jar suitable for secure storage of various small items from stationery to buttons, from jewelry to coins.