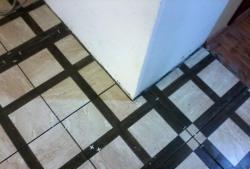
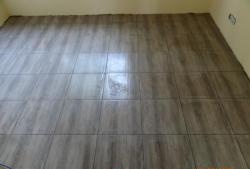
The first step in any finish is preparing the work surface. This work is especially responsible. Indeed, for effective tile laying, for example, you need a perfectly flat surface.
Many continue to work the old fashioned way - take as a basis curved walls or floors. In this case, a straight plane is achieved due to the various layers of tile adhesive. And sometimes it is justified. However, nevertheless, the preliminary alignment of the basic foundation provides undeniable advantages:
1. The absolute absence of voids under the tiles;
2. Multiple acceleration of the laying process;
3. Stabilization of the quality of work.
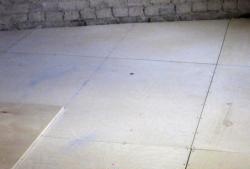
Before you begin leveling the floor, it must be thoroughly cleaned of dirt, dust and grease, and then primed. Of course, the primer must be allowed to dry.
Tip:
A very reliable primer is PVA glue diluted with water. It should be applied to the floor, simply pouring puddles and dispersing them with a wide spatula.
It is necessary to mention that the ideal leveling of the surface can be achieved only by installing a cement-sand screed, installing beacons. However, as a rule, the screed is not made with a thickness of less than two centimeters, otherwise it will be unreliable. And this means the inevitability of the appearance of an unpleasant step. In addition, if the surface is not too curved, then the screed should not be poured at all.
Tip:
It is believed that tiles need to be glued solely on level. However, this is far from the case, and with a minimal deviation, you can generally forget about it. By the way, visual alignment of the floor, as a rule, leads to an almost ideal, in this regard, result.
In addition, the use of self-leveling mixtures is also not recommended. After all, they are leveled with a needle roller, which repeats all the tubercles and depressions on the surface. Sometimes, after such an alignment, you grab your head. Although this method is quite suitable for linoleum, and sometimes for laminate.
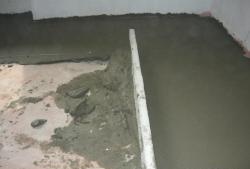
The most reliable tool is the plaster rule. And the longer it is, the higher the quality of work. Thanks to him, the layer of the mixture used during leveling will be minimal. And in many places it is practically zero. This work is called alignment under the rule, and its meaning is to level the troughs with the hillocks (zeros).
Tip:
As practice shows, the most successful mixture for leveling the floor is cement-based tile adhesive. It is durable and has excellent adhesion. And its elasticity determines the application of the thinnest layers. But to accelerate the setting, it is necessary to add a handful of any gypsum mixture to it. In addition, the presence of gypsum makes the mixture non-shrink. The main thing is not to overdo it, as this will weaken the solution. Consistency should be like thick kefir.
Achieve this by the following actions:
1. In the starting corner of the room pour a strip of the mixture with the length of the rule and the width of 30 centimeters. Of course, the approximate thickness of the layer should already be kept in mind;
Tip:
Before pouring, it is necessary to “shoot” the surface with the rule and mark the hillocks, thereby understanding the thickness of the layers.

2. Then, as a rule, pull this puddle in a preselected direction. Stretching the mixture to the place where it is necessary to pour more, the rule is deployed and driven in the opposite direction;

3. Repeating the previous procedure a couple of times and eliminating the maximum emptiness and sink, add the same mixture to the same method;
Tip:
No need to be afraid of scratches and small shells. They are eliminated by the second layer. And in general, for the installation of tiles, the surface should not be smooth, but even.

4. Having passed from wall to wall, it is necessary to shift to the side, as far as the length of the plaster rule allows. And repeat the previous process;
5. Aligning the entire room in one direction, it is necessary to allow the mixture to seize. With the correct ratio of components, its setting takes place within an hour;
After which everything is repeated again, only the direction of movement is taken perpendicular to the previous one;
Working in a small and not polygonal room, these two layers of the mixture are poured and leveled in just a couple of hours, taking into account the setting time;
Tip:
Before laying the tiles, the floors must dry to gain strength. Twelve hours is basically enough. Further processing consists only in scraping off various sagging and “burrs” from the surface. This is done with a wide spatula without much effort.
As a rule, two passes in perpendicular directions are enough. But, to improve the result, you can stretch the floors again. Especially if the base surface was quite uneven.
Tip:
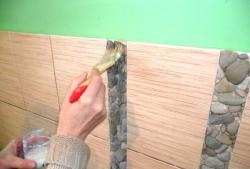
Many try to prime everything. However, the most effective technology for installing tiles eliminates the need for priming the prepared surface.