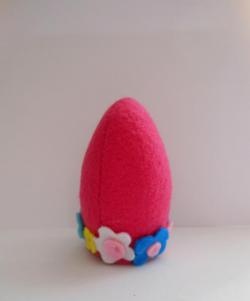
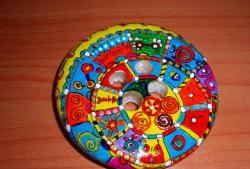
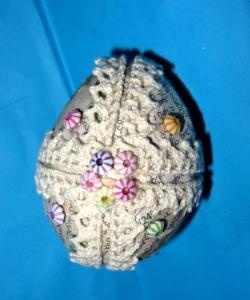
I propose to paint a blank from solid wood in the form of an egg as an Easter souvenir. As a basis, we take a sky-blue background and golden patterns in the form of twisting lines, adding flowers and berries of strawberries.

Such present will not break as its natural counterpart and will remain with its owner for many years. He will remind not only of the bright holiday, but also of the person who gave it. It is pleasant to pick it up and examine it, besides it will ennoble the interior as an imitation of a Faberge egg.
We need:

- bulk blank in the form of eggs from solid wood,
- grinding sponge
- primer for acrylic paints,
- acrylic paints, including metallic gold,
- brushes
- thinner for acrylic paints,
- glossy acrylic varnish,
- pencil, eraser,
- Construction gloves can also come in handy.
- Manufacturing algorithm.
1. Take the grinding sponge and process the workpiece. To protect your hands, you can use construction gloves.

Usually in the manufacture of a workpiece of this type, in the workshop it is fixed in the machine from the end sides. Therefore, notches in the form of burrs are often formed at attachment points. First of all, they need to be processed with a large abrasive, and then sanded with a small one. Secondly, the entire workpiece is polished with a fully grinding sponge of low abrasiveness.
2. Take a blank, a large-diameter bristle brush and acrylic primer.

Cover the workpiece with soil.
3. Then we process the workpiece with a grinding sponge of the lowest abrasiveness or sandpaper number zero.

Repeat the procedure with applying the primer and grinding.
4. For the next step, we will need a smooth, coated blank, pencil and eraser.

We apply a drawing. In our case, the basis is taken thin lines in the form of a pattern, which are complemented by flowers and berries.


5. We take a blank, a brush made of nylon, a thinner for acrylic paints and blue paint.

We mix the thinner and the paint to get the most delicate blue color and apply it to the workpiece, trying not to go on the flowers and berries. Since the resulting mixture is transparent, it can be coated with patterns, and they will be visible later, which is useful for further coloring.

This stage will give us a more voluminous drawing and high-quality color in the future.
6. Take the blank, brush, gold and yellow paints.

Mix the colors and draw the main golden picture.

7. We take white and red paints.

And complement the picture with white flower petals and red berries.

8. Take the blue paint and brush.

Carefully draw the main background, trying to pay more attention to drawing places near the gold lines. So the background will be more voluminous.
9. Get the gold paint and number one brush. A natural or synthetic brush does not matter, the main thing is that it be very thin at the end.

We paint with dots on the berries and stamens on the flowers.


10. Take the blank, brushes of diameter 3, 2 and 1, blue paint.

Dilute the paint with water and circle all the patterns with a thick line, using brush number 3.
Then, with the help of brushes 1 and 2, paint flowers and berries, and make golden patterns bright.

eleven.At the stage of correction of defects with the help of gold paint and brushes of different diameters, we bring the gold lines to perfection.


12. At the final stage, we will need an acrylic varnish and a large-diameter synthetic brush.

Varnish the surface several times. Each time, following the annotation, we wait for the set time for the varnish to dry.
The souvenir is ready.


The egg symbolizes life; it does not look alive outside, but carries life inside. The souvenir created by us symbolizes the beginning of a new life and will bring good luck and change for the better for its recipient.