To work on the craft, we need:
- Pencil;
- White paper (we used sheets of A4 paper);
- Gouache or watercolor paints of blue, yellow, pink and green colors;
- Brush and container with water;
- PVA glue;
- scissors;
- Knitting needle or rod from a ballpoint pen;
- Thread or wire with a needle.
Starting work, we take a blank sheet and cut a square out of it, folding the upper edge of the paper to the lower opposite side:

Folding the basic double square shape, you need to fold the sheet four times: two times on one side and two times on the other:

Now we unfold the square sheet and fold it into a double-square shape:


Now the right and left upper sides of the resulting rhombus need to be bent and folded to the middle, and then return to their previous position. This needs to be done to outline the exact fold lines:

Having returned the previous position to both sides of the figure, they need to be bent inward:


Next, we turn the figure over and bend the lower sides to the middle, after which, also having returned to their previous position, we fold them inside the figure:


Next, the lower side triangles, which have now become distinguished, need to be bent up:

After that, they need to be folded inside the figure and flipped over:


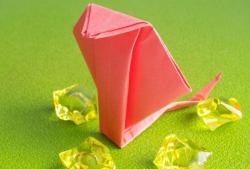
Now we need to bend the upper large sheet of the figure forward, and bend the three back “petals” in the opposite direction, after which, opening them, bend their side edges closer to the middle (this will prevent the petals from folding back):

To make the lower petal of the finished flower larger, and the finished flower more magnificent, you need to take for it a part of the two upper side petals, folding the figure in the manner shown in the following photo:

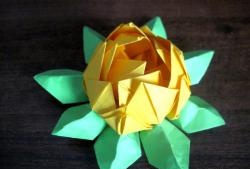
Now that's it - our gladiolus made of paper using the origami technique is ready. We need to make five such flowers, and then we proceed to create the stem and leaves.
To make the stem, we need paper 2.5 to 3 times longer than the one that was taken to work with the flower; you can take the paper left after working with flowers:

From the glued rectangle, you need to cut out a long triangular figure and fold it in half, after which its sides are folded to the middle; and then, wrapping the small triangles in the lower ends in the opposite direction, fold the lower ends themselves upward:

Next, bend the side edges from the middle of the figure (not from the top) as shown in the photo:

After that, add the whole sheet in half:

Now we need to take one of the cropped triangles and first bend its sides to the middle, then fold it in half and insert it into the previous one.


We need to make three more such sheets.Next, the shapes of flowers need to be glued to the longitudinal groove of the sheet from the side where the smaller sheet is glued. In order for the figures to stick more reliably, they can be compressed using clothespins:

When all the flowers and leaves are glued, the crafts can be painted:

After that, our gladiolus bush is ready and we can begin to make digitalis. For it, we need to divide into eight parts two sheets of white paper, and from the third sheet make the same spiky stem as for gladiolus:

From the cut parts of the sheet, we need to glue the shapes of digitalis flowers in the shape of cones and stick them to the paper stalk:

When the glue hardens, the flowers can be painted:

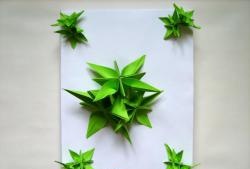
The leaves for digitalis need to be modeled after the stem is made, but wider (without bending the sides), and also stick and color them:

Having made two bushes (with a total of 16 flowers), we decided to attach another flower to them, collected from seven parts of different sizes glued together:


This flower turned out to be like yellow camellia. After gluing all of its parts, you will need to trim the petals (cut off their excess areas), and the petals can be folded and pressed to the middle, and then dissolve them, forming a bud.
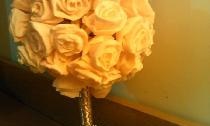
All ready-made flowers should be gathered together and tied with a ribbon. Behind a large camellia flower there is a ribbon, but it is not visible:

Next, we take A4-size paper and cut it into thin strips, which we twist into tubes with a ballpoint pen and glue them together:

Each of the tubes should have a narrow beginning and a wide end, so that another narrower can be glued to the wide end of one tube. By connecting 4 - 5 tubes in this way, we twist them and get a figure in the form of an eight:

We need to process (wrap) the resulting figure with other tubes several times in order to make it stronger. You can draw several tubes through the middle crafts:

When you need to start processing a second time, we will weave a little differently than the first: having made several turns of a braiding tube on one side, we will lead it to the other and, after also making several turns there, we will draw a tube to the opposite side, and so we will wrap it with the whole craft to the end. If the tube ends, you will need to insert a new one, and so that the weaving does not diverge, you can use a clothespin:

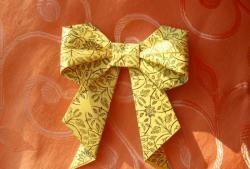
After finishing work with the tubes, our craft looks like this:

It can be covered with a layer of transparent or white acrylic varnish, if available, attach flowers.
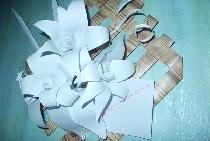
Flowers can be glued, but it will be safer to sew with a wire or thread with a needle. And after that, our origami paper flower panel is ready:


Sincerely, Vorobyov Dinara.