For the manufacture of
You'll need:
- - slices of multilayer plywood 16 mm thick;
- - screw with wing nut and washer;
- - thin cloves;
- - drill, drill;
- - pieces of thin rubber, glue;
- - epoxy resin or glue.
Manufacture
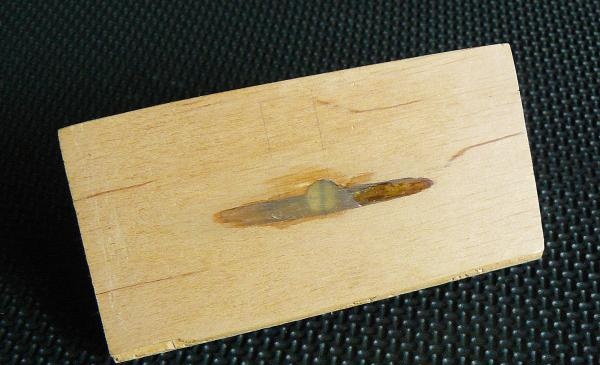
The grater consists of two parts - the base-iron and the clamping holder, which are connected by a screw to the wing nut.
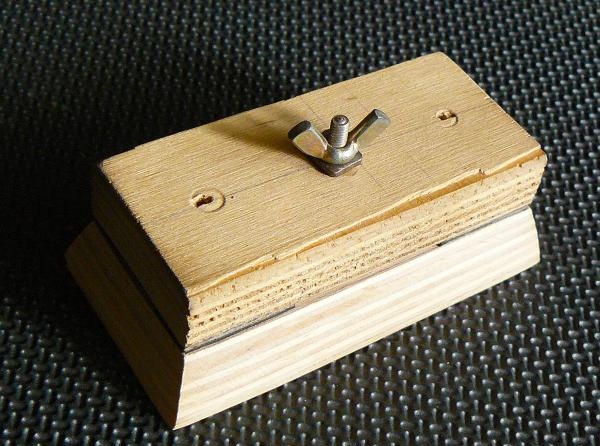
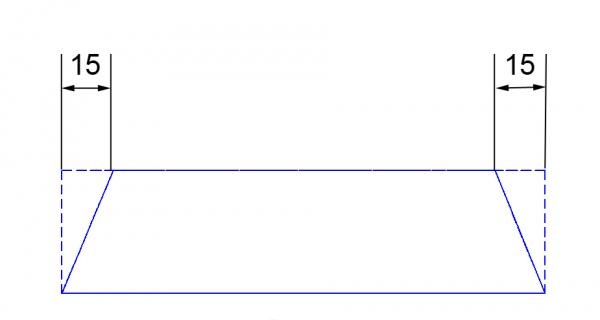
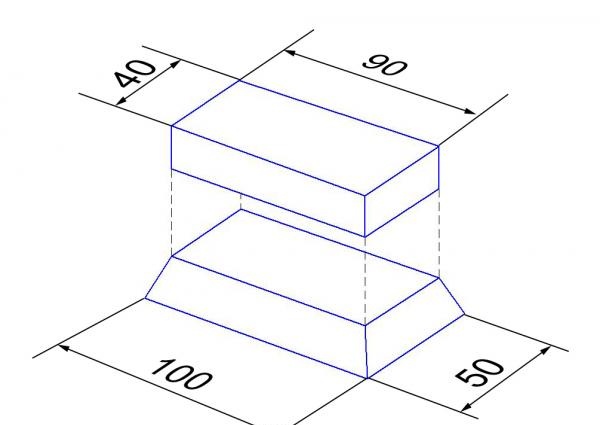
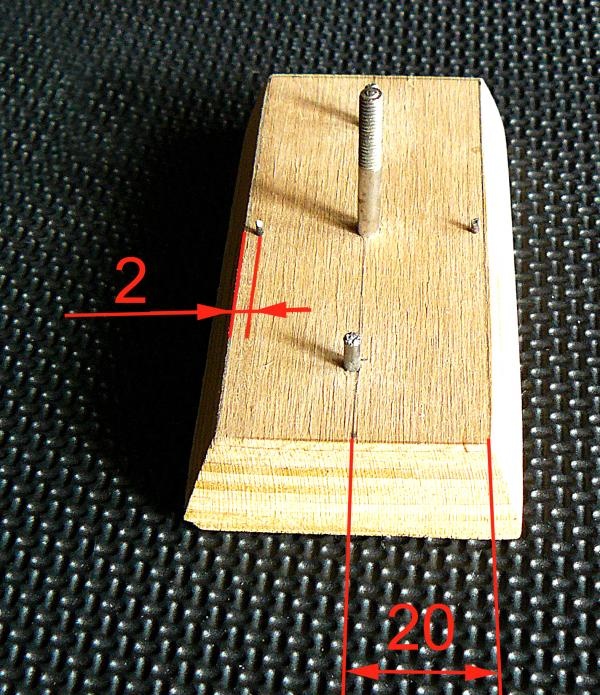
The base has ends that are equally beveled on all sides.
The clamping holder is equal in size to the upper plane of the base.
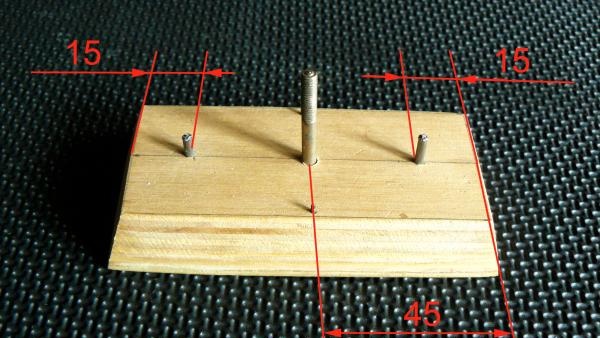
A screw is installed in the center of the base to secure the holder. Use the wing screw that you have available, so its diameter is not indicated. The length of the screw should be approximately 4 cm. Combine the base and the holder and drill a diameter slightly larger than the diameter of the screw and drill a through hole in the center. On the side of the sole of the base, drill a hole so that the screw head is completely hidden. In the screw head, drill a hole for a small stud, acting as a stopper. We bite off the clove hat.
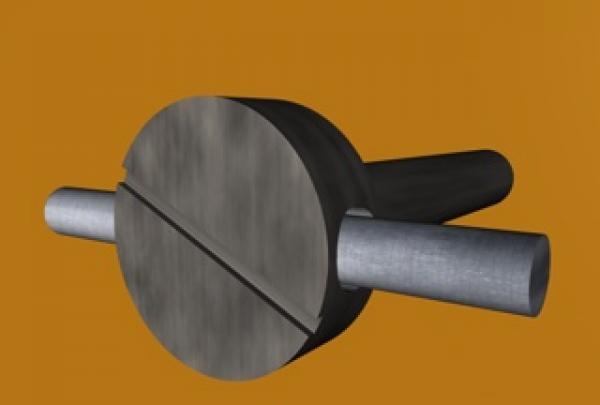
To recess the stud, we make a slot on both sides of the hole for the screw head.

The slot can be chosen as a grinder or a chisel. When the screw with the stopper is installed in the slot with a slot, fill the cavity with epoxy resin or epoxy glue. After the resin hardens, we clean the protruding part with sandpaper.

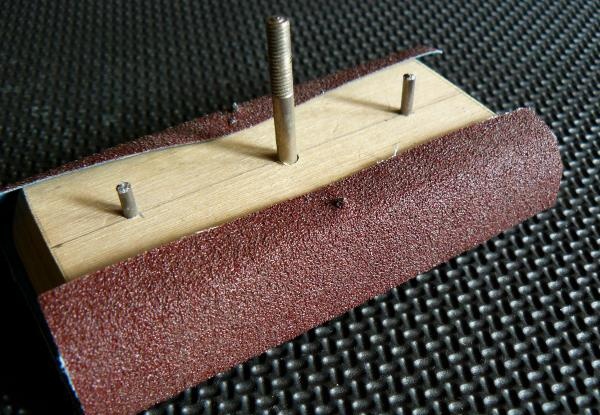
To ensure that the holder does not move, we make guides.
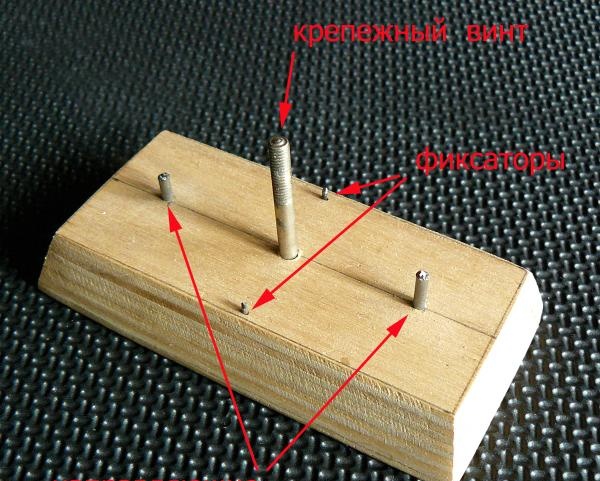
We install the holder exactly on the base, screw the lamb through the washer. We choose two studs for guides (with a diameter of 2 - 2.5 mm). We are preparing two drills - with a diameter slightly smaller than the diameter of the cloves and slightly larger. With a “smaller” drill in the base, we drill a non-through hole for the guides through the holder. We drive the cloves into the base into the holes obtained, bite off the hats. In the holder, from the base, with a “large” drill, drill holes for the free entry of the guides.
To reliably press sandpaper on the inner corners of the holder, glue pieces of thin rubber with Moment glue or other similar. The protruding parts of the rubber are cut flush with the sides.
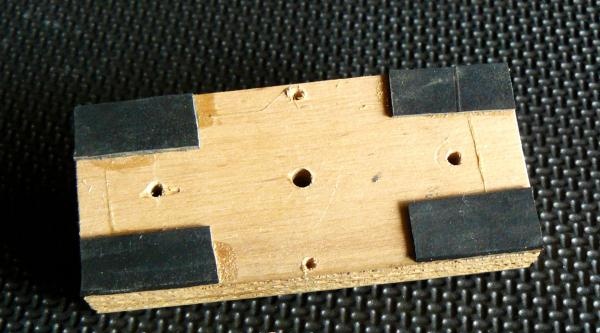
We install clamps for the convenience of changing sandpaper. These are thin cloves (1 mm in diameter) that drive along the long sides of the base.
We bite cloves at a height of 2-3 mm from the plane of the base. We put on the holder, with a slight pressure on the inner side of the holder there are depressed marks from the clips. We expand and deepen the marks with an awl.
Putting on sandpaper. Cut a piece of sandpaper 10 x 10 cm in size. We pierce one edge in the middle with a latch, wrap the emery paper around the base and hook it with a second latch (pierce).
We put on the holder from above, clamp it with a lamb. The tool is ready to work. After erasing the sandpaper, remove it, rotate it 90 degrees, fix it again on a grater and for some time it is still suitable for work.