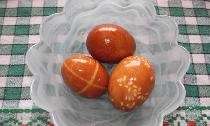
Previously, I have always traditionally used dyes that are sold for the holiday in any store. But with the advent of her daughter, she thought - are dyes for eggs so safe? But what if he passes through the shell and the child eats colored protein? Variants of staining eggs with natural dyes, such as rice, husks of onions or potassium permanganate do not suit me - the eggs are not very beautiful. And then I found a solution to the problem - a simple and inexpensive technique decoupage!
You can work in this technique with a child - because we do not use any chemicals and dyes, plus it is very interesting, it develops motor skills and creative thinking.
In order to decorate eggs using decoupage technique you will need quite a bit:
- boiled chicken eggs (still warm).
- raw chicken egg.
- beautiful paper napkins (preferably several different packages).
- brush for applying protein.

Stage One: Cook the required number of eggs. By the way, it doesn’t matter what color the eggs are. By Easter, white is usually bought up or sold more expensive than brown. Thus, we save 10 rubles per egg.
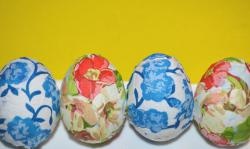
While the eggs are boiling, I open the packages with napkins and separate the top layer, the one with the picture, from the white base. I lay out several divided napkins around myself and study the drawing. At this stage, you can imagine what the finished eggs will look like.
For example, my napkins were: with a floral pattern, with birds. From the large drawing I selected fragments with the part of the drawing that I needed - flowers and a square part from a napkin with a bird.

Stage two: the eggs are cooked, slightly cooled. We break a raw egg into a salad bowl and mix the yolk with protein (if the picture on the napkins is light, it is better to separate the protein from the yolk and continue to use only protein).

Stage Three: Creativity. Brush fresh yolk with protein (or one protein) on a warm boiled egg.


Top with prepared pieces of napkins and straighten with a brush.


Try to leave as few folds as possible, then the picture will look prettier.


Carefully take the eggs - until the protein wipes dry, it is very bad to hold on. Leave to dry for 5-15 minutes, it all depends on how warm the eggs were - the warmer the faster they dry.

At this stage, it all depends on your imagination.


You can create eggs in one style, or you can make many different ones.


And if you are preparing Easter eggs using decoupage technique with your children, believe me, you will find a lot of fun and unforgettable moments! That's what happened with us!

Christ is Risen!