Do it yourself
Life hacks, master classes, useful tips, recipes.
home » Electronics » DIY electronics » Generator for wind turbine
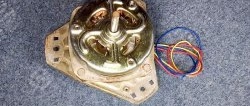
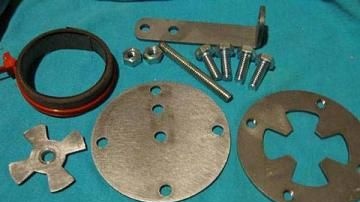
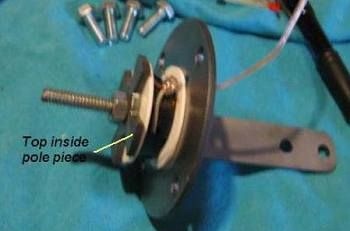
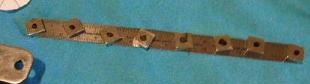
Let's start assembling the mechanical part of the generator. The generator parts are shown below. All of them are made of steel. A transformer steel strip is used for the ring, but a steel sleeve can also be used.

generator for wind turbine

Let's pass the wire from the coil into the hole in the base.

generator for wind turbine

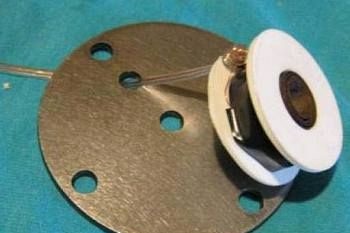
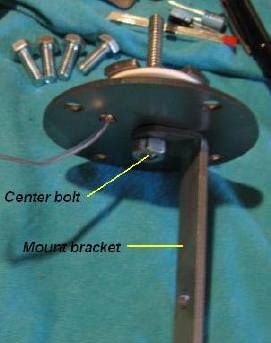
Having secured the nut on the axis, we will tighten the package from the corner, the round base board, the coil and the cross-shaped magnetic circuit with another nut. See pictures below.

generator for wind turbine


generator for wind turbine

Let's install a steel magnetic core in the form of a ring on top of the coil and insert 4 bolts. Bolts with a diameter of 6mm and a length of 20mm.

generator for wind turbine

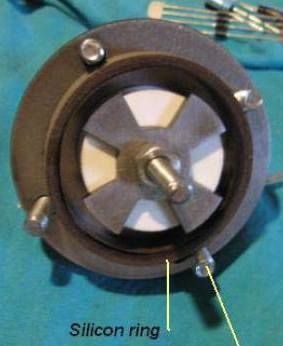
Install the top plate, tightening it with bolts. Tighten the bolts lightly to avoid damaging the threads on the plate.

generator for wind turbine

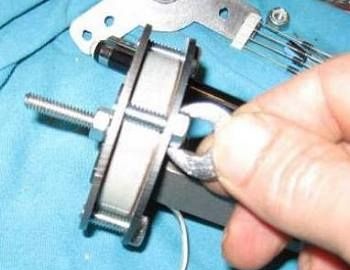
By tightening the central nut, we press the cross-shaped magnetic circuit to the coil so that it does not protrude beyond the plane of the top plate.

generator for wind turbine

At this point, the stator assembly can be considered complete.
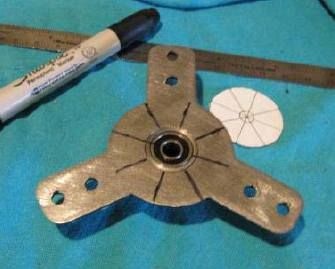
Let's start assembling the rotor. We need 8 pieces of permanent magnets and bearings.

generator for wind turbine

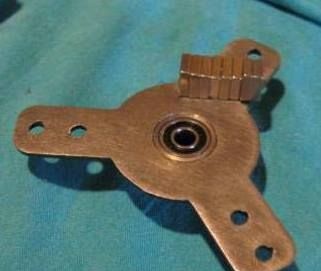
Next, you need to mark the places for attaching the magnets. To do this, draw a template-drawing

generator for wind turbine

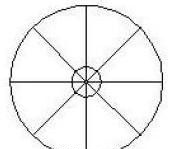
And placing it on the rotor...

generator for wind turbine

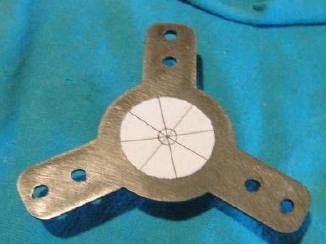
Use a marker to mark the places where the magnets are attached.

generator for wind turbine

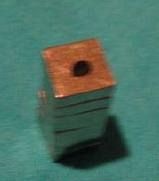
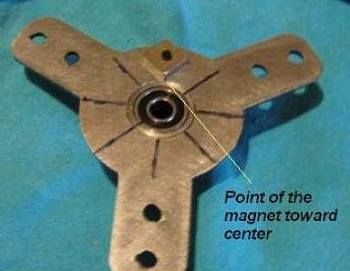
The magnets on the rotor should whatedit according to pole position. Therefore, before sticking them on, you need to mark the poles of the same name, for example, with a marker. The easiest way to do this is to collect all the magnets in a column. In this case, all poles of the same name will be oriented in one direction.

generator for wind turbine


generator for wind turbine

Place the magnets on the rotor, alternating poles.

generator for wind turbine


generator for wind turbine

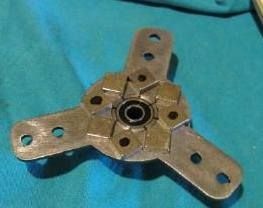
After installing the magnets, you can apply glue around them for final fixation. However, the magnets hold up well even without glue.

Place the rotor on the axle and secure it.

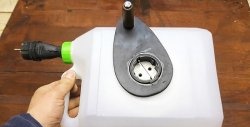
Actually, we're done with the mechanics. Now, by rotating the rotor by hand, you can get 3..4V AC output voltage. After the rectifier you get 7...9V.

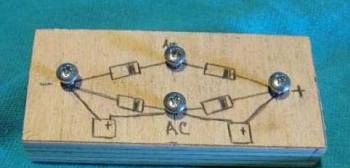
Let's assemble a rectifier and a doubling voltage multiplier. Its diagram is shown in the figure below. As diodes, you can take any diode with a current of 1 A or higher and a voltage of at least 50V. Electrolytic capacitors 47.0uF x 50V, or any larger capacity.

generator for wind turbine

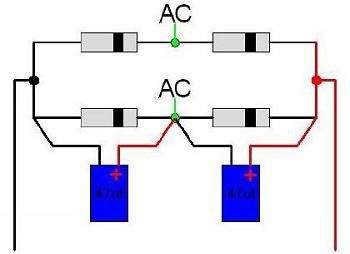
If multiplication is not needed, then we connect the capacitor between the plus and minus of the output and remove them from the diodes.

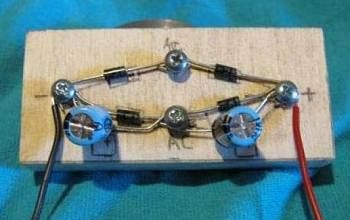
In the absence of a soldering iron, the rectifier can be assembled as shown in the pictures below.

generator for wind turbine


generator for wind turbine

Let's connect the generator to the rectifier at the AC points.

generator for wind turbine

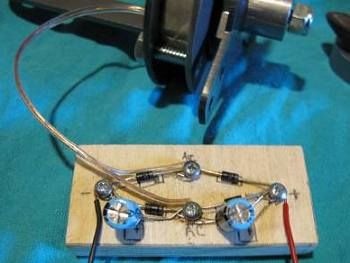
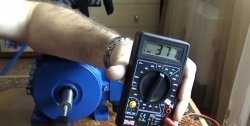
And connect to the output multimeter.

generator for wind turbine

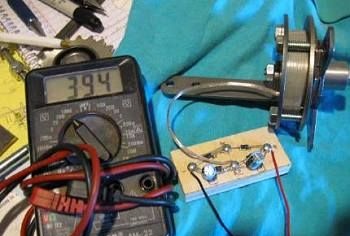
With fast rotation, the output can reach almost 40 V without load.
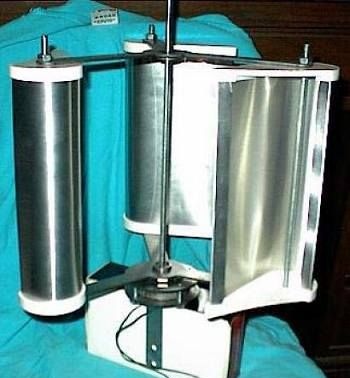
In the future, this generator can be connected to various turbines.
For example, with vertical axis.

generator for wind turbine

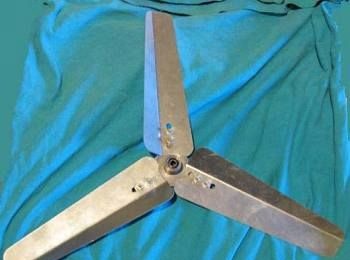
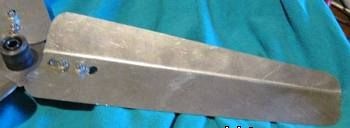
Or, having made blades from thin aluminum, assemble a turntable with a horizontal axis of rotation.

generator for wind turbine


generator for wind turbine

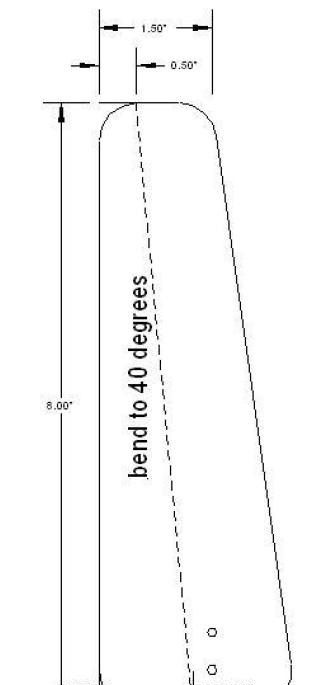
A drawing of the blade is shown in the figure below. All dimensions are given in inches, 1 inch = 25.4 mm.

generator for wind turbine


Actually, that's all. Then you can use this windmill and generator as you please.

Good luck!


come back
Comment
  • bowtiesmilelaughingblushsmileyrelaxed relaxedsmirk
    heart_eyeskissing_heartkissing_closed_eyesflushedrelievedsatisfiedgrin
    winkstuck_out_tongue_winking_eyestuck_out_tongue_closed_eyesgrinningkissingstuck_out_tonguesleeping
    worriedfrowninganguishedopen_mouthgrimacingconfusedhushed
    expressionlessunamusedsweat_smilesweatdisappointed_relievedwearypassive
    disappointedconfoundedfearfulcold_sweatperseverecrysob
    joyastonishedscreamtired_faceangryragetriumph
    sleepyyummasksunglassesdizzy_faceimpsmiling_imp
    neutral_faceno_mouthinnocent
4 minus one =
Comments (7)
  1. Dmitriy
    #1 Dmitriy Guests June 18, 2013 02:01
    0
    If only there were detailed drawings with dimensions, that would be great. (((
  2. Alexander
    #2 Alexander Guests September 6, 2013 08:30
    0
    Post the drawings of all the parts, what brand of bearings you used, what metal is on the blades and parts of the generator itself, what magnets, etc. In general, you need to describe in more detail all the work and materials! The device is good, I want to make one for myself! I hope you can post everything soon.
  3. Vladimir
    #3 Vladimir Guests 9 October 2013 18:07
    2
    Everything is fine. There is no data on the coil, wire diameter, coil and ring dimensions. If you want to share, please post at least the main dimensions and parameters. So this is just an idea copied from a foreign source for the invention of a windmill.
  4. wth
    #4 wth Guests 11 November 2013 23:22
    0
    Yes, please indicate the data of the coils, as you indicate, I will collect :no:
  5. Vovik_Ay
    #5 Vovik_Ay Guests 3 February 2014 13:25
    1
    At a glance, with a winding of 300-400 turns, wires with a cross-section of 0.4 mm, the generator will produce 10-20 W at 800 rpm. Tolerable for a small windmill. But the magnetic sticking will be strong enough, it will be difficult for the generator to move away.In this sense, axial generators are preferable, and the manufacturing complexity is approximately the same.
  6. Nik
    #6 Nik Guests 2 November 2015 12:28
    1
    Actually, I should draw a diagram, otherwise it’s not clear from the photos.
  7. Vitaly
    #7 Vitaly Guests November 9, 2015 07:18
    2
    The best generator for a windmill is a car generator, type G 250. At a speed of 800 rpm it will give a power of at least 500 watts

How to chop garlic so it's healthy

Kanzashi flowers | Do it yourself

Quick and easy rain shelter

How to get rid of itching after a mosquito bite in 20 seconds

«Do it yourself - with your own hands» - a site of interesting homemade products made from scrap materials and items at home. Step-by-step master classes with photos and descriptions, technologies, life hacks - everything a real master or just a craftsman needs for needlework. Crafts of any complexity, a large selection of directions and ideas for creativity.

We recommend reading

Washing machine error codes