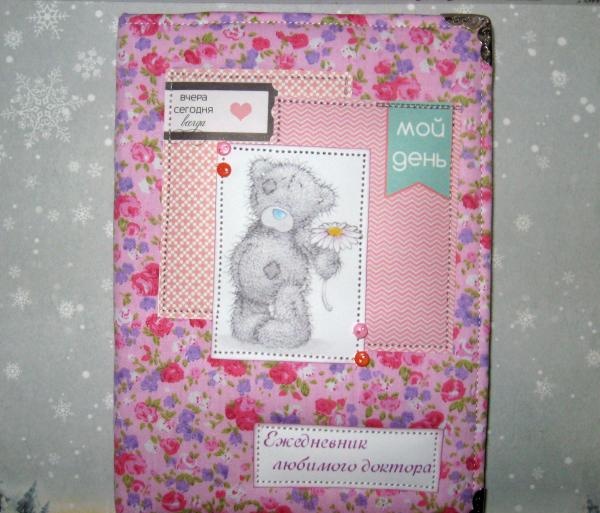
Paperback diary
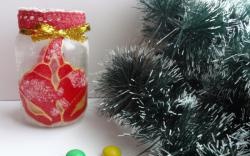
2015 is coming to an end and we need to start thinking about gifts for the New Year. New Year's holidays are always considered to be quite special in the year, so you need to pay special attention to these gifts. As a rule, they prepare congratulations not only for their family members, but also for friends, colleagues, teachers, doctors, professors. Even if it’s just some little thing, you should definitely give it as a gift, even if it’s something not at all expensive, but very necessary. Here's what present relevant for the New Year 2016? These can be beautiful balls, monkeys, notebooks, diaries. For example, almost every person needs a diary for the next year. So, it will not only be a good gift for the New Year, but also, as they say, useful around the house. But, if you need to congratulate someone specifically, for example, your favorite doctor, then you can buy a regular ready-made diary for 2016 and make a cover on it with the inscription “Favorite Doctor’s Diary” using the technique scrapbooking. This cover will be soft, fabric with your favorite pictures and decorations.
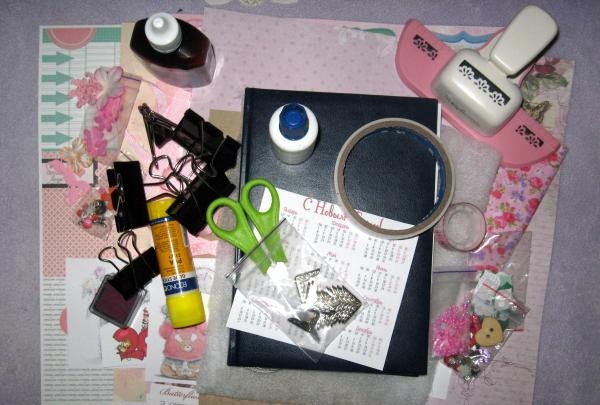
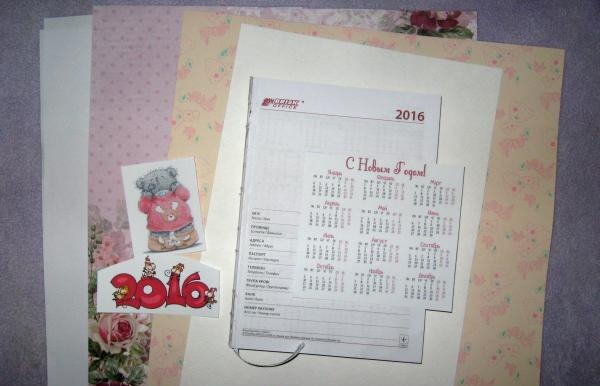
For the master class on creating a cover we need to take:
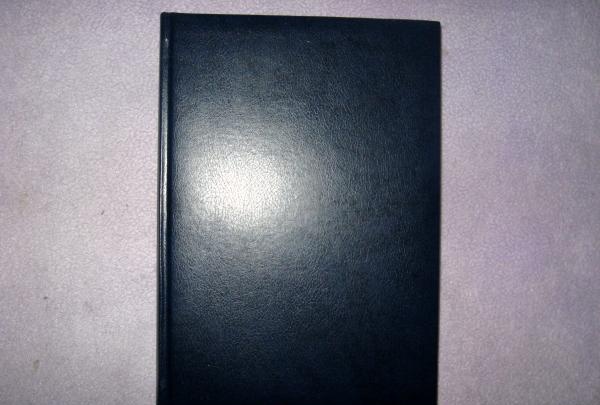
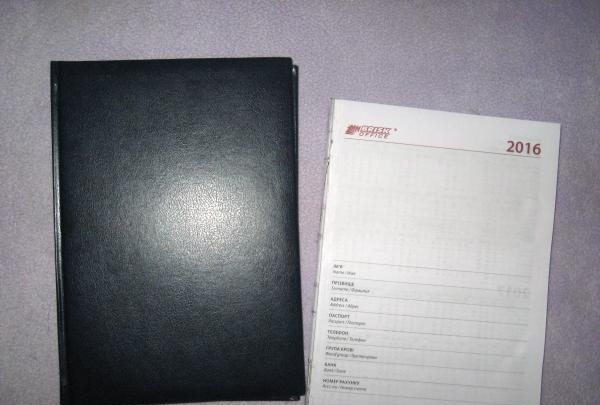
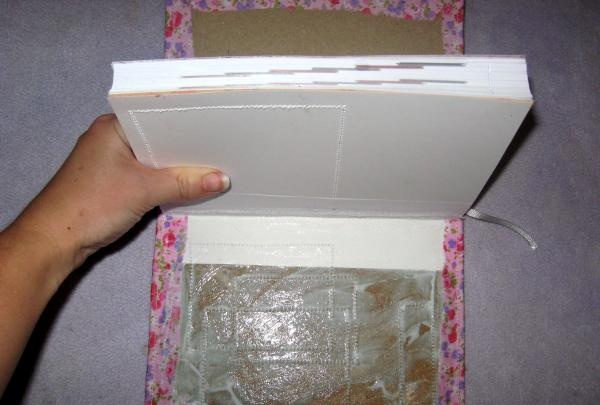
To begin, carefully remove the cover from the diary, do it carefully, if you have a stationery knife, you can make several cuts to easily remove the block.
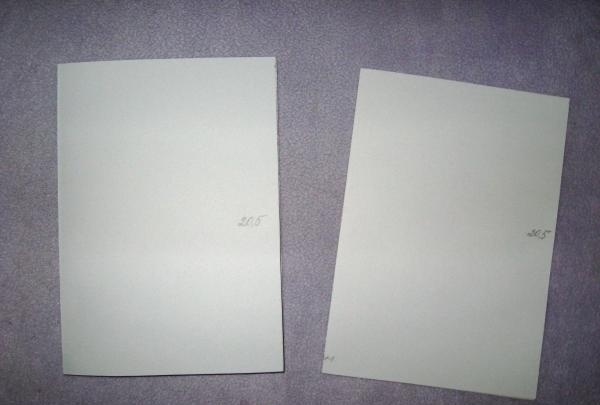
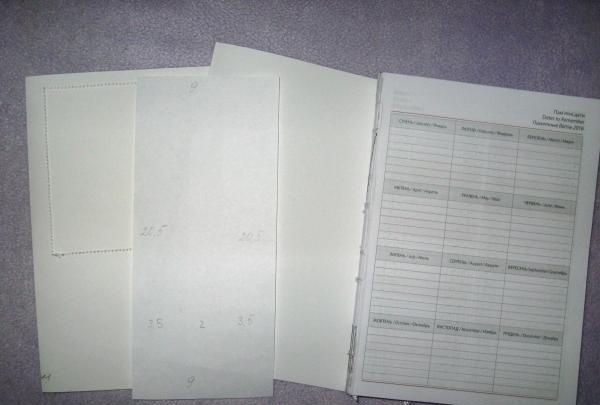
We have disconnected it, now we need to make endpapers for our binding. Endpapers are thick sheets that connect the cover and binding. From each sheet of scrap paper we cut out two parts measuring 20.5 * 29 cm. Divide the side that is 29 cm in half 2 * 14.5 cm.

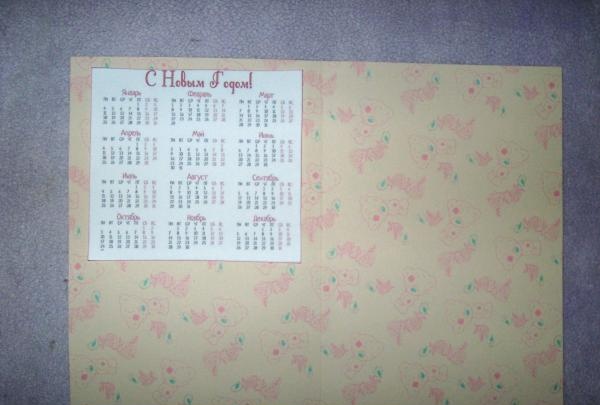
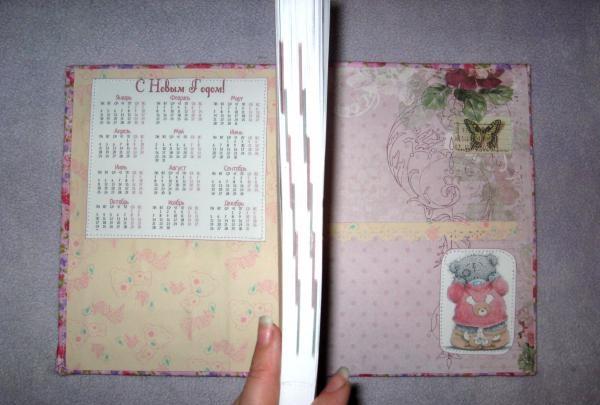
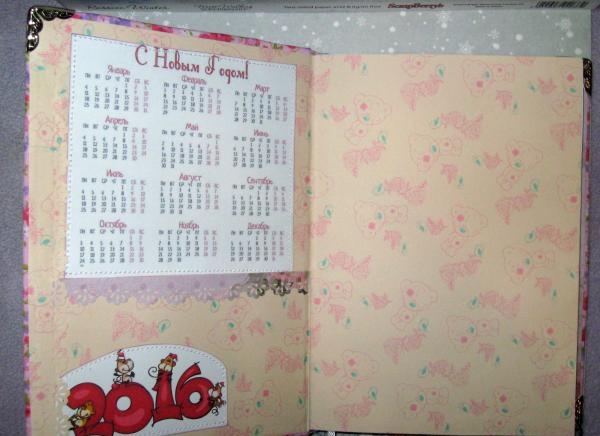
We draw bend lines and fold two blanks. Open one sheet of paper and glue the calendar grid onto the left side with double-sided tape (if you have an ink pad, it is better to tint the edges of the grid).
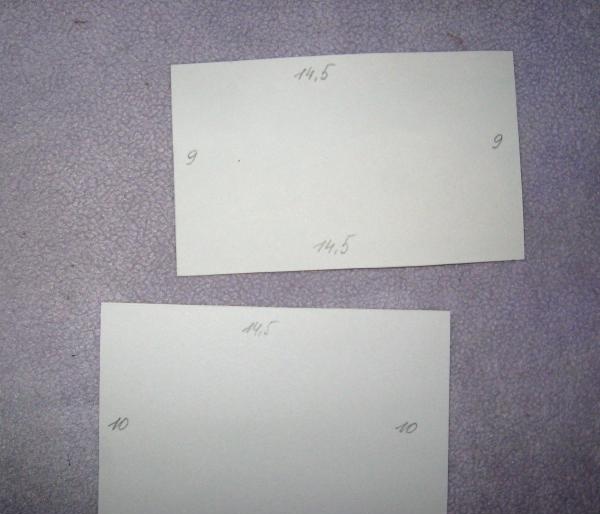
From the remaining sheets, we cut out two pockets 9*14.5 cm and 10*14.5 cm. We punch holes from the remaining strips and glue them at the top onto the pockets using PVA glue. On one pocket we glue a picture of a bear, and on the second the inscription 2016 with monkeys.

We sew on the pictures and the grid using a typewriter.Now we glue the prepared endpapers on top and bottom of the block, spreading glue literally 2-3 mm from the binding. We apply and press the endpapers for about 5 minutes so that the glue sticks. We cut out a rectangle of 9*20.5 cm from office paper and divide it into three parts on the smaller side, respectively 3.5*2*3.5 cm. Draw vertical bend lines.
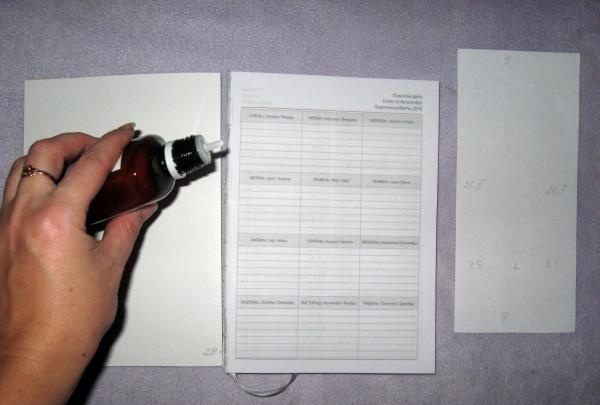
Apply glue and glue it to the diary block.


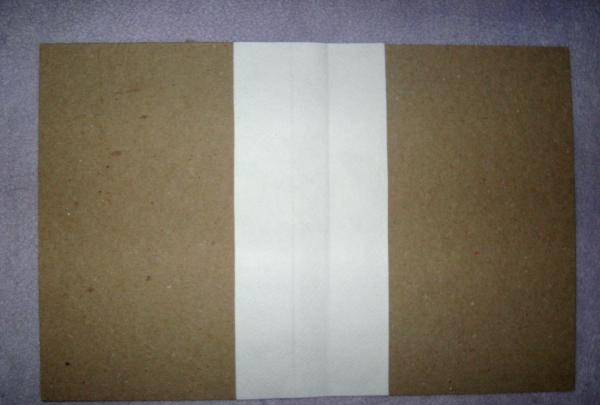
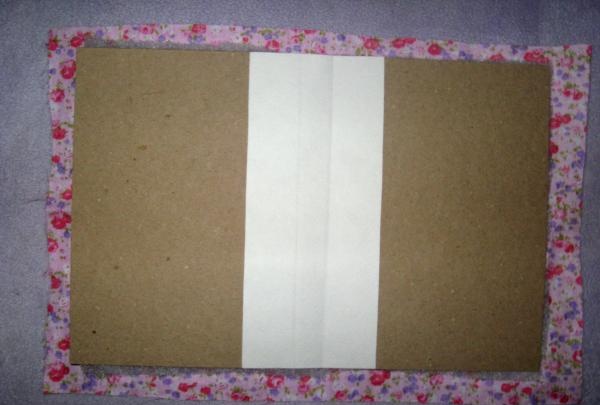
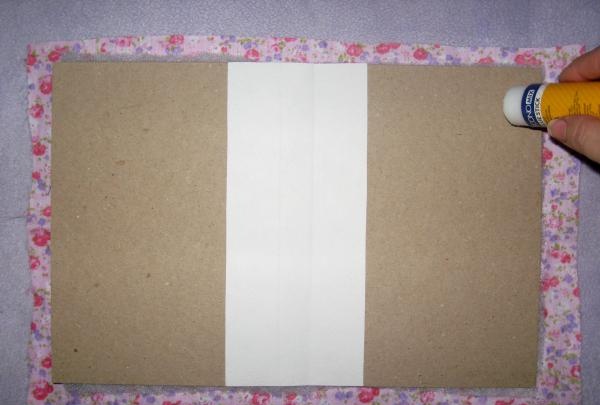
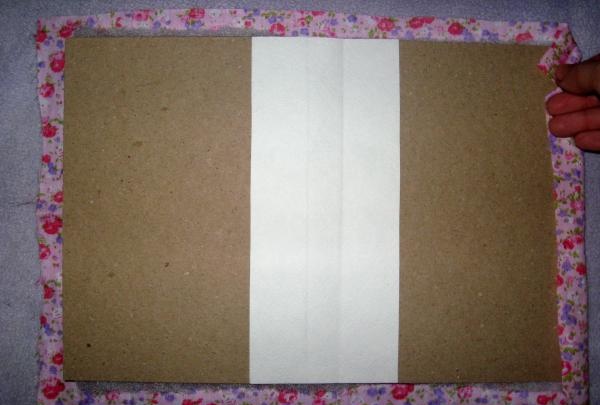
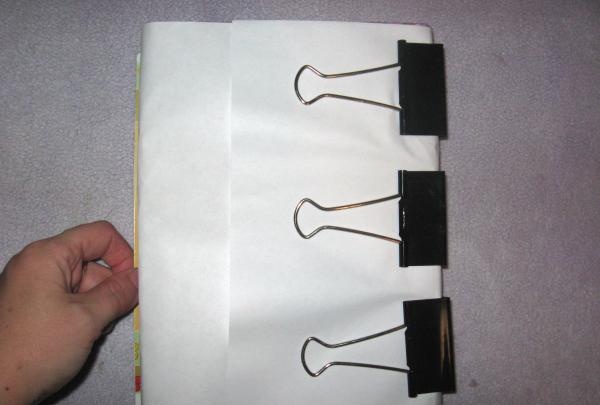
We put some sheets or notebooks on the bottom and top and use clamps to clamp the block for about 30-40 minutes. In the meantime, we are making the cover. We lay sheets of binding cardboard and cut out a blank from the cardboard for gluing the covers together.


Glue the blank with a glue stick.

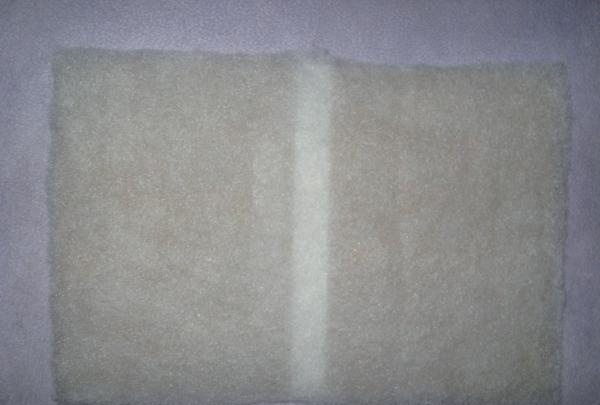
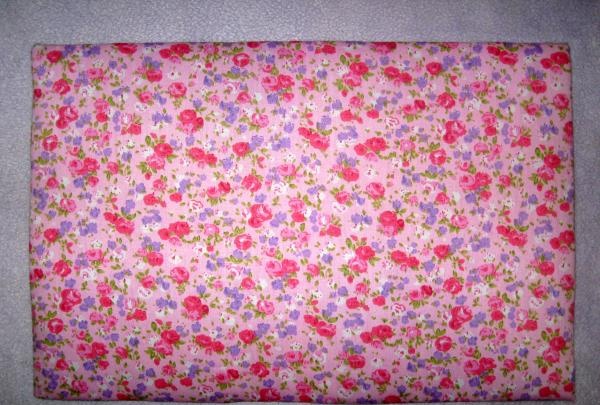
We cut the padding polyester to the size of the cover when unfolded, and glue it to the cover with tape. Iron the fabric well so that there are no wrinkles and lay it face down on the table. Place the cover with the padding polyester facing down.
We coat the edges with glue, wrap the fabric, fold the corners beautifully and glue it.
We sew the edge of the cover on a typewriter.

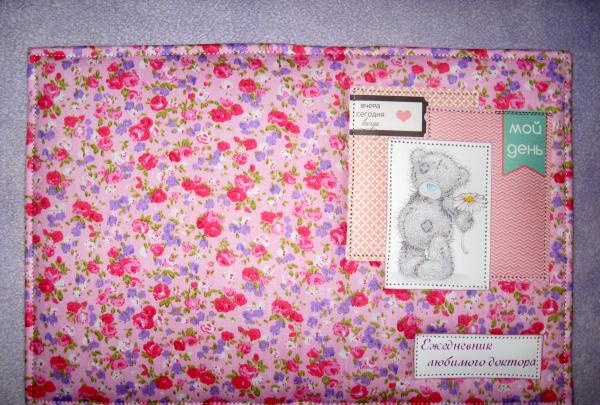
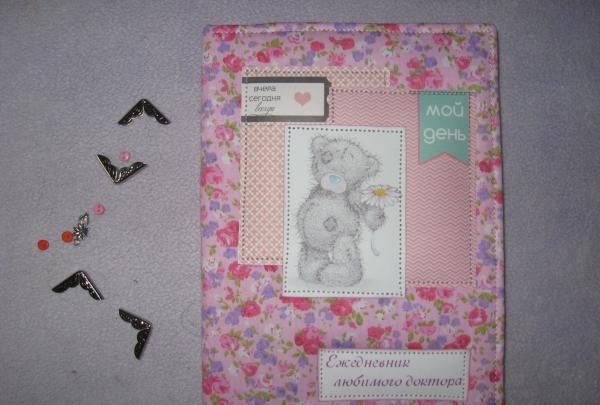
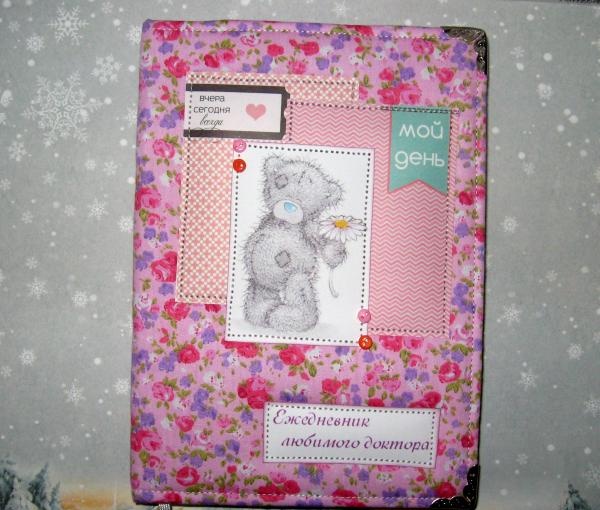
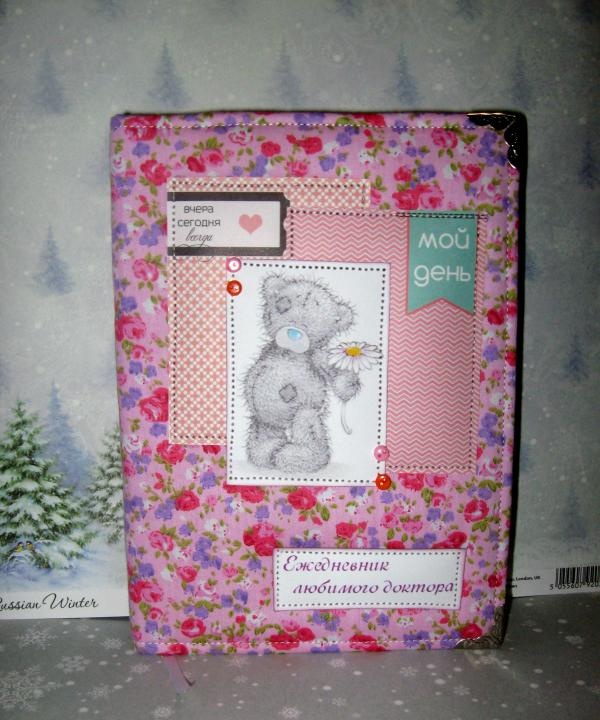
We lay out the pictures in this order and sew them on by machine one at a time.


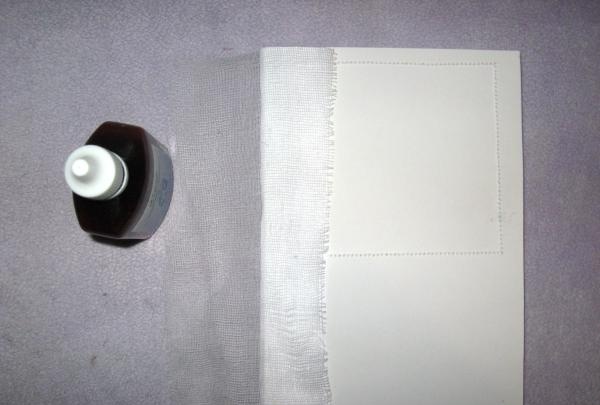
We cut off the bandage, fold it in half and glue it to the edge of the diary block.
Spread on the inside and cover.
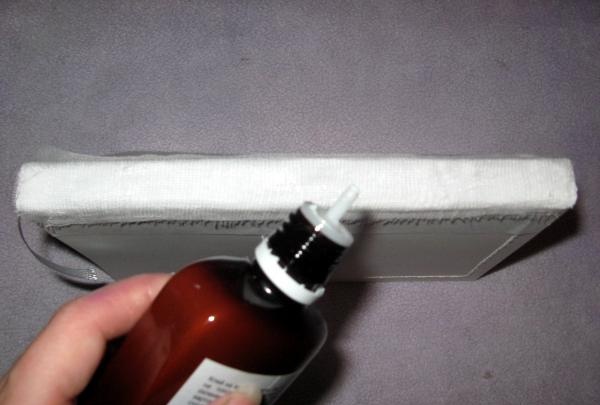
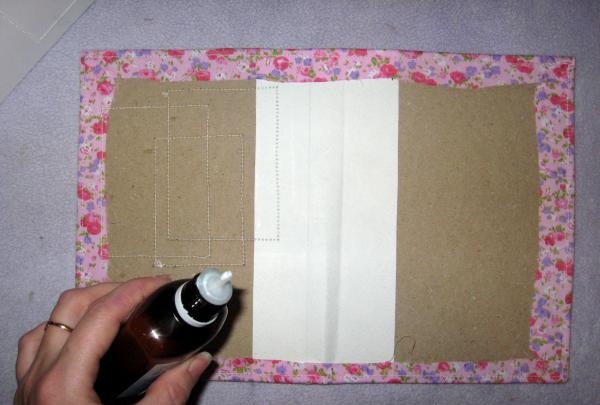
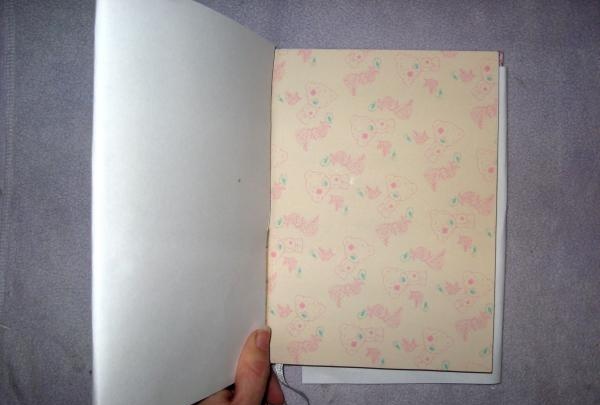
We insert the block into the cover, clamp it and hold it for 5-10 minutes. Now we coat the sides of the notebook and glue the endpapers to the front and back of the notebook.

We level it well. We immediately glue the pockets. We carefully wrap the front and back cover with white sheets and close it.
We clamp it into the clamps and leave it for about 10-12 hours so that the notepad sticks well. Remove the clips and glue the corners and buttons.
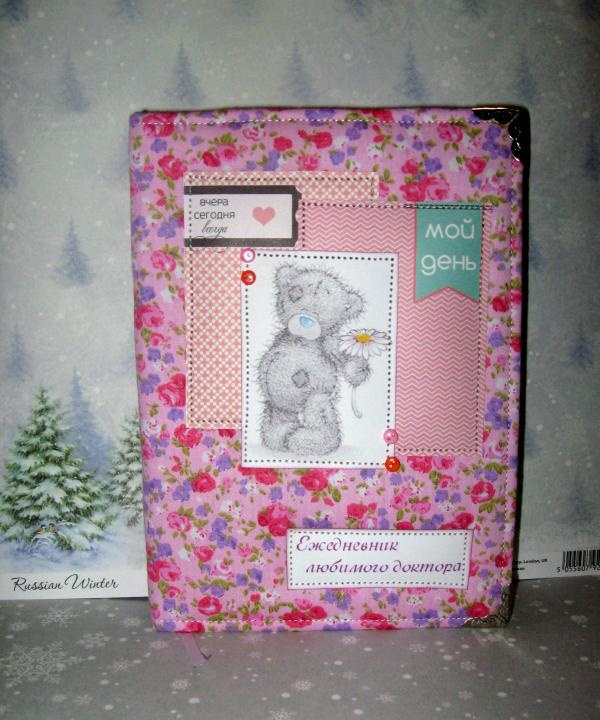
Ready. We received this bright diary for 2016 with our own hands.Thank you for your attention and good luck to everyone in your creations!
For the master class on creating a cover we need to take:
- Diary in ready-made binding for 2016;
- Two blanks made of binding cardboard 15.5*21 cm;
- The cardboard is thick;
- Office paper;
- Cotton fabric, bright pink with flowers, cut 25*32 cm;
- 4 metal corners in silver;
- Two sheets of 30*30 cm scrap paper with bears and light pink;
- Cards made of scrap paper, two pieces, size 7.5*10 cm;
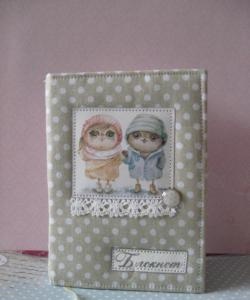
- Pictures with bears;
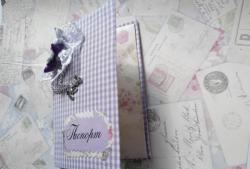
- Card with the inscription “Daybook of your favorite doctor”;
- Small acrylic orange and pink buttons;
- Glue stick;
- Glue with the effect of double-sided tape from Evgenia Kurdibanovskaya;
- PVA glue with a brush;
- Large office clips;
- Pencil;
- Ruler;
- Scissors;
- Double-sided tape;
- Pink ink pad;
- Calendar grid for 2016;
- Curb hole punch;
- Sheet synthetic winterizer;
- Bandage or gauze.
To begin, carefully remove the cover from the diary, do it carefully, if you have a stationery knife, you can make several cuts to easily remove the block.
We have disconnected it, now we need to make endpapers for our binding. Endpapers are thick sheets that connect the cover and binding. From each sheet of scrap paper we cut out two parts measuring 20.5 * 29 cm. Divide the side that is 29 cm in half 2 * 14.5 cm.
We draw bend lines and fold two blanks. Open one sheet of paper and glue the calendar grid onto the left side with double-sided tape (if you have an ink pad, it is better to tint the edges of the grid).
From the remaining sheets, we cut out two pockets 9*14.5 cm and 10*14.5 cm. We punch holes from the remaining strips and glue them at the top onto the pockets using PVA glue. On one pocket we glue a picture of a bear, and on the second the inscription 2016 with monkeys.
We sew on the pictures and the grid using a typewriter.Now we glue the prepared endpapers on top and bottom of the block, spreading glue literally 2-3 mm from the binding. We apply and press the endpapers for about 5 minutes so that the glue sticks. We cut out a rectangle of 9*20.5 cm from office paper and divide it into three parts on the smaller side, respectively 3.5*2*3.5 cm. Draw vertical bend lines.
Apply glue and glue it to the diary block.
We put some sheets or notebooks on the bottom and top and use clamps to clamp the block for about 30-40 minutes. In the meantime, we are making the cover. We lay sheets of binding cardboard and cut out a blank from the cardboard for gluing the covers together.
Glue the blank with a glue stick.
We cut the padding polyester to the size of the cover when unfolded, and glue it to the cover with tape. Iron the fabric well so that there are no wrinkles and lay it face down on the table. Place the cover with the padding polyester facing down.
We coat the edges with glue, wrap the fabric, fold the corners beautifully and glue it.
We sew the edge of the cover on a typewriter.
We lay out the pictures in this order and sew them on by machine one at a time.
We cut off the bandage, fold it in half and glue it to the edge of the diary block.
Spread on the inside and cover.
We insert the block into the cover, clamp it and hold it for 5-10 minutes. Now we coat the sides of the notebook and glue the endpapers to the front and back of the notebook.
We level it well. We immediately glue the pockets. We carefully wrap the front and back cover with white sheets and close it.
We clamp it into the clamps and leave it for about 10-12 hours so that the notepad sticks well. Remove the clips and glue the corners and buttons.
Ready. We received this bright diary for 2016 with our own hands.Thank you for your attention and good luck to everyone in your creations!
Similar master classes


Particularly interesting


Comments (0)
