And now we (I and my photos) will tell and show you how to make a scratching post with our own hands and literally from improvised materials. To get started, stock up with a sufficient amount of corrugated cardboard (it took 4.5 boxes about the size of champagne). It is important that the boxes you choose are made from the same thickness of cardboard.
Arm yourself with a ruler and a pencil, large scissors, two tubes of gel glue and a roll of masking tape (scotch tape will definitely not work, because its outer side does not adhere well with glue). Disassemble the boxes "for parts", cutting them along the fold lines. Each face will need to be cleaned of dust with a damp cloth - otherwise you will not succeed in making a tight roll. When all this has been done, we cut narrow stripes from the box parts (in my case it was 8.5 cm).

It is clear that these strips will be of different lengths, so I advise you to use the shortest ones at the beginning, because it is easier to fold them into a roll.

When you fold the very first strip, immediately fix it with masking tape, as shown below. This is necessary so that the roll does not unfold when you grease the joint with glue before applying the next strip. Lubricated? Attach a new strip and hold it with your hand for a minute or two so that the glue is absorbed.

Do not be alarmed if the middle of the roll at first looks a bit “loose” and clumsy; in the future, everything will "settle down", and irregularities will smooth out.

The more stripes you wind, the more even and attractive the future claw-claw looks; By the way, various toys are easily made from cardboard, with which cats have fun with great pleasure. In the meantime, look at the product, ready for about three quarters.

We continue to patiently wind up strip after strip, fastening each masking tape and smearing the joints with glue. The arrow shows the direction in which it is necessary to periodically “roll” the roll so that the layers lay denser.

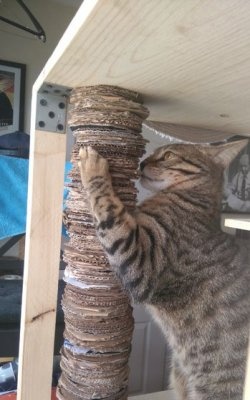
When our circle has reached the desired diameter (I got exactly 36 cm), glue the outer layer with patterned or colored paper. I used an ordinary wrapping, and on top - self-adhesive, so that the edges do not shag when the cat is engaged in “manicure”.

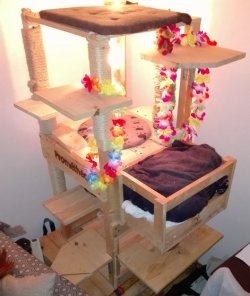
Here is the last photo: this is how the claw-tip looked right after manufacturing. See, what is all new and steady? And now go back to the first photo and compare it with the scratching post after active use for a year and a half. The wear rate is quite low, which means that our home-made claw point will still serve and will serve.