Do it yourself
Life hacks, master classes, useful tips, recipes.
home » Present » Gift wrapping » Gift packaging “A Million Scarlet Roses”
Women of any age are pleased to receive flowers, and receiving a bouquet, which is also a gift wrapping, is doubly pleasant. This master class will clearly demonstrate how to use colored and corrugated paper to pack in an original and beautiful way. present.

gift packaging Million red roses


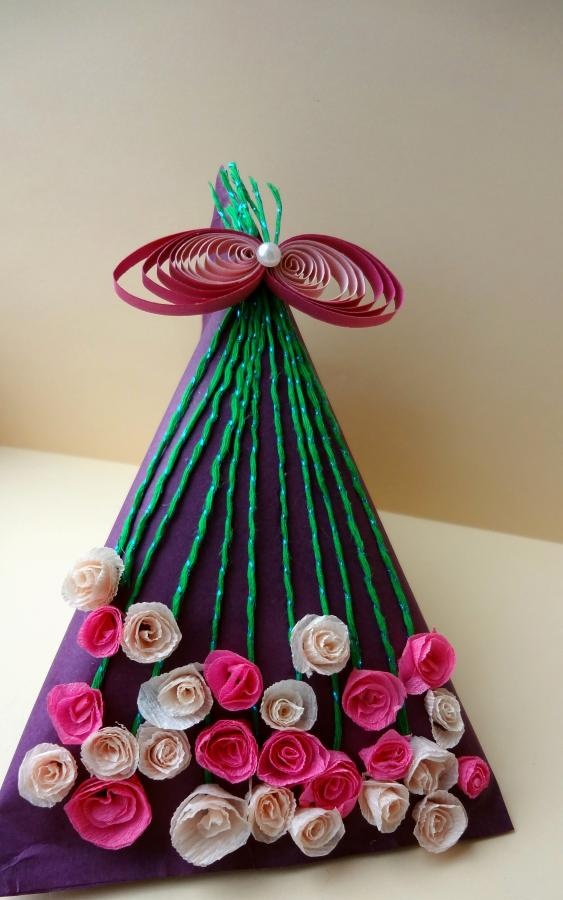
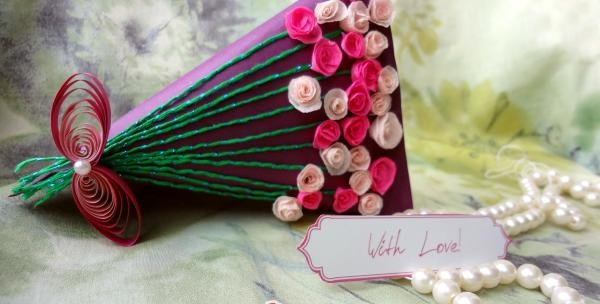
With the help of this master class, you can create designer packaging with minimal financial costs and a little free time, which will certainly surprise the recipient with its beauty and originality.
Materials for the master class:
- a sheet of purple paper;
- corrugated paper in pink and light pink colors;
- green threads;
- ruler, scissors, glue.
Progress:
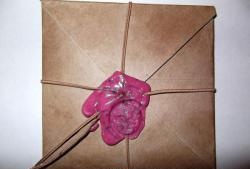
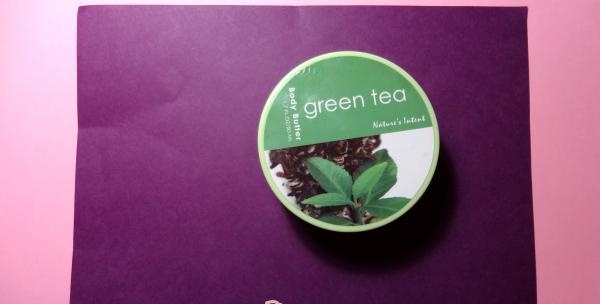
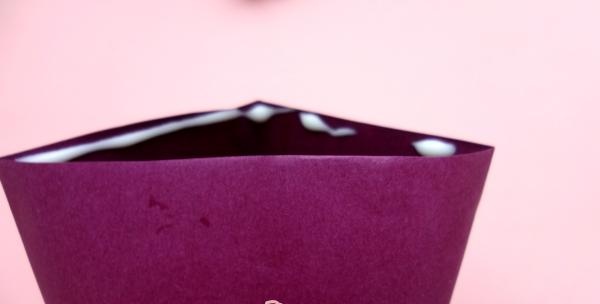
1. In this example we will be packaging a small round jar of cream. To do this, place the jar of cream on a sheet of colored paper and visually determine the size of the future package.

gift packaging Million red roses


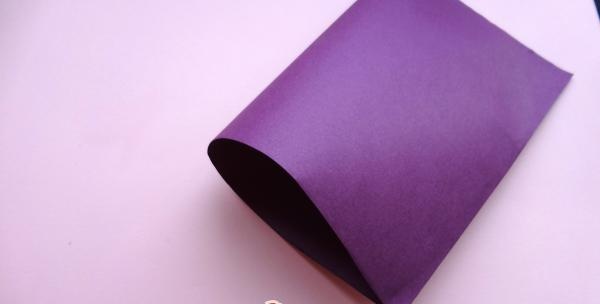
2. We bend the side of the future packaging by 0.5 cm.

gift packaging Million red roses


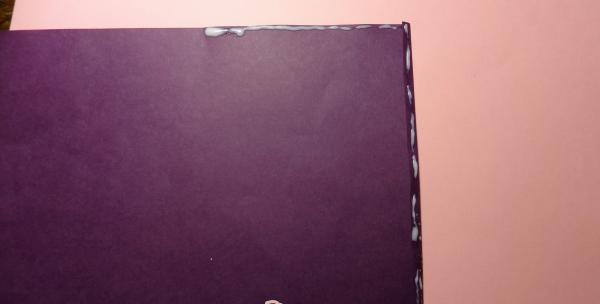
3. Apply glue to the top and sides of the package.

gift packaging Million red roses


4. Let's connect, you should get a package with one open edge.

gift packaging Million red roses


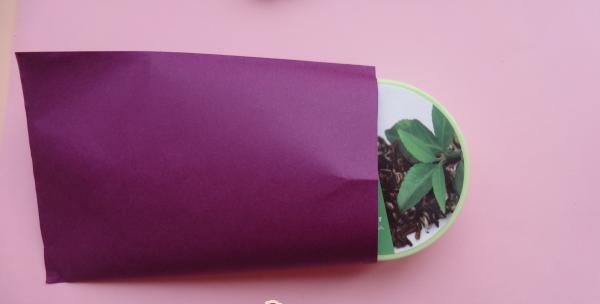
5. Place a gift inside the box.

gift packaging Million red roses


6. Seal the last edge of the package.

gift packaging Million red roses


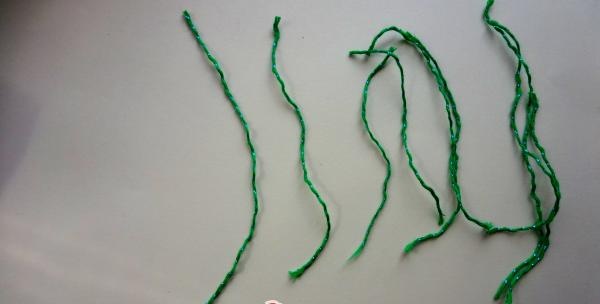
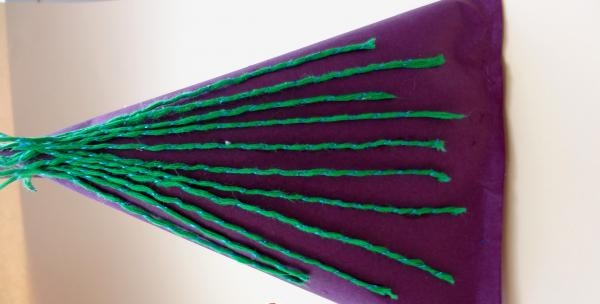
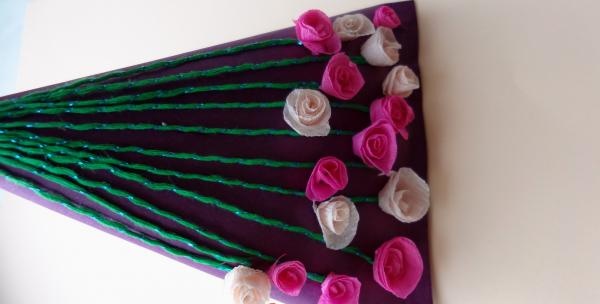
7. Green threads, cut into different sizes.

gift packaging Million red roses


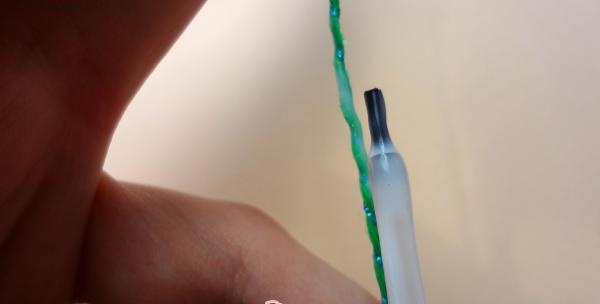
8. Carefully coat each thread with PVA glue.

gift packaging Million red roses


9. Glue the threads to the front of the package, leaving the ends unglued.

gift packaging Million red roses


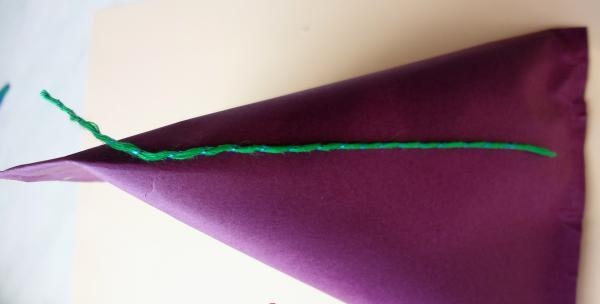
10. Glue all the threads in the same way.

gift packaging Million red roses


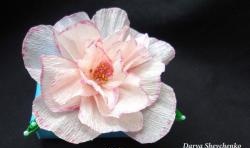
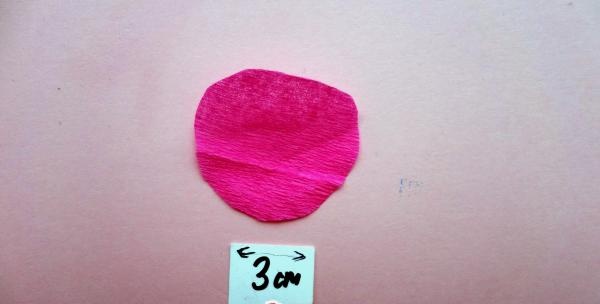
11. Cut out a circle with a diameter of 3 cm from pink corrugated paper.

gift packaging Million red roses


12. Visually, or with a pencil, draw a spiral. The more magnificent you want the rose, the more branched the spiral should be.

gift packaging Million red roses


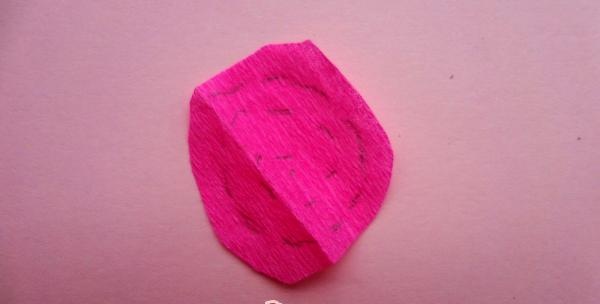
13. Cut out the spiral with scissors.

gift packaging Million red roses


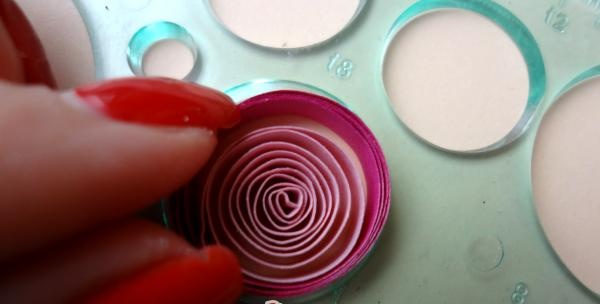
14. We begin to twist the spiral from the middle to the edges.

gift packaging Million red roses


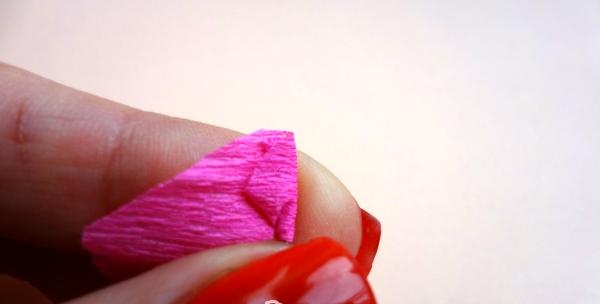
15. Place the resulting rose on a flat surface and give it the opportunity to unwind slightly.

gift packaging Million red roses


16. Fix the free edge with glue.

gift packaging Million red roses


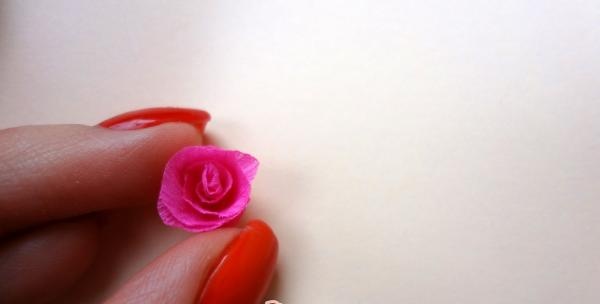
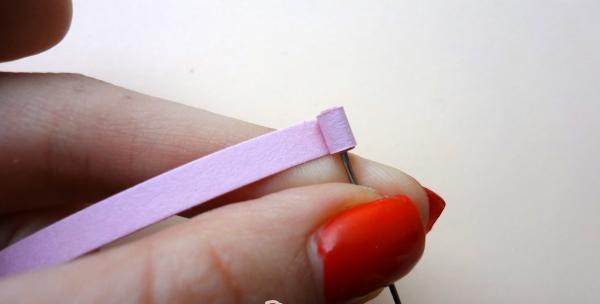
17. To make it convenient to glue the rose to the packaging, trim the sharp edge a little with scissors.

gift packaging Million red roses


18. In the same way we make light pink roses.

gift packaging Million red roses


19. We make a large number of such roses, largely depending on the size of the package.

gift packaging Million red roses


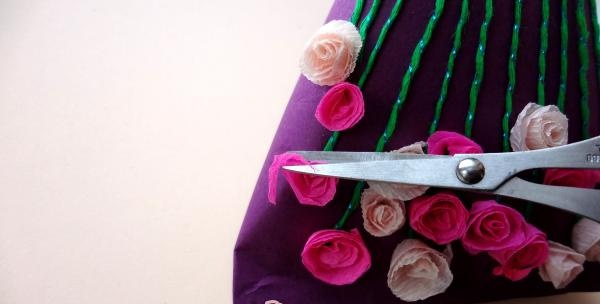
20. We begin to glue the roses to the stem threads.

gift packaging Million red roses


21. If any irregularities have formed on the petals of our roses, we will trim them with scissors.

gift packaging Million red roses


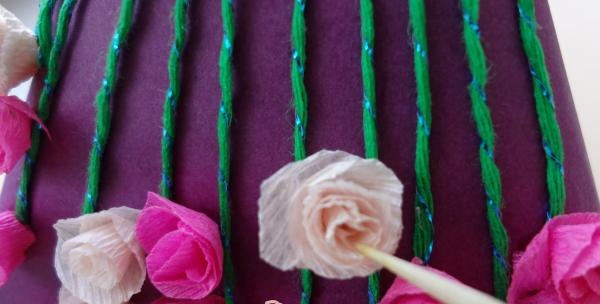
22. During the process of gluing and processing, the rose petals may have become deformed, so we will straighten them with a toothpick.

gift packaging Million red roses


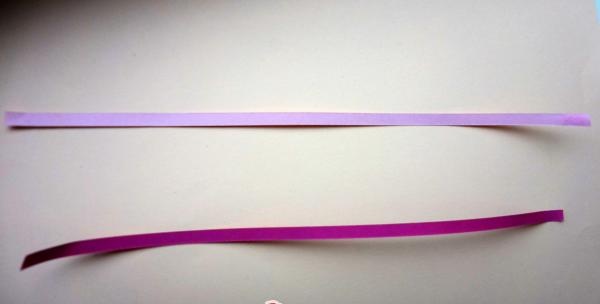
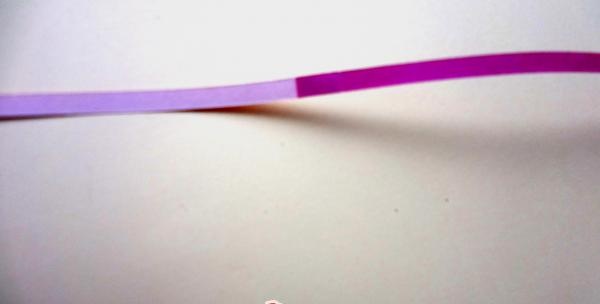
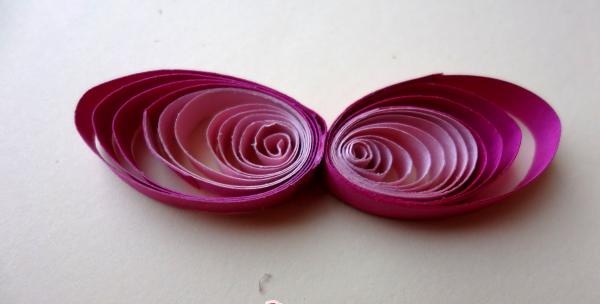
23. Making a bow. Take two strips 0.5 cm wide and 10-15 cm long, light pink and dark pink.

gift packaging Million red roses


24. Glue them together.

gift packaging Million red roses


25. Start rolling the roll using a quilling tool or a split toothpick.

gift packaging Million red roses


26. Place the resulting roll on a flat surface or in a special ruler and let it unwind slightly.

gift packaging Million red roses


27. We make two of these rolls. Give the resulting rolls a teardrop shape, lightly connecting the edges with your fingers. Let's glue them together.

gift packaging Million red roses


28. The middle of the bow can be decorated with a decorative bead.

gift packaging Million red roses


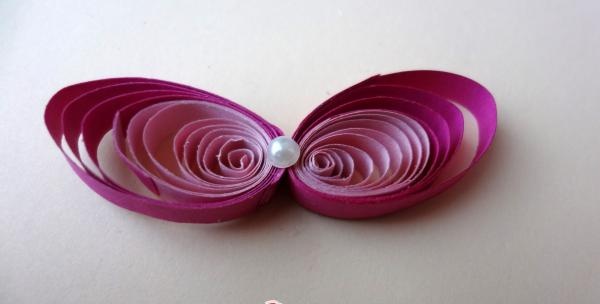
29. Glue the bow to the stem threads.

gift packaging Million red roses


30. That's all, our packaging is ready.We wish you creative success!

gift packaging Million red roses

gift packaging Million red roses
come back
Comment
  • bowtiesmilelaughingblushsmileyrelaxed relaxedsmirk
    heart_eyeskissing_heartkissing_closed_eyesflushedrelievedsatisfiedgrin
    winkstuck_out_tongue_winking_eyestuck_out_tongue_closed_eyesgrinningkissingstuck_out_tonguesleeping
    worriedfrowninganguishedopen_mouthgrimacingconfusedhushed
    expressionlessunamusedsweat_smilesweatdisappointed_relievedwearypassive
    disappointedconfoundedfearfulcold_sweatperseverecrysob
    joyastonishedscreamtired_faceangryragetriumph
    sleepyyummasksunglassesdizzy_faceimpsmiling_imp
    neutral_faceno_mouthinnocent
5+two=
Comments (0)

Beaded trees photo master classes, diagrams

How to cover a surface with camouflage fabric with your own hands

Volumetric card for a young man | Do it yourself

A simple DIY distiller

«Do it yourself - with your own hands» - a site of interesting homemade products made from scrap materials and items at home. Step-by-step master classes with photos and descriptions, technologies, life hacks - everything a real master or just a craftsman needs for needlework. Crafts of any complexity, a large selection of directions and ideas for creativity.

We recommend reading

Washing machine error codes