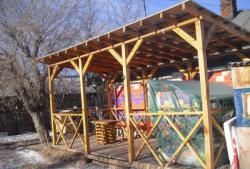
The process of erecting a gable roof.
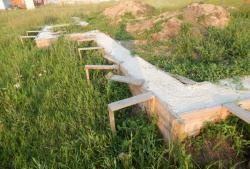
1. In order to build a roof, we need a forest - bars and edged boards.

2. We lay out the bars under the beams around the perimeter of the roof. We use timber 50 * 150 mm.

3. In order for the beams not to rot, it is necessary to waterproof them from the wall. To do this, prepare the roofing material.

4. The ruberoid is bent to the required length and cut with a thread.

5. Elements of waterproofing for beams prepared.

6. Install the beams at the required distance from the edge of the wall.

7. To fix the waterproofing on the beams, we need a stapler.

8. We put waterproofing under the beam.

9. Wrap the beam with roofing material and fix it with a stapler.

10. Such work is carried out with each beam.

11. The distance between the beams should be equal.

12. So that the beams do not move among themselves and it is convenient to move along the future roof, we fix them with the help of boards.

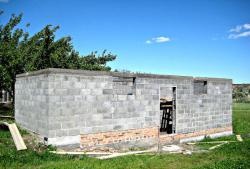
13. We lay out the blocks along the perimeter of the wall for further lining of the beams.

14. We make a lining of beams.

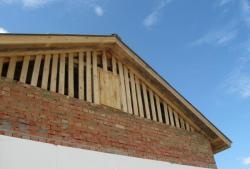
15. For the manufacture of the rafter system, a beam of 50 * 100 mm will be needed, in which it is necessary to make cuts and cuts at a certain angle.

16. In order to carry out such work, it is necessary to decompose the bars in such a way that they repeat the contour of the future rafter system.

17. We measure the length on the beam-template on which the extreme points of the sole of the rafters will be located.

18. The ridge part of the rafters is brought together until the corners of the beam touch.

19. In the ridge part on both sides we mark with a pencil the line of contact of the beam.

20. In order to make the sole of the rafters, it is necessary to attach a bar on top and mark the line with a pencil.

21. Marked the sole of the rafters.

22. We saw off on the planned line.

23. The ridge part is marked.

24. In the ridge part we produce cuts equal to half the width of the timber.

25. Cutting is done with a regular frequency from the marked line to the edge of the beam.

26. Using a hammer or ax, remove excess wood.

27. Using a chisel, level the surface of the two bars that will be folded.

28. The bars are stacked in the ridge part.

29. Rafters prepared for installation.

30. In order to install the rafters evenly, it is necessary to pull the cord.

31. Focusing on this cord, we drive a nail into each beam.

32. In the ridge part of the rafters we hammer in a nail that will fasten the rafters together.

33. Install the rafters, which will abut against the nail-limiter.

34. Then we fix the first rafter.

35. We attach the sole of the rafters to the beams using nails of 150 or 200 mm.

36. The subsequent rafters are fixed together with the help of trims.

37. When all the roof rafters are installed, it is necessary to produce a crate. To do this, hammer nails into certain rafters along the length of the board (crate) at an equal distance from each other.

38. On clogged nails we put the board of the crate. We nail the board to each rafter with the help of 2 nails 100 mm.

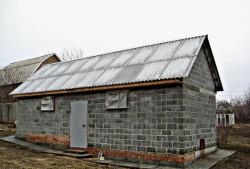
39. The roof lathing is ready.

40. The next step is to remove the excess parts of the beams.

41. To do this, draw a cut line using a square.

42. We cut off the excess part of the beam.

43. Such work is done with all beams.

44. We cover the roof with slate and set the skates.