So, let's get to the point. A week ago, a lonely pensioner living in a rural area turned to us for help. He said that part of the ceiling in the living room collapsed, miraculously not crushing him. We decided to help the old man and together we went to inspect the premises.
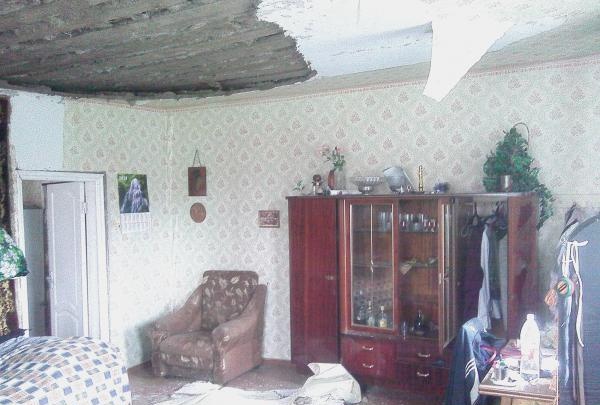
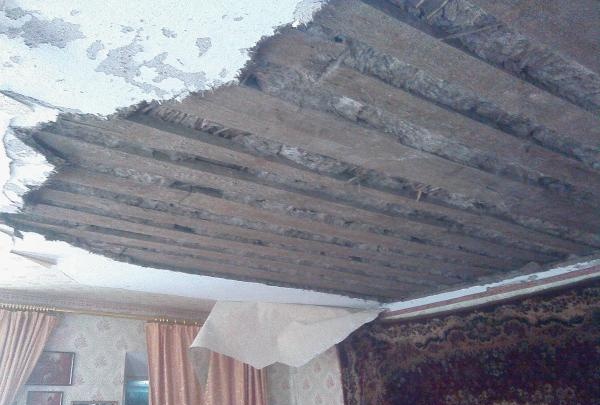
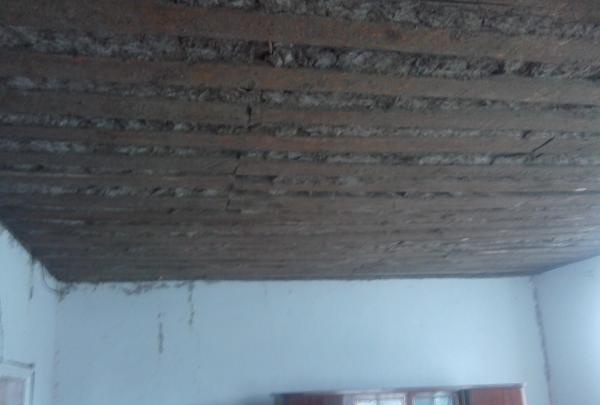
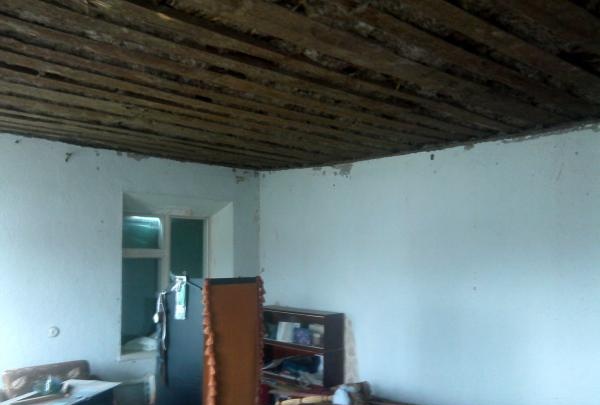
At the indicated address there was an old but still strong tourist house, sheathed on the outside with a wooden shackle. Inside, things were worse: cracks in the corners, gaps in the floor, red stains on the ceiling, eloquently indicating a leak in the roof. The ceiling itself consisted of several wooden beams lined with edged boards from below. The boards on both sides were coated with a thick layer of clay, mixed with broken straw.
In the large living room (25 m?), a layer of clay that had fallen off lay on the floor. The owner explained that in winter there was snow in the attic.With the arrival of spring, it began to gradually melt, saturating the clay with moisture. As a result of this, a collapse occurred. Well, maybe, but we checked the roof just in case. She turned out to be intact. But large cracks were visible on the gables. Apparently the snow got there through them. To my grandfather’s delight, we fixed the problem areas.
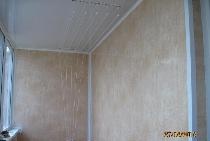
To questions about how he sees the new ceiling, the following answer was given: “Guys, it should be inexpensive and beautiful.” Moisture-resistant plasterboard and hanging systems were beyond the client's means. In the end, we agreed on plastic. Of course, this material is more suitable for an office than a living room, but the owner, as they say, is a master.
Tools and materials
To complete this order, we purchased the following materials:
– OSB boards (oriented strand board);
– aluminum profile 60/25 mm;
– guide profile 25/27 mm;
– profile extensions;
– straight hangers;
– white plastic panels with a glossy surface;
– ceiling plinth;
– glue “Moment”;
– wood screws;
- screws for metal.
And here is the list of necessary tools:
– cordless drill;
– grinder or metal scissors;
– circular saw (for cutting OSB);
– hydraulic level;
– roulette;
– carpenter’s miter box;
– saw with fine teeth;
– mounting gun;
– bayonet shovel;
– thick fishing line;
– marker or pencil.
Detailed description of the repair
Before getting down to business, we drew up a clear action plan. As a result of a short brainstorming, several points appeared on paper indicating the order of work. Here they are:
– preparing the room for renovation (exemption from furniture and other things);
– cleaning the ceiling from any clay remaining on it;
– installation of OSB on ceiling boards;
– marking and screwing hangers to the slabs;
– beating the ceiling level;
– assembly of sheathing from profiles;
– screwing plastic panels to it;
– installation of ceiling plinth.
The first day
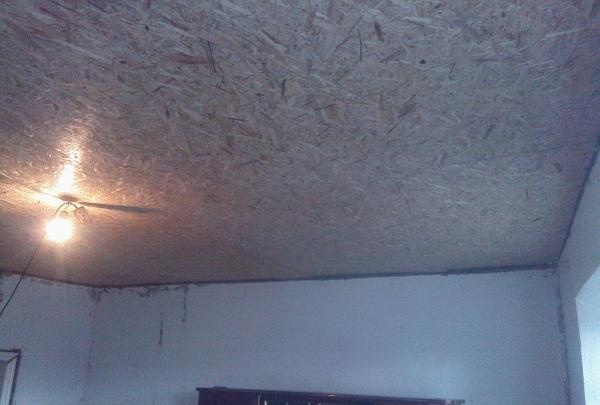
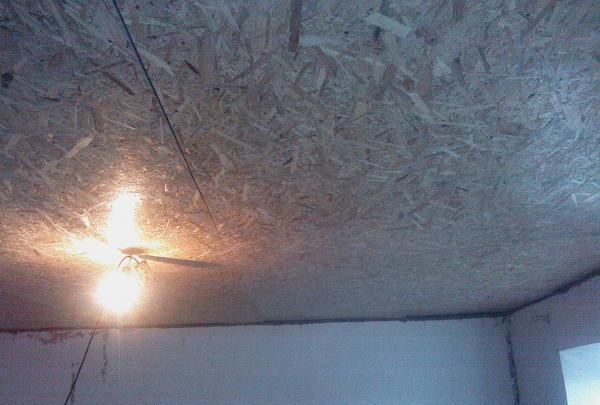
There were a lot of things in the living room. It took an hour to clean up. Then we started removing the remaining clay from the ceiling. They did this with a bayonet shovel, driving it between the clay layer and the hemming boards. Massive pieces fell to the floor with a roar. The room was instantly filled with thick dust. It was difficult to breathe. I wanted to escape into the fresh air, but nevertheless the work continued. Dirty as miners after a shift, we achieved our goal: we cleared the ceiling and cleaned the room. Now it was possible to screw the OSB.
This is not a difficult task, but requires physical strength. The slabs are heavy. Holding them above your head with outstretched arms, like a weightlifter holding a barbell, is not sugar. We started from a flat corner. A friend held it, and I screwed it to the hemming boards. Self-tapping screws were not spared (25 pieces per sheet). Still the ceiling.
Three rows were screwed on. In the fourth, the sheets had to be adjusted to size. This is where the circular saw came in handy. A minute - and the sheet is sawn. Great tool. Cuts wood and other wood-based materials quickly and accurately. By evening, the installation of the OSB was completed.

Second day
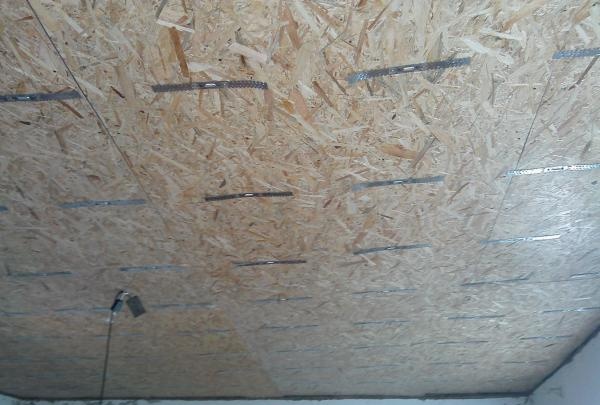
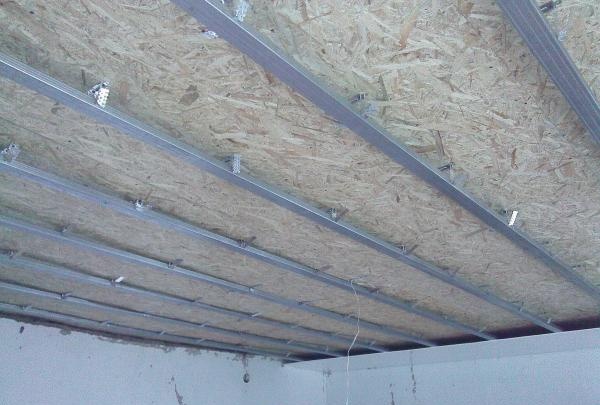
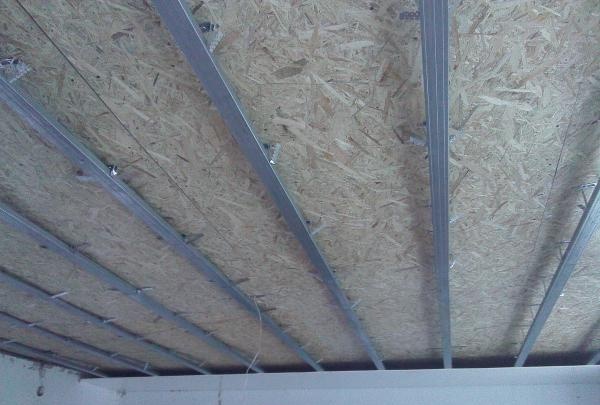
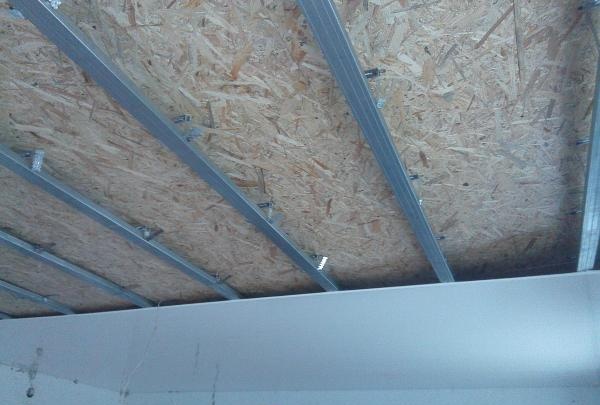
If the ceiling is flat, then the plastic panels can be attached directly to the OSB boards. We were unlucky in this sense. It sagged a lot in the middle of the room. To eliminate this defect, it was necessary to mount a frame made of aluminum profiles.
In the morning, the first thing we did was make markings: we stretched the fishing line and used it to mark the places where the hangers were attached with a marker on the slabs. The distance between rows (step) was 0.5 meters. In rows it was also equal to 0.5 meters. The main thing in this matter is to arrange the suspensions in a straight line.Otherwise, problems will subsequently arise with screwing the profiles.
Before installing the profiles, it was necessary to set a zero at the lowest point of sagging of the ceiling (determined visually). This is easy to do with a hydraulic level. One end of the tube is applied to this point, the other - alternately to each of the walls. When the liquid level in the device is balanced, marks are made on the walls. Nothing complicated, but concentration at this stage is necessary like air.
Using the marks, we screwed the profile guides on two opposite walls, between which we pulled fishing lines (under each row of hangers). The result was a flat plane. After this, the main profile strips were screwed on. The fishing line, serving as a clear guide, eliminated mistakes. By the end of the day the frame was installed.
Day three
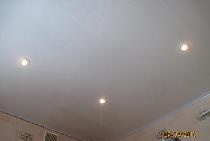
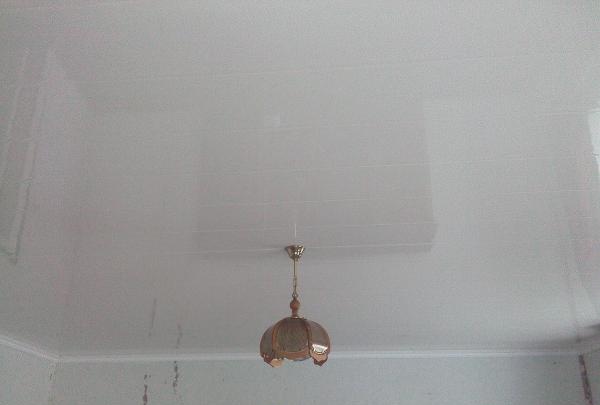
Well, the hard work was done. Now all we had to do was decorate the room with elegant plastic. It's easy to attach. We did it this way: we adjusted the PVC panels to the size of the room, cutting off the excess with a grinder (you can also use a stationery knife), and then successively screwed them to the profiles with self-tapping screws. All. One caveat: the connecting tenon of each new panel is inserted into the groove of the previous one tightly, without gaps.
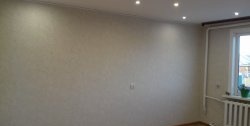
The renovation was nearing completion. The screwdrivers hummed merrily in a duet. The living room was literally transformed before our eyes. Soon the plastic was screwed on.
Small gaps between the walls and panels were covered with baseboards. It turned out beautiful. The baseboards were installed with glue (liquid nails). To ensure they matched perfectly in the corners of the room, a miter box was used. This simple device allows you to cut workpieces at different angles. They cut with a saw with a fine tooth and without setting.In general, on this day we managed to finish this project.

Summary
The owner was pleased with the work. He almost cried with happiness when we gave him a discount. The cost of the repair was 30 thousand rubles (20 - material, 10 - our fee). Also, in passing, the sewer system was cleaned, a gas leak was eliminated, and part of the electrical wiring, torn out by a fallen clay layer, was replaced. In a word, we parted with grandfather on friendly terms. That's all.