Green and red yarn 50 g each (length 100 g - 250 m).
Hooks No. 3 and 4.
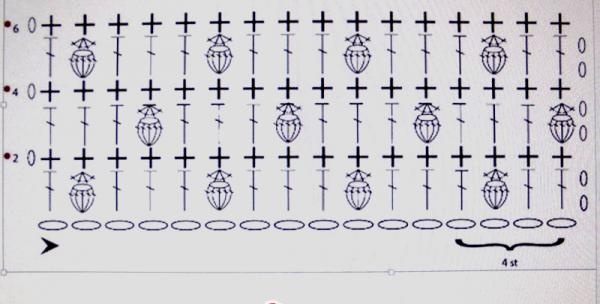
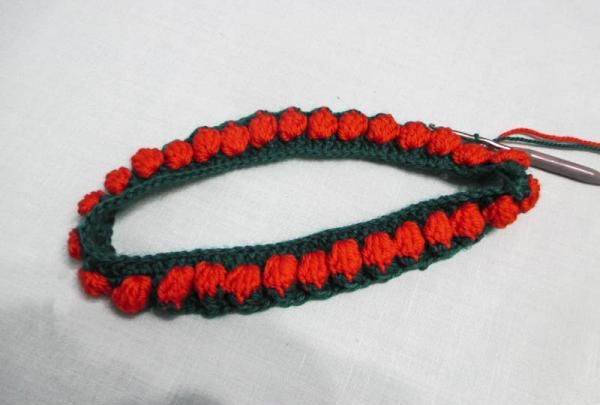
We knit the main pattern according to the pattern, where a series of double crochets and puffy stitches are knitted with red yarn. It will be a strawberry. And the next row is knitted with green thread. These will be the leaves.
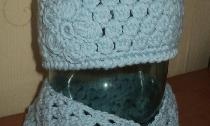
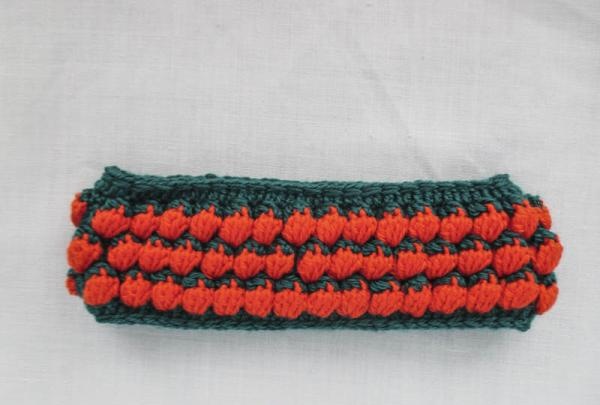
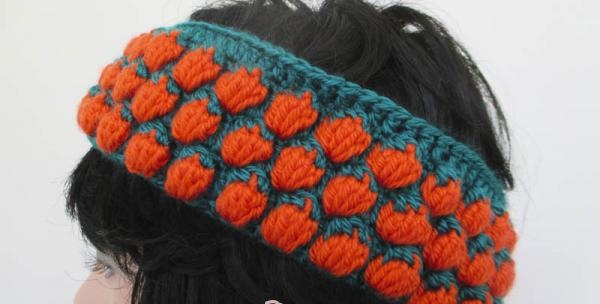
Headband.
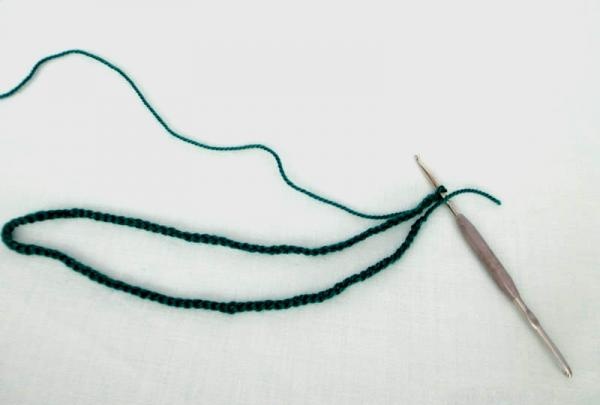
Step 1. Knit a chain of voile crochet No. 4 with green thread. Its length is equal to the size of the head. However, do not forget that the number of loops must be a multiple of 4 according to the pattern repeat. I dialed 120 v/p.
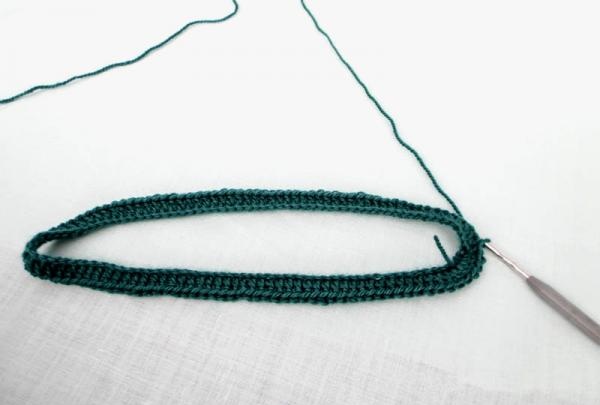
Step 2. Change the hook to No. 3 and knit a row of s/dc, not forgetting to make loops for lifting at the beginning of the row. We connect the circle with a connecting loop.
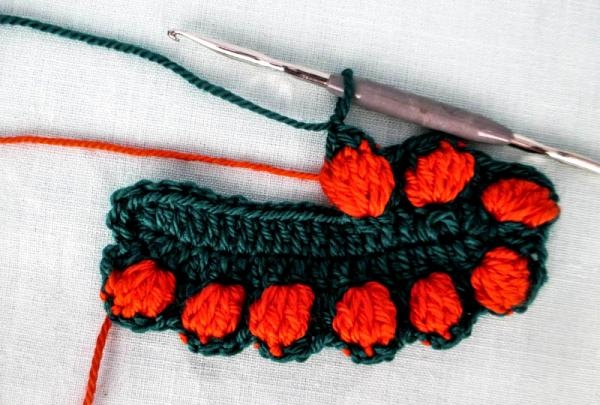
Step 3.Change the thread and continue in the same direction. Two chain stitches, *2 /dc in the first 2 stitches of the previous row, puffy stitch with 5 crochets, 1 dc*. We continue this pattern to the end of the circle, 1 dc and connect the row with a connecting column.
Step 4. Change the thread. Rise from 1 ch, *1 single crochet in the first loop of the row, knit a cluster (between the strawberry yarn overs we stretch loops, leaving them on the hook until we collect 5 and knit them together), 2 dc in the next two loops of the previous one row*. We continue to the end of the circle, connecting it.
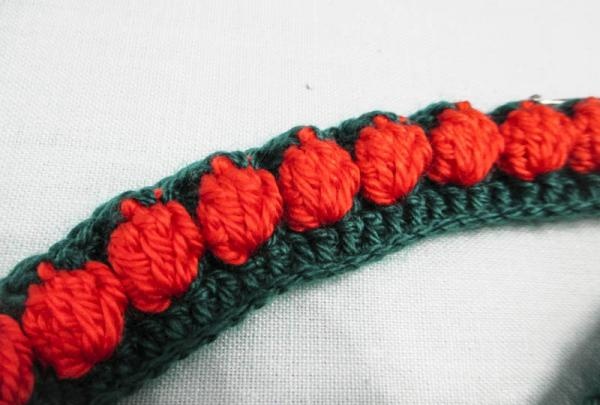
This is how the knitting looks closer.
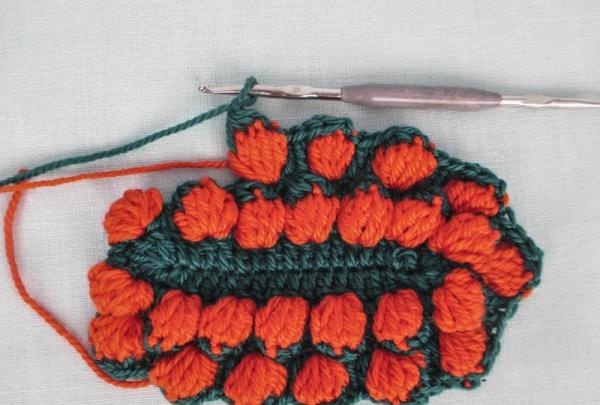
Step 5. Change the thread, make 2 single stitches and in the same base *knit a fluffy stitch, 2 double stitches in the next 3 stitches of the row*. Continue ** to the end, connecting the circle.
Step 6. Change the thread. Lifting loop, *cluster of 4 untied sc between the strawberry stitches, 3 sc in the next stitches*, to the end of the row. Connect the circle.
Step 7 and step 8 are knitted like step 5 and step 4.
Step 9. Two VP rises, s/dc in each loop of the previous row. We break and hide the thread. You can try on the bandage! If it is too big, just string a ribbon or thread inside it.
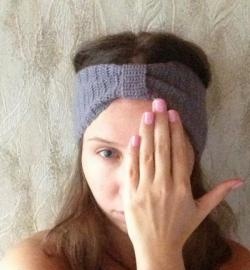
But it’s already on my princess’s head.
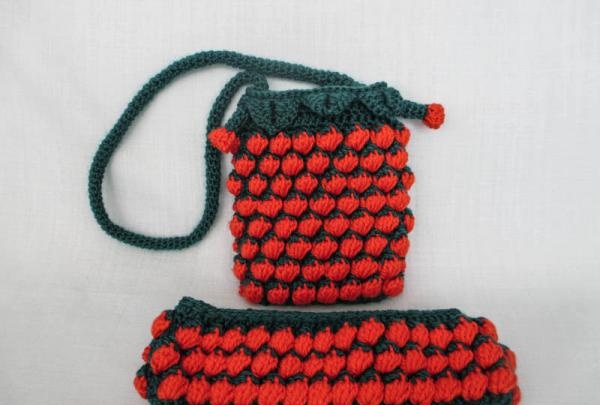
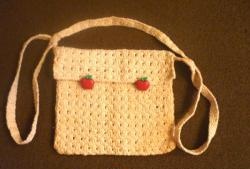
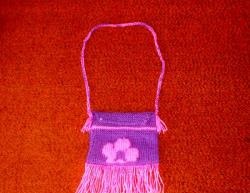
Handbag.
We begin to knit the bag from the bottom with green threads. Whatever size you like. You can knit a large bag. Maybe less. The number of loops in the row will depend on this. The main thing is to remember! The multiple of the number of loops around the circumference of the bottom should be four.
I knitted 21 single crochets with a No. 4 crochet hook, changed the hook to No. 3 and knitted one dc in each loop of the chain on both sides, and 4 in the end loops. I closed the circle and it turned out to be 48 dc.
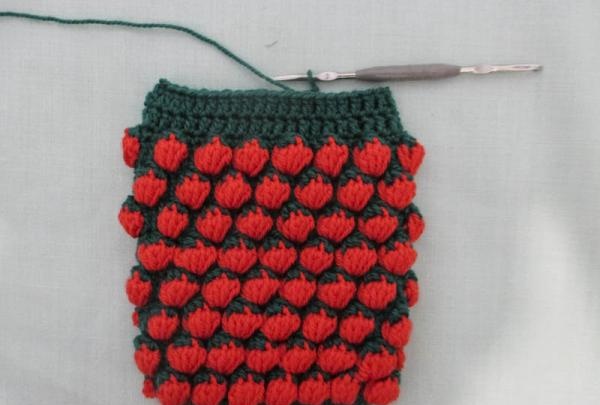
I changed the thread and started knitting according to the main pattern. In the first round there were 12 strawberries.
We knit the second round in a checkerboard pattern. Again according to the main drawing.
We knit 8 such rows with strawberries.

We tie them with green thread.
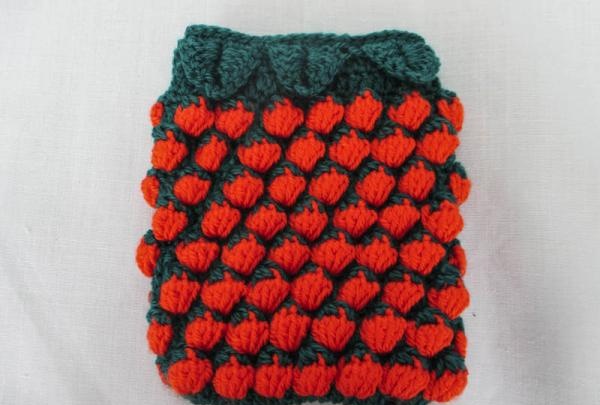
For beauty, you can make a series of scales.
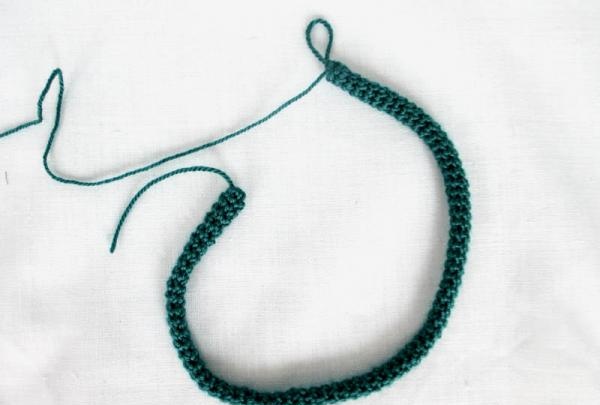
We knit the handle for the bag like this: dial 6 chain stitches, connect and continue knitting single crochet in a spiral into each loop of the row.
At both ends of the handle we knit with red yarn 12 dc and close them in a circle. We secure the handles in the bag through the hole between the posts.
The bag is ready.
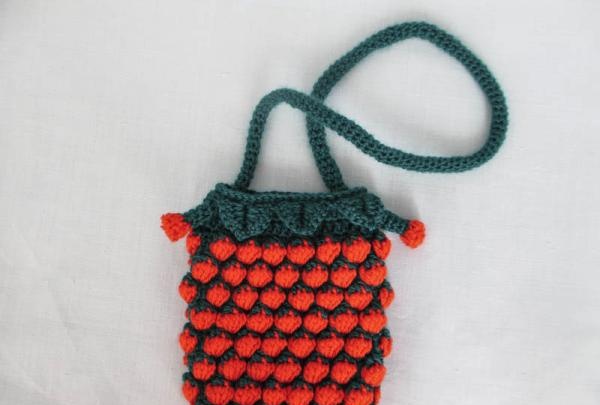
This is such a cute set we got.