Most often, such a base is reinforced concrete floor slabs, over which the coating layers are built up:
• Reinforced concrete flooring - cement leveling screed - waterproofing - black plywood flooring - front wooden coating.
• Reinforced concrete slab - cement leveling screed - waterproofing - logs - vapor-tight film layer - wooden front coating.
• Reinforced concrete slab - cement leveling screed - waterproofing - logs - vapor barrier - black plywood flooring - front wooden coating.
However, the ideal basis is not always at the disposal of builders or repairmen. We are talking about houses in which the floors are not continuous, but are made of metal, reinforced concrete or wooden beams. Buildings with an extremely uneven concrete base and crumbling cement screeds can also be considered problematic from the point of view of repair. Modern methods of correction, restoration and repair of the base using new materials - special dry compositions, light concrete, leveling mixtures - allow these problems to be effectively addressed, while cheapening construction and shortening its time.
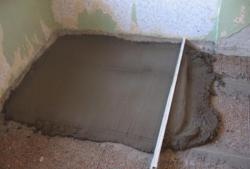
In the end, you can remove the old cement or concrete screed and create a new one. But in this approach, there is one serious drawback that does not correspond to the modern rhythm of life - a large initial moisture content in concrete and a long, up to 3 months, pause in the interior decoration work, associated with the screed drying to an acceptable level of moisture content. We learned how to overcome this obstacle by using dry bulk screeds based on expanded clay, which have a number of advantages that are absent in traditional cement-based ones:
• Dry screeds are much lighter than cement screeds; their weight is not critical for wooden floors in old buildings.
• Expanded clay screeds are environmentally friendly.
• Dry screeds are durable and not shrink, like cement screeds.
• Due to the porous structure of the material, expanded clay screed does not remove heat from the front layer of the floor and perfectly absorbs sound.
• In the expanded clay layer it is easy to “hide” communications - pipes and cables.
• The process of flooring becomes almost continuous until the work is completed.
Expanded clay is usually used for building dry screeds, porous and light granules from which are obtained from calcined clay. Expanded clay differ in the size and shape of the granules. For dry screeds of small thickness, expanded clay sand with particles 1-6 mm in diameter is used. The different diameter of the granules ensures their tight packing with small air gaps. Such a screed does not shrink over time.
Consider the steps of flooring with a dry screed device in more detail:
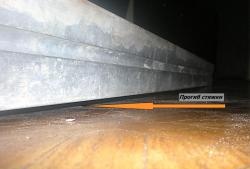
1. The creak of old floors indicates wear below the underlying layers of the coating. To get to them, dismantle the upper face layer, then the black floor and the waterproof layer underneath. Next, the logs and the vapor barrier layer are removed. The old screed is destroyed using a powerful hammer drill operating in shock mode with a special nozzle.
2.Temporarily dismantle wooden slats or a metal profile, used to level the old cement-based screed. Construction debris is thoroughly removed until a clean slab surface is obtained.


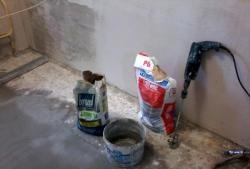
3. If moisture gets on the expanded clay screed, its properties will change - the granules will begin to stick together, and the screed will shrink. As a result, the elements above the located floor elements under load will begin to shift relative to each other - the floors will begin to creak. To exclude the contact of the material of the dry screed with moisture rising from below in the form of water vapor, a vapor insulating layer is laid under it. It can be made of dense plastic film, glassine, special vapor and moisture insulation materials. Strips of film with a five-centimeter overlap are spread over the entire area of the room, bending against the walls.


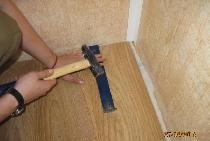
4. An edge tape made of foamed polyethylene is fastened around the perimeter of the room using a double-sided masking tape, which serves to fix the thermal expansion joint and absorb shock noise (footsteps will be hidden and not transmitted to neighboring rooms).
5. The top edge of the dry bulk screed should be completely flat in all directions. Therefore, first, over the entire area of the room, it is necessary to set and fix the level guides in the form of strips of a metal profile, which will also perform some reinforcing function in the screed. This is the most complex and crucial operation when installing a dry screed, which determines the final quality of the entire work. When performing it, use a flat rail with a spirit level fixed to it. Laser construction level can also be very useful.
6. You can backfill the screed material, distributing it evenly, leveling its level along the guides. As the screed aligns, it is useful to slightly tighten it, pressing down on top, for example, by cutting a board. To obtain a high-quality screed, the amount of expanded clay sand should be such that a layer of at least 2 cm high is obtained. Accordingly, the guides set earlier must satisfy the necessary geometric parameters. If necessary, move along the screed so as not to spoil the work - because the legs will be immersed in soft and supple material - you need to move along the stairs of their plywood or sheets of gypsum fiber.
The following stages of installing a floor on a dry screed are significantly different from the technology with a cement-based screed. The steps are traditional when lags are installed on top of the screed in order to create a ventilated gap, to lay insulation and sound-absorbing material between the lags, or to raise the floor level. Waterproofing spreads on the logs so that moisture does not penetrate the heater from above. All this is covered with a black floor, on which the front material is laid.


In addition, there is a technology where columns of brick are built on a loose base, onto which logs are laid through a layer of waterproofing. However, in this case we are talking about a rigid cushion made of gravel compacted into the ground. A relatively soft dry screed for brick columns cannot serve as a base. The expediency of an add-on above a dry coupler lag seems doubtful too. The porosity of expanded clay granules allows air movement, and the material itself provides sufficient sound absorption and thermal insulation.
7. Modern construction technologies include laying waterproofing and the subfloor directly on the screed and its guides. Moreover, for example, a layer of moisture-resistant gypsum fiber sheets can act in both roles. When laying, the sheets are tapped on top with a rubber mallet, attached to the guide screws and glued joints. Sometimes, for fidelity, GVLV is laid in two layers, displacing the joints. When using plywood as a material for the black floor, for waterproofing, you will have to lay another layer of film under it.


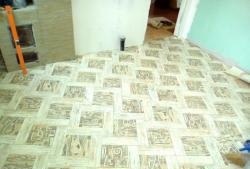
8. Surplus edge tape near the walls is cut off. The black floor is ready. Now you can lay any coating.