- fabric for the base of the pockets (any dense fabric that holds its shape),
- finishing fabric for pockets (several types),
- non-woven material such as padding polyester (as an additional lining in the base of the pockets),
- sewing threads in the color of the fabric,
- white lace 1.5 cm wide with a figured edge,
- felt of different colors (for applique),
- glue "Moment crystal",
- decorative buttons, rhinestones and other small items for decorating pockets,
- sewing machine,
- iron,
- cutting scissors,
- ruler with right angle,
- tailor's chalk,
- safety pins.
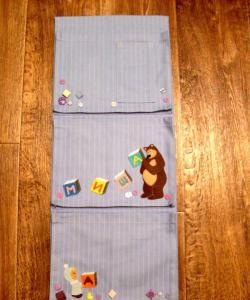
The standard size of pockets is 25*65 cm.
Based on it, the calculations and cutting of pocket parts will be made.
It is recommended to decate all fabrics before cutting.
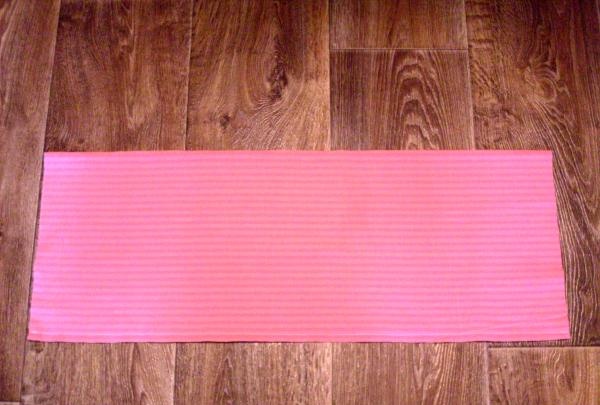
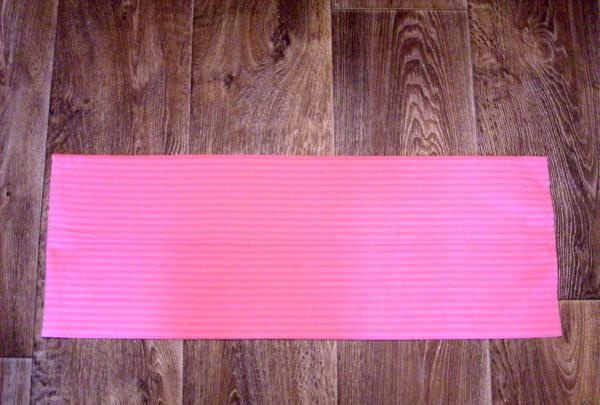
From the prepared material, you should cut out a base for the pockets - a rectangle measuring 53*70 cm. This blank should be folded in half lengthwise with the front side inward and sewn along the longitudinal sections with a seam 1 cm wide.
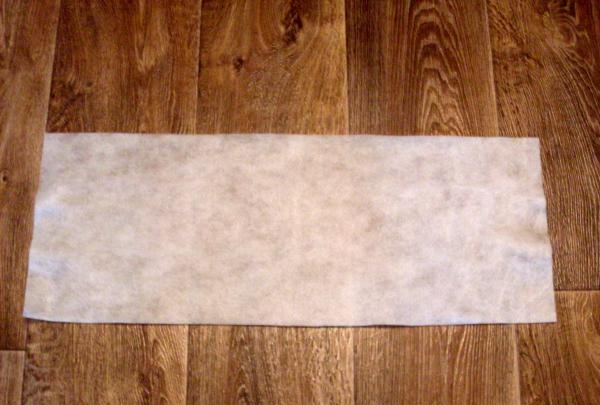
From the cushioning material you need to cut out a rectangle measuring 25*66cm.
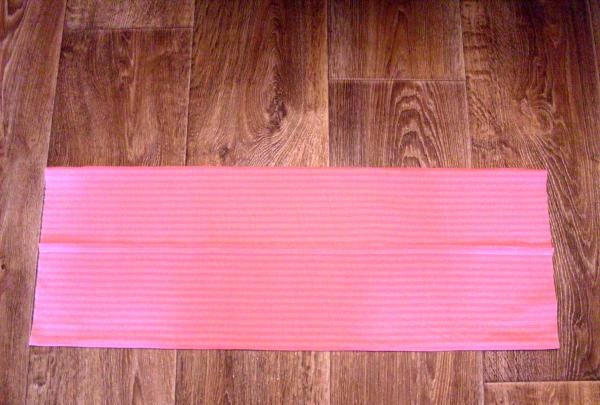
The seam connecting the longitudinal sections of the base of the pockets should be ironed, placing it in the middle of the part, as shown in the photo.
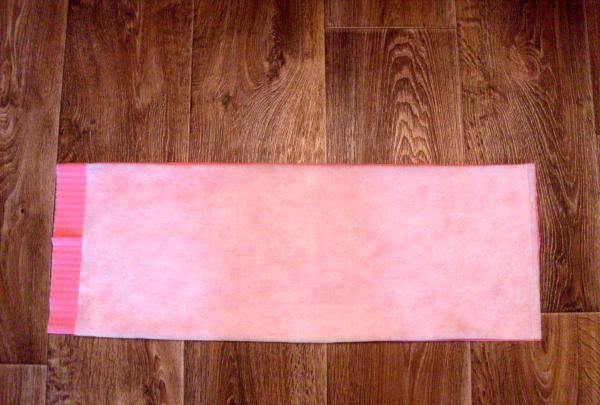
On top of the base you need to place a pad of non-woven material, leveling it with any transverse side, and lay a fastening stitch with a seam 1 cm wide.
After this, the part of the base of the pockets must be turned right side out, the corners straightened, and ironed.
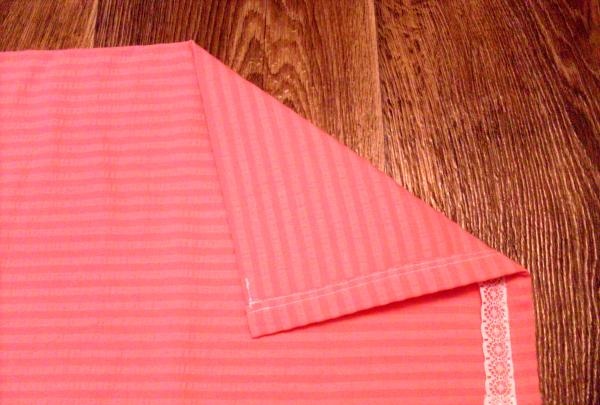
Then you should process the upper open edge of the pockets. To do this, you need to iron it 3 cm on the wrong side and then bend it another 1 cm and sew a line - you will get a drawstring for hanging pockets. Just below the drawstring you need to stitch the lace.

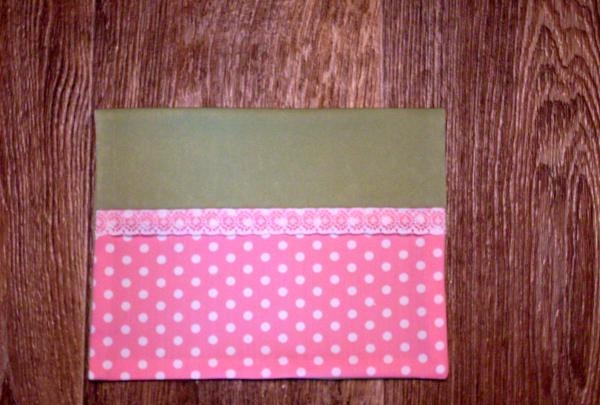
You need to cut out pockets from the finishing fabric. When finished they will be 19*24 cm.
In this case, the pockets will be two-color, and the green fabric, being a contrasting edging on the front side of the pocket, will also be its lining on the back side.
The size of the pink part of the pocket is 14*26.5 cm, the green part is 28*26.5 cm.
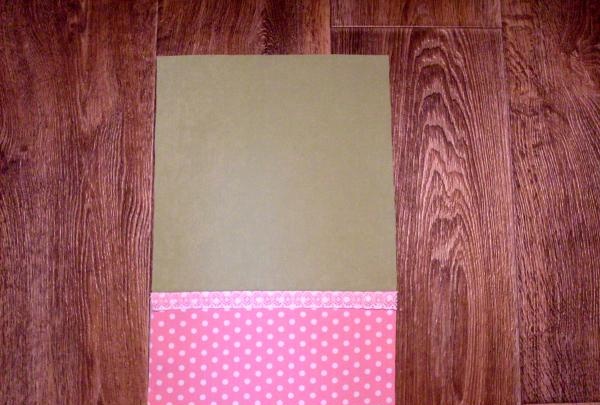
The parts of the pocket should be sewn together with a seam 1 cm wide along a side 26.5 cm long. The seam allowance should be ironed towards the pink fabric, and lace should be sewn over the seam of the parts.
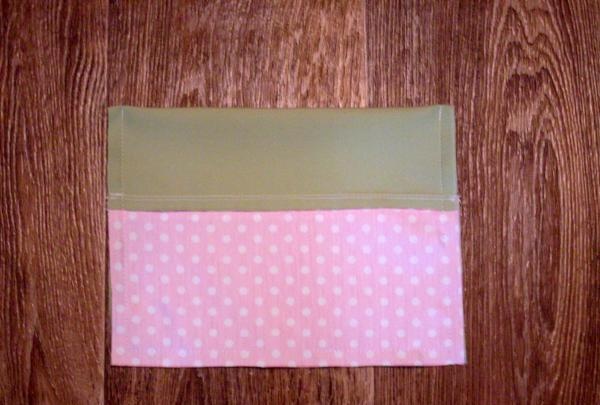
The prepared pocket part needs to be folded in half, face inward, and a stitch is sewn around the perimeter, leaving an unstitched area in one place for turning inside out.
The pocket must be turned right side out, the corners straightened, and ironed.
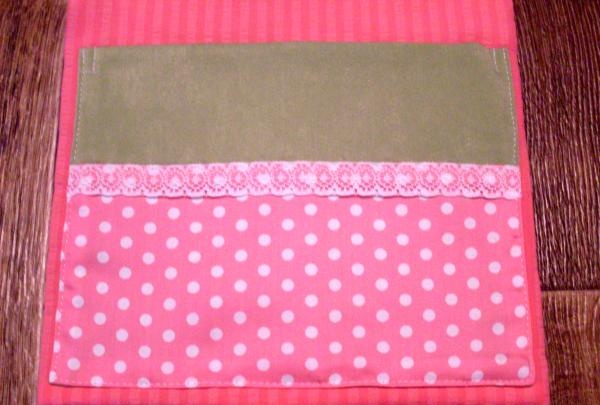
When the pocket is ready, you need to stitch it onto the base with a seam 1 mm wide from the edge. You should definitely put 1.5 cm long fasteners in the corners - this will help the pocket not come off during use.
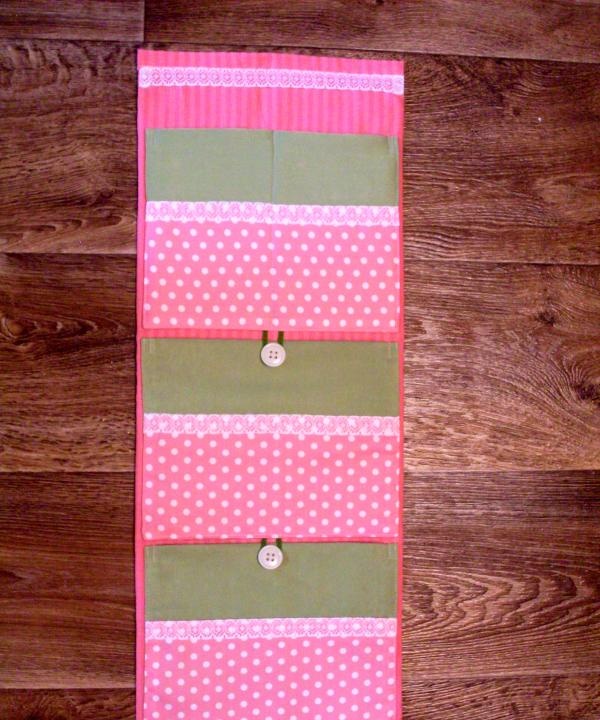
In a similar way, you should sew 2 more pockets, which then also need to be sewn onto the base.Loops should be placed under the second and third pockets for fastening, and buttons should be sewn on the first and second.
The top pocket can be stitched in half lengthwise - you get 2 small pockets.
Sewn pockets need to be carefully ironed.
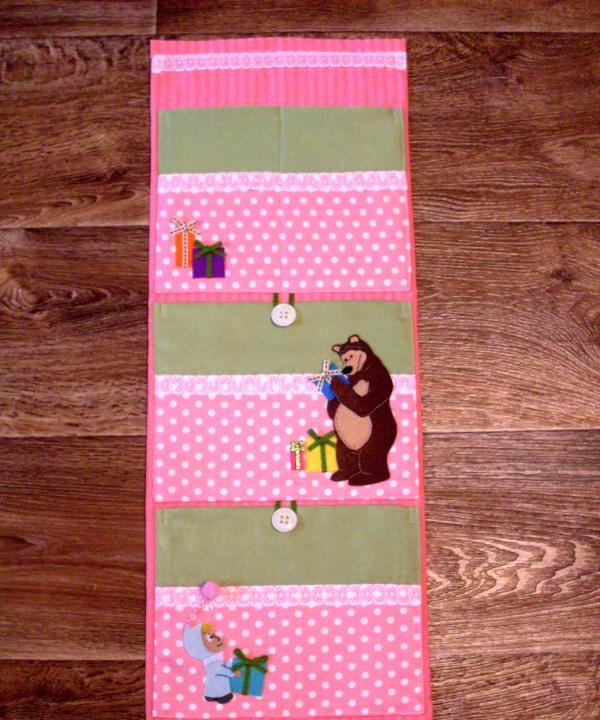
To decorate pockets, you can use felt appliqués made based on cartoon characters. Ready-made felt appliqués are simply glued onto the pockets.
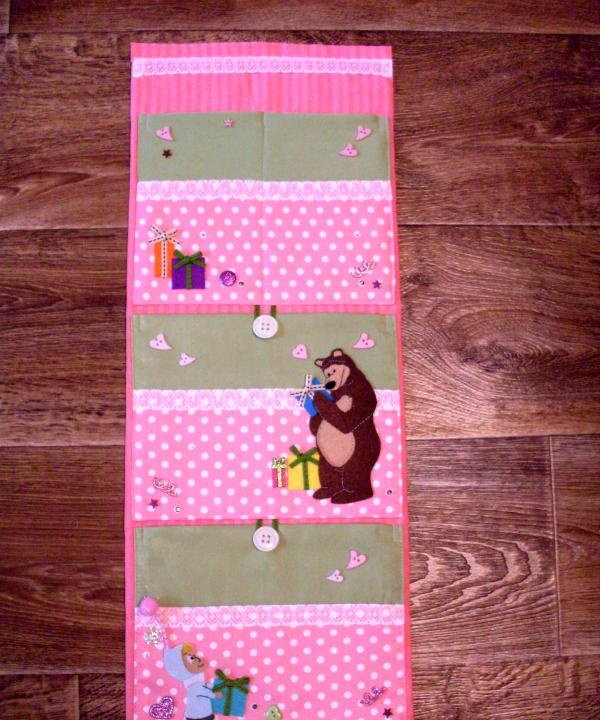
Another decoration technique can be multi-colored buttons, rhinestones, beads - anything that will make the pockets truly bright, interesting, and attractive to children. They can also simply be glued on.
The pockets are ready!