Do it yourself
Life hacks, master classes, useful tips, recipes.
home » Handicraft techniques » Scrapbooking » Scrapbooking cards » “Happy Birthday” card in tiffany color
Everyone knows very well that the fashionable and trendy color of 2015 is tiffany color, or it is also called mint or menthol. This color is very delicate and a little mysterious, so every person tries to buy something new for themselves in this color in order to keep up with fashion. It’s also very good to make it in tiffany color present friends and family. Among such gifts can be either a purchased souvenir or item, or a gift that will be made with your own hands. You can list endlessly what you can give to your friend or girlfriend, mom or dad, son or daughter, uncle or aunt, and so on, but most any gift must be accompanied by a greeting card. It is in it that the real memory of this particular holiday remains, and after a year a person can pick it up again and re-read your congratulations. In stores you may not find a birthday card in exactly the Tiffany color, but you can make it yourself, and one very interesting technique of modern needlework will help us with this, this scrapbooking. Moreover, we will make a folding postcard from a series of complex postcards, which will give it even more originality and unusualness.

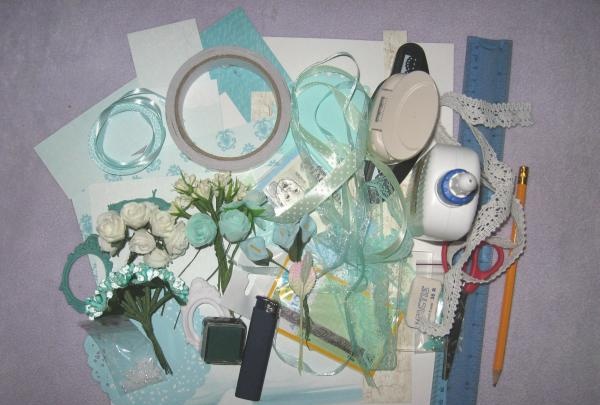
For this interesting master class we will need to take:
• Watercolor sheet of A4 paper;
• Tiffany-colored scrapbooking paper in several colors;
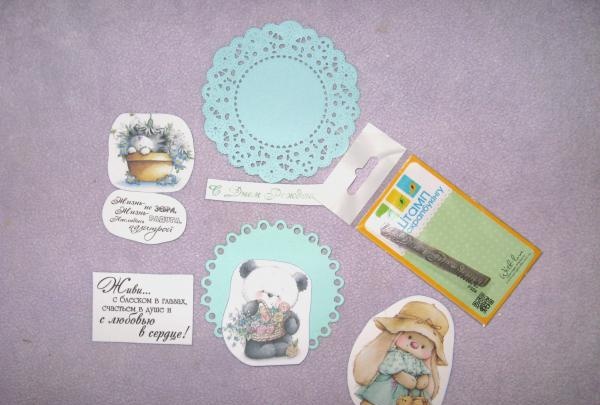
• Cut out circle;
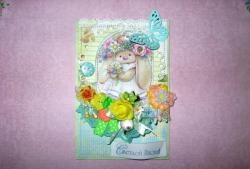
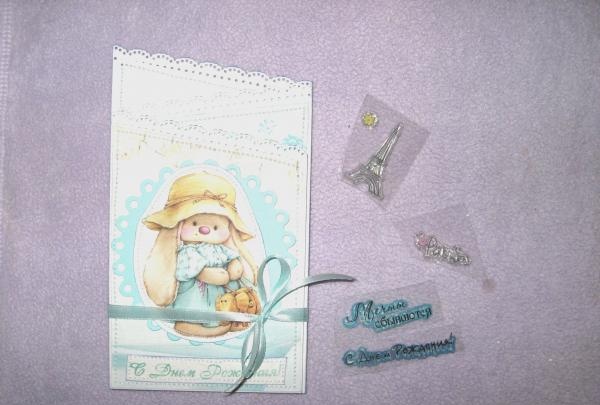
• Pictures with a cat, a hare and a panda;
• Printed inscriptions;
• Stamp “Happy Birthday”, “Dreams Come True” and green ink;
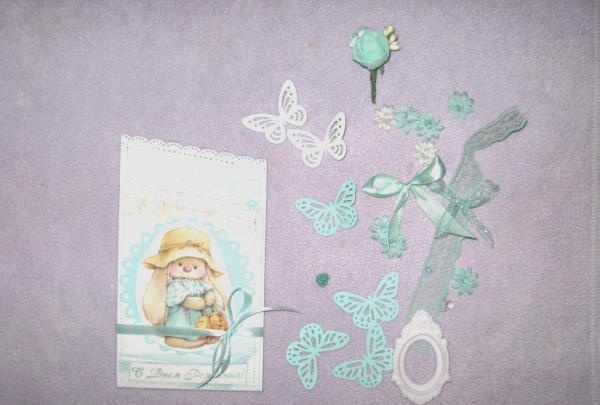
• Carved white and tiffany butterflies;
• Satin and organza ribbons in tiffany color;
• Bouquets of complex stamens beige and tiffany;
• Latex rose tiffany color;
• Paper leaves are beige-green;
• Polymer decorations: roses, daisies, white frame;
• Cotton lace also in tiffany color;
• Pearl half-beads and a shiny cabochon center in silver;
• Two curb hole punches;
• PVA glue;
• Scissors and lighter;
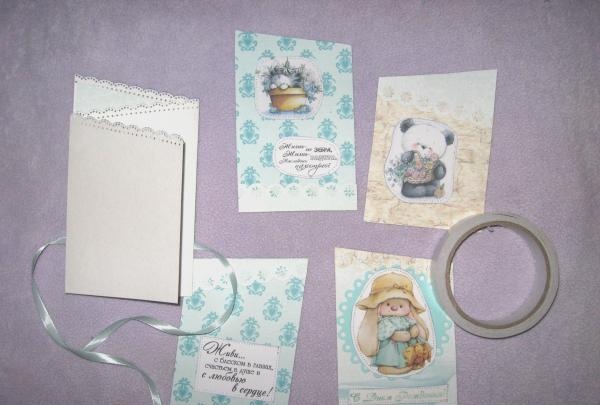
• Double-sided tape;
• Pencil, ruler, eraser, glue gun.

Birthday card

we will need to take


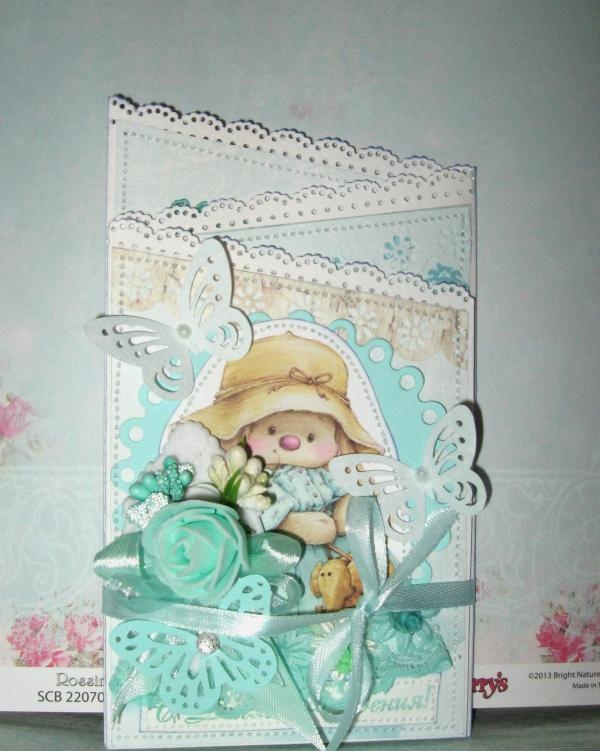
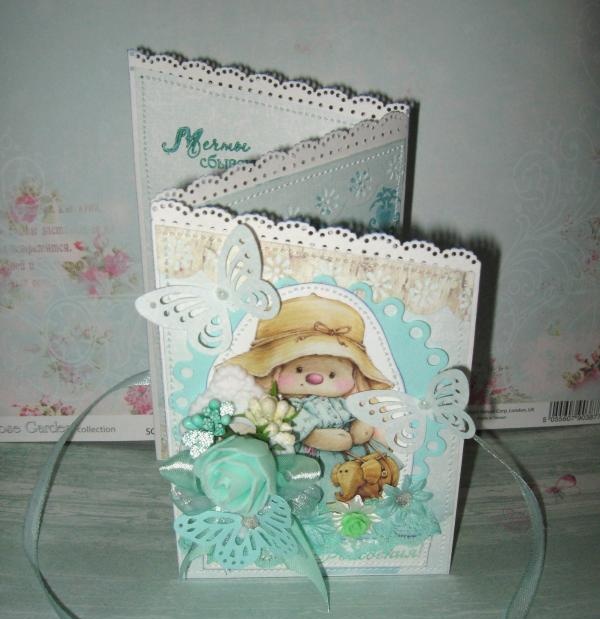
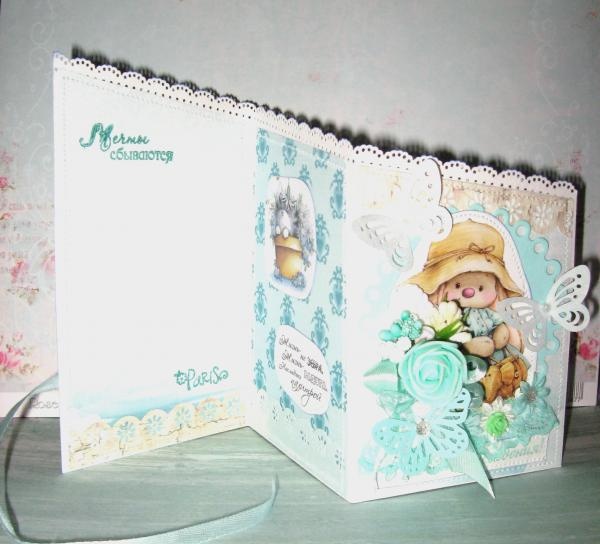
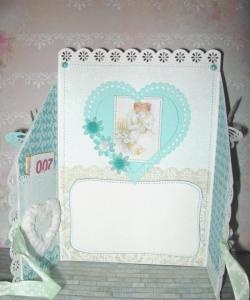
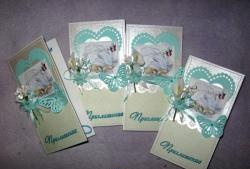
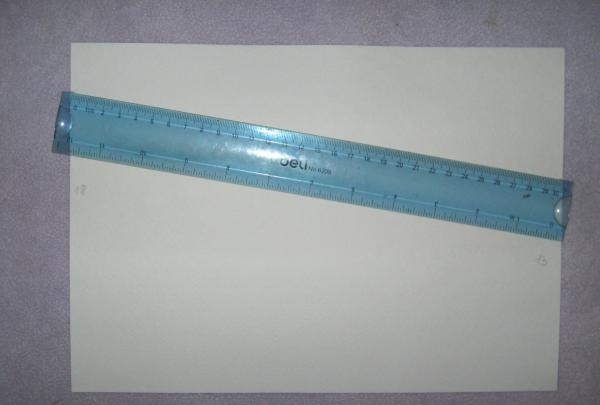
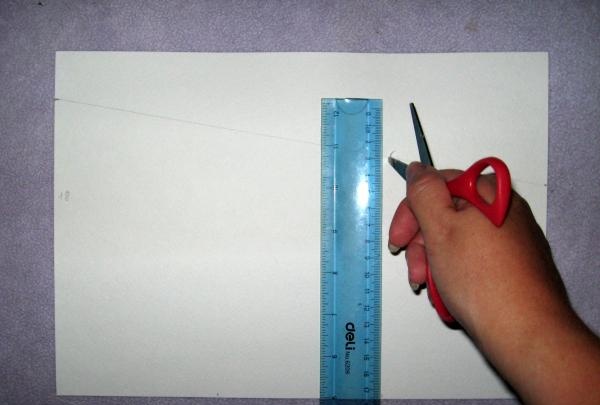
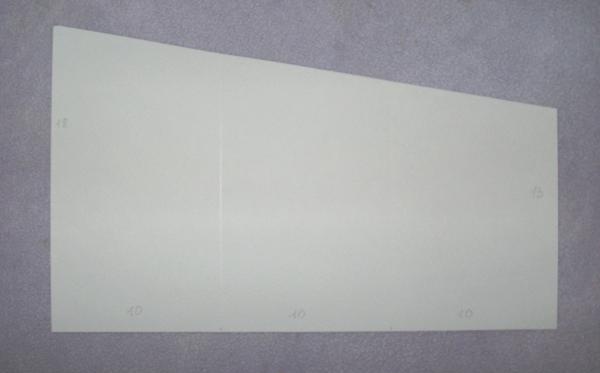
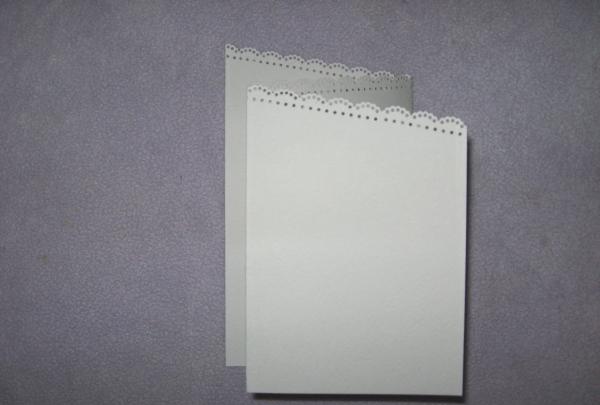
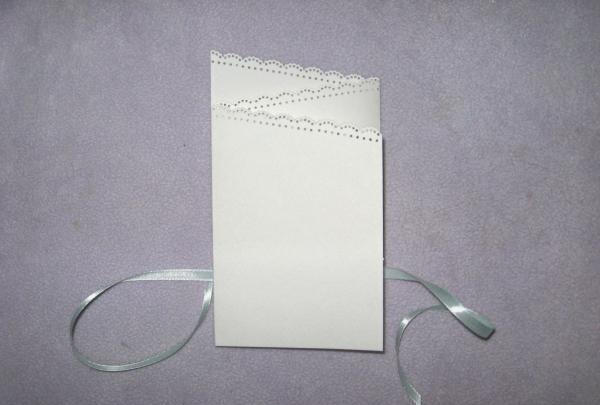
The first thing we'll be doing is creating the base of an intricate watercolor fold-out card. To do this, unfold the watercolor sheet horizontally, divide it into three parts of 10 cm each, draw bends under the ruler so that the card folds. The height of the postcard will fluctuate, so measure 13 cm on one side and 18 cm on the other, connect and draw an oblique line.

unfold horizontally

draw bends under the ruler


Now, using a lace hole punch, we make the openwork top of the card base.

connect and draw an oblique line

make an openwork top


Let's fold it like this. Now we will prepare its design. To do this, we take scrap paper of different textures, but all in Tiffany color.

make an openwork top

decor


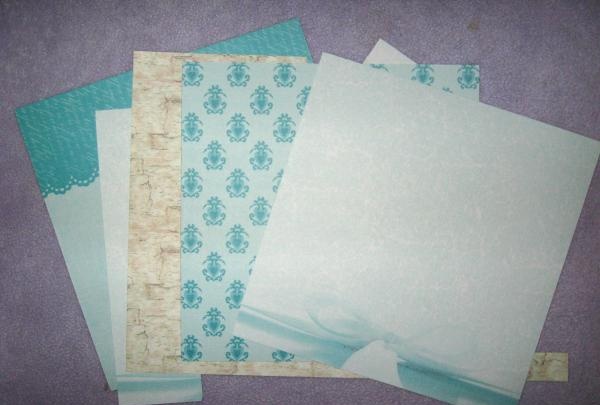
We cut out blanks like this.

Cut it out


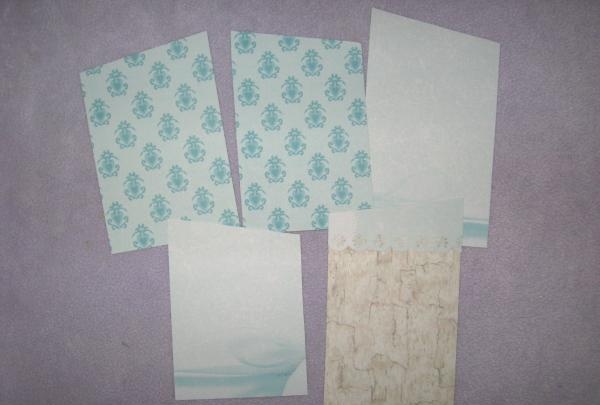
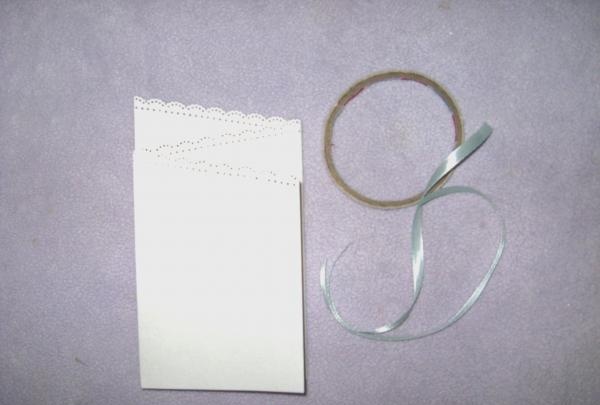
We go through the pieces that remain with a hole punch and glue the scrap blanks at the top with PVA glue.Our card has an interesting shape, so it will be closed and tied; to do this, we cut two 15 cm pieces of satin ribbon and glue them with double-sided tape on the back of the piece.

Cut it out

decor


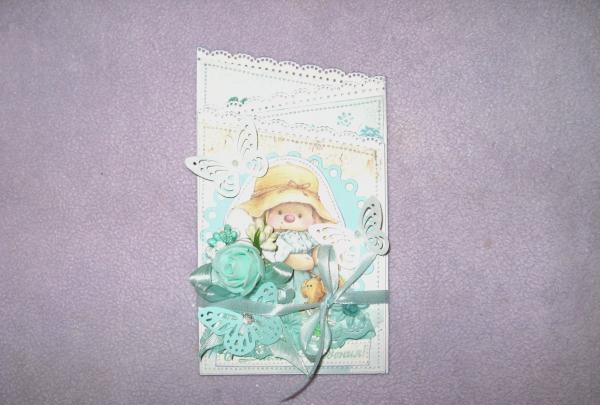
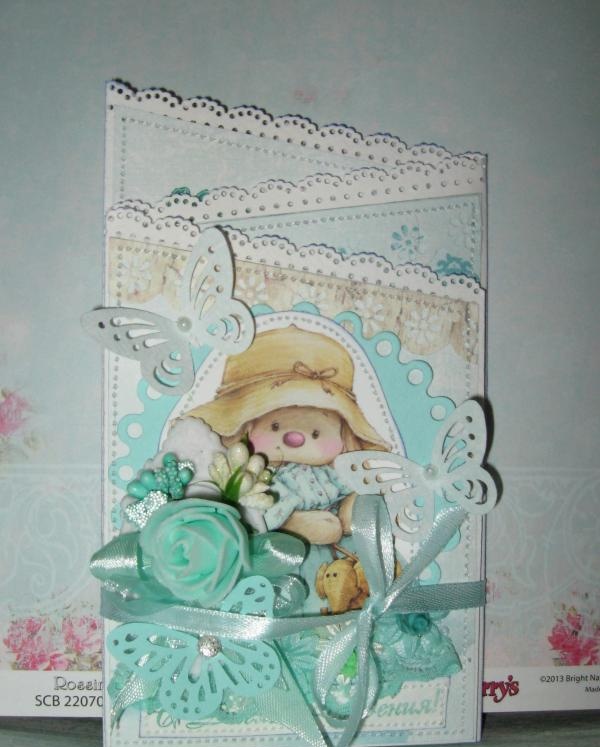
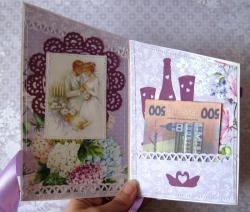
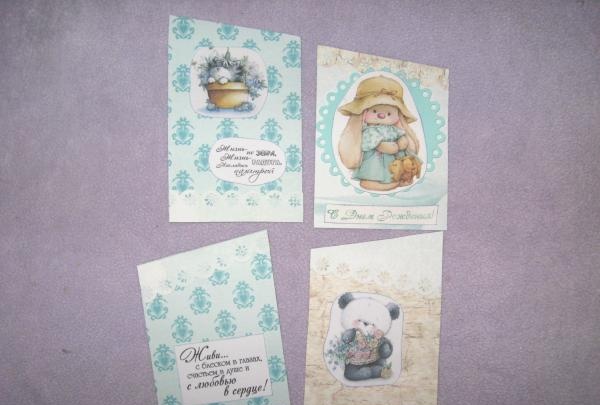
We cut off pictures and inscriptions with rounded corners and tint the edges. On a piece of watercolor we stamp the inscription “Happy Birthday”.

decor

we tint the edges


Using pieces of double-sided tape we glue the inscriptions with pictures onto the scrap figures. We sew each element on a sewing machine. Now we glue all these scrap blanks onto the base.

we tint the edges

decor


We sew all three sides using a sewing machine. This is how the card is folded and tied with a bow.

decor

decor


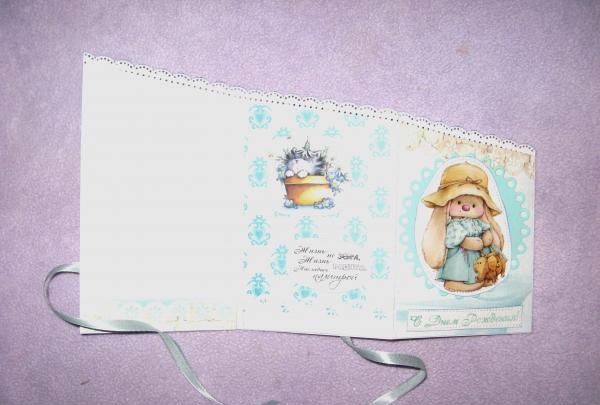
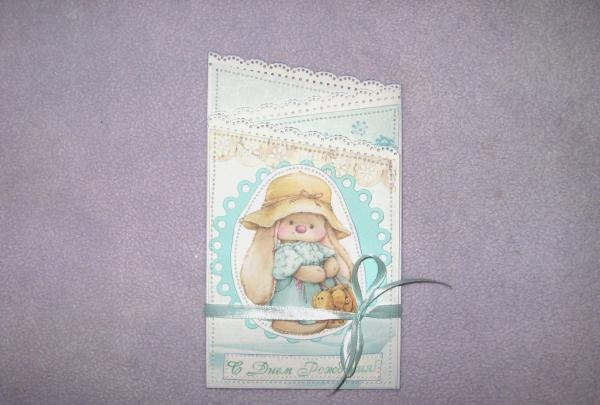
Now we make a bouquet from flowers and stamens, tie bows from ribbons and glue decor on the front of the postcard. Inside we stamp various inscriptions and objects.

decor

decor


The result is such an interesting birthday card. Thank you for your attention and have fun!

Birthday card

Birthday card

Birthday card

Birthday card
come back
Comment
  • bowtiesmilelaughingblushsmileyrelaxed relaxedsmirk
    heart_eyeskissing_heartkissing_closed_eyesflushedrelievedsatisfiedgrin
    winkstuck_out_tongue_winking_eyestuck_out_tongue_closed_eyesgrinningkissingstuck_out_tonguesleeping
    worriedfrowninganguishedopen_mouthgrimacingconfusedhushed
    expressionlessunamusedsweat_smilesweatdisappointed_relievedwearypassive
    disappointedconfoundedfearfulcold_sweatperseverecrysob
    joyastonishedscreamtired_faceangryragetriumph
    sleepyyummasksunglassesdizzy_faceimpsmiling_imp
    neutral_faceno_mouthinnocent
3+three=
Comments (0)

Do it yourself - crafts and master classes | Page 333

Curtain holders “Pearl of the interior” | Do it yourself

Headband for girls that will highlight the beauty of your hair

How to cut steel with a self-tapping screw

«Do it yourself - with your own hands» - a site of interesting homemade products made from scrap materials and items at home. Step-by-step master classes with photos and descriptions, technologies, life hacks - everything a real master or just a craftsman needs for needlework. Crafts of any complexity, a large selection of directions and ideas for creativity.

We recommend reading

Washing machine error codes