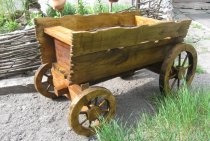
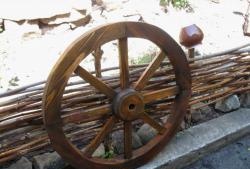
Nowadays, there are many options for how to decorate your summer cottage. One such option is a wooden cart wheel. This element can add zest and make the landscape design of the area special. This element is also great for country style. Now we will look step by step at the instructions for making this element from wood. Although the work requires certain skills and the availability of special tools, if these two factors are present, you can save your money. You only have to spend money on the material.
Will need
So, to complete this element we need:
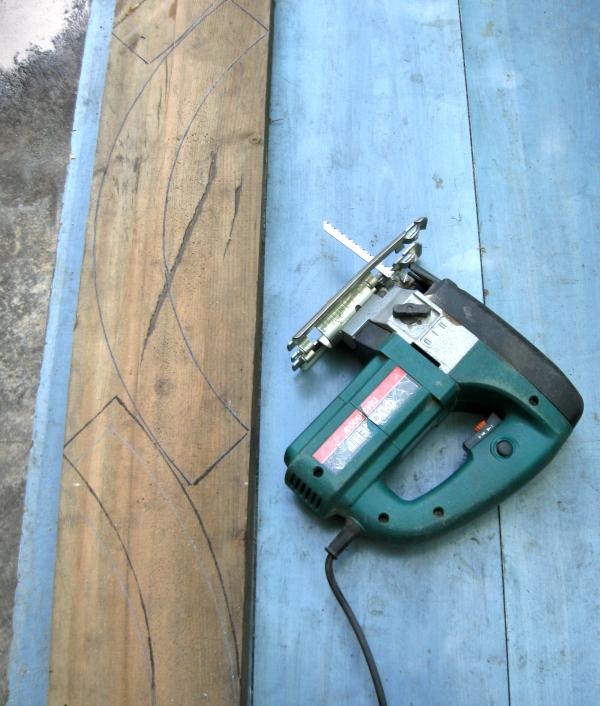
- Jigsaw;
- Electric planer or surface planer;
- Grinder;
- Milling cutter;
- Screwdriver;
- Scraps;
- Chisel and mallet;
- PVA glue, varnish, stain;
- Self-tapping screws;
- Drills for the self-tapping screws that you will use, as well as a 30 mm feather drill;
- Ruler, square, pencil, compass, brush;
- Wood (board 50 mm thick and 25 mm wide).
Making a wooden wheel
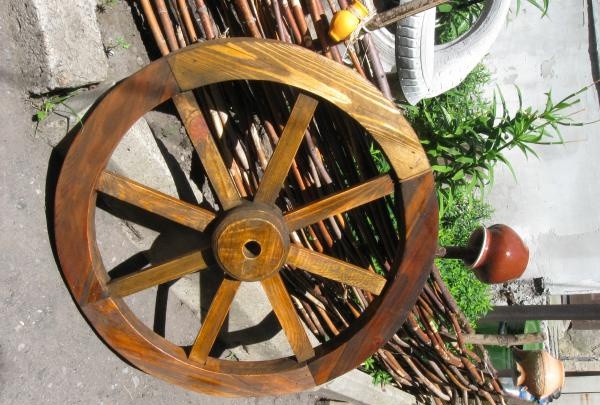
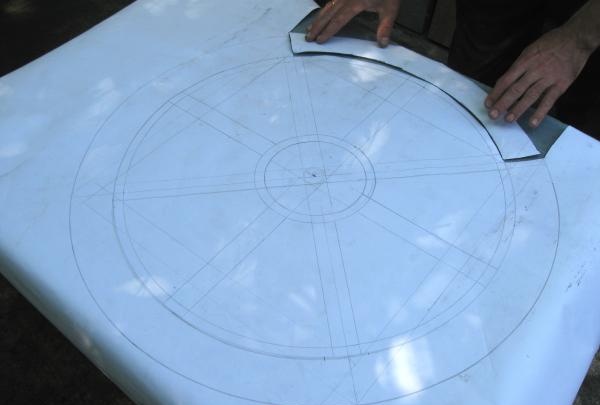
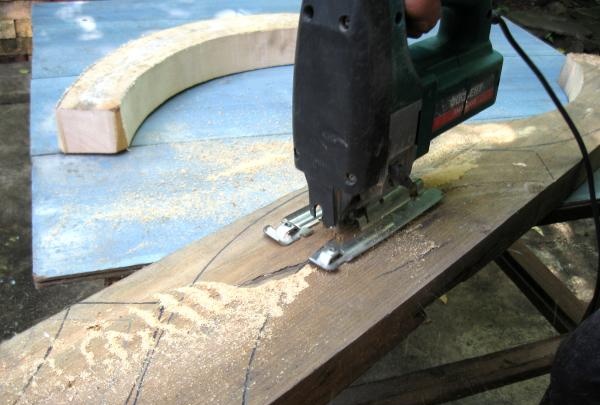
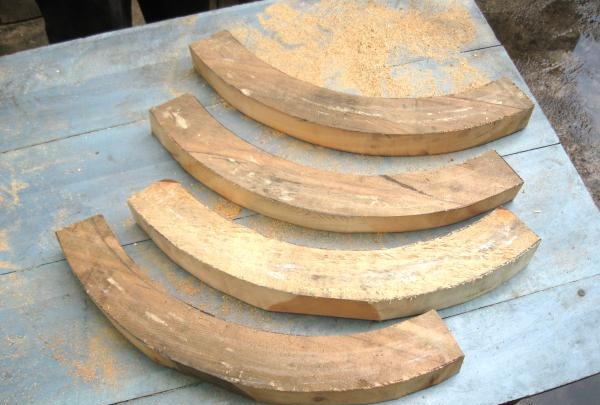
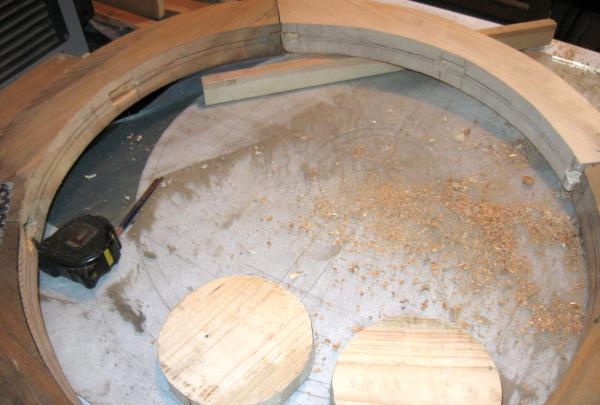
The first stage of work is making the pattern.It is necessary to draw in advance a drawing of the dimensions of the wheel that you plan to make. The diameter shown in the figure is 700 mm. Then four patterns are made, according to which semicircles are cut out of wood. These semicircles are cut out with a jigsaw.
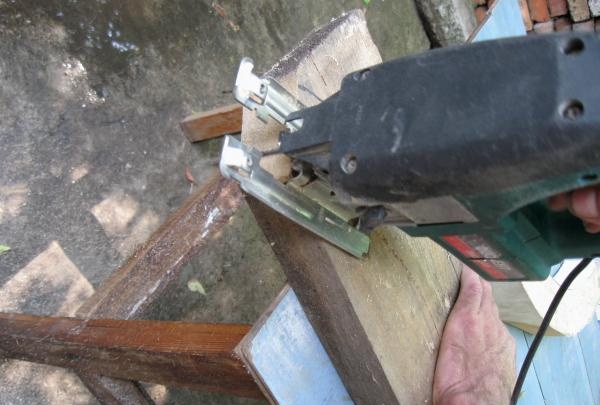
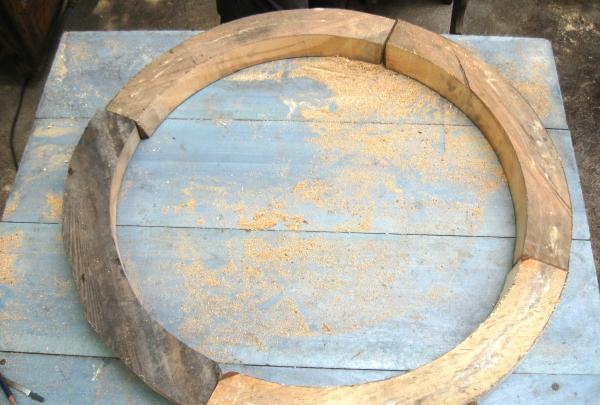
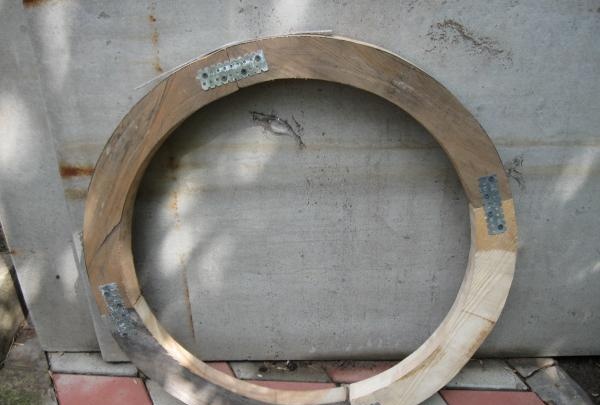
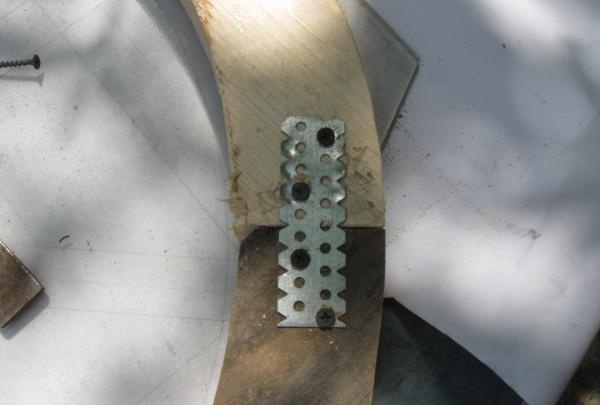
When the four semicircles are ready, they need to be glued together. For this it will be better to use PVA glue. These four parts can be temporarily secured with a metal profile or beacon. While the glue dries, at this time you can work on the remaining spare parts of the wheel.
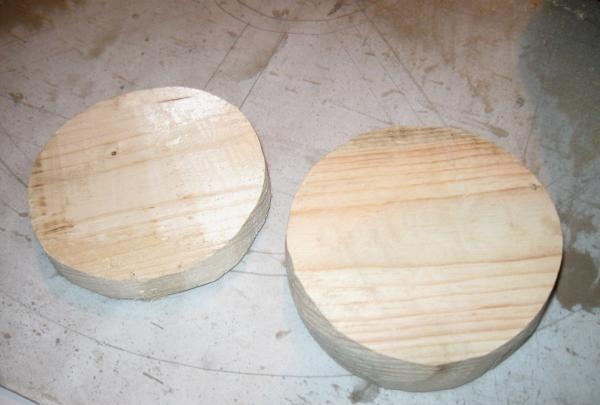
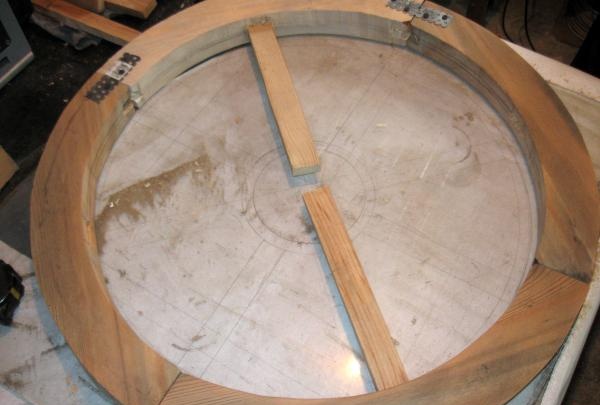
Using a compass, two identical circles with a diameter of 20–25 mm are drawn on a wooden board 30 mm thick and a block 50–60 mm thick. You can also prepare blanks for knitting needles. The length of the blanks depends on the size of your wheel. A total of 8 blanks are needed.
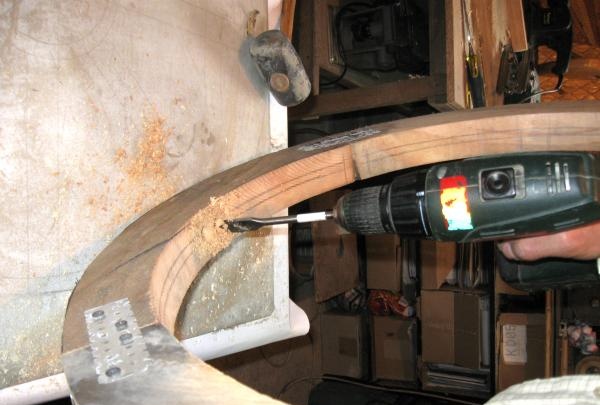
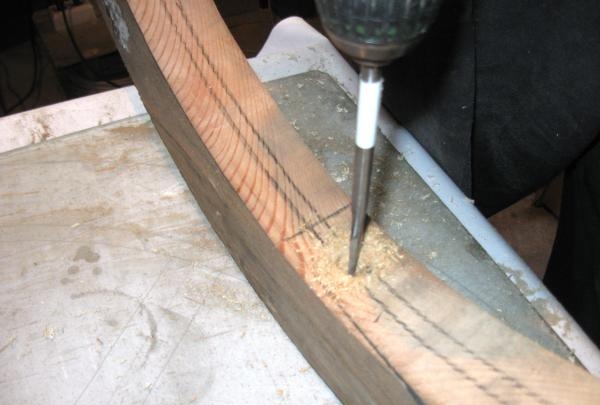
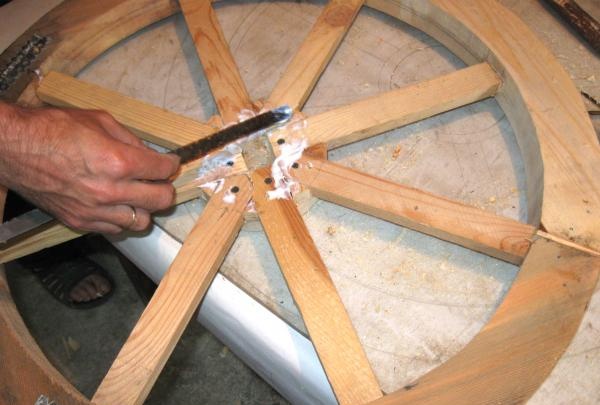
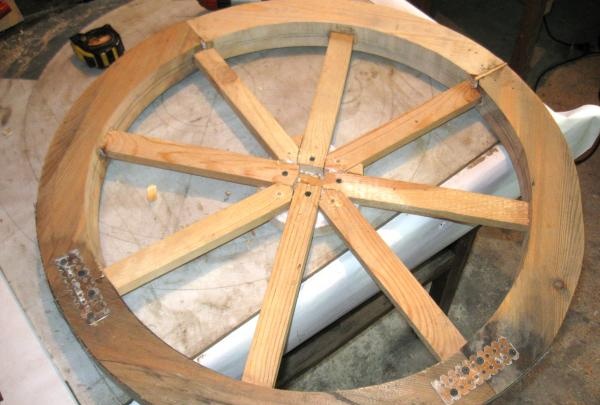
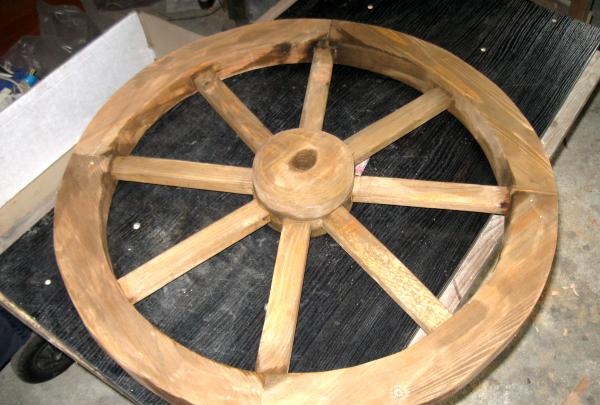
When the wheel is fastened and the glue has hardened, 8 sockets must be made on the inside of the wheel into which the spokes will subsequently be inserted. This operation is performed using a mallet and chisel. To make it easier to hollow out a tenon, you can use a feather drill or a milling cutter with a special attachment for selecting nests. The size of the sockets should correspond to the size of the knitting needles. Moreover, it will be better if the knitting needles do not fit freely into the nests, but on the contrary, they will have to be hammered in with a mallet.
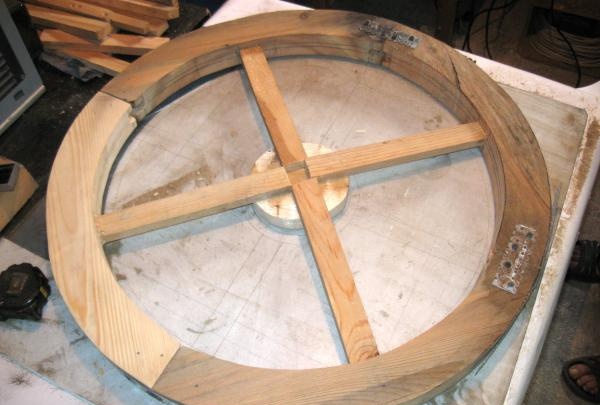
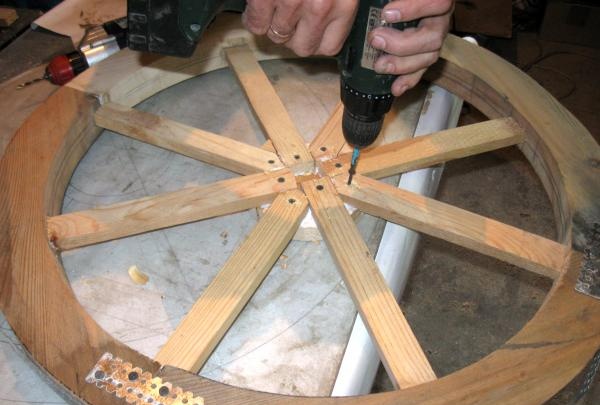
Next, you need to carefully coat the nests with PVA glue and hammer wooden knitting needles into them. When the spokes are secured, we fit the wheel to the drawing in order to determine the exact middle and glue two circles on both sides. To further fasten the inner circle with the knitting needles, you can use self-tapping screws.Since gaps will form between the knitting needles, they need to be filled with wooden wedges, which can be made using a chisel or jigsaw.
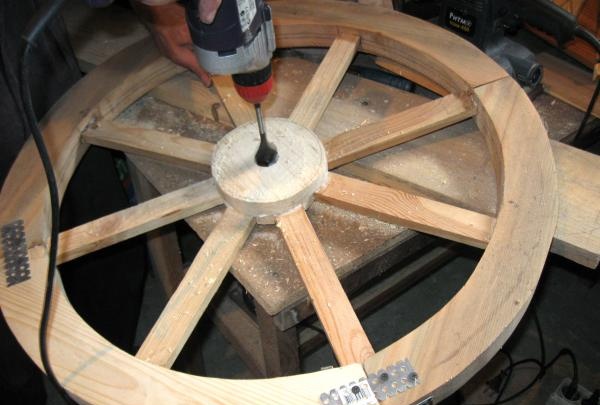
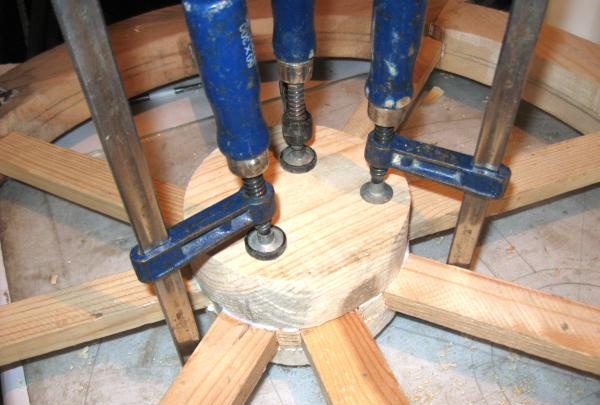
To decorate the wheel and give it a little openwork look, you can use a cutter with a shaped attachment. For example, you can pay attention to the illustration, where the inner circle is processed with a figured cutter. Alternatively, the same can be done with all the knitting needles. Finally, using a screwdriver and a 30 mm spade drill, a through hole is made in the middle of the wheel.
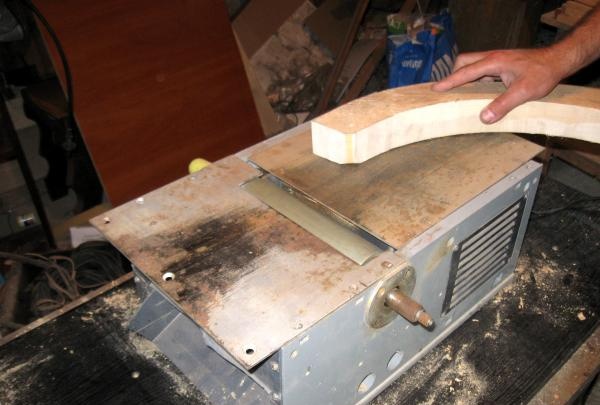
Next, using a sander, all irregularities are removed from the surface of the wood. Some areas will be difficult to sand, so you will also have to use regular sandpaper by hand. For example, between the spokes. To facilitate this process, you can use an electric planer, thickness planer and sander in advance before fastening the parts, since sanding the product already assembled is not very convenient. You can also take into account that this is a garden decoration and that the wheel will be located outside. Therefore, there is no need to thoroughly polish the surface and make the product perfectly smooth.
After grinding the wheel, it must be opened with stain. You can choose the color of the stain at your discretion and taste. Some people don’t use stain at all, because they like the color of natural wood, so they just open it with varnish. However, stain serves more than just paint. It also performs a protective function for wood. After you have stained the wheel, you need to varnish the product to add shine. This must be done in any case, regardless of whether you use stain or not.
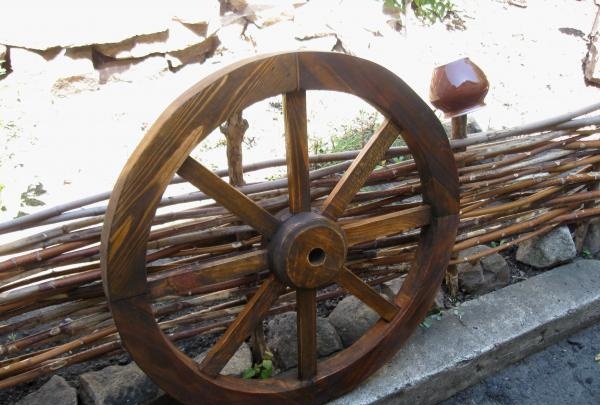
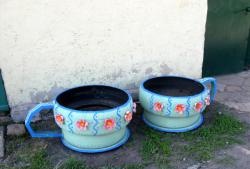
You can rest assured that this element will perfectly decorate your garden plot.This highlight can bring comfort and tranquility to the landscape design of any area. A wooden wheel will be especially beautifully combined next to clay pots with flowers, leaning against a stone wall. This decoration goes well with natural materials.