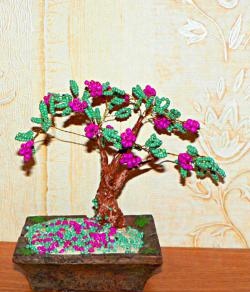
To your attention I offer my master class of the topiary “Tree of Happiness”. So, for this we need the following materials:

- sisal;
- corrugated paper;
- several pages of the newspaper;
- glue gun;
- a few sticks of silicone glue;
- buds of artificial flowers;
- gypsum;
- a pot (a jar of yogurt);
- beads;
- tulle or any other material;
- a narrow ribbon;
- dense wire.
Composition
1. We take several layers of the newspaper and arrange it one after another, forming a ball. We fix each layer with glue.

2. On top of the newspaper ball we cover with corrugated paper and also fix the ends with glue.

3. From sisal we wind small balls with a diameter of about 2-2.5 cm. To do this, you need to pinch a little sisal from the skein and twist the ball with your palms.

4. Using glue, fix the balls on a pre-prepared top for a tree (newspaper ball). It’s not worth sticking too tight, as we will insert flowers between some sisal balls.

5. After all the balls are glued, insert the flowers and fix them with a glue gun.

Optionally in topiary there may be more or less buds, so I did not initially specify the number of flowers. It all depends on the size of the product and your imagination.
6. Next, we decorate the top for the tree with beads or any other accessories.


7. We proceed to the formation of the trunk. To do this, take the wire, bend it in the form of a spiral and glue it with sisal.

8. At the top we make a hole in order to insert the barrel. To do this, select the most unfortunate angle of the flower ball, make a puncture with scissors or an awl and, having applied a lot of silicone glue, fix the trunk.
9. I also decorated the trunk with beads.


10. Pour gypsum into a jar (pot), add water and mix. The consistency should be a type of thick sour cream.

11. Insert the tree trunk into the gypsum and set it in such a place that the tree hardens evenly. For example, I rested the top of the tree on the window frame.

12. After the gypsum hardens well, we proceed to the design of the pot. You can, of course, buy a beautiful, elegant pot and not waste time decorating it. But in my case, this is a jar of yogurt, so the design is inevitable. Cut off the necessary piece of corrugated paper and wrap it in a pot.


13. On top of the paper we cover several layers of tulle or any other fabric that is suitable in color.

14. The final touches. We tie a bow from a folded ribbon several times on a tree trunk near the very beginning of the crown of the topiary.

A pot can be decorated with beads or any other accessories.

Topiary "Tree of Happiness" - ready!


I really hope that my workshop will come in handy for you to create your own composition.Initially, I did not write the number of materials, their colors and the size of the product. In fact, thanks to your imagination and desire to create beauty, you yourself will come to what color and size you need decoration in the form of a topiary. Good luck and creative ideas!