For a hot air balloon, we need the simplest things:
• paper flashlight,
• 4 napkins with sunflowers,
• a broken basket without a handle,
• stickers in the form of flowers,
• scissors,
• brushes,
• paints,
• PVA glue,
• 5-6 meters of cord
• balloon passengers and fantasy.

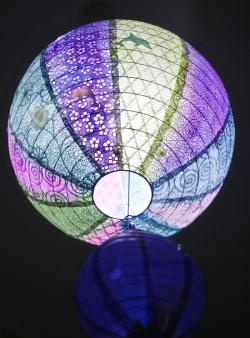
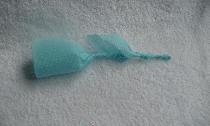
When I came across napkins with sunflowers in the store, I thought that they very much resemble flames that burst from the burner and inflate a balloon. The flashlight lay for a long time, it remains to bring together all the elements. Cut out the pieces of flowers of the right size.

Now you need to remove three white paper layers from the napkin so that only the painted one remains.

We carefully lay it on the bottom of the lamp and coat it with PVA glue. I dilute the adhesive with water in a 1: 1 ratio so that it is easier to apply. You can use undiluted, but then there is a big risk of tearing the napkin when smearing it on the surface. The brush for this process must be taken with soft bristles.

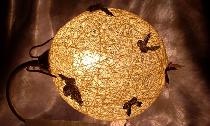
From the pieces of the napkin, we gradually form our flame below.

We do this until we completely fill the circle. We try to distribute the napkins so that there are no ugly gaps left.

From above, I decided to duplicate the same pattern for symmetry. Let it be the sun.


To make the sunflower fire brighter and more complete, I painted red and yellow gouache on the tongues of flame.

Now we tie the cord to the basket, distributing its segments at equal distances inside the circle. Try to keep all the nodules inside the basket. Each suspension takes about a meter of cord. You can optionally duplicate the cord around the lamp. It is very important to center the basket, this is one of the most difficult moments of work. Check it out, it should hang exactly under the balloon. To facilitate this process, you can look through the hole below. Through it you can clearly see where the center of the basket is. A real basket of twigs is quite expensive, you can weave it from newspapers. Newspaper weaving workshops can be easily found online.

In the finale, I decided to decorate the center of the paper shade with yellow-green gouache stripes and flower stickers. Try to find stickers on tissue paper so that they do not peel off the tissue paper that is pasted over the lampshade. Luminous stickers with phosphorus coating look very nice on such lamps. The result was a real waltz of flowers.

We sit in the basket of passengers. Try to distribute them so that there are no distortions. Carefully fix the lampshade on the lamp and again check whether the basket hangs evenly. After that we send our balloon on a long flight. Have a good trip!