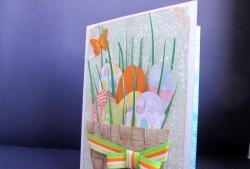
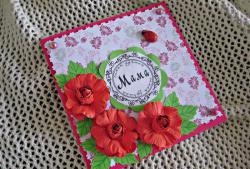
Easter card with handmade decorations
Spring brings us not only joy, freshness, spring warmth, the first green branches on the trees and the first flowers that awaken after a long, harsh and tiring winter, but also spring gives us a lot of holidays, which each differ from each other in their own way . It is difficult to say which spring holiday is considered the most beloved, but we all know very well one of the biggest church holidays of spring - Easter. This holiday is also considered a little sad, since on this day the resurrection of Jesus Christ, our Almighty God, took place. But on the other hand, it is also considered a rather bright and joyful holiday, since after the resurrection of our Lord God, people gained wisdom and pity for each other, and every spring, on the Feast of Easter, families gather at the festive table to congratulate each other and say congratulatory words: “Christ is Risen,” and in response hear “Truly He is Risen.” On this day, people exchange Easter cakes, colored eggs, sweets, towels, but they can also give each other greeting cards with warm and sincere congratulations. The now venerable and very well developed handicraft technique in our times, namely scrapbooking, in which you can make an Easter greeting card with your own hands, which is not only interesting, but also quite pleasant and unusual to receive one for yourself present.
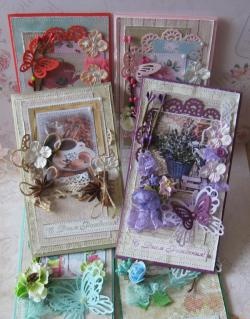
We won’t hesitate for long, but right now we’ll look at a detailed master class on creating an Easter card:
• Green marbled cardboard A4 sheet;
• A circle cut out in a light green tone;
• Picture with a spring bunny;
• Three sheets of scrap paper in green and light green tones;
• Watercolor paper;
• Turquoise die-cut butterfly;
• Small acrylic buttons;
• Wooden buttons in blue with polka dots;
• Light green lace with elastic;
• Tiffany-colored openwork lace;
• Bright green ribbon with white polka dots made of rep, 10 mm wide;
• Yellow and orange flowers;
• Green compound stamens;
• Paper chamomile;
• White berry in sugar;
• Peach mesh;
• Polymer flowers;
• “Happy Easter” stamp, aquamarine ink;
• Lace hole punch;
• Double-sided tape, pencil, PVA glue, ruler, scissors, lighter and glue gun.


First of all, cut out a 10*30 cm rectangle from cardboard. Divide it exactly in half and fold the base of the postcard 10*15 cm. We get a vertical base.


We will now cut out three steps from scrap paper.


Cut out two large rectangles for the back and bottom front layer of the card. We cut out the other three shapes in these sizes and make them lace at the bottom.


Now we glue on each other layer by layer.


Glue a circle and a picture of a bunny on top. We sew the bunny on the machine. We also use a hole punch to make strips and glue them onto a watercolor inner blank 9.5*14.5 cm.


Use double-sided tape to glue all three parts inside, outside and behind the card base.


We sew the back and front parts together with the base with a machine. We stamp the inscription “Happy Easter”.


Cut out two strips of lettuce lace with an elastic band and glue it in tiers to the card. We cut out another lace strip from Tiffany-colored lace and also glue it to the card.


Rest decor We also glue it as in the photo. Done, this spring Easter card in light green color came out.

We won’t hesitate for long, but right now we’ll look at a detailed master class on creating an Easter card:
• Green marbled cardboard A4 sheet;
• A circle cut out in a light green tone;
• Picture with a spring bunny;
• Three sheets of scrap paper in green and light green tones;
• Watercolor paper;
• Turquoise die-cut butterfly;
• Small acrylic buttons;
• Wooden buttons in blue with polka dots;
• Light green lace with elastic;
• Tiffany-colored openwork lace;
• Bright green ribbon with white polka dots made of rep, 10 mm wide;
• Yellow and orange flowers;
• Green compound stamens;
• Paper chamomile;
• White berry in sugar;
• Peach mesh;
• Polymer flowers;
• “Happy Easter” stamp, aquamarine ink;
• Lace hole punch;
• Double-sided tape, pencil, PVA glue, ruler, scissors, lighter and glue gun.
First of all, cut out a 10*30 cm rectangle from cardboard. Divide it exactly in half and fold the base of the postcard 10*15 cm. We get a vertical base.
We will now cut out three steps from scrap paper.
Cut out two large rectangles for the back and bottom front layer of the card. We cut out the other three shapes in these sizes and make them lace at the bottom.
Now we glue on each other layer by layer.
Glue a circle and a picture of a bunny on top. We sew the bunny on the machine. We also use a hole punch to make strips and glue them onto a watercolor inner blank 9.5*14.5 cm.
Use double-sided tape to glue all three parts inside, outside and behind the card base.
We sew the back and front parts together with the base with a machine. We stamp the inscription “Happy Easter”.
Cut out two strips of lettuce lace with an elastic band and glue it in tiers to the card. We cut out another lace strip from Tiffany-colored lace and also glue it to the card.
Rest decor We also glue it as in the photo. Done, this spring Easter card in light green color came out.
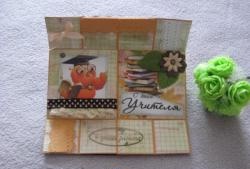
Similar master classes


Particularly interesting

Comments (0)
