In order for everything you need to work to be at hand, and creating a rim-diadem brought maximum pleasure, take the following:
- base blank for the rim (metal or plastic rim without decorations);
- green thin satin ribbon for the base of the rim (2 cm);
- Super glue;
- white thread or monofilament for sewing beads;
- wire for beadwork;
- a needle;
- clerical knife and scissors;
- floristic teip tape;
- wooden toothpick;
- white polymer clay and a little green or yellow, you can also take a small piece of blue or purple;
- mold (texture sheet) for the petals (you can take thick corrugated paper);
- pearl beads of different sizes;

Let's start with the preparation of the base: for this, gently glue one end of the satin ribbon to the end of the base rim, and begin to wrap the ribbon around the base. Before starting work, it is necessary to burn the initial end of the tape with a lighter or on a candle.


After the base is completely wrapped, cut off the free end of the tape with a small margin and glue it in the same way as at the beginning of the work.

The foundation is ready.

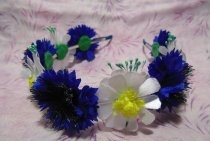
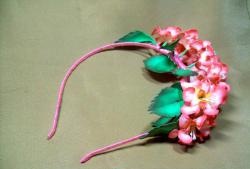
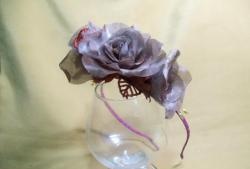
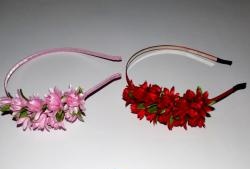
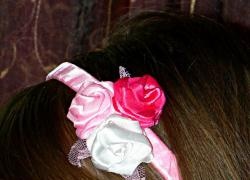
Now we need to make flowers from plastic. Traditionally, roses, buds of orange blossom or apple trees are the leaders in bijouterie floristry; we will make roses, as these are universal flowers suitable for a wedding celebration or for any other significant occasion.
So that the flowers do not turn out too bright and defiant, we will add a very slightly different color to the main white color, let's take, for example, blue. When you mix white and blue, you get a light shade of blue, divide it into two pieces, set aside one, and mix the second with a little more white. No need to mix until a uniform color, so you get a beautiful effect of streaks. Now for sculpting the buds we have, in fact, white color, light blue and white with a slight shade of blue.


All flowers are sculpted as follows: from the middle to the extreme petals. The center of the bud is a drop-shaped slice of light blue plastic. We will attach the remaining petals to it - from small to medium, from medium to large. Therefore, pieces should be split off from all types of working plastics of different sizes. Light blue will be the smallest (roll up balls), white with a blue tint - larger, white - the largest. Here are our blanks for one flower.

Now we flatten each ball in the palm of our hand, apply it to the texture sheet (mold), attach it to the middle-droplet so that each subsequent petal slightly goes to the previous one. We put the finished flower slightly harden, since it is too soft from our fingers, we make a hole in it for fasteners.


We make a lot of flowers of various sizes to make the rim very beautiful.

We begin to manufacture the petals by mixing yellow, green and blue plastic. By technology, their manufacture is approximately the same as the manufacture of petals. Only blanks of a more elongated drop-shaped shape, of different sizes.We make a hole at the base of each leaf.


We spread all this splendor on a plate or foil and send it to bake in the oven, observing the temperature regime of baking for the type of polymer clay with which you work.

Finished flowers are varnished or matte and prepared for assembly on the base.
To do this, take a needle and thread and sew flowers and pearls in a free order. Sew the flowers like this: from the base we remove the needle with the thread, enter from the bottom of the flower, that is, the needle comes out of the center of the bud. We collect one bead onto the needle and again insert the needle into the center of the flower, bringing it to the base.


Instead of a thread and a needle, you can use bead wire, weaving flowers on the base, the wire can be camouflaged with a teyp tape.


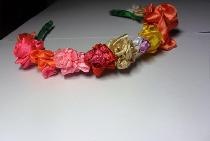
The decoration is ready, it looks gently and elegantly, it is also important that it is the only one of its kind and no other girl has exactly the same!